What Is an Aluminium Window Sub Sill
Water finds every gap a building gives it. The visible sill beneath your window handles surface runoff, but what catches moisture that slips past the frame itself? That job belongs to a hidden component most homeowners never see.
Defining the Aluminium Window Sub Sill
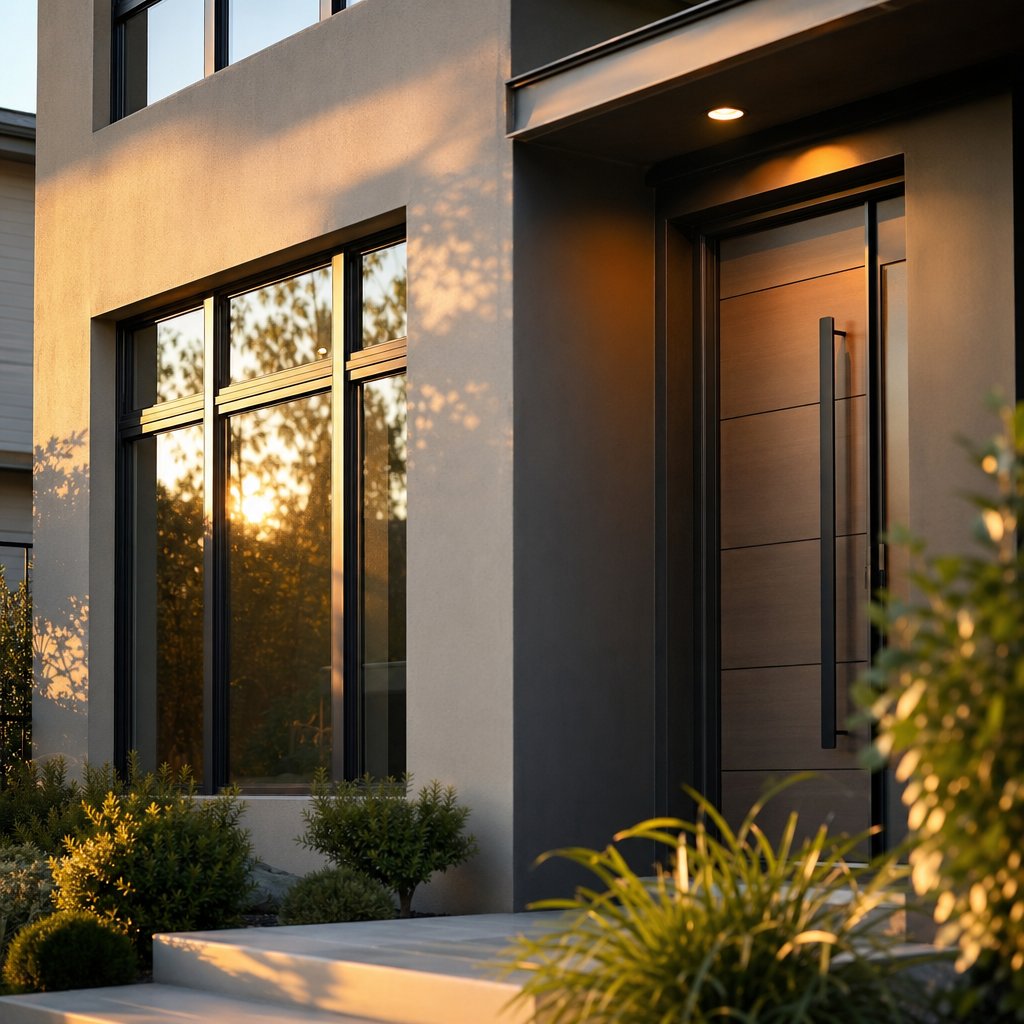
An aluminium window sub sill is a profiled aluminium component installed directly beneath the window frame within the rough opening. Unlike the external sill you can see from outside, which manages rainwater running down the glass, the subsill sits concealed behind or below the visible frame. Its purpose is to act as a secondary drainage plane, intercepting any moisture that bypasses the primary window seals and redirecting it outward before it can reach the wall cavity, framing, or interior finishes.
So what is a window sill doing differently from a sub sill? The external sill slopes outward to shed rain off the facade. The window sub sill works underneath that first line of defence, forming a shallow tray with turned-up edges that captures leakage at the frame-to-wall junction. Think of it as a safety net positioned exactly where water damage would otherwise begin silently inside the wall assembly.
Terminology varies by region. In the UK trade, you will commonly see “sub-cill” or “extension cill” on specification sheets, following the traditional British industry spelling. Australian and US suppliers favour “sub sill,” “subsill,” or “sill pan” to describe the same component. Regardless of spelling, the function is identical: manage moisture at the most vulnerable point in the window-to-wall interface.
Where the Sub Sill Sits in the Window Assembly
Physically, the sub sill occupies the horizontal base of the rough opening, sitting on top of the structural framing or masonry beneath the window. The window frame rests on or just above it, and the external cladding or render finishes over its front edge. Its back edge turns upward to form a dam, while its ends are closed with raised flanges that prevent water from escaping sideways into the wall at the jamb intersections. A forward slope, typically a minimum of five degrees, ensures gravity moves captured moisture toward weep slots or an outward drainage path rather than allowing it to pool.
A sub sill is not decorative trim. It is a critical secondary line of defence against moisture ingress, designed on the assumption that primary seals will eventually allow some water through. Buildings that omit this component rely entirely on sealant joints that degrade over time, leaving no backup drainage path when those seals fail.
This layered approach to moisture management raises a practical question: with so many names for similar components across different markets, how do you ensure you are ordering the right product for your specific window system?
Sub Sill Terminology and Naming Conventions
The naming landscape around window sill components is genuinely confusing. Search for one term and you will find products, forum threads, and spec sheets using half a dozen overlapping names for what may or may not be the same part. Sorting through this matters because ordering the wrong component wastes time and money, and in a worst case leaves a gap in your weatherproofing system.
Sub Sill vs Sill Plate vs Extension Cill
The core confusion sits between three terms that sound related but refer to different things. Whether you search “window sill or window cill,” you are dealing with a spelling variation rather than a product difference. The Oxford English Dictionary lists “cill” as a variant spelling of “sill,” and the UK fenestration trade adopted “cill” as its preferred form. Australian and US industries use “sill” almost exclusively.
A window sill plate, by contrast, is not an aluminium weatherproofing profile at all. The sill plate in a window context refers to the horizontal timber or steel framing member at the bottom of the rough opening, the structural piece the window frame bears onto. Meanwhile, sill trim and extension cills are external cover pieces that clip onto or extend forward from the window frame to bridge the gap between frame and outer wall face, managing surface water runoff rather than acting as a concealed drainage tray.
| Term | Region | What It Refers To |
|---|---|---|
| Sub sill / subsill | Australia, US | Concealed aluminium drainage tray beneath the window frame |
| Sub-cill | UK | Same component as sub sill (alternate spelling) |
| Extension cill | UK | Profile that clips to the frame face and projects outward over the wall |
| Sill plate (window context) | US, Australia | Structural framing member at the base of the rough opening |
| Sill pan | US | Formed tray (metal or flexible) beneath the frame; similar function to sub sill |
| Sill trim / cill pressing | All regions | Decorative or protective aluminium cover over an existing masonry or timber sill |
Why Terminology Matters When Ordering
Getting this wrong has real consequences. A builder sourcing from a UK manufacturer who requests a “sub-cill” will receive the concealed drainage profile. Request a “cill extension” and you will receive the clip-on face cover, a completely different product with a different function. Likewise, specifying a sill plate window component to an Australian supplier may land you structural timber rather than the aluminium drainage profile you actually need.
International sourcing makes this worse. Catalogues from different regions use these terms inconsistently, and generic sill trim listings often group decorative covers alongside functional drainage profiles. The safest approach is to describe the function you need (concealed drainage beneath the frame, or external projection over the wall face) and confirm dimensions, rather than relying on a product name alone. Knowing these distinctions gives tradespeople a shared language when communicating with manufacturers, regardless of which side of the world the product ships from.
Why Aluminium Sub Sills Are Critical for Waterproofing
Every window opening is a hole punched through an otherwise continuous weather barrier. No matter how precisely a frame is installed or how fresh the sealant bead looks on day one, the window-to-wall interface remains the single most vulnerable point in any facade. Rain, condensation, and wind-driven moisture will eventually find a path inward. The question is not whether water will penetrate, but what happens when it does.
This is where waterproofing philosophy splits into two fundamentally different camps, and where the aluminium window sub sill earns its place in the building envelope.
How Sub Sills Manage Water at the Window-to-Wall Interface
A face-sealed system relies entirely on the primary seal between frame and wall to keep every drop of moisture out. If that seal holds perfectly, water never enters. The problem? Sealant degrades under UV exposure, buildings move with thermal cycling, and wind-driven rain generates pressures that push water through microscopic gaps. Research at George Brown College into pressure-equalised window installations confirmed what experienced builders already know: face sealing is an unforgiving practice because any water that breaches the seal has no escape route.
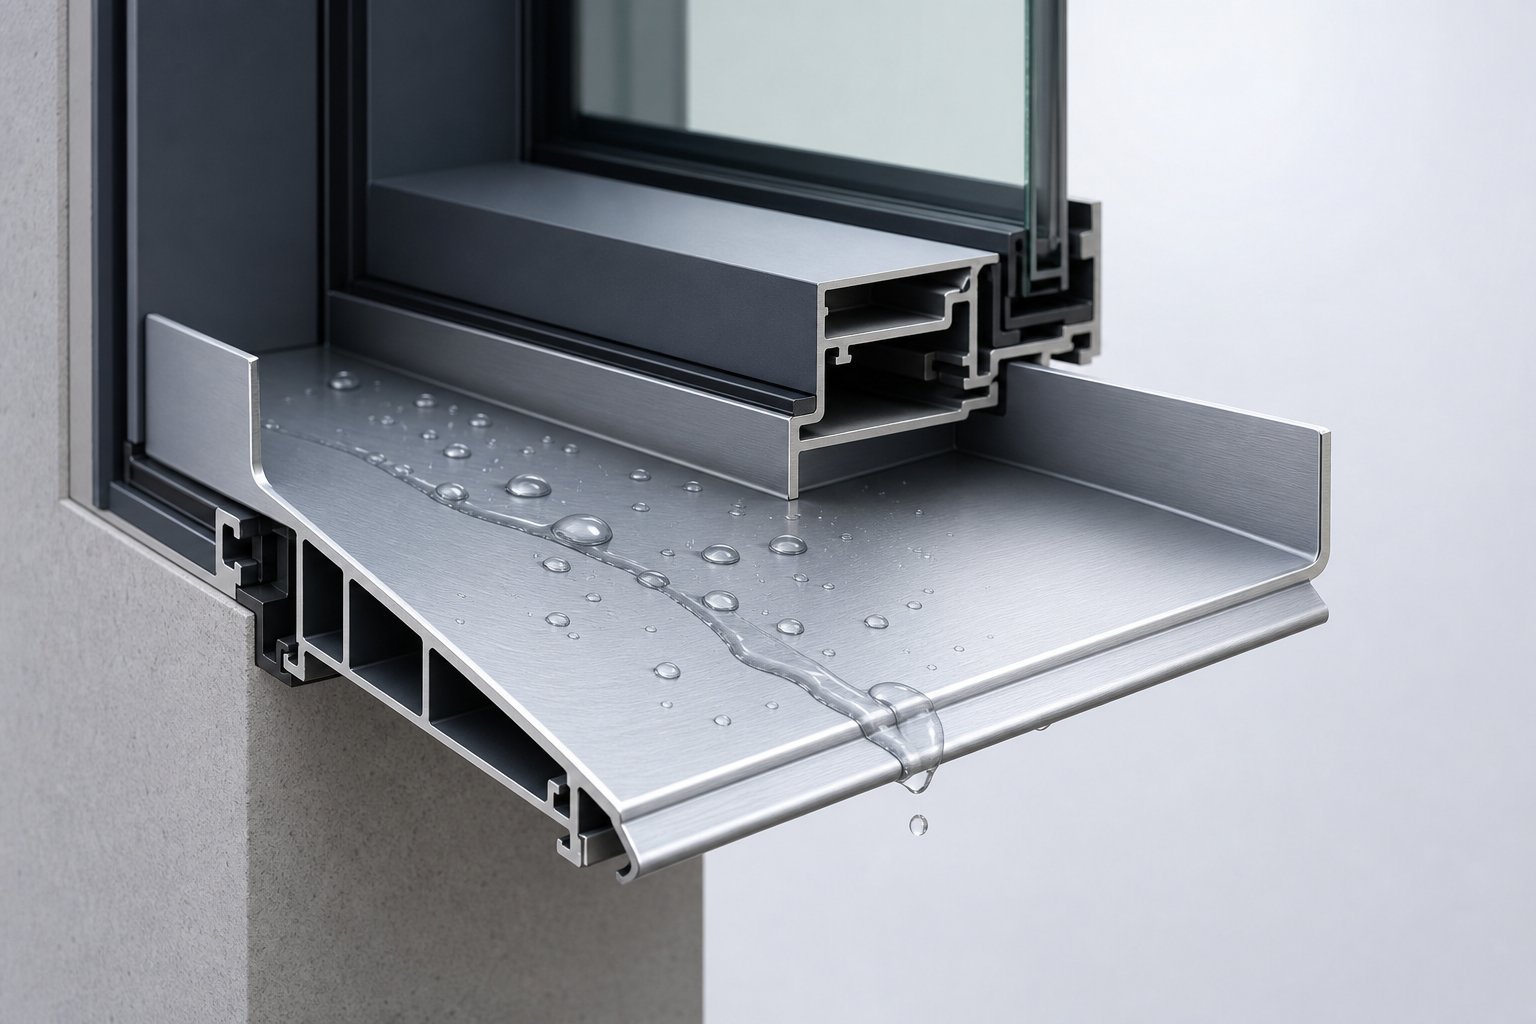
A drained system takes the opposite approach. It assumes some water will pass the first barrier and designs a managed pathway for that moisture to exit harmlessly. The aluminium sub sill is the centrepiece of this strategy at the sill level, functioning as a metal window sill flashing that forms a shallow tray directly beneath the window frame. Any moisture migrating past the primary seal, whether from failed caulking, condensation runoff, or wind-driven rain forced through the frame joints, lands on this tray rather than soaking into framing timber or dropping into the wall cavity.
For the drainage to work, the sub sill must slope toward the exterior. Building Science Corporation identifies a positive slope as one of the four essential characteristics of any pan flashing. In practice, a minimum fall of five degrees (roughly 10 mm over a 100 mm depth) moves captured water outward under gravity alone, preventing ponding that could back up against the frame or overwhelm end dams during heavy rain events.
The aluminum sill pan does not operate in isolation. It integrates with the broader moisture management system surrounding the opening. Head flashings above the window intercept water running down the face of the wall and kick it outward over the frame. Jamb flashings on each side channel any vertical moisture flow downward onto the sub sill rather than letting it bypass into the wall cavity. And the damp proof course (DPC) within the wall build-up connects with the sub sill’s front edge, ensuring water that drains off the tray exits over the top of the cladding or into a dedicated drainage cavity rather than being trapped behind render or brickwork.
End Dams and Secondary Flashing Integration
A sloped tray only works if water stays on it. Without containment at the sides, moisture simply runs off the ends of the sub sill and directly into the wall framing at the jamb intersections, exactly where structural connections are most susceptible to rot and corrosion. This is why end dams are non-negotiable.
End dams are turned-up flanges at each end of the sub sill, forming small walls that contain water within the tray and prevent lateral migration. On extruded aluminium profiles, these may be integrated into the section design. On site-formed sheet metal, end dams are created by folding the material upward and sealing the corners. Building Science Corporation notes that corners between the end dam and back dam should be folded rather than cut to avoid creating leak points at the most critical junction. A cut corner relies entirely on sealant to remain watertight; a folded corner maintains the continuous metal barrier even if the sealant eventually fails.
Below the aluminium sub sill, flexible flashing membranes wrap into the rough opening and lap over the wall’s drainage plane. The sub sill sits on top of this membrane layer, and its front lip extends outward to overlap the building wrap or membrane beneath the window by a minimum of 50 mm. This overlap ensures that any water draining off the sub sill’s front edge falls onto the external side of the drainage plane rather than tracking behind it, which would channel moisture deeper into the wall assembly. End caps for window sills serve a similar containment purpose on the external visible sill, but the sub sill’s end dams do the heavy lifting at the concealed drainage level where failure has far greater consequences.
Together, these elements create what building scientists call a window sill cap of protection, a layered defence where each component backs up the one above it:
- Primary drainage slope: Minimum five-degree forward fall moves captured water toward the exterior under gravity, preventing ponding beneath the frame.
- End dam containment: Turned-up flanges at each jamb prevent lateral water escape into the wall cavity at the most damage-prone structural intersections.
- Overlap with wall membrane: The sub sill’s front edge laps over the drainage plane by at least 50 mm, ensuring discharged water exits on the weather side of the building wrap.
- Capillary break: A gap or drip edge at the sub sill’s leading edge breaks the surface tension that would otherwise wick water back along the underside of the profile and into the wall.
This layered approach means no single seal, joint, or component bears the full burden of keeping moisture out. When the primary frame seal ages and admits small amounts of water (as it inevitably will), the sub sill catches and redirects it before damage begins. The system is forgiving by design, built around the reality that perfection is temporary but drainage is permanent.
Of course, understanding why drainage matters only gets you halfway. The material the sub sill is made from determines whether that drainage performance lasts five years or fifty, which raises the question of how aluminium stacks up against PVC, composite, and pressed metal alternatives in real-world conditions.
Aluminium vs Alternative Sub Sill Materials
Drainage design keeps water moving, but the material that forms the tray determines how long that protection actually lasts. A perfectly sloped sub sill made from a material that warps, cracks, or degrades under UV exposure becomes a liability rather than an asset within a few years. Material choice is not cosmetic here. It directly governs whether the drainage function survives the life of the building.
Aluminium dominates the commercial and mid-to-high-end residential market for good reason, but it is not the only option. PVC, uPVC, pressed metal (galvanised steel or zinc-coated), and composite profiles all compete for the same position beneath the window frame. Each brings trade-offs that matter depending on budget, climate zone, and building type.
Aluminium Sub Sills vs PVC and uPVC Options
The most common alternative to a metal window sill profile at the sub sill position is PVC or uPVC. The appeal is straightforward: lower material cost and no risk of thermal bridging. PVC profiles do not conduct heat the way aluminium does, which makes them attractive on paper for cold-climate detailing where condensation at the sill junction is a concern.
The problems emerge over time. PVC is significantly less rigid than aluminium, particularly across wider openings. A sub sill spanning 1200 mm or more in PVC can deflect under load or flex when the window frame above settles, creating gaps in the seal between frame and tray. Aluminium extrusions maintain dimensional stability across spans that would cause a PVC profile to sag.
UV resistance is the other major differentiator. In Australian conditions, where sub sill front edges often receive direct or reflected sunlight, PVC degrades faster than it would in milder European climates. Industry comparisons note that dark-coloured PVC absorbs significantly more heat, accelerating expansion and increasing the risk of warping on sun-exposed elevations. Aluminium with a powder-coated or anodised finish resists UV breakdown across decades rather than years.
Expansion and contraction rates compound the issue. PVC expands roughly three times more than aluminium per degree of temperature change. For a concealed sub sill that must maintain consistent seal contact with the window frame above and the flashing membrane below, that movement creates cyclic stress on every sealant joint it touches. Aluminium’s lower thermal expansion means joints stay tighter for longer.
When Composite or Pressed Metal Alternatives Make Sense
Composite sub sill profiles, typically a blend of PVC and wood fibre or fibreglass-reinforced polymers, occupy a middle ground. They offer better rigidity than straight PVC and lower thermal conductivity than aluminium. Composite window components can achieve lifespans of 30 to 40 years, approaching aluminium territory, though at a price point that often exceeds aluminium extrusions in the Australian market.
Pressed metal, usually galvanised steel or zincalume, provides another option where aluminium capping windows and trim is not feasible due to budget constraints. Galvanised sub sills are common in volume residential builds where cost per opening drives specification decisions. They perform well structurally and resist UV without issue, but their Achilles heel is corrosion. In coastal zones or areas with high humidity, galvanised coatings degrade faster than aluminium’s natural oxide layer, particularly at cut edges where the zinc protection is compromised.
For metal window trim exterior applications in salt-air environments along Australia’s coastline, aluminium remains the safer long-term investment. Its self-healing oxide layer resists pitting corrosion that would eat through galvanised steel within 15 to 20 years in the same exposure conditions.
| Material | Typical Lifespan | UV Resistance | Thermal Conductivity | Relative Cost | Best Suited For |
|---|---|---|---|---|---|
| Aluminium (extruded) | 40-60+ years | Excellent (powder-coated or anodised) | High (thermal break needed in cold climates) | Medium-high | Commercial, coastal, high-end residential, any climate zone |
| PVC / uPVC | 15-25 years | Moderate (degrades in high-UV environments) | Low (natural insulator) | Low | Budget residential, cold climates, narrow openings under 900 mm |
| Composite (fibre-reinforced) | 30-40 years | Good | Low-medium | High | Energy-rated builds, passive house projects, thermally sensitive details |
| Pressed metal (galvanised steel) | 20-30 years | Excellent | High | Low-medium | Volume residential, inland non-coastal builds, budget commercial |
Aluminium’s combination of rigidity, corrosion resistance, and longevity makes it the benchmark against which every alternative is measured. Its one genuine weakness, high thermal conductivity, becomes relevant primarily in climate zones where winter condensation at the sill is a design concern. That weakness, however, is addressable through thermal break profiles and careful detailing, topics that demand their own discussion when specifying the correct profile dimensions and gauge for your specific wall build-up.
Sizing and Specification for Aluminium Sub Sills
Selecting a sub sill profile is not a one-size-fits-all exercise. The correct profile depends on three variables working together: the window frame’s depth, the total wall build-up thickness, and how far the sub sill needs to project beyond the face of the cladding to shed water clear of the wall below. Get any one of these wrong and you end up with a profile that either falls short of the cladding edge (trapping water behind the wall finish) or projects too far forward without adequate support (risking deflection and pooling).
Manufacturer spec sheets list dimensions, but rarely explain how those numbers relate to your specific wall construction. Bridging that gap between catalogue data and site reality is where most sizing errors occur.
Measuring for the Correct Sub Sill Profile
The relationship between frame depth, cavity width, and external projection determines which profile you need. A brick veneer wall with a 50 mm cavity and 110 mm brick leaf presents a completely different requirement to a lightweight clad wall with 20 mm fibre cement sheeting over a timber frame. Both need the sub sill to extend from the back of the rough opening to beyond the outer face of the cladding, but the total coverage dimension varies significantly.
Before ordering, work through these measurements at the actual opening rather than relying on drawings alone. As building measurement guides emphasise, measuring at multiple points and using the smallest reading avoids sizing to an opening that is wider on paper than it is in reality.
- Measure the rough opening width: Take readings at three points (top, middle, bottom of the sill area) and record the smallest dimension. This determines the sub sill’s cut length, accounting for the end dams that must turn up within the opening at each jamb.
- Determine the window frame depth: Measure from the front face of the frame to its rear edge where it bears on the rough sill. The sub sill must extend at least this full depth so the frame sits entirely over the drainage tray with no gap at the back.
- Identify the wall build-up thickness: Measure from the inner face of the rough opening framing to the outer face of the finished cladding. Include everything: sheathing, cavity battens, insulation, building wrap, and the cladding material itself.
- Calculate the required external projection: The sub sill’s front lip should project a minimum of 15 to 25 mm beyond the finished cladding face. This overhang creates the drip edge that throws discharged water clear of the wall surface below, preventing staining and stopping capillary action from wicking moisture back into the assembly.
- Select a profile that accommodates all dimensions with adequate overlap: The total profile width (back upstand to front drip edge) must cover frame depth plus wall build-up plus external projection. Standard profiles range from 90 mm to 200 mm in total width, with most residential applications falling between 120 mm and 170 mm depending on wall construction type.
For under window sill trim that doubles as the visible external finish, the projection dimension becomes even more critical because the profile edge is exposed to view. Residential projects typically allow 20 mm of visible overhang as a balance between effective drainage and clean aesthetics.
Standard Profiles, Gauges and Finish Options
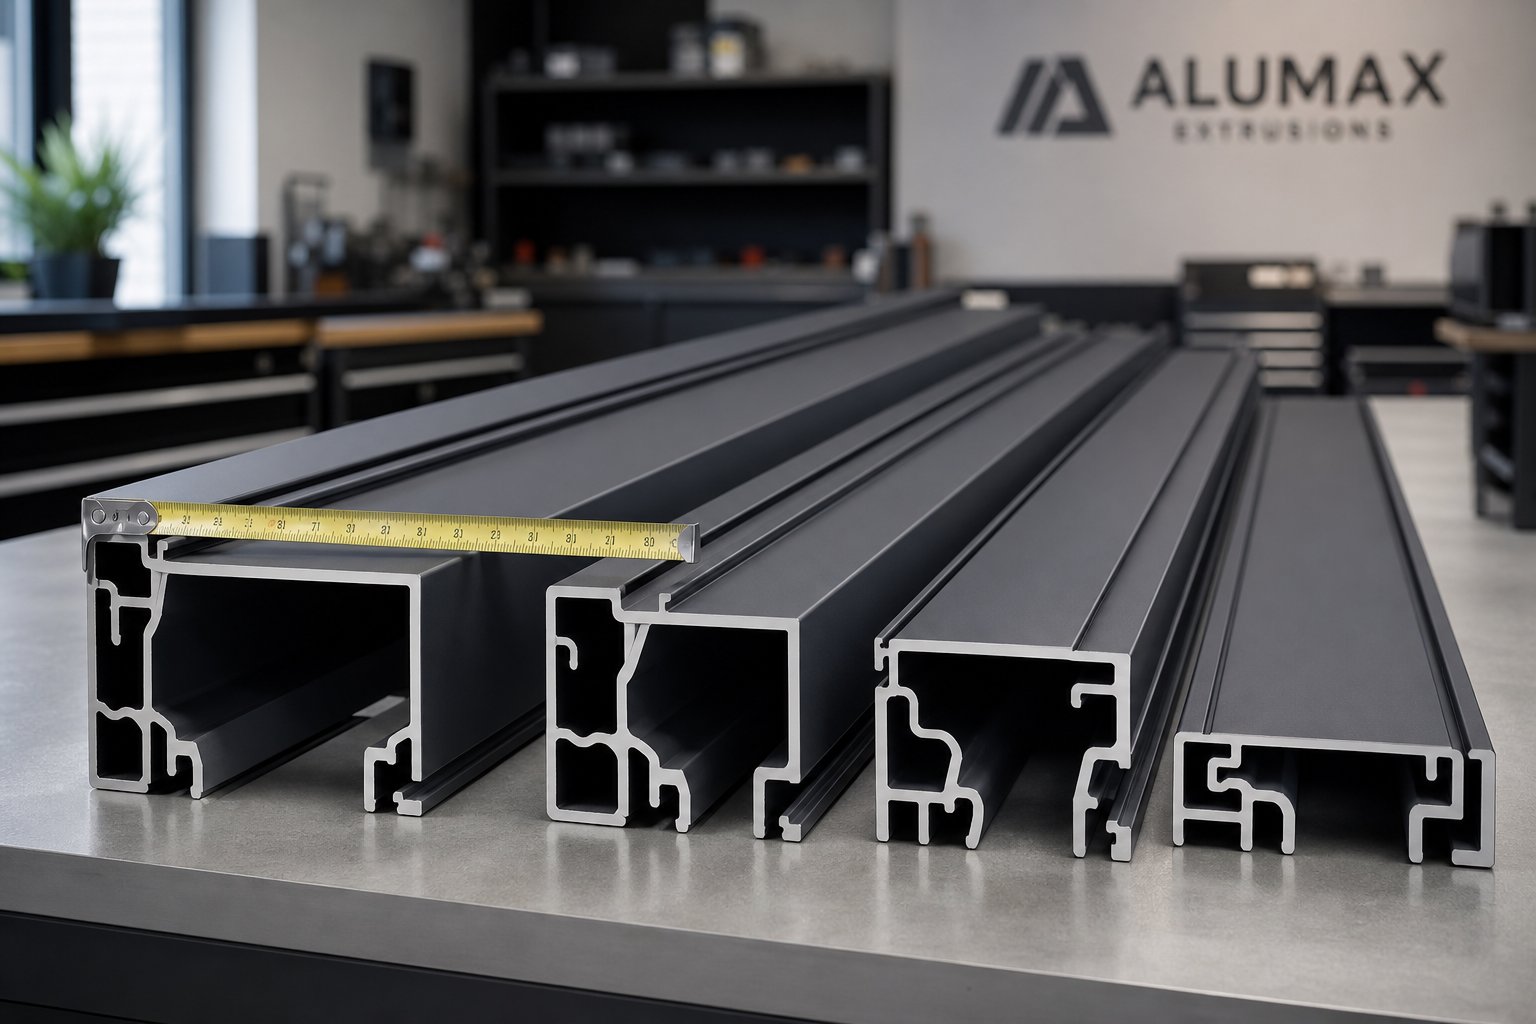
Aluminium sub sill profiles split into two manufacturing categories: extruded sections and folded sheet. Understanding the difference matters for structural performance and longevity.
Extruded profiles are formed by pushing heated aluminium alloy through a die, creating a continuous cross-section with consistent wall thickness and integrated features like drainage channels, snap-fit legs, and internal ribs. Architectural extrusions typically use 6063-T5 or 6063-T6 aluminium alloy, chosen for its excellent extrudability, corrosion resistance, and ability to accept anodising and powder coating finishes. Where higher structural demands exist, such as commercial buildings with wider openings or heavier window frames, 6061-T6 alloy provides greater strength at the cost of slightly reduced formability.
Folded sheet profiles, by contrast, are brake-pressed from flat aluminium sheet into a sub sill shape. They cost less to produce in small quantities and can be custom-formed on site, but they lack the integrated features and consistent dimensional accuracy of extrusions. For residential window sill molding where the sub sill also serves a visible aesthetic role, extruded sections deliver a cleaner, more precise finish that folded sheet cannot match.
Material thickness varies by application:
- Residential sub sills: Typically 1.6 mm to 2.0 mm wall thickness for extruded profiles, or 0.9 mm to 1.2 mm for folded sheet alternatives. The lighter gauge works for openings under 1200 mm where loading is minimal.
- Commercial sub sills: 2.0 mm to 3.0 mm extruded sections, particularly for openings exceeding 1500 mm or where heavier commercial window frames impose greater bearing loads on the sub sill.
Finish selection affects both durability and compatibility with the window trim sill and frame above. The main options, ranked by longevity in Australian conditions:
- Mill finish (raw aluminium): No applied coating. Develops a natural oxide layer that provides basic corrosion resistance. Acceptable for fully concealed sub sills where appearance is irrelevant, but prone to water staining and surface oxidation where any portion remains visible. Lowest cost.
- Anodised finish: An electrochemical process that thickens the natural oxide layer to between 15 and 25 microns for architectural applications. Provides excellent hardness, UV stability, and corrosion resistance. Anodising enhances wear resistance while maintaining the metallic appearance of the aluminium. Ideal for window sill trim exterior applications where a subtle, low-maintenance metal look suits the facade design.
- Powder-coated finish: A dry polymer powder baked onto the aluminium surface at around 200 degrees Celsius, forming a durable layer typically 60 to 80 microns thick. Offers the widest colour range (any RAL code or custom colour match), good UV resistance, and strong adhesion when properly pre-treated. The most common choice where the sub sill edge is visible and must colour-match the window frame or building trim.
- PVDF (fluorocarbon) coating: A premium finish using polyvinylidene fluoride resin, offering superior colour retention and weathering resistance over 25 to 30 years. Typically specified on commercial projects or high-end residential builds in exposed coastal or high-UV locations where long-term colour stability justifies the cost premium over standard powder coating.
Matching the sub sill finish to the window frame ensures visual continuity where any portion of the profile is exposed. Most Australian aluminium window manufacturers powder coat frames and sub sills in the same batch to guarantee colour consistency, which is worth confirming at the ordering stage rather than trying to match after the fact.
With profile dimensions, gauge, and finish locked in, the next challenge shifts from specification to execution: how to actually cut, fix, and seal the sub sill into position without compromising the drainage performance you have just carefully designed.
Step-by-Step Sub Sill Installation for New Builds and Retrofits
A well-specified sub sill only performs if it is installed correctly. The profile sitting in your workshop means nothing until it is cut to length, fixed in position with the right fall, sealed at every junction, and integrated into the surrounding membrane system. Precision here separates a building that stays dry for decades from one that develops concealed moisture damage within a few years.
Installation method depends heavily on context. A new build gives you access to the raw structure before cladding goes on, meaning the sub sill integrates directly with building wrap and flexible membranes in the correct sequence. A retrofit forces you to work backwards, peeling away existing finishes to tie into the drainage plane that is already in place. Both routes reach the same destination, but the path differs enough that treating them identically invites failure.
Preparing the Rough Opening for Sub Sill Installation
Surface preparation sets the foundation for everything that follows. The base of the rough opening must be clean, dry, and free of loose debris, mortar droppings, or protruding fixings that would prevent the sub sill from sitting flat. Any high spots should be ground down rather than relying on packing to bridge them, since packing creates point loads that can deform thinner gauge profiles over time.
Check level across the sill area and confirm the correct fall toward the exterior. A minimum slope of five degrees ensures gravity moves water forward rather than allowing it to pool beneath the frame. If the structural sill is dead level (as it often is in masonry construction), you will need tapered packers or a mortar bed shaped to create that slope before the sub sill goes down.
Membrane application comes next. In new builds, the flexible flashing membrane wraps into the rough opening from the building wrap, lapping onto the sill area by at least 100 mm and turning up at the jambs by the same dimension. The sub sill sits on top of this membrane, not beneath it, so that any water draining off the front edge lands on the weather side of the wrap rather than tracking behind it. Industry installation guides emphasise that the frame should bridge the DPM and any damage to the membrane must be repaired before proceeding.
Cutting, Fixing and Sealing the Sub Sill
Aluminium extrusions cut cleanly with a drop saw fitted with a non-ferrous blade (typically 80-tooth carbide or higher). Avoid abrasive cutting discs, as these generate heat that discolours the aluminium and can damage powder-coated finishes near the cut line. For how to trim a window sill opening precisely, measure the internal width of the rough opening at the sill and subtract the minimum clearance your profile’s end dam formation requires, typically 2 to 3 mm each side to allow the upturned ends to fold without binding against the reveals.
End dams on extruded profiles are usually pre-formed at the factory. For site-formed sheet profiles, fold the end material upward using a hand brake or sheet metal bender, then seal the corner junction with neutral-cure silicone. Fold rather than cut the corners wherever possible. A cut corner relies entirely on sealant to remain watertight, while a folded corner maintains continuous metal even if the sealant joint eventually fails.
Fixing methods should avoid penetrating through the drainage surface of the sub sill. Every screw hole through the tray floor is a potential leak point that relies on sealant to remain sealed, adding risk over time. Preferred approaches include:
- Clip systems: Aluminium clips fix to the structural sill, and the sub sill profile snaps or slides onto the clips. No penetrations through the drainage plane.
- Adhesive fixing: Structural adhesive (polyurethane-based) bonds the sub sill to the membrane-covered sill area. Suitable for lightweight residential profiles where wind uplift loads are minimal.
- Mechanical brackets to reveals: L-brackets fixed into the jamb reveals support the sub sill from the sides, keeping the tray floor intact. This method works well for wider openings where the profile needs lateral restraint.
Where through-fixing is unavoidable (heavy commercial frames, high wind zones), each penetration must be sealed with a butyl washer beneath the screw head and the fixing point back-sealed with neutral-cure silicone. Never use acidic-cure silicone on aluminium as it corrodes the metal and causes adhesion failure over time.
Sealant selection matters for every joint the sub sill touches. Neutral-cure silicone provides excellent adhesion to aluminium, flexibility over a wide temperature range, and long-term UV resistance. Polyurethane sealants offer higher tear strength for joints subject to movement but are less forgiving of surface preparation errors. For the critical junction between the sub sill’s back upstand and the window frame, neutral-cure silicone remains the industry standard in Australian practice.
Understanding how to wrap windows in aluminum trim requires the same careful sequencing. The window frame cover or external capping must lap over the sub sill’s back dam to maintain the shingled drainage principle: upper components always overlap lower components so water sheds downward without entering joints.
New Build vs Retrofit Installation Differences
The sequencing challenge is where new builds and retrofits diverge most sharply. In new construction, the sub sill is installed early in the waterproofing sequence, after the building wrap and rough opening membranes are in place but before the window frame and cladding go on. This allows every layer to overlap correctly in a shingle pattern from top to bottom.
Retrofit installations must reverse-engineer that sequence. The cladding is already in place, the building wrap may or may not be accessible, and the existing window sill molding exterior finish must be carefully removed or cut back to allow the sub sill to slide into position. How to trim window sill finishes back far enough to integrate a retrofit sub sill without damaging surrounding render or brick is one of the trickier aspects of the job. Typically, a 20 mm chase is cut into the existing render below the frame line, allowing the sub sill’s back edge to tuck behind the finish rather than sitting on top of it.
| Stage | New Build Approach | Retrofit Approach |
|---|---|---|
| Membrane integration | Sub sill sits directly on freshly applied flexible flashing membrane, lapped over building wrap in correct shingle sequence | Existing membrane may need cutting back and re-lapping; new membrane strip applied beneath sub sill and sealed to existing wrap where accessible |
| Fixing method | Clip systems or adhesive to raw substrate; full access to structural sill for bracket positioning | Mechanical brackets to reveals preferred (avoids disturbing existing waterproofing layers); adhesive fixing where existing membrane cannot be penetrated |
| Sequencing with other trades | Sub sill installed after wrap and before cladding, plastering, and window frame; window frame cover and external trim fitted after frame is plumbed and fixed | Existing cladding and render must be cut back first; sub sill fitted before new window frame; external finishes made good after installation is complete and sealed |
| End dam access | Full access to form and seal end dams before jamb linings are fitted | Limited access; end dams may need to be pre-formed and slid into position with sealant applied blind |
| Verification | Water test before cladding covers the sub sill; easy to inspect and correct | Water test before external finishes are reinstated; limited opportunity to correct once render is patched |
Regardless of whether the project is new or retrofit, always water-test the completed sub sill installation before covering it with finishes. Run a gentle hose stream across the sill area for five to ten minutes, then inspect internally and at the front drainage edge to confirm water exits only at the intended weep points. Catching a missed seal or incorrect fall at this stage costs minutes. Discovering it after cladding and internal linings are finished costs thousands.
Even with careful installation, certain recurring errors trip up experienced tradespeople. The most damaging ones are rarely obvious at the time of fixing, only revealing themselves months or years later as staining, rot, or condensation in the wall cavity.
Common Sub Sill Installation Mistakes and How to Avoid Them
Some installation errors announce themselves immediately: a profile that does not fit, a cut that is too short, a fixing that misses the substrate. Those are frustrating but fixable on the spot. The dangerous mistakes are the ones that look perfectly fine on the day of installation yet quietly undermine the sub sill’s drainage function over months or years. By the time staining appears on internal linings or a musty smell develops in the wall cavity, the damage is well advanced and the repair bill has multiplied.
Understanding why each mistake causes harm, not just what to avoid, gives you the judgement to adapt when site conditions do not match the textbook scenario.
Drainage Slope and End Dam Failures
The single most common error is installing the sub sill dead flat. It looks neat, it sits level against the spirit level, and it feels correct. But a flat sill window installation defeats the entire purpose of the drainage tray. Water that lands on a level surface has no reason to move. It pools beneath the frame, sits against sealant joints for extended periods, and eventually finds a path inward through capillary action or hydrostatic pressure during heavy rain.
Experienced installers note that window sills need a back slope of roughly 5 to 15 degrees to channel water away reliably. For a concealed sub sill, a minimum five-degree fall toward the exterior translates to approximately 10 mm of drop over a 100 mm profile depth. That slope must be built into the substrate beneath the sub sill (using tapered packers or a shaped mortar bed on masonry) rather than relying on the profile itself to flex into position. Forcing a rigid aluminium extrusion into a slope it was not set up to hold creates stress points that eventually spring back toward level.
Missing or poorly formed end dams are equally destructive, though the failure mode differs. Without those turned-up flanges at each jamb, water pooling on the sub sill (however slight) migrates sideways along the profile and drops directly into the wall framing at the jamb corners. These are the exact locations where structural connections, packing, and timber are most vulnerable to sustained moisture. A sub sill without end dams is not a drainage tray; it is a water slide aimed at the most damage-prone parts of the wall assembly.
Site-formed end dams fail most often at the corner junction where the upturned end meets the back dam. If the corner is cut rather than folded, the gap relies entirely on sealant to remain watertight. Sealant joints at internal corners are difficult to tool properly, prone to thinning during application, and degrade faster than joints on flat surfaces due to stress concentration. Always fold corners where the material allows it, maintaining a continuous metal barrier even when the sealant ages.
Thermal Bridging and Sealant Selection Errors
Aluminium conducts heat roughly 1500 times more effectively than timber. When a continuous aluminium sub sill profile contacts internal framing or extends unbroken from the exterior face into the conditioned interior, it creates a direct thermal bridge. In cooler months or when air conditioning drives interior temperatures well below outdoor conditions, this bridge pulls heat through the assembly and drops the interior surface temperature of surrounding materials below the dew point. The result is condensation forming on or near the sill junction, feeding moisture into timber framing and wall linings without a single drop of rain being involved.
The fix is straightforward in principle: interrupt the aluminium’s continuity with a thermal break (polyamide strip or similar non-conductive spacer), or ensure the sub sill profile terminates before it contacts interior elements. Problems arise when installers treat the sub sill as just another piece of trim and run it hard against the internal wall lining or stud framing without any separation.
Sealant selection causes a different category of failure, and it is remarkably common because the wrong product appears to work perfectly for the first 12 to 18 months. Acetic-cure (acetoxy) silicone corrodes aluminium because it releases acetic acid as it cures. The vinegar smell during application is the acid doing its work. On aluminium substrates, this acid attacks the metal surface beneath the sealant bead, weakening adhesion progressively until the seal peels away entirely. By the time the failure becomes visible, the corrosion has spread beneath the joint and the aluminium surface is pitted and stained.
Neutral-cure silicone releases a non-corrosive byproduct during curing and maintains long-term adhesion to aluminium without degrading the substrate. It costs slightly more per cartridge and cures more slowly, but for an exterior aluminum window sill cover or concealed sub sill where re-sealing requires removing cladding and trim, the difference in longevity makes neutral cure the only sensible choice. Every joint between aluminium and any adjacent surface should use neutral-cure silicone or a compatible polyurethane sealant, full stop.
The following list captures the most damaging errors in one place for quick reference:
- Flat or insufficient fall: Water pools beneath the frame rather than draining outward, eventually penetrating sealant joints through sustained hydrostatic pressure and capillary action.
- Missing or cut-corner end dams: Lateral water migration at jambs delivers moisture directly into structural framing connections, causing concealed rot and corrosion.
- Inadequate membrane overlap: The sub sill’s front edge fails to lap over the wall’s drainage plane by the required minimum (50 mm), allowing discharged water to track behind the building wrap and into the wall cavity.
- Acetic-cure silicone on aluminium: Acid released during curing corrodes the metal substrate, causing progressive adhesion loss and eventual seal failure within two to five years.
- Penetrating fixings through the tray floor: Every screw hole through the drainage surface is a potential leak point; each relies on a sealant washer that degrades over time, creating direct pathways for water into the structure below.
- Continuous aluminium bridging to interior: Unbroken thermal conductivity path causes condensation on interior surfaces near the sill, feeding moisture into linings and framing without any external water source.
- No water testing before cladding: Defects remain invisible once external finishes cover the sub sill; a simple hose test before closing up costs minutes but prevents thousands in future remediation.
Most of these errors share a common thread: they are invisible once the wall is finished. Window sill covers exterior cladding hides the sub sill entirely from view, meaning a mistake made during installation stays hidden until water damage manifests on internal surfaces or during a renovation that opens the wall. This is precisely why getting it right the first time, rather than relying on inspection after the fact, matters so much at the sub sill level of the assembly.
Avoiding thermal bridging through correct detailing raises a broader design question. For buildings where energy performance is tightly regulated or condensation risk is high, a standard solid aluminium profile may not be enough. Thermally broken sub sill profiles address this limitation directly, though their application depends on climate zone, window system type, and the thermal targets your build needs to hit.

Thermal Break vs Standard Aluminium Sub Sills
Standard solid aluminium sub sills work brilliantly as drainage trays, but they share a physical property with every other aluminium component in the building envelope: they conduct heat with remarkable efficiency. Pure aluminium conducts heat approximately 1000 times faster than wood, and when a solid extruded aluminium window sill profile runs unbroken from the exterior face through to the interior side of the wall, it creates a thermal shortcut that bypasses insulation entirely. In mild Australian climates, this may never cause a noticeable problem. In cooler regions or heavily air-conditioned buildings, that shortcut invites condensation at the sill junction, silently feeding moisture into surrounding materials.
The solution is not to abandon aluminium. It is to interrupt the conductive pathway while keeping the drainage performance intact.
How Thermal Break Sub Sills Work
A thermally broken sub sill profile is not a single continuous piece of aluminium. It consists of two separate aluminium sections, one facing the exterior and one facing the interior, joined by a strip of low-conductivity material that holds the assembly together structurally while blocking heat flow between the two halves.
The insulating strip is typically polyamide (nylon reinforced with glass fibres) or polyurethane. Polyamide is chosen for its strength and heat resistance, while polyurethane offers excellent insulation properties and flexibility. Both have thermal conductivity values around 0.3 W/mK, compared to aluminium’s 237 W/mK. That difference, roughly 800 to 1, is what makes the concept work.
In practical terms, the thermal break keeps the interior-facing aluminium section close to room temperature rather than letting it chill toward the outdoor temperature. This raises the surface above the dew point, preventing the condensation that would otherwise form on or near the sill and migrate into wall linings. For the exterior aluminium window sill portion, drainage function is unaffected because the outer section retains its full profile shape, slope, and end dams exactly as a standard profile would.
The performance benefit shows up as a reduced U-value at the sill junction. Thermally broken aluminium systems routinely achieve U-values of 0.8 to 2.0 W/(m²K), representing a 70 to 85 percent improvement over non-broken profiles. While those figures relate to complete window frames rather than sub sills alone, the same principle applies: interrupting the aluminium pathway at the sub sill prevents that component from undermining the thermal performance of the surrounding assembly.
Matching Sub Sill Thermal Performance to Your Window System
A thermally broken window frame paired with a solid, unbroken sub sill underneath creates an odd mismatch. The frame resists heat flow admirably, but the sub sill beneath it acts as a thermal bypass route, allowing heat to conduct around the frame’s thermal break via the sill profile sitting directly below. The weakest thermal link in the chain determines the overall performance at that junction, not the strongest.
This is why the sub sill specification should never be treated as a separate purchasing decision from the window system itself. The two components sit in direct contact, and their thermal ratings need to complement each other. A high-performance thermally broken frame demands a thermally broken sub sill to maintain continuity of the thermal envelope. A standard frame in a mild climate zone may perform perfectly well with a solid extruded aluminium window sill beneath it, particularly where NatHERS modelling or NCC Section J calculations do not flag the sill junction as a problematic thermal bridge.
Australian conditions vary enormously. A build in tropical Queensland faces negligible winter condensation risk at the sill, making a standard solid profile entirely adequate. A build in alpine Victoria or elevated regions of New South Wales, where interior heating runs for months and exterior temperatures drop well below the dew point, needs the thermal break to prevent moisture forming at the sill junction.
When selecting sub sills, working with a window supplier that considers the full frame-to-wall thermal performance ensures the sub sill specification matches the overall window design rather than being treated as an afterthought. MEICHEN’s aluminium window systems integrate thermal considerations at the frame level for Australian conditions, meaning the sub sill selection can be discussed as part of the complete window specification rather than sourced independently and hoped to align.
The broader takeaway: thermal break sub sills are not universally necessary, but they are non-negotiable where energy ratings demand them or where condensation risk is real. Matching the sub sill’s thermal performance to the window frame above it keeps the building envelope consistent, avoiding the scenario where a single component becomes the weakest point in an otherwise well-insulated wall assembly. That consistency of specification, across frame, sub sill, and weatherproofing details, is ultimately what determines whether the right product ends up on the right project.
Choosing the Right Sub Sill for Your Project
Thermal performance, drainage design, material longevity, correct sizing, proper installation. Each of these topics matters on its own, but a sub sill window detail only succeeds when every factor aligns within the specific context of your project. A coastal brick veneer home in Perth faces a completely different set of demands than a multi-storey commercial build in Melbourne’s CBD. Choosing the right profile means weighing all the variables together rather than optimising for one and hoping the rest falls into place.
The temptation, particularly on tight timelines, is to treat the window subsill as a standalone purchase: find something that roughly fits the opening, order it, and move on. That approach leads to mismatches between frame depth and profile width, thermal weak points that contradict the window system’s rating, or drainage details that conflict with the wall’s membrane design. A subsill window component is not trim. It is a functional interface between the window system, the wall assembly, and the external environment, and it needs to be specified with that full picture in mind.
Key Decision Factors for Sub Sill Selection
Not all factors carry equal weight. Some are non-negotiable constraints (the window system dictates minimum dimensions), while others are preferences that can flex within a range (finish colour, budget allocation). Working through them in priority order prevents low-priority preferences from overriding critical performance requirements.
- Window system compatibility: The sub sill must physically match your window frame’s depth, bearing width, and fixing interface. Different window brands use different frame profiles, and a sub sill designed for one system may not seat correctly beneath another. Always confirm dimensional compatibility with the frame manufacturer’s specifications before ordering.
- Wall build-up and depth: Total wall thickness, from internal lining to external cladding face, determines the sub sill’s required coverage width. Brick veneer, lightweight clad, rendered blockwork, and cavity wall systems each present different depth requirements. Measure the actual build-up on site rather than relying on architectural drawings, which may not reflect as-built conditions.
- Thermal performance requirements: If your build targets a specific NatHERS star rating or must comply with NCC Section J energy provisions, the sub sill’s thermal properties need to align with the window frame’s thermal break rating. A solid aluminium profile may be perfectly adequate in climate zones 1 through 4, while zones 6 through 8 often demand a thermally broken sub sill to prevent condensation at the junction.
- Drainage and waterproofing design: The sub sill must integrate with the building’s broader moisture management strategy. Consider how it connects to the wall’s drainage plane, whether weep slots or open fronts suit your cladding detail, and how end dams interact with jamb flashings. In high-exposure locations (coastal, cyclone-prone, or high-rainfall areas), drainage capacity and redundancy become more critical than in sheltered inland sites.
- Finish and aesthetic match: Where the sub sill’s front edge is visible below the window frame, it becomes part of the facade’s visual language. Powder-coated finishes matched to the window frame colour create a cohesive look. For fully concealed installations behind cladding, mill finish or anodised options reduce cost without aesthetic compromise.
- Budget: Sub sill cost varies with material gauge, profile complexity (extruded vs folded sheet), finish type, and whether the product is a standard catalogue item or a custom extrusion. Budget should inform the decision, but never override compatibility, thermal, or drainage requirements. A cheaper profile that fails its waterproofing function costs far more in remediation than the saving it delivered at purchase.
These six factors interact. A project in a high-wind coastal zone (factor 4) may demand a heavier gauge extruded profile (factor 6) that also needs marine-grade powder coating (factor 5) and thermal break construction (factor 3). Each constraint narrows the field of suitable products, which is why approaching the decision as an integrated specification rather than a series of isolated choices produces better outcomes.
Working With Your Window Supplier for Integrated Specification
The most reliable path to a correctly specified sub sill is to select it alongside the window system rather than sourcing it independently after the fact. When both components come from the same specification process, dimensional compatibility is guaranteed, thermal continuity is maintained, and the drainage interface between frame and sub sill has been designed to work as a system rather than cobbled together from separate catalogues.
This matters practically because window manufacturers design their frame profiles with specific sub sill geometries in mind. The frame’s bottom rail depth, its drainage slot positions, and its fixing lug locations all assume a particular sub sill profile beneath them. Substitute a generic sub sill sourced from a different supplier and those assumptions may not hold. The drainage slots might not align with the sub sill’s collection channels. The fixing lugs might not clear the sub sill’s back dam. Small mismatches compound into real performance gaps once water hits the junction.
For Australian projects, consulting MEICHEN’s aluminium window range allows builders and homeowners to discuss sub sill integration as part of the complete window specification. This ensures compatibility across frame type, hardware, glazing, and weatherproofing details rather than leaving the sub sill as a loose end to be resolved on site. When the window supplier understands the full wall build-up and can recommend a matched sub sill profile, you eliminate the guesswork that leads to costly site modifications.
Browsing generic window sills for sale online without knowing your exact frame dimensions, wall depth, and thermal requirements is a common source of ordering errors. The product descriptions rarely provide enough context to confirm compatibility with your specific window system. A sill that appears correct in catalogue dimensions may use a different drainage geometry, a shallower back dam, or a fixing interface that does not align with your chosen frame. Working from the window system outward, specifying the sub sill as an integrated accessory, avoids that trap entirely.
Ultimately, the aluminium window sub sill is not a product you choose once and forget. It is a decision that locks in the weatherproofing performance of every window opening for the life of the building. Approach it with the same care you would give to the window frame itself, specify it in context rather than isolation, and verify compatibility before anything gets cut. The wall behind your window will thank you for decades to come.
Frequently Asked Questions About Aluminium Window Sub Sills
1. What is the difference between a window sill and a sub sill?
The external window sill is the visible component that slopes outward to shed rainwater off the facade. The sub sill is a concealed aluminium tray installed beneath the window frame inside the rough opening. Its job is to act as a secondary drainage plane, catching any moisture that bypasses the primary window seals and redirecting it outward before it reaches the wall cavity or internal framing. The sub sill is part of a drained system designed on the assumption that primary seals will eventually allow some water through.
2. Do I need a sub sill on every window?
In most Australian residential and commercial builds, a sub sill is recommended on every window opening because it provides a critical backup drainage path at the most vulnerable point in the building envelope. While some sheltered openings under eaves or verandahs face less direct rain exposure, wind-driven moisture and condensation can still reach the frame-to-wall junction. Building codes under the NCC and best-practice waterproofing standards increasingly treat sub sills as standard rather than optional, particularly in coastal, cyclone-prone, or high-rainfall areas.
3. What slope does a sub sill need to drain properly?
A minimum fall of five degrees toward the exterior is the accepted standard for aluminium sub sills. This translates to roughly 10 mm of drop over a 100 mm profile depth. The slope must be built into the substrate beneath the sub sill using tapered packers or a shaped mortar bed, rather than relying on the aluminium profile to flex into position. Without adequate fall, water pools beneath the frame and eventually penetrates sealant joints through capillary action or hydrostatic pressure during heavy rain events.
4. Can I use a PVC sub sill instead of aluminium in Australia?
PVC sub sills cost less and offer lower thermal conductivity, but they bring significant trade-offs in Australian conditions. PVC is less rigid across wider openings (prone to sagging beyond 900 mm spans), degrades faster under high UV exposure typical of Australian climates, and expands roughly three times more than aluminium per degree of temperature change. This thermal movement stresses sealant joints and can create gaps in the drainage tray over time. For Australian builds, particularly in coastal or sun-exposed locations, aluminium provides superior longevity and dimensional stability that justifies the higher initial cost.
5. Should I choose a thermally broken sub sill or a standard solid aluminium profile?
The decision depends on your climate zone and energy performance targets. In warmer Australian regions (NatHERS climate zones 1 through 4), standard solid aluminium sub sills typically perform well without condensation issues. In cooler zones (6 through 8), where interior heating runs for extended periods and exterior temperatures drop below the dew point, a thermally broken profile prevents condensation forming at the sill junction. If your window frames are thermally broken, pairing them with a thermally broken sub sill maintains envelope continuity. Suppliers like MEICHEN (meichenwindows.com.au/aluminium-windows/) can advise on matching sub sill thermal performance to their aluminium window systems for Australian conditions.
More Window & Door Guides