What Aluminium Sliding Window Rollers Do and Why They Matter
That stubborn grind every time you nudge the window open is not just annoying — it is a warning sign. Somewhere inside the bottom rail of your sliding sash, a tiny component is struggling under the full weight of glass, aluminium, and years of daily use. That component is the roller, and understanding what it does is the first step toward fixing the problem for good.
What Are Aluminium Sliding Window Rollers
Aluminium sliding window rollers are small wheeled assemblies mounted inside the bottom rail of a sliding sash, enabling the panel to travel smoothly along a horizontal track within an aluminium window frame.
Each roller assembly typically consists of a wheel, an axle, a housing that slots into the sash rail, and an adjustment screw that lets you fine-tune the sash height. Most aluminium sliding windows carry two roller assemblies — one at each end of the bottom rail — though wider or heavier panels may use more. Despite measuring only a few centimetres across, these sliding window rollers bear the entire weight of the sash every single time you open or close the window. Dust, grit, moisture, and coastal salt air gradually work their way into the mechanism, degrading the wheels and bearings from the inside out.
Think of rollers as the foundation of your window’s mechanical system. The sash, track, weatherseals, and locking hardware all depend on them sitting at the correct height and spinning freely. When that foundation shifts, everything downstream suffers.
Why Rollers Matter More Than You Think
Most homeowners only think about window rollers once something goes wrong — and by then, the knock-on effects have usually spread beyond the rollers themselves. A worn or damaged set of rollers does not just make the window hard to slide. It triggers a chain reaction across multiple parts of a sliding window, each consequence compounding the last.
- Increased opening force: Flat-spotted wheels, corroded bearings, or collapsed housings force you to shove the sash rather than glide it. Over time, this extra force can warp the track and damage the frame.
- Air infiltration and poor seal compression: When rollers wear unevenly, the sash drops or tilts, pulling away from the weatherseals. Even a gap of one or two millimetres lets draughts, dust, and moisture creep in — undermining the energy efficiency you expect from a properly sealed aluminium window.
- Difficulty engaging security locks: Locks and latches are calibrated to engage when the sash sits at a precise height. A sagging panel means the lock strike and keeper no longer align, leaving you with a window that either refuses to lock or feels insecure when it does.
- Accelerated track wear: A sash dragging along the track instead of rolling above it grinds down the aluminium rail, turning a simple roller swap into a much costlier track repair.
If any of these symptoms sound familiar, you are in the right place. This guide covers every stage of the roller lifecycle — from identifying the sliding window parts inside your frame, through material selection and troubleshooting, to precise measurement, hands-on replacement, and the ongoing maintenance that keeps everything running quietly for years to come.
Getting the diagnosis right, though, starts with knowing exactly what you are looking at inside that bottom rail. The anatomy of a roller assembly holds a few surprises — and a few details that make the difference between ordering the right part and wasting time on a costly mismatch.
Roller Anatomy Explained From Wheel to Housing
Cracking open the bottom rail of your sash reveals a compact but surprisingly sophisticated piece of engineering. Each sliding window roller assembly packs several interdependent parts into a space barely larger than a matchbox — and every one of those parts plays a distinct role. Knowing what each component does gives you a real advantage when sourcing replacements or describing the problem to a supplier over the phone.
Core Components of a Roller Assembly
A typical window roller breaks down into five key parts. Some are visible from outside the sash; others you will only see once the assembly is removed. Here is what each one does, what it is usually made from, and how it tells you something is wrong.
| Component | Function | Common Materials | Failure Symptom |
|---|---|---|---|
| Wheel | The rotating disc that contacts the track rail, carrying the full weight of the sash as it slides | Nylon, stainless steel, standard steel, brass, plastic | Flat spots, visible wear grooves, or cracking — the sash drags or makes a rhythmic thumping sound |
| Axle | The pin the wheel spins on, transferring load from the housing to the wheel’s bearing | Hardened steel, stainless steel | Bent axle causes wobble; corroded axle creates grinding resistance |
| Housing (Carriage) | The frame that holds the wheel and axle, mounting into the sash rail channel | Zinc die-cast, pressed steel, reinforced nylon | Cracked or deformed housing lets the wheel tilt, producing rattle and uneven sash height |
| Bearing | Sits inside the wheel hub, reducing friction and enabling smooth rotation | Sealed ball bearing, plain (sleeve) bearing, needle bearing | Seized or gritty bearing — the wheel resists spinning freely when flicked by hand |
| Height-Adjustment Screw | Accessible from the sash face or edge, it raises or lowers the wheel to set correct sash height | Zinc-plated steel, stainless steel | Stripped thread or corroded head — sash cannot be adjusted and sits too low or too high |
When you remove an old roller, lay it on a flat surface and check each of these parts individually. A housing might look fine at a glance, yet the bearing inside the wheel could be completely seized. Conversely, a wheel might still appear round while the housing has hairline cracks that cause the whole assembly to shift under load. Photographing the assembly from multiple angles — ideally beside a ruler — creates a handy reference if you need to match it against a sliding window parts diagram from the manufacturer or an aftermarket catalogue.
How the Roller Interfaces With the Track
The relationship between your roller and its track is not just about size. It is about shape. Roller wheels come in three common profiles — concave (curved inward to grip a raised rail), flat (designed for flat or broad track surfaces), and convex (rounded outward for recessed channels). The track rail itself might be a raised fin, a recessed U-channel, or a T-bar, depending on the window system series and its manufacturer.
Matching your roller’s wheel profile to your track’s rail shape is the single most important compatibility factor.
A concave wheel sitting on a flat rail, for instance, only makes contact at two narrow points instead of spreading the load across the full wheel surface. That concentrated pressure accelerates wear on both the wheel and the track. Worse, the sash can skip or derail at the slightest lateral nudge — a common cause of those alarming moments when a panel jumps sideways in its frame. Excessive noise during operation often traces back to this same mismatch, as the wheel chatters against a rail profile it was never designed to ride.
If your windows came with an exploded-view drawing or installation manual, the track and roller profiles will usually be illustrated there. These sliding window guides from the original manufacturer are invaluable when you need to cross-reference aftermarket replacements. Without that documentation, a clear photo of the track’s cross-section — taken from the end of the sill rail — combined with your roller measurements gives a supplier enough detail to confirm compatibility before you commit to a purchase.
Profile and dimensions, though, are only half the equation. The material your wheel and bearing are made from determines how long the assembly will last and how quietly it will perform — factors that vary dramatically depending on where your home sits and what your windows weigh.
Roller Materials Compared for Durability and Performance
Choosing a replacement roller with the right dimensions and profile is essential — but two identically shaped assemblies can deliver wildly different lifespans depending on what they are made from. A nylon window wheel spinning on sealed ball bearings will outlast a cheap plastic one on a plain sleeve by years, especially in a harsh coastal environment. Material selection is where many homeowners unknowingly set themselves up for either a decade of trouble-free operation or another replacement job within twelve months.
Two material decisions matter here: what the wheel itself is made from, and what type of bearing sits inside it. Both affect noise, smoothness, load handling, and resistance to the corrosion that Australian conditions — from tropical humidity to salt-laden southerly winds — throw at your window hardware every day.
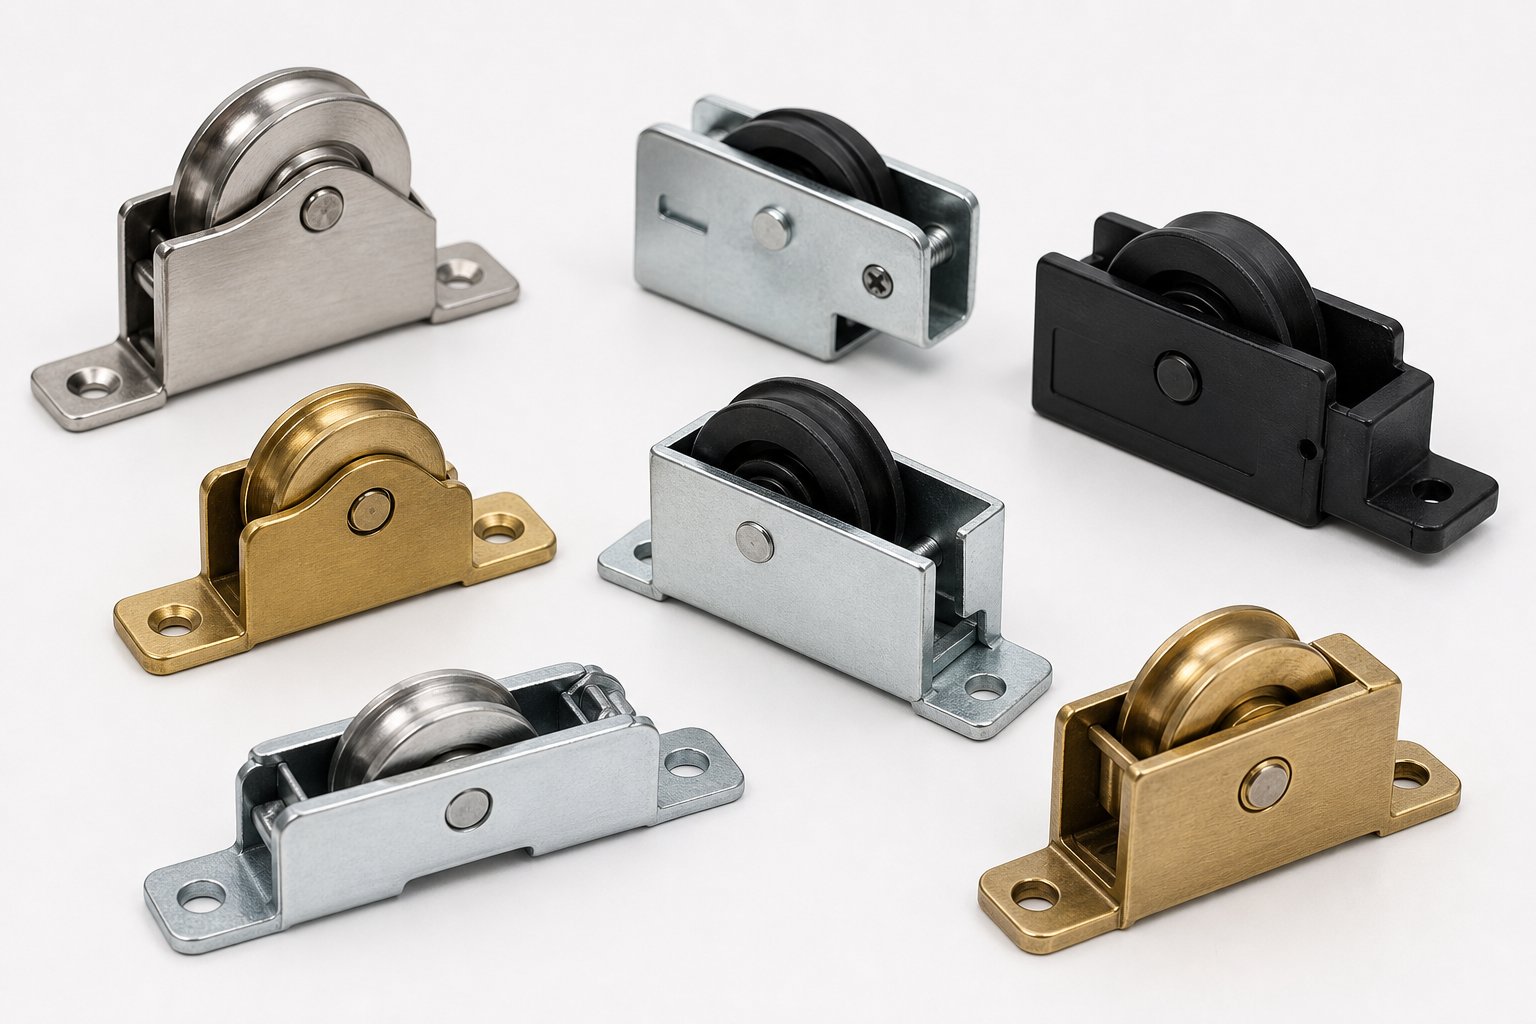
Nylon, Steel, Stainless Steel, Brass, and Plastic Wheels Compared
Each wheel material brings a distinct balance of strength, noise performance, and environmental resilience. The table below breaks down the five most common options you will encounter when shopping for aluminium sliding window rollers, whether through a specialist hardware supplier or an online catalogue.
| Material | Durability | Noise Level | Weight Capacity | Corrosion Resistance | Best Use Case |
|---|---|---|---|---|---|
| Nylon (PA66 / glass-fibre reinforced) | Good — resists wear well in moderate-load applications, though prolonged intense heat or UV can cause brittleness over time | Very quiet — inherent vibration dampening makes it the quietest option | Low to moderate — suited to standard single-glazed and lighter double-glazed sashes | Excellent — completely immune to rust; performs well in coastal and humid conditions | Residential bedrooms, living areas, and standard-weight windows where quiet gliding matters most |
| Stainless Steel (304 or 316 grade) | Excellent — extremely hard-wearing surface resists abrasion and deformation under sustained heavy loads | Moderate to higher — metal-on-metal contact can transmit more rolling noise unless paired with dampeners | High — engineered for heavy double-glazed and oversized sash panels | Excellent — 316-grade stainless is the benchmark for salt-air environments near the coast | Coastal properties, heavy glazed panels, high-traffic commercial windows, and pool-adjacent openings |
| Standard Steel (zinc-plated or powder-coated) | Very good — strong and resistant to flat-spotting under high loads | Moderate — similar to stainless, though coating condition affects noise over time | High — handles heavy sashes effectively when corrosion is controlled | Poor to moderate — relies entirely on its protective coating; once that coating chips or wears through, rust sets in quickly | Inland residential or commercial applications with low moisture exposure and regular maintenance |
| Brass | Moderate — softer than steel, so it wears faster under heavy or frequent cycling | Low — smooth rolling characteristics with less vibration than steel | Moderate — handles standard-weight sashes comfortably but not ideal for heavy double-glazed units | Good — naturally resists corrosion, though it can tarnish in aggressive salt-air zones | Heritage restorations, mid-weight residential windows, and applications where a smoother feel is preferred over maximum load capacity |
| Generic Plastic (basic polymers, non-reinforced) | Poor — cracks, flat-spots, and deforms relatively quickly, especially under heat or sustained load | Quiet initially — but deterioration creates thumping and rough travel as flat spots develop | Low — suitable only for the lightest sash panels | Good — does not rust, but UV exposure degrades the material itself | Temporary fixes, flyscreen panels, and ultra-light sashes where cost is the overriding concern |
A few general principles stand out from this comparison. If your home sits anywhere along Australia’s coastline — and that covers a significant portion of the population from the Gold Coast to the Mornington Peninsula — corrosion resistance should sit at the top of your priority list. Salt-laden air does not just attack the wheel surface; it works its way into axle pins and fasteners, seizing the entire assembly from the inside out. Stainless steel or high-quality nylon window wheels handle this environment far better than standard steel or basic plastic alternatives.
For inland homes in drier climates, reinforced nylon aluminium rollers often deliver the best all-round value. They run quietly, resist track-marking, and cost less than stainless equivalents. The trade-off is load capacity: if you have heavy double-glazed sashes — increasingly common as Australian energy efficiency requirements tighten — nylon may not carry the weight without eventually developing flat spots. In those cases, stainless steel earns its higher price.
Always check the manufacturer’s rated load capacity for the specific roller model you are considering. Two nylon wheels from different brands can handle very different weights depending on the polymer grade and reinforcement. Treat the table above as a starting framework, then confirm specific ratings against the product datasheet before purchasing.
Bearing Types and Their Impact on Performance
The bearing hidden inside each window wheel determines how freely it spins, how long it keeps spinning, and how much grit and moisture it can tolerate before seizing. Three bearing types dominate the market for aluminium sliding window rollers, and each targets a different balance of cost, smoothness, and longevity.
- Sealed ball bearings — Deliver the smoothest operation under load. Steel or ceramic balls roll between precision-machined races inside the hub, and a rubber or metal seal keeps dust, moisture, and salt spray out of the mechanism. Ball-bearing rollers maintain a low rolling resistance over thousands of open-close cycles, making them the preferred choice for frequently used windows and heavier sashes. Their sealed construction also means less ongoing maintenance — a genuine advantage for upper-storey windows where access is inconvenient. The trade-off is cost: ball-bearing assemblies are the most expensive of the three types.
- Plain (sleeve) bearings — The simplest and cheapest design, where the wheel rotates directly around a metal sleeve or the axle itself. Friction is higher from day one, and performance degrades faster as dirt infiltrates the contact surface. Plain bearings suit lightweight, infrequently operated windows — a spare room or storage area, for instance — but they struggle in dusty or coastal environments where contamination is constant. Expect a noticeably shorter service life compared to ball-bearing equivalents under the same conditions.
- Needle bearings — Use small cylindrical rollers instead of balls, spreading the contact load across a larger surface area. This gives them strong load-handling characteristics in a compact package. Needle bearings are less common in residential aluminium rollers but appear in some commercial-grade assemblies designed for oversized panels. Their tolerance for debris falls between sealed ball bearings and plain sleeves, and they can be harder to source as replacements in standard residential sizes.
For most Australian homeowners, the decision comes down to sealed ball bearings versus plain sleeves — and the answer usually depends on how much the window weighs, how often it gets opened, and how close the property is to the ocean. A beachside apartment in Manly or a canal-front home in Surfers Paradise demands sealed bearings paired with stainless steel wheels. The combination resists salt-air corrosion at both the wheel surface and the internal mechanism, dramatically extending the interval between replacements. Further inland — say a brick-veneer home in Melbourne’s western suburbs or a weatherboard cottage in Toowoomba — nylon wheels on quality ball bearings will typically serve you well for years without fuss.
Regardless of bearing type, give any new roller a quick spin test before installation. Hold the assembly by the housing and flick the wheel with your finger. It should rotate freely for several seconds with no gritty resistance or wobble. A wheel that feels rough out of the box will only get worse once it carries the full weight of your sash.
Material and bearing choices set the foundation for roller longevity — but even the best components cannot help if the real problem is not the roller at all. Sticky, noisy, or uneven window behaviour sometimes originates from the track, the frame, or accumulated debris rather than a failing wheel. Pinpointing the actual culprit before ordering parts saves both time and money.
Troubleshooting Sliding Window Problems by Symptom
Something drove you to search for answers — a grinding sound, a sash that fights you every morning, or a window that simply refuses to sit straight when closed. Rather than working through a generic checklist, start with the specific symptom you are experiencing. The cause is often obvious once you know where to look, and the right fix might be simpler (or entirely different) than you expect.
Symptom-Based Diagnosis Reference
The table below pairs the five most common complaints with their likely causes and the action that gets you back to smooth operation fastest. Scan the left column for the behaviour your window is displaying, then work across.
| Symptom | Likely Cause | Recommended Action |
|---|---|---|
| Window drags or requires heavy force to slide | Worn or flat-spotted wheel; debris packed into the sliding window track; collapsed or seized bearing | Remove the sash, inspect the wheel surface for flat spots or cracks, and spin each roller by hand to check bearing condition. Vacuum and clean the track channel thoroughly. Replace rollers if the wheel no longer spins freely. |
| Window wobbles or rattles during sliding | Cracked or deformed roller housing; loose mounting screws; worn axle allowing wheel play | Pull the sash and examine each housing for hairline cracks or warping. Tighten or replace mounting screws. If the housing is compromised, the entire roller assembly needs replacing — a cracked carriage cannot be reliably repaired. |
| Grinding or scraping noise when the sash moves | Flat-spotted wheel dragging across the track; corroded or grit-contaminated bearing; bent axle | Inspect the wheel profile for visible wear marks or uneven surfaces. Flick the wheel — if it grinds or barely rotates, the bearing has failed. A bent axle will show as wobble. Replace the affected assembly and clean the window slider track before reinstalling. |
| Window does not sit level when closed | One roller sitting lower than the other due to uneven wear; broken or stripped height-adjustment screw | Try adjusting both rollers using the height-adjustment screws (quarter-turn increments). If one screw is stripped or will not turn, that roller must be replaced. Check both ends — a sash that leans to one side almost always points to a single failed roller. |
| Window jumps off or derails from the track | Wrong wheel profile for the track rail shape; severely worn window guide rail; missing or broken anti-lift guide | Confirm that the roller’s wheel profile (concave, flat, or convex) matches the track rail type. Inspect the track for excessive wear, denting, or deformation. Check that the top anti-lift block or guide is still in place and not cracked. Mismatched profiles require a correct replacement roller, not a workaround. |
A few patterns emerge here. Dragging and noise almost always indicate wheel or bearing failure — the roller has physically deteriorated and needs to be swapped out. Wobbling and rattling point toward the housing or mounting, which is structural rather than rotational. Derailing, on the other hand, is typically a compatibility or track-condition issue that no amount of lubrication will solve. Identifying which category your symptom falls into prevents you from chasing the wrong fix.
When the Problem Is Not the Roller
Here is the part that saves you money: not every sticky or noisy sliding window has a roller problem. Several adjacent issues produce symptoms that look and sound remarkably similar to roller failure, and replacing perfectly functional rollers will not resolve any of them. Before you order parts or book a technician, run through these quick checks.
- Inspect the track for damage: Run your finger along the full length of the sill rail. Dents, bends, or raised burrs from impact or corrosion create drag points that stall the sash regardless of roller condition. A bent or warped track needs straightening or replacement — a window guide replacement addresses the root cause where new rollers alone would not.
- Check for debris or paint in the channel: Accumulated dirt, sand, pet hair, and even dried paint drips are among the most common causes of stiff window operation. Vacuum the track, then wipe it with a damp cloth and mild detergent. You may find this alone restores smooth sliding without touching the rollers at all.
- Assess weatherstripping condition: Swollen, displaced, or deteriorated weatherseals can press against the sash and create significant drag. If the seals look compressed flat on one side or are peeling away from the frame, they are adding friction that mimics a worn roller.
- Look for frame racking: Over time, building settlement or foundation movement can shift the window frame out of square. A racked frame pinches the sash unevenly, making it bind at certain points along the travel. Close the window and check the gaps between sash and frame — if they are noticeably wider at one corner than the opposite, the frame rather than the roller is the issue. This typically requires professional assessment.
- Test the sash off the track: If you can safely remove the sash, set it aside and roll each roller by hand. Smooth, free-spinning wheels combined with a dirty or damaged track confirm that the problem lives in the frame, not the sash. This single test can redirect your entire repair approach.
Skipping these checks is how homeowners end up buying replacement rollers, fitting them, and discovering the window still grinds — because the real culprit was a bent track or compacted grit they never cleared. Spending five minutes on basic elimination first is always worth it. In cases where the track itself is the problem, a targeted window guide replacement resolves the issue far more effectively than swapping rollers that were never faulty.
Once you have confirmed the rollers genuinely need replacing, the next challenge is sourcing the correct part. Aluminium sliding window rollers are not one-size-fits-all, and ordering by guesswork almost guarantees a return trip to the supplier. Precise measurement and identification turn that gamble into a sure thing.
How to Measure and Identify the Correct Replacement Roller
Guesswork is the most expensive way to buy a sliding window roller. Two assemblies can look nearly identical on a shelf yet differ by a few critical millimetres — enough to prevent mounting, misalign the wheel on the track, or leave the sash sitting at the wrong height. The good news is that a methodical measurement process, using tools most households already own, eliminates the guesswork entirely and puts the correct part in your hands the first time.
Step-by-Step Roller Measurement Process
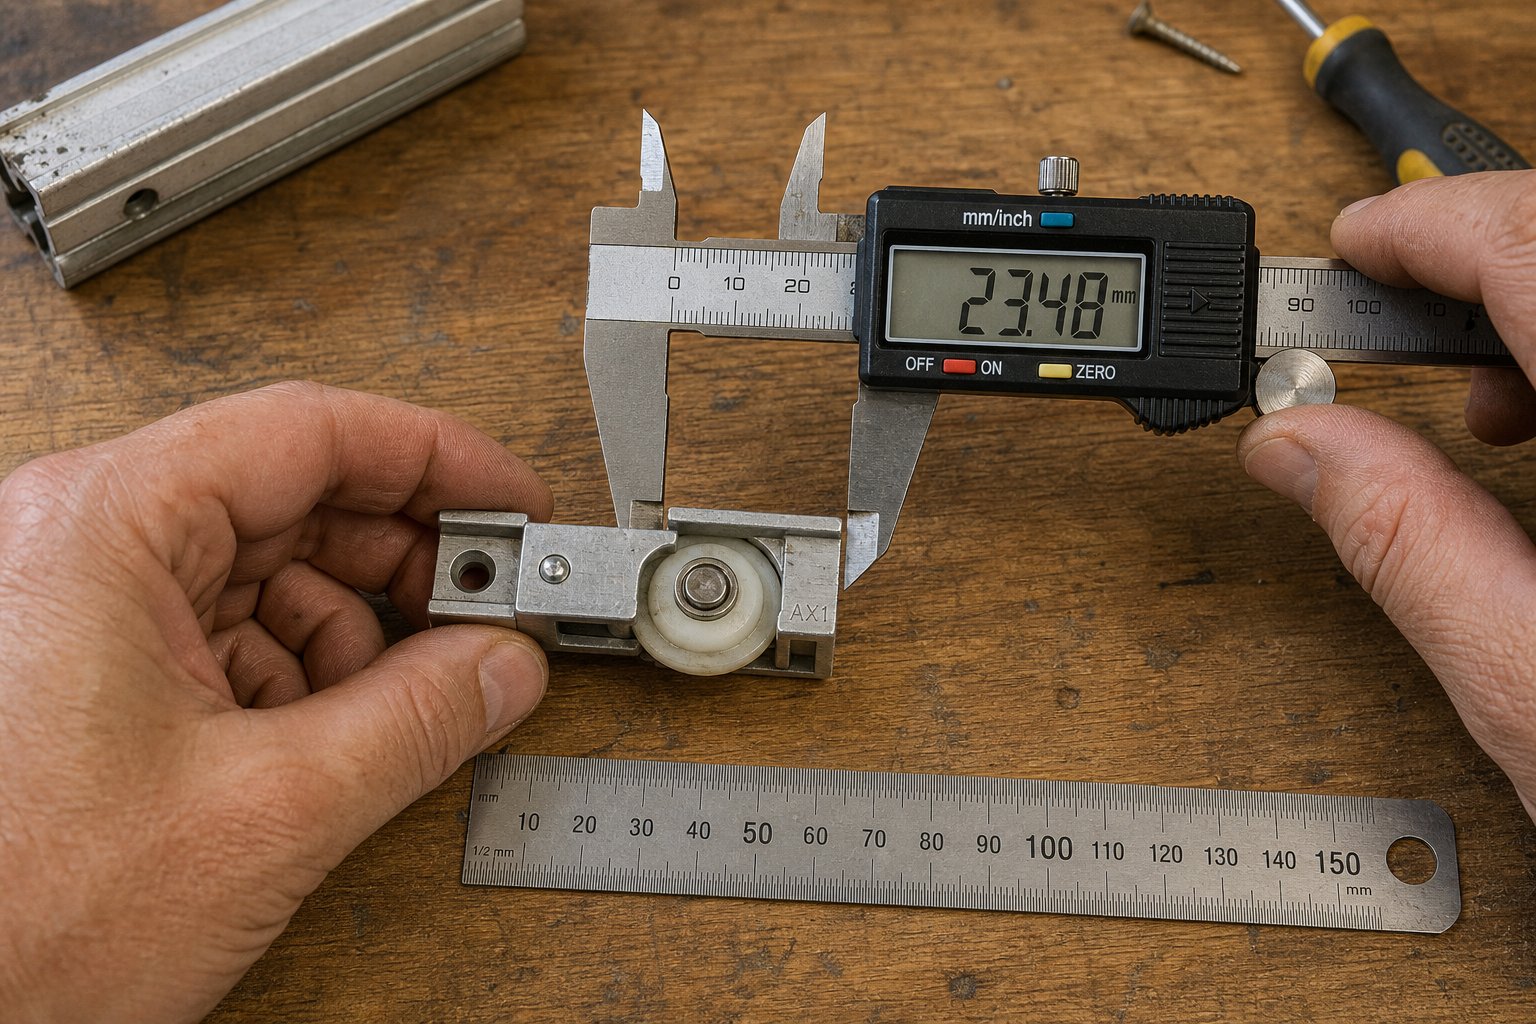
Before you open a catalogue or visit a supplier, you need the old roller in your hand and a clear set of dimensions on paper. Digital callipers deliver the precision this job demands — most housing and wheel dimensions fall within tight tolerances where even a millimetre matters. A standard ruler works in a pinch, but callipers reduce the risk of a costly mismatch. Follow this sequence from start to finish.
- Remove the sash panel from the frame. Lift the sash upward into the head track to disengage the bottom rail from the sill track, then swing the base inward and carefully lower the panel out. Heavy double-glazed units may need a second pair of hands — do not risk the glass or your back.
- Unscrew and extract the existing roller assembly. Locate the mounting screws at each end of the bottom rail (usually one or two per roller). Remove them with the appropriate screwdriver and slide or gently prise the assembly out of its channel. Keep the screws — you may need them for comparison if the new roller ships with different fasteners.
- Measure overall housing length and width in millimetres. These dimensions determine whether the replacement physically fits inside the sash rail channel. Measure the housing body only, excluding any protruding adjustment screw or spring clip.
- Measure wheel diameter from edge to edge. Place your callipers across the widest point of the wheel. Common residential sizes range from roughly 12 mm to 25 mm, though heavier commercial systems can go larger. Even a 2 mm difference here changes how the sash sits on the track.
- Note the wheel profile shape. Is the running surface concave (curved inward), flat, or convex (rounded outward)? This must match your track rail type — the compatibility point covered earlier in this guide. If in doubt, press the wheel gently against the track rail and check whether full contact is made.
- Count and measure mounting-screw hole positions. Record how many holes the housing has, their spacing centre-to-centre, and their diameter. Some housings use a single central screw; others rely on two screws at set intervals. Misaligned holes mean the replacement will not anchor securely.
- Check the axle diameter and bearing type. Note whether the wheel spins on a sealed ball bearing, a plain sleeve, or a needle bearing. While you may not always match the exact bearing type, knowing what the original used helps you assess whether an aftermarket option is a genuine upgrade or a downgrade.
- Record the adjustment screw location. Is it accessible from the face of the sash (face-mount) or from the bottom edge (edge-mount)? This detail is easy to overlook, yet a face-mount replacement will not work in an edge-mount sash and vice versa — the access hole simply will not line up.
Once you have worked through all eight steps, photograph the old roller from the front, back, side, and bottom — each time with a ruler or calliper jaw visible in the frame for scale. These images become your insurance policy when comparing parts for sliding windows online or describing what you need to a supplier over the phone. A picture eliminates the ambiguity that words alone can leave behind, especially when discussing subtle profile shapes or housing features.
Decoding Part Numbers and Cross-Referencing Compatibility
Aluminium sliding window manufacturers frequently use proprietary roller designs tailored to their specific system series. A roller engineered for one brand’s 100-series track may share similar dimensions with another brand’s product, yet differ in mounting configuration or wheel profile just enough to cause problems. This is why replacement rollers are not universal — even when marketing language implies otherwise.
When cross-referencing your measurements against aftermarket catalogues, you will encounter two broad categories of replacement parts:
- Brand-specific OEM rollers — Manufactured to the original equipment specification for a particular window system. These match every dimension, profile, and mounting point precisely. The downside is availability: if the window brand has changed suppliers, discontinued the series, or simply does not sell individual window slider parts to the public, sourcing OEM assemblies can involve long lead times or minimum order quantities.
- Universal-fit (aftermarket) rollers — Designed to cover a range of common housing widths, wheel diameters, and mounting configurations through adjustable features or multi-position screw holes. A well-engineered universal roller can be a perfectly reliable solution, particularly for older windows where OEM stock has dried up. The risk lies in the word “universal” itself — it does not mean the roller fits every system. You still need to confirm that the wheel profile, housing depth, and adjustment screw orientation match your sash. Treat “universal” as “widely compatible” rather than “guaranteed to fit.”
Start by searching for your window system’s brand name and series number. Many Australian manufacturers and importers publish exploded-view diagrams or sliding window parts replacement lists on their websites. If a part number is stamped on the old roller housing, search that code directly — it can shortcut the entire identification process. Where no part number exists, your dimension set and photographs become the primary matching tools.
If your measurements land between standard catalogue sizes, or the housing shape does not match anything listed online, take the old roller to a specialist window hardware supplier rather than forcing a close-enough fit from a general hardware store. Specialists stock a far wider range and can often identify obscure assemblies on sight — they have seen thousands of parts for sliding windows come across the counter. Spending ten minutes at a trade counter beats a week of shipping the wrong part back and forth.
Always remove and measure the existing roller before ordering — visual identification alone leads to costly mismatches.
With the correct replacement roller identified and in hand, the temptation is to jump straight into fitting it. Before you do, there is one more step worth trying — a simple adjustment that takes less than five minutes and may restore your sash to smooth operation without replacing anything at all.
Adjustment Tips and the DIY vs Professional Decision
That brand-new replacement roller sitting on your benchtop might not even be necessary — at least, not yet. Before committing to a full swap, a hidden adjustment mechanism built into nearly every aluminium sliding window roller deserves five minutes of your attention. It is the single most overlooked fix in sliding window hardware maintenance, and it costs nothing beyond a screwdriver and a little patience.
Roller Height Adjustment — The Five-Minute Fix
Most rollers for sliding windows include a height-adjustment screw that raises or lowers the wheel relative to the bottom rail. Over months and years of use, vibration, thermal cycling, and gradual bearing wear can cause the wheel to sit slightly lower than its ideal position. The sash drops a fraction, seals lose compression, locks stop engaging cleanly, and the window feels heavy to slide. Adjusting that single screw lifts the sash back into alignment and can restore the smooth glide you thought was gone for good.
Here is how to find and use it.
Locating the adjustment screw: Look at each end of the bottom rail — the screw is typically recessed into the face of the rail (the vertical surface you see when the window is closed) or accessible from the bottom edge. Some manufacturers cover the screw head with a small plastic cap that pops off with a flathead screwdriver or the tip of a utility knife. You should find one adjustment point at each end of the sash, corresponding to the roller at that end.
Tools needed: A Phillips-head or flathead screwdriver, depending on the screw type. That is genuinely all you need. No sash removal, no disassembly, no replacement parts.
The adjustment technique: Work in small quarter-turn increments. Turning the screw clockwise typically raises the wheel, pushing the sash upward and away from the track. After each quarter-turn, test the sash — slide it back and forth, check that the weatherseals compress evenly against the frame, and try engaging the lock. If the lock latches with a clean click and the sash glides without dragging, you have hit the sweet spot. Repeat at the opposite end if needed, aiming for even resistance across the full travel of the sash.
A couple of cautions. Do not over-raise the wheels. Cranking the adjustment too far lifts the sash into the head track and can make it impossible to slide or even jam it in place. If you lose track of your starting point, wind the screw fully counterclockwise (wheel retracted) and start fresh with slow quarter-turns upward. And if the screw spins freely without moving the wheel, or refuses to turn at all despite gentle force, the adjustment mechanism has failed — a stripped thread or corroded shaft means the roller assembly itself needs replacing.
This adjustment addresses the most common cause of gradually worsening window performance: incremental sash drop. It will not fix a cracked housing, a flat-spotted wheel, or a seized bearing. But for a sash that has simply settled over time, five minutes with a screwdriver can defer a full window glides replacement by months or even years.
When to Replace Yourself and When to Call a Professional
Adjustment did not solve the problem, or the roller is clearly damaged. Replacement is the next step — but should you tackle it yourself or hand the job to a professional? The honest answer depends on your specific window, not just your confidence with tools. Some roller swaps are genuinely straightforward weekend tasks. Others involve risks that make professional help the smarter investment.
The table below breaks the decision down by the factors that actually matter.
| Factor | DIY-Friendly | Call a Professional |
|---|---|---|
| Window size and weight | Standard single-glazed panels are light enough for one person to lift out of the track safely — typically under 15 kg for a common residential size | Double-glazed aluminium sashes are substantially heavier; a standard residential double-glazed panel can weigh 25 kg or more depending on dimensions and glass thickness, making solo removal risky for both you and the glass |
| Accessibility | Ground-floor windows with clear working space around the opening — easy to manoeuvre the sash out and lay it flat on a padded surface | Upper-storey windows, windows above furniture or benchtops that cannot be moved, or windows accessed only from outside via ladder |
| Glass type | Standard annealed or toughened glass in a lightweight frame — relatively forgiving to handle | Laminated safety glass, thick double-glazed IGUs, or oversized panels — heavy, fragile at the edges, and expensive to replace if dropped |
| Number of windows | One or two windows — the learning curve pays off quickly and total time remains manageable | Five or more windows needing work — a professional completes the batch faster with proper equipment, and the per-window cost drops significantly at volume |
| Tool confidence | Comfortable using a screwdriver, callipers, and following sequential instructions; have handled sliding window guide replacement or similar tasks before | Unfamiliar with sash removal, unsure about identifying the correct roller orientation, or uncomfortable working with heavy glass panels above ground level |
Here is the reality that many online guides gloss over: a large double-glazed aluminium sliding window can weigh considerably more than people expect. The aluminium frame alone is light, but once you factor in two panes of 5 mm or 6 mm glass with an air gap between them, even a moderately sized sash becomes a serious two-person lift. Dropping that panel does not just mean a broken window — it means potential injury from shattered glass and a replacement cost that dwarfs the price of a professional roller service.
If your windows are single-glazed, ground-floor, and a manageable size, DIY replacement is entirely realistic. The next section walks through every step. But if you are dealing with heavy double-glazed units on an upper storey, or you are simply not confident handling glass, calling a window specialist or glazier is not a compromise — it is the pragmatic choice. Many charge a modest call-out fee and can complete a sliding window guide replacement across multiple windows in a single visit, often sourcing the correct rollers from their existing stock and saving you the measurement and ordering process entirely.
For those ready to do the job themselves, the replacement process follows a logical sequence that mirrors the measurement steps you have already completed — starting with safe sash removal and finishing with a precisely adjusted, silky-smooth window.
Step-by-Step Roller Replacement Walkthrough
You have diagnosed the fault, measured every dimension, and the correct replacement roller is sitting on the bench beside you. All that separates you from a smooth, quiet window is the physical swap itself. The process is straightforward — methodical rather than complicated — but rushing any single step risks damaging the aluminium rail or, worse, the glass. Take it slowly, follow the sequence below, and the whole job wraps up in under thirty minutes per window.
Removing the Old Roller Assembly
Sash removal is the part that intimidates most people, yet it follows the same basic technique every time. If you completed the measurement steps in the previous section, you have already done this once — the only difference now is that the old roller is not going back in.
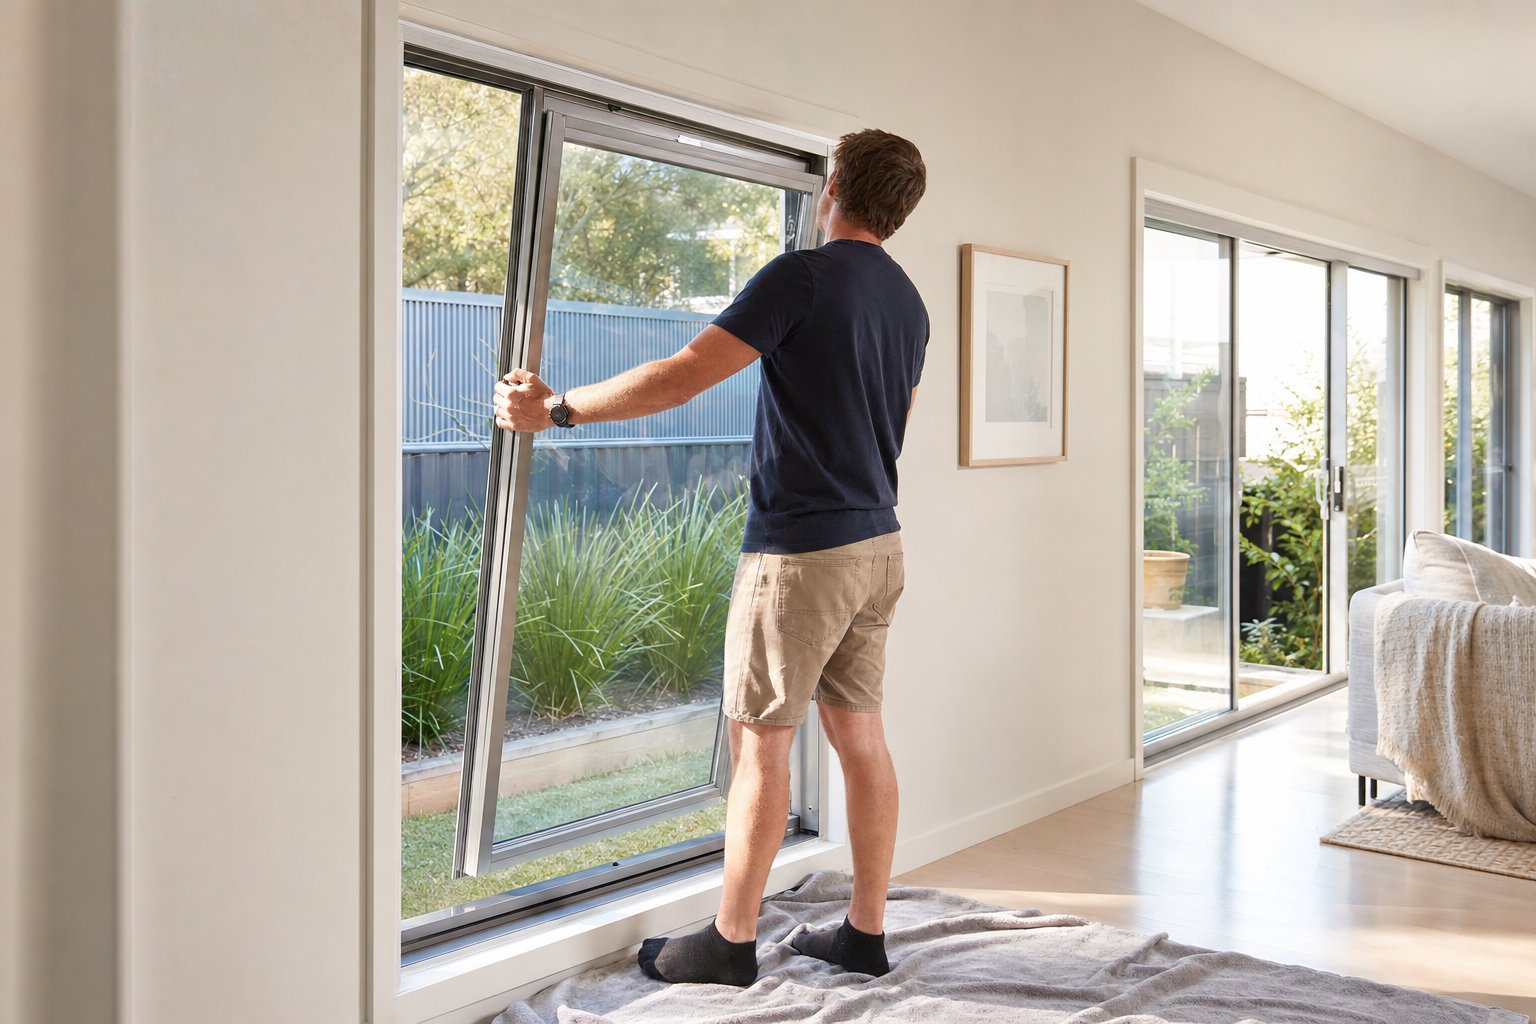
- Lift the sash panel upward into the head track to disengage the bottom rail from the sill. Some windows feature anti-lift blocks or safety clips in the head track — run your finger along the channel and remove any you find before attempting to lift.
- Swing the bottom of the sash inward once it clears the sill rail, angling it toward you in a controlled motion. Keep one hand on each side of the aluminium frame for a balanced grip.
- Carefully lower the panel out of the frame and lay it flat on a padded surface — an old towel or blanket on the floor protects both the glass and your flooring. For heavy double-glazed sashes, have a helper support the opposite end. Never lean a removed sash against a wall unsupported.
- Locate and remove the roller mounting screws. These sit at each end of the bottom rail — typically one or two Phillips-head screws per roller. Place them in a small container so they do not roll away.
- Slide or gently prise the old roller assembly out of the rail channel. If the housing is corroded or wedged tight, a flathead screwdriver used as a lever at the edge of the housing usually frees it. Avoid hammering — aluminium deforms easily, and a dented channel will make the new assembly sit poorly.
Wear work gloves throughout this process. Aluminium extrusions can have surprisingly sharp edges at cut ends, and glass panels — even toughened ones — demand respect whenever they are out of the frame. Keep children and pets clear of the work area, and never place a removed sash where it could topple.
Installing the New Roller and Reassembling
With the old assembly out, you are looking at an empty channel that probably contains years of accumulated grit, old lubricant residue, and possibly a few scraps of degraded weatherstripping. Cleaning this pocket before the new roller goes in is a small step that makes a measurable difference to how long your window rollers replacement lasts.
- Clean the roller pocket and rail channel thoroughly. Vacuum out loose debris first, then wipe the channel with a damp cloth to remove oily residue. A cotton bud or old toothbrush helps clear compacted grit from corners. Let the channel dry before proceeding.
- Insert the new roller assembly into the channel and ensure it seats fully. The housing should sit flush within the rail — if it protrudes or rocks, double-check that you have the correct orientation and that no debris is trapped underneath.
- Tighten the mounting screws firmly but carefully. Over-torquing is one of the most common mistakes during window rollers replacement. Aluminium is softer than steel, and an over-driven screw can crack the rail wall or strip the thread in the extrusion. Snug is enough — the housing should not shift when you press on it, but the screw should not distort the surrounding metal.
- Wind the adjustment screw to retract the wheel before reinstalling the sash. Lowering the wheel fully gives you maximum clearance to get the bottom rail back over the sill track without scraping. Forget this step and you will fight the sash all the way in.
- Reverse the removal process to refit the sash into the frame. Lift the panel, angle the top into the head track first, push upward to gain clearance, then lower the bottom rail onto the sill track. Slide the sash back and forth a short distance to confirm the rollers are engaging the track properly.
- Adjust roller height incrementally using quarter-turn clockwise rotations of the adjustment screw at each end, just as described in the previous section. After each adjustment, test the sash across its full travel. The target is effortless gliding with consistent weatherseal compression and clean lock engagement — the lock should latch with a positive click, not require force or wiggling.
Once the sash moves smoothly and the locks engage correctly, apply a thin bead of silicone-based track lubricant along the full length of the sill rail. Silicone spray or a purpose-made sliding window track lubricant works well — a light, even coat is all you need. This final step reduces rolling friction, protects the track surface from oxidation, and keeps the new rollers operating at their best from day one.
Never use oil-based lubricants on aluminium tracks — they attract dust and accelerate wear.
Petroleum-based oils, WD-40 (as a long-term lubricant rather than a penetrant), and general-purpose grease all trap airborne grit against the track surface, creating an abrasive paste that grinds down both the rail and the wheel. Silicone lubricant, by contrast, leaves a dry or near-dry film that repels dust rather than collecting it. This single product choice can double the effective lifespan of your new rollers.
A successful replacement restores the window to factory-smooth operation — but it also raises a practical question. If your rollers failed because they were wrong for the window system in the first place, or because a universal assembly did not quite match the track profile, the same problem will eventually resurface. Understanding how rollers interact with different aluminium window systems — and why genuine compatibility matters more than convenience — keeps the fix permanent rather than temporary.
Roller Compatibility Across Aluminium Window Systems
A roller that fits is not the same as a roller that belongs. That distinction trips up countless homeowners and even some builders — because two sliding window roller assemblies can share identical housing widths and wheel diameters yet behave completely differently once installed in separate window systems. The reason comes down to engineering: every aluminium sliding window system is designed as an integrated unit, and the roller is just one piece of a tightly toleranced puzzle.
Why Universal Rollers Do Not Always Work
The word “universal” on roller packaging promises broad compatibility. In practice, it delivers something closer to broad approximation. Aluminium sliding window systems differ across several critical variables — rail channel width, horizontal sliding window track profile, sash weight rating, frame depth, and mounting configuration — and a generic roller only needs to miss on one of these to cause problems.
Consider the track profile alone. One manufacturer’s system might use a raised rail that demands a concave wheel, while another relies on a recessed channel suited to a convex profile. A universal roller with a flat wheel will physically roll along both, but it makes only partial contact with either, concentrating load on a narrow strip of the wheel surface. The result is accelerated wear, increased noise, and a sash that feels vaguely unstable even though it technically moves.
Housing shape adds another layer of complexity. Some systems secure the roller with a lip or hook that interlocks with the rail channel; others rely on a simple friction fit held by screws. A universal housing designed for screw-only mounting will rock inside a channel engineered for an interlocking tab — and that subtle movement, repeated thousands of times a year, wears out both the housing and the channel wall far sooner than a properly matched assembly would.
Different window system series compound the issue further. A manufacturer might offer a two-track residential system alongside a three-track commercial series, each with distinct frame depths, sash weights, and track geometries. Sliding window replacement rollers designed for the lighter two-track system simply cannot handle the heavier panels and wider channels of the three-track version, even though both systems carry the same brand name. Treating the brand as the compatibility indicator, rather than the specific system series, leads to the kind of close-but-wrong mismatch that degrades performance from day one.
Matching Rollers to Your Window System
The most reliable path to a correct match starts with identifying the exact window system installed in your home — not just the brand, but the series. Manufacturers who document their systems thoroughly make this straightforward. MEICHEN’s MA100 Sliding Window, for example, publishes detailed product-level specifications covering track configuration, section profiles, seals, and hardware for its two-track aluminium sliding window system. That level of documentation means a homeowner, builder, or architect can cross-reference roller housing dimensions, wheel profiles, and sash weight ratings directly against the manufacturer’s data — eliminating the guesswork that makes replacement rollers for sliding windows such a common source of frustration.
This transparency benefits everyone in the supply chain. A developer specifying windows across a multi-dwelling project can confirm roller compatibility at the quoting stage, while a homeowner replacing a single worn assembly years after installation can trace the correct part back to documented specifications rather than relying on memory or approximation.
Regardless of the window system in your home, use this checklist every time you source sliding window roller assemblies to confirm genuine compatibility before committing to a purchase:
- Window system series name or number — found on the original window documentation, frame sticker, or manufacturer’s website
- Track count — single, double, or triple track, which determines the sill profile and available clearance
- Sash weight rating — the maximum panel weight the roller is engineered to support, factoring in glass type (single-glazed versus double-glazed)
- Roller housing dimensions — overall length, width, and depth of the carriage, confirmed by direct measurement against the rail channel
- Wheel profile type — concave, flat, or convex, matched to the horizontal sliding window track rail shape
If any one of these five checkpoints does not align between your existing system and the replacement roller, stop and investigate further. A partial match might allow the sash to slide, but it will not deliver the smooth, quiet operation or the proper seal compression and lock engagement that a correctly specified assembly provides.
Consulting the window manufacturer’s technical documentation or product page — such as MEICHEN’s detailed MA100 system page for their aluminium sliding windows — remains the single most reliable way to confirm compatibility. Where that documentation is unavailable, a specialist window hardware supplier with access to cross-reference databases becomes your next best resource. Either way, the principle holds: match the roller to the system, not just the opening.
Getting compatibility right at the selection stage eliminates the cycle of trial-and-error replacements that wears out tracks and drains budgets. It also sets the stage for the final piece of the puzzle — a straightforward maintenance routine that keeps those correctly matched rollers performing at their best for years, not months.
Maintenance Practices That Extend Roller Lifespan
Every fix covered in this guide — the diagnosis, the measurement, the careful replacement — buys you a fresh start. What you do after that fresh start determines whether your next roller swap is three years away or ten. The difference almost always comes down to a handful of small, unglamorous habits repeated at sensible intervals. None of them require special skills. Most take less time than brewing a cup of tea.
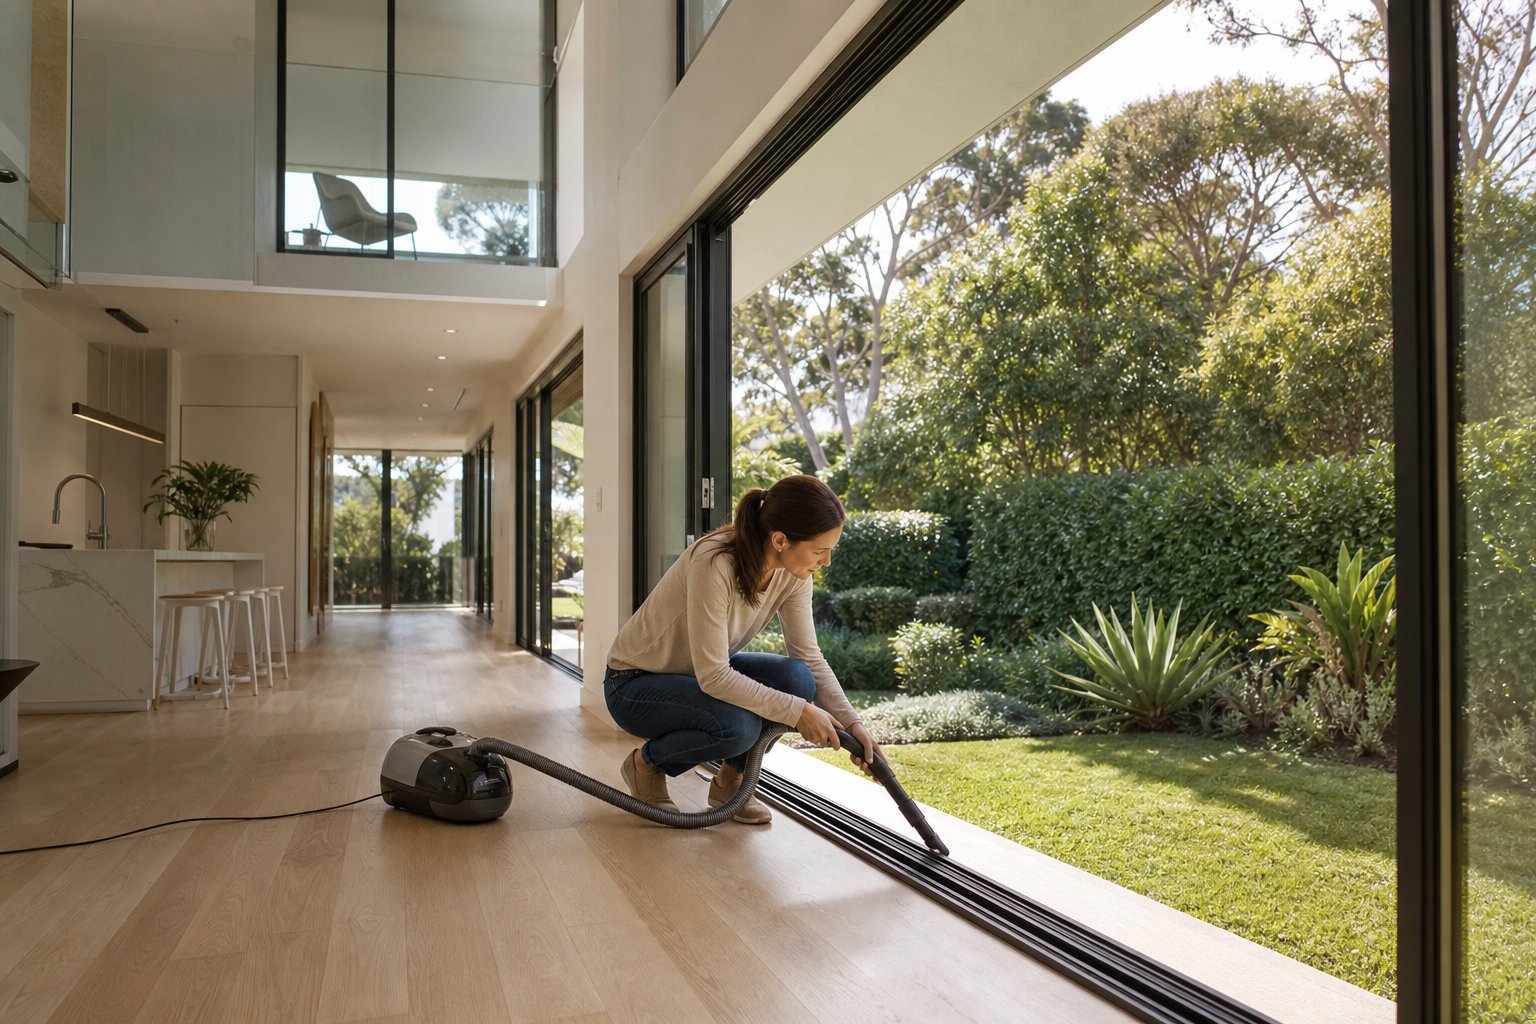
Old sliding window rollers rarely fail because of a single catastrophic event. They degrade incrementally: a thin layer of grit embeds in the bearing this month, salt air corrodes a fraction of the axle surface next season, and compacted dust raises friction along the track millimetre by millimetre. By the time the sash starts grinding, the damage has been accumulating quietly for years. A proactive maintenance schedule interrupts that cycle early, long before symptoms appear.
Routine Maintenance Schedule for Sliding Window Rollers
The table below lays out a practical, year-round plan. It covers every touchpoint between the rollers, track, seals, and locking hardware — because, as earlier sections demonstrated, these components are deeply interdependent. A clean track protects the rollers. Properly compressed seals prevent debris from reaching the track in the first place. And well-adjusted rollers ensure the seals compress correctly. Maintain one and you support them all.
| Task | Frequency | Tools Needed | Purpose |
|---|---|---|---|
| Vacuum the sill track | Every 1–2 months | Vacuum cleaner with crevice attachment | Removes loose sand, dust, pet hair, and leaf debris before it compacts into an abrasive layer that grinds against both the track rail and the roller wheels |
| Apply silicone-based lubricant to the track | Every 6 months | Silicone spray or dry PTFE lubricant; clean cloth for excess | Reduces rolling friction, repels moisture, and leaves a dust-resistant film — unlike petroleum-based products, which attract grit and accelerate wear |
| Inspect roller adjustment and sash alignment | Annually | Phillips-head or flathead screwdriver | Catches gradual sash drop before it compromises seal compression, lock engagement, or track contact. A quarter-turn correction once a year prevents the kind of misalignment that shortens roller life dramatically |
| Check weatherseal compression and lock engagement | Annually | Visual inspection; no tools required | Confirms seals are pressing evenly against the frame (no visible gaps or daylight) and locks latch with a clean click. Uneven compression or stiff locks often signal a roller height issue worth correcting now rather than later |
| Full roller inspection and cleaning | Every 2–3 years, or when symptoms appear | Screwdriver, vacuum, damp cloth, old toothbrush, silicone lubricant | Involves removing the sash, extracting each roller, cleaning the housing and wheel of accumulated residue, spinning the wheel to check bearing condition, and clearing the rail channel of compacted debris. This deeper service catches cracked housings, corroded axles, and worn bearings before they cause track damage |
Coastal properties deserve a tighter schedule. If you live within a few kilometres of the ocean — from Bondi to Fremantle, Cairns to Hobart — salt-laden air works its way into every crevice. Bump track vacuuming to monthly, apply lubricant every three to four months instead of six, and inspect rollers annually rather than biannually. Australian housing maintenance data consistently shows that windows deteriorate faster when routine care is skipped, and salt-air environments compress those timelines further. Homes near the beach, overlooking canals, or exposed to prevailing sea breezes face the harshest conditions for replacement window rollers and tracks alike.
Seasonal shifts matter too. Summer heat across much of Australia can soften generic plastic wheels and cause them to develop flat spots under a heavy sash’s resting weight, while winter moisture in southern states and Tasmania creates ideal conditions for bearing corrosion. Adjusting your cleaning and lubrication routine to match seasonal pressures — more frequent moisture checks in winter, closer attention to wheel condition during prolonged hot spells — keeps the schedule responsive rather than rigid.
One habit ties everything together: after each maintenance session, slide the window open and closed a dozen times. Feel for changes in resistance. Listen for any new noise. This thirty-second sensory check reveals subtle shifts that a visual inspection alone can miss, and it trains your instinct for detecting problems early — well before you are back to searching for replacement parts for sliding windows.
Choosing Quality Rollers and Window Systems for Long-Term Performance
Maintenance extends roller life, but it cannot upgrade a fundamentally poor component. A bargain roller made from unreinforced plastic with a plain sleeve bearing will still fail prematurely, no matter how diligently you vacuum the track. Longevity starts at the system level — with the quality decisions made when the window was first specified and installed.
Aluminium sliding window systems engineered as integrated units — where the track extrusion, roller assembly, weatherseals, and locking hardware are designed to work together from the outset — outperform windows assembled from mix-and-match commodity parts. Precision-extruded tracks with consistent rail profiles reduce point-loading on the wheel. Properly rated roller assemblies matched to the sash weight prevent overloaded bearings. And robust seals that maintain compression over years keep debris out of the roller path in the first place. Each element supports the others, creating a system where maintenance preserves performance rather than compensating for design shortcomings.
For homeowners planning a renovation, or builders and architects specifying windows for a new project, this system-level thinking pays dividends over the window’s full lifecycle. Evaluating how well a manufacturer documents their roller specifications, track dimensions, and replacement part compatibility reveals a great deal about overall engineering quality. MEICHEN’s MA100 Sliding Window system illustrates this approach — its product documentation covers track configurations, section profiles, seals, and hardware specifications for a two-track aluminium sliding window designed for project-based supply. Builders and developers sourcing across multiple dwellings can verify roller compatibility, double-glazed sash weight ratings, and window tracks replacement availability before the first frame is installed, reducing long-term maintenance uncertainty and callback risk.
That same documentation serves homeowners years down the track when a roller eventually wears out. Instead of measuring blind and hoping an aftermarket part fits, you trace the system series back to the manufacturer’s specifications and source a direct match. It is a fundamentally different experience from the frustrating trial-and-error cycle that poorly documented window systems impose on their owners.
Whether you are maintaining existing windows or specifying new ones, the principle stays the same: invest in the system, not just the component. Quality aluminium sliding window rollers paired with precision tracks and well-documented replacement parts for sliding windows transform roller maintenance from a recurring headache into a brief, occasional routine — the kind of task you handle in a few minutes and forget about for months.
A five-minute seasonal maintenance routine can add years to your sliding window rollers and keep your windows operating like new.
Bookmark this guide as a reference for the full lifecycle — from that first grinding symptom through diagnosis, measurement, replacement, and the ongoing care that keeps your aluminium windows gliding quietly for years to come. And when the time comes to specify or replace rollers, consult the manufacturer’s technical resources first. A few minutes of research upfront saves hours of rework and ensures every component in your sliding window system is working together exactly as intended.
Frequently Asked Questions About Aluminium Sliding Window Rollers
1. How do I know if my aluminium sliding window rollers need replacing?
Several telltale signs indicate worn rollers: the sash requires heavy force to slide, produces grinding or scraping noises during operation, wobbles or rattles as it moves, sits unevenly when closed, or repeatedly jumps off the track. Before ordering replacements, remove the sash and spin each roller by hand. A healthy roller spins freely for several seconds without gritty resistance or wobble. If the wheel has visible flat spots, cracks, or refuses to rotate smoothly, replacement is warranted. Also check for cracked housings and corroded axles, as these structural failures cannot be repaired.
2. Are sliding window rollers universal or do I need a specific type?
Sliding window rollers are not truly universal, even when marketed that way. Aluminium window systems vary in rail channel width, track profile shape, sash weight rating, and mounting configuration. A roller labelled ‘universal’ may physically fit the channel but use the wrong wheel profile for your track, leading to premature wear, increased noise, or derailing. The safest approach is to identify your exact window system series, then cross-reference roller specifications against the manufacturer’s documentation. Systems like MEICHEN’s MA100 Sliding Window publish detailed hardware specifications, making it straightforward to source a correctly matched replacement.
3. What is the best roller material for coastal Australian homes?
For properties near the coast, stainless steel wheels (preferably 316-grade) paired with sealed ball bearings offer the strongest defence against salt-air corrosion. Salt spray infiltrates axle pins, bearings, and fasteners, seizing the entire assembly from the inside out. Standard steel rollers with zinc plating fail quickly once the protective coating chips, while generic plastic degrades under UV exposure. High-quality reinforced nylon is also a viable coastal option for lighter sashes, as it is completely immune to rust. Whichever material you choose, sealed bearings are essential — they prevent salt and moisture from reaching the internal mechanism.
4. Can I adjust my sliding window rollers without removing the sash?
Yes, most aluminium sliding window rollers feature a height-adjustment screw accessible from the face or bottom edge of the sash rail, often hidden behind a small plastic cap. Using a Phillips-head or flathead screwdriver, turn the screw in small quarter-turn clockwise increments to raise the wheel and lift the sash. Test the window after each adjustment — the goal is smooth gliding with even weatherseal compression and a clean lock engagement. This simple five-minute fix addresses gradual sash drop caused by vibration and bearing wear, and it can defer a full roller replacement by months or even years.
5. How often should I maintain my sliding window rollers and tracks?
A practical maintenance schedule includes vacuuming the sill track every one to two months to remove grit and debris, applying silicone-based lubricant to the track every six months, and inspecting roller adjustment and sash alignment annually. A deeper service — removing the sash, extracting rollers, cleaning housings, and checking bearing condition — is recommended every two to three years or whenever symptoms like stiffness or noise appear. Coastal properties should tighten this schedule, with monthly track cleaning and lubricant application every three to four months to combat salt-air corrosion.
More Window & Door Guides