What Is a Transom Window and Why Does It Matter
The Simple Definition
Ever noticed a strip of glass sitting above a front door and wondered what it’s called? You’re looking at a transom window.
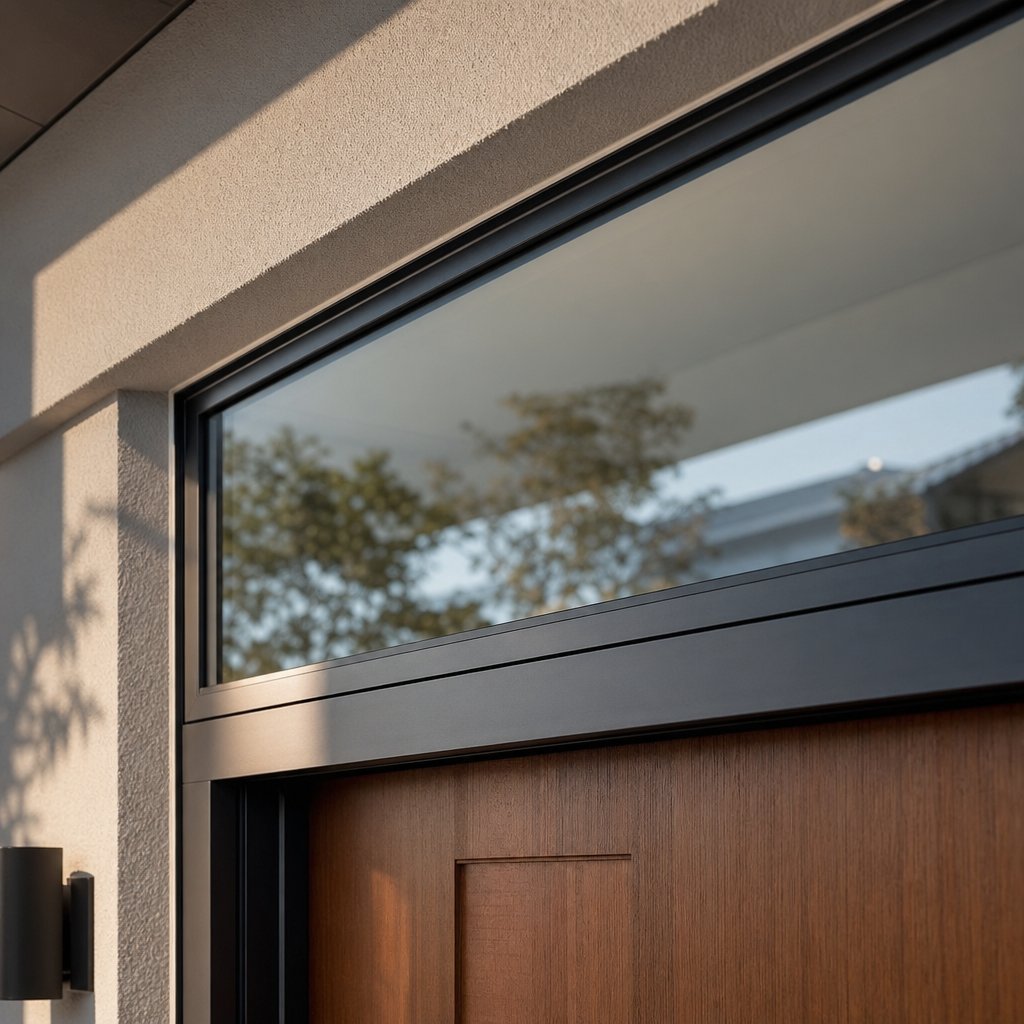
A transom window is a fixed or operable window installed directly above a door or another window, separated by a horizontal structural bar known as the transom. Its primary purpose is to admit natural light and, in operable versions, provide ventilation without compromising privacy or security.
The name comes from the transom beam itself — the horizontal crosspiece dividing the door frame from the wall above. So when someone asks “what is transom glass,” the answer is straightforward: it’s the glazed panel that fills that space above the transom bar.
From Victorian Ventilation to Modern Design
Transom windows weren’t always decorative. In medieval European buildings, they served a purely functional role — hinged at the bottom and swung open to let hot air escape while keeping doors closed for privacy and security. Before air conditioning existed, a transom window opener (often a simple hook-and-rod mechanism, similar in concept to casement window cranks) gave occupants control over airflow in tall-ceilinged rooms.
During the Renaissance and Baroque periods, these openings evolved into ornate design features with leaded glass and stained patterns adorning churches and grand estates. Today, transom windows bridge that history — they still solve the same light and airflow problems, but they do it with materials and styles suited to contemporary architecture.
Where Transom Windows Are Used Today
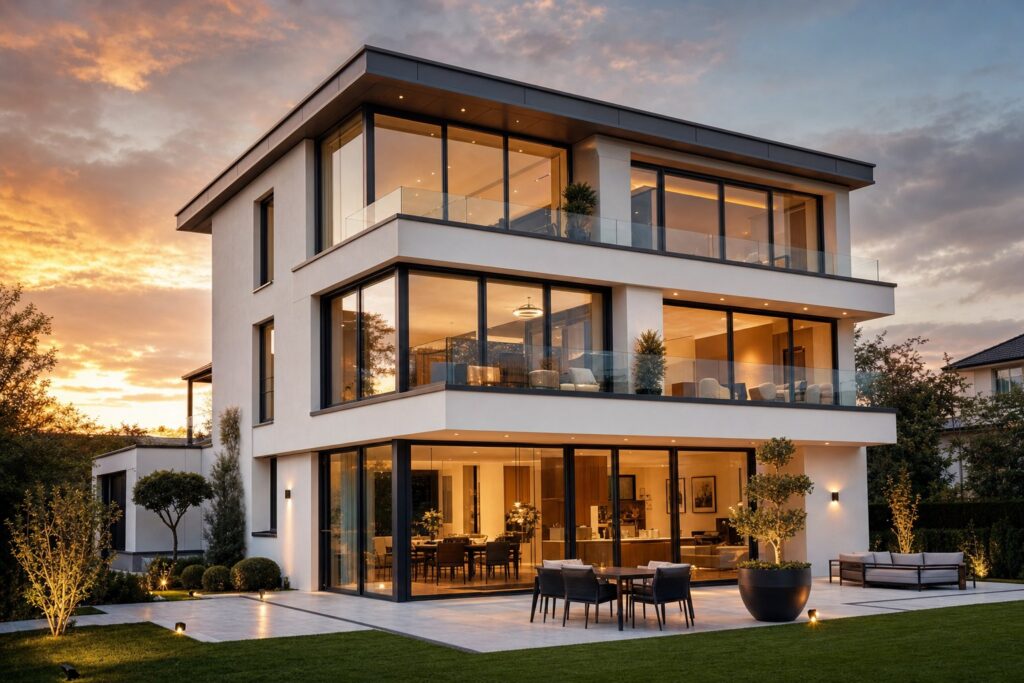
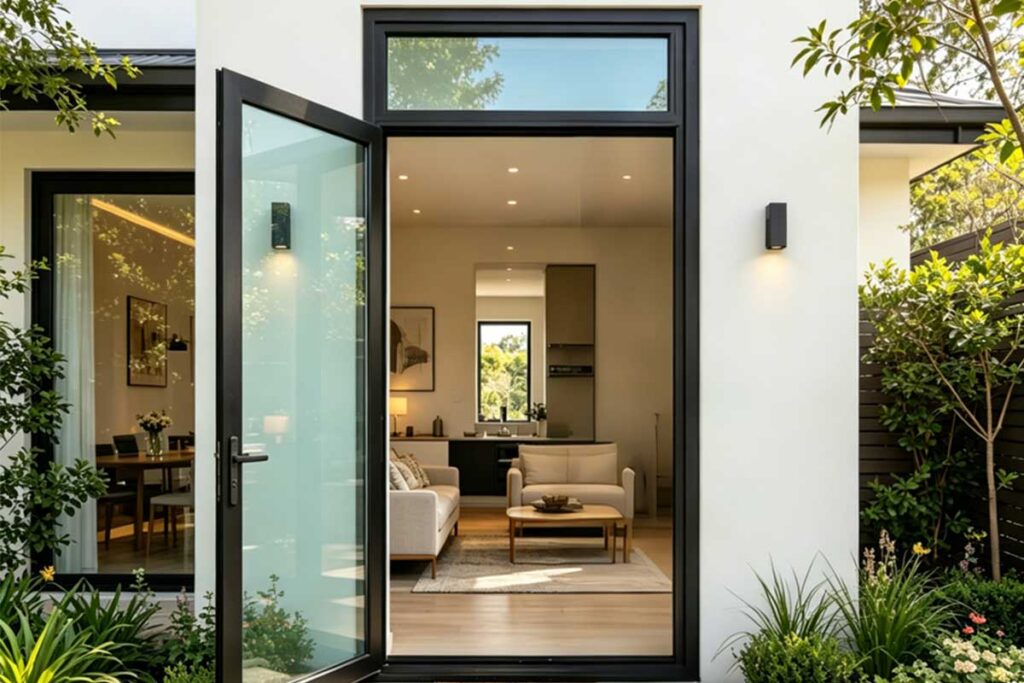
You’ll find transom windows in more places than you might expect. Above front doors, they’re one of the most popular ways to flood an entryway with daylight. Above interior doors, they borrow light for dark hallways. In bathrooms, frosted transoms let sunshine in without sacrificing privacy. Commercial spaces use them to create visual height and reduce reliance on artificial lighting.
The versatility is what keeps them relevant — whether you’re renovating a Victorian terrace or designing a modern open-plan home, there’s a transom configuration that fits. The real question is which type, glass, and frame material will work best for your specific situation.
Transom Window Types and When to Use Each One
So what is a transom on a door, really, beyond that basic definition? It depends entirely on the type you choose. Each style carries different trade-offs in light, airflow, aesthetics, and installation complexity — and picking the wrong one for your situation means either overspending on features you don’t need or missing out on function you’ll wish you had.
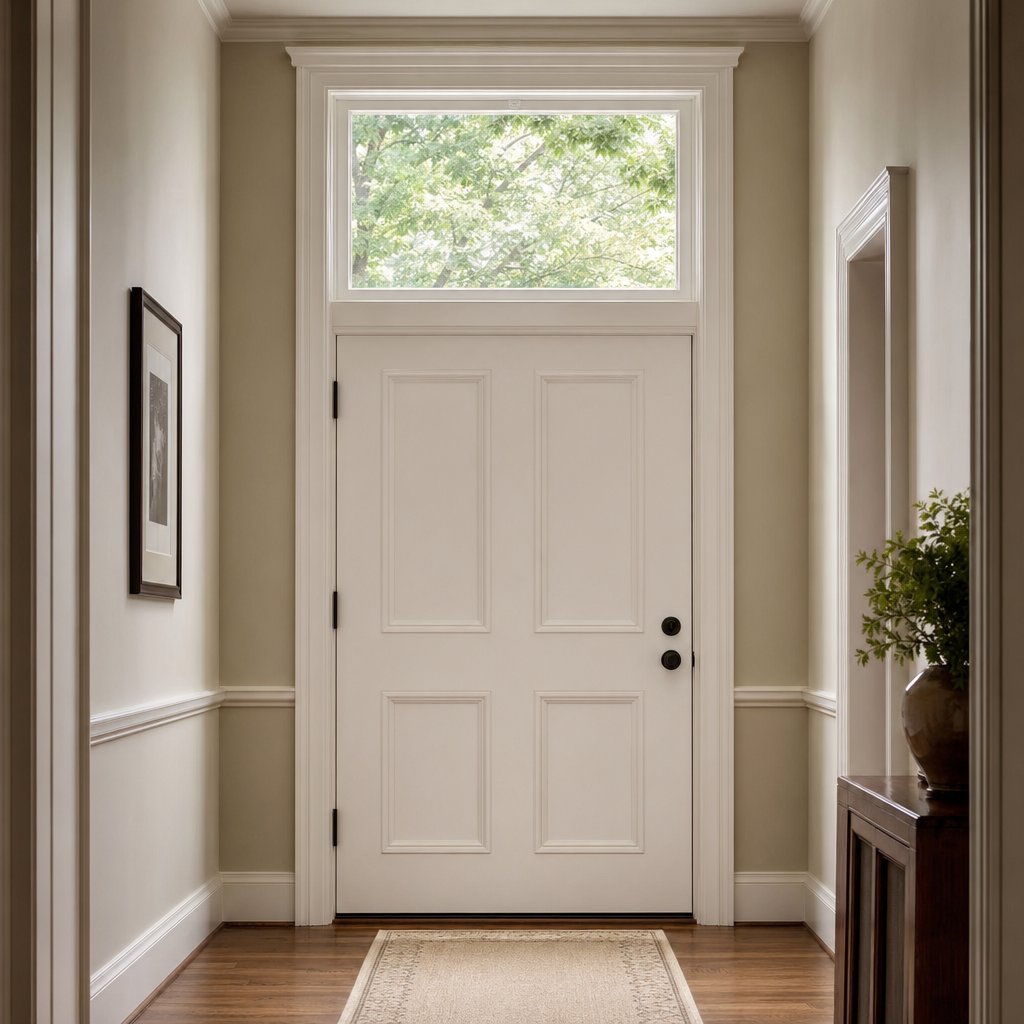
Fixed Transom Windows
Fixed transoms are the most common variety and the simplest to install. They don’t open. They don’t ventilate. What they do is flood a space with natural light while adding architectural interest above a doorway or window. Because there’s no operable hardware — no hinges, no transom sash mechanism, no seals to maintain — they’re the most affordable option and require virtually zero upkeep.
You’ll see fixed transoms above entry doors in everything from Craftsman bungalows to sleek contemporary builds. They pair well with sidelights to create a cohesive entryway composition, and their sealed construction means fewer potential points for air or water infiltration. The limitation? If ventilation matters to you, a fixed transom won’t deliver it.
Operable and Venting Transoms
Operable transoms — sometimes called vent windows — solve the airflow problem. These are hinged or pivoting panels that open to allow cross-ventilation, and their high placement means air circulates at ceiling level without compromising privacy or security at ground level.
Historically, row houses and office buildings relied on these for climate control before mechanical HVAC systems existed. Today, they’re making a comeback in homes where passive cooling strategies reduce energy costs. The transom sash can be top-hinged (tilting outward), bottom-hinged (tilting inward), or side-pivoting, depending on the design. Some use manual chain winders for hard-to-reach installations, while others integrate motorized openers.
The trade-off is cost and complexity. Operable transoms require weatherproof seals, quality hardware, and more precise installation than their fixed counterparts. They also need occasional maintenance to keep hinges and seals performing well.
Fanlight, Arched, and Decorative Styles
Imagine a semicircular window fanning out above a Georgian front door — that’s a fanlight, and it’s one of the most recognizable transom forms in architectural history. Fanlights became iconic during the Georgian period, forming the decorative focal point of house frontages across London, Dublin, Edinburgh, and eventually colonial architecture in North America and Australia.
Arched and elliptical transoms suit traditional, Federal, and Mediterranean styles. They add elegance to a transom above door installations but come with higher costs due to custom curved framing. Decorative transoms — featuring stained glass, leaded glass, or patterned designs — function as artistic focal points. They’re particularly effective on mid century front doors and heritage renovations where character matters as much as light transmission.
Rectangular transoms, by contrast, deliver clean modern lines. They complement contemporary architecture and pair naturally with sliding or French doors for a seamless visual flow.
| Type | Ventilation | Light Transmission | Best Use Case | Complexity |
|---|---|---|---|---|
| Fixed | None | High (full glass area) | Entryways, hallways, any light-focused application | Low |
| Operable / Venting | Yes (adjustable) | High | Bathrooms, kitchens, passive cooling strategies | Medium-High |
| Fanlight / Arched | Typically none (fixed) | Moderate (curved frame reduces glass area) | Georgian, Federal, and heritage homes | High (custom framing) |
| Rectangular | Optional (fixed or operable) | High | Contemporary and minimalist designs | Low-Medium |
| Decorative (stained/leaded) | Typically none | Low-Moderate (coloured glass filters light) | Statement pieces, heritage restorations | High (artisan craftsmanship) |
The type you choose shapes everything downstream — from glass selection and frame material to installation method and long-term maintenance. And speaking of glass, the panel you put inside that frame changes how your transom actually performs day to day.
Glass Options That Change How a Transom Performs
Here’s something most people overlook: the glass you choose for a transom doesn’t behave the same way it would in a standard window. Why? Because transoms sit higher on the wall. That elevated position changes the privacy equation, alters how light enters a room, and shifts which energy concerns actually matter. A door transom at eye level demands different glass than one mounted seven or eight feet off the ground.
Think of it this way — clear glass in a regular window beside your front door might feel exposed. That same clear glass in a transom above the door? It lets light pour in while anyone outside would need a ladder to peer through it. Position changes everything, and your glass selection should reflect that.
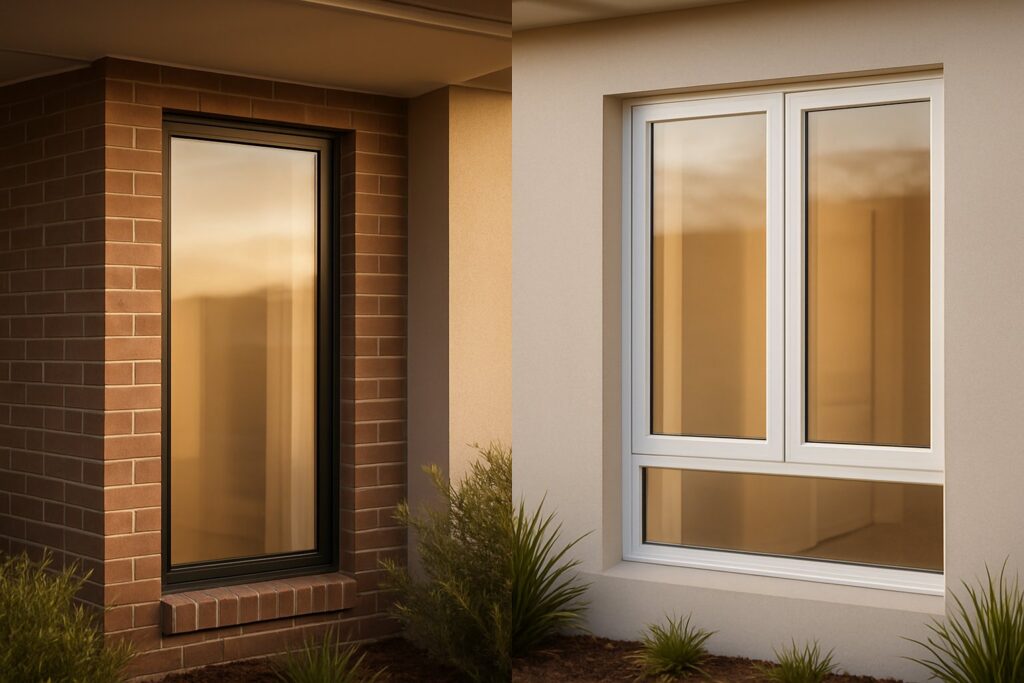
Clear, Frosted, and Textured Glass
Clear glass remains the most popular choice for transom windows, and for good reason. It delivers maximum visible light transmittance, creating a bright, open feel in entryways and living spaces. Because transoms are positioned well above sightlines, clear glass rarely creates the privacy issues it would in a standard window. It’s also the most affordable option — ideal when your primary goal is simply getting more daylight into a room.
Frosted and obscured glass steps in where privacy does matter. An interior door with transom window in a bathroom or bedroom benefits from frosted glazing that diffuses light into a soft glow while blocking any clear view. The textured surface also reduces glare, which can be a bonus in spaces where direct sunlight would otherwise create harsh reflections on screens or mirrors.
Textured and seeded glass occupies a middle ground between clear and frosted. Seeded glass — with its tiny air bubbles trapped in the pane — adds vintage character that suits heritage renovations and antique transom window restorations. It lets plenty of light through while creating a subtle visual distortion that feels warm and handcrafted rather than industrial.
Decorative and Stained Glass Options
Stained and leaded glass transforms a transom from a functional element into a focal point. These decorative panels filter light into colour, casting patterns across floors and walls that shift throughout the day. They work particularly well in entryways where the window door window arrangement — sidelights flanking a door with a transom above — creates a frame for the decorative piece.
The trade-off is reduced light transmission. Coloured glass absorbs and reflects a portion of incoming light, so rooms relying heavily on a stained transom for illumination will feel dimmer than those with clear glazing. That said, the aesthetic payoff often outweighs the light loss, especially in spaces that already receive adequate natural light from other sources.
Energy-Efficient Glass for Exterior Transoms
Exterior-facing transoms need to work harder than interior ones. They’re exposed to weather, temperature swings, and UV radiation — all of which affect comfort and energy bills. This is where Low-E (low-emissivity) coated glass earns its place. A microscopically thin metallic coating reflects infrared radiation, keeping heat inside during winter and outside during summer. Low-E windows can reduce energy loss by 30% to 50% compared to uncoated glass, and they also block UV rays that fade furniture and flooring.
Double glazing — two panes separated by a sealed air or argon gas space — adds another layer of thermal and acoustic insulation. For transoms on exterior walls, combining Low-E coatings with insulated glazing units delivers the best overall performance. The cost is higher than single-pane clear glass, but the long-term energy savings and comfort improvements justify the investment for most homeowners.
Here’s a quick summary of your main glass options and what each one does best:
- Clear glass — maximum light transmission, ideal for elevated transoms where privacy isn’t a concern
- Frosted or obscured glass — diffuses light while blocking visibility, perfect for bathrooms and interior door with transom window applications
- Textured and seeded glass — vintage character with moderate light diffusion, suits heritage and period-style homes
- Stained and leaded glass — decorative statement piece that filters coloured light, best for entryways and feature walls
- Low-E coated glass — reflects infrared radiation to improve energy efficiency, essential for exterior-facing transoms
- Double glazed units — enhanced thermal and acoustic insulation, recommended for any exterior application in variable climates
Glass determines how your transom looks and performs — but it’s only half the equation. The frame holding that glass in place affects durability, maintenance, sightlines, and how well the whole assembly weathers the years ahead.
Transom Window Materials Compared
Frame material shapes everything from how much glass you actually see to how often you’ll be dragging a ladder out for maintenance. And transoms aren’t standard windows — they sit higher, they’re often fixed, and they’re one of the first things visitors notice above your front door. That changes which material trade-offs actually matter.
For a fixed transom window, wear and tear on operable hardware is irrelevant. Durability against weather exposure and UV degradation matters more. Because transoms are mounted high, reaching them for repainting or seal repairs is inconvenient at best and expensive at worst — making low-maintenance materials far more attractive than they’d be for a ground-level window. And since transoms are visually prominent (people often ask “what is the window above a door called” precisely because it catches their eye), frame aesthetics carry real weight in curb appeal.
Wood and Vinyl Frames for Transoms
Wood delivers a warmth and character that’s hard to replicate. A traditional wooden window sash paired with a timber transom frame creates a cohesive, heritage-appropriate look — ideal for period homes, Queenslanders, and Federation-style renovations. Wood is also a natural insulator, performing well thermally without the need for thermal breaks. The downside? It demands regular painting or staining to prevent rot, warping, and insect damage. On a transom door assembly mounted two and a half metres off the ground, that maintenance becomes a genuine hassle.
Vinyl (uPVC) sits at the opposite end of the spectrum. It’s the most affordable frame material, requires no painting or refinishing, resists moisture well, and offers solid thermal performance. The limitations? Vinyl frames tend to be thicker, which reduces the visible glass area — a real drawback in a small transom where every centimetre of glazing counts. Colour options are also more limited, and lower-grade vinyl can yellow or become brittle after years of UV exposure.
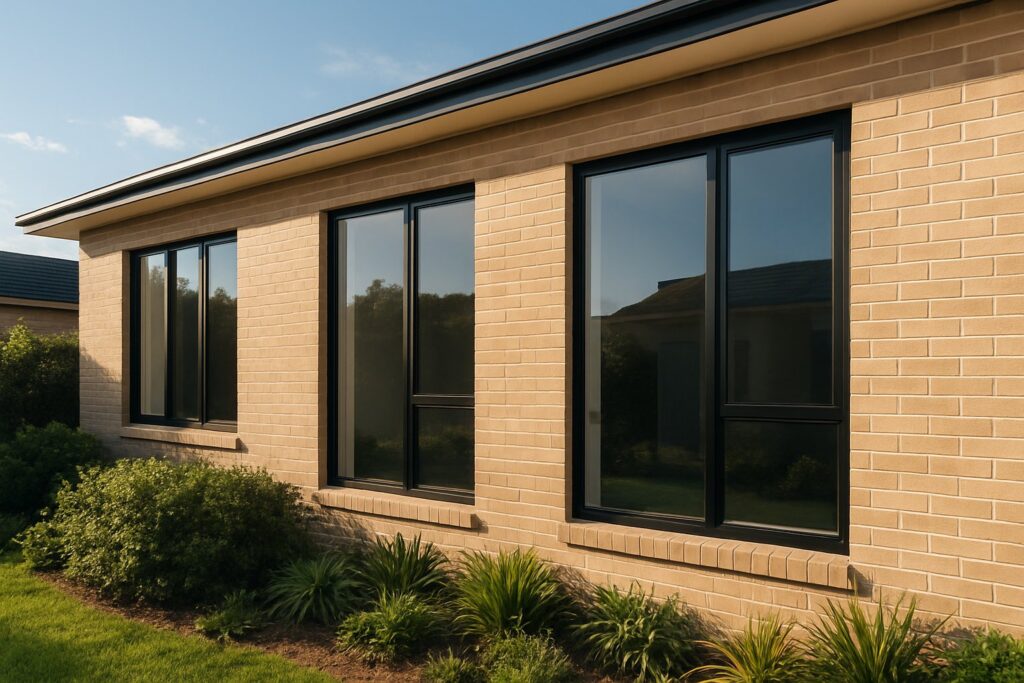
Why Aluminium Suits Modern Transom Designs
Aluminium is where slim sightlines and structural strength converge. Because the material has an excellent strength-to-weight ratio, frames can be engineered much thinner than wood or vinyl while still supporting the glass securely. The result? More visible glass area in the same rough opening — which is exactly what you want from a transom designed to maximise light.
Aluminium won’t rot, warp, or attract termites. It handles coastal salt air, intense UV, and temperature swings without degrading — making it highly durable in Australian climates. Modern thermally broken aluminium profiles address the old criticism about heat conductivity, delivering energy performance that rivals other materials. For contemporary homes, commercial fit-outs, and anyone who values clean lines with minimal upkeep, aluminium is a strong match.
Suppliers like MEICHEN offer Australian-standard-compliant aluminium window systems designed for energy efficiency — a relevant consideration when you’re comparing frame materials for exterior transoms where weather resistance and thermal performance are non-negotiable.
Fiberglass and Composite Alternatives
Fiberglass combines the strength of aluminium with the insulating properties of wood. It resists warping, swelling, and rotting, and it can be painted to match any colour scheme — a flexibility that appeals to homeowners who want a premium look without ongoing timber maintenance. Fiberglass frames can last 30-plus years with minimal upkeep. The catch is cost: fiberglass typically sits at the higher end of the pricing scale, and availability can be limited depending on your region.
Composite frames blend wood fibres with polymer resins, aiming to deliver the aesthetics of timber with the durability of synthetic materials. They’re paintable, reasonably strong, and more moisture-resistant than solid wood. Availability remains patchy compared to mainstream options, and pricing varies widely by manufacturer. For most transom projects, composites are worth exploring if wood aesthetics matter but timber maintenance doesn’t appeal.
Here’s how the five materials stack up side by side:
| Material | Durability | Maintenance | Sightline Width | Best Style Match | Relative Cost |
|---|---|---|---|---|---|
| Aluminium | Excellent — corrosion-resistant, UV-stable | Very low — occasional wipe-down | Slim (maximises glass area) | Modern, contemporary, commercial | Mid-range |
| Wood | Good if maintained — vulnerable to rot and pests | High — regular painting/staining | Medium | Heritage, Federation, Craftsman | Mid to high |
| Vinyl (uPVC) | Good — moisture-resistant, no rot | Very low — soap and water | Wide (thicker profiles) | Budget-friendly builds, rentals | Low |
| Fiberglass | Excellent — no warping, swelling, or rot | Low — paintable if desired | Medium-slim | Premium residential, mixed styles | High |
| Composite | Good — better than wood, varies by brand | Low to moderate | Medium | Traditional aesthetics, low-maintenance goals | Mid to high |
People sometimes search for “whats the roof thing called people put above doors” and land on transoms — which tells you how visible these elements are from the street. That visibility makes your material choice a curb appeal decision as much as a performance one. The frame you pick determines how your transom ages, how it looks from the kerb, and how much attention it demands over the years.
Material and glass sorted, the next consideration is where these elements go inside your home — because transoms aren’t just for front doors anymore.
Interior Transom Windows for Modern Living
Most people picture a transom above a front door — an entry door with transom is the classic image. But some of the most impactful applications happen entirely indoors, where borrowed light can rescue rooms that would otherwise depend on artificial fixtures all day long.
How Interior Transoms Transform Dark Spaces
Imagine a hallway that never sees direct sunlight. The bedrooms on either side have windows, but with doors closed, the corridor stays dim from morning to night. Install a transom above each bedroom door, and suddenly that hallway borrows daylight from every room it connects to — no electrical work, no skylight, no structural drama.
Interior transoms work because they sit above the door frame, well above eye level. Light passes freely between spaces while acoustic separation and visual privacy remain intact. A closed door still feels like a closed door. You just get the bonus of natural light flowing overhead. For open-concept homes that still need defined zones — or older layouts with too many walls — windows with transoms above interior doors strike a balance between openness and enclosure that few other elements achieve.
Best Rooms and Walls for Interior Transoms
Not every wall benefits equally. The biggest payoff comes where light-rich rooms sit adjacent to light-starved ones. Here are the five most effective interior applications:
- Above bedroom doors — borrows hallway or adjacent-room light without compromising sleep privacy
- Above home office partitions — maintains visual connection and daylight while blocking conversation noise
- In bathroom walls (with frosted glass) — transfers light from adjoining rooms without any line of sight
- Between living and dining areas — adds architectural interest and a sense of height to transitional walls
- Above laundry or utility room doors — brightens windowless service spaces that otherwise feel closed-in
One real-world example from a Brooklyn brownstone renovation shows a family that retrofitted transoms above office and laundry room doors to preserve privacy while taking full advantage of hallway windows — creating a brighter, more connected layout without removing a single wall.
Adding transoms to interior partition walls is typically simpler than exterior installations. Most interior walls are non-load-bearing, which means framing modifications are straightforward and rarely require engineering approval. Even in renovations, the work is often limited to cutting the opening, installing a header, and fitting the frame — a manageable project for an experienced builder.
Modern vs Traditional Interior Transom Styles
Style sets the tone. Slim black steel frames with clear glass suit contemporary and industrial interiors — think loft conversions and open-plan living spaces where windows with transoms echo the look of steel-framed partitions. Wood transom windows with divided lights (multiple small panes separated by muntins) lean traditional, complementing Craftsman, colonial, and period-style homes where character and warmth matter.
White-painted timber frames split the difference, working in both modern farmhouse and transitional designs. And for anyone restoring a heritage property, salvaged or reproduction transome window panels with original wavy glass add authenticity that new materials simply can’t replicate.
The style you choose should echo the doors and trim already in the space. A mismatched frame draws attention for the wrong reasons — consistency between the transom, the door below, and the surrounding mouldings is what makes the whole composition feel intentional rather than afterthought.
Interior transoms solve the light problem elegantly, but they still cost money. Understanding what drives that price — and where you can save without sacrificing quality — keeps the project realistic from day one.
Cost Factors That Shape Transom Window Pricing
So what is a transom going to cost you? That depends. Unlike a standard replacement window where you can ballpark a figure quickly, transoms carry a wider spread of variables — and each one compounds the next. The good news is that once you understand what drives the price, you can make deliberate trade-offs instead of getting blindsided by quotes.
What Drives Transom Window Costs Up or Down
No single factor determines your final number. It’s the combination that matters. Here are the key cost drivers ranked from most to least impactful on your total project price:
- New construction vs. retrofit — retrofitting a transom into an existing wall involves structural assessment, potential header modifications, and significantly more labour than framing one into a new build. According to Mr. Remodel’s cost data, labour on retrofit installations can push costs to double or more compared to straightforward new-construction installs.
- Fixed vs. operable — an operable transom requires hinges, seals, locking hardware, and more precise engineering. That hardware and the weatherproofing it demands can add substantially to both material and installation costs.
- Standard vs. custom sizing — a rectangular transom in a stock dimension is far cheaper than a custom-curved fanlight or arched design that requires bespoke framing and specialty glass cutting.
- Frame material — vinyl is the most budget-friendly option. Wood frames can add approximately 50% more to the base cost, with fiberglass sitting at the premium end.
- Glass type — clear single-pane glass is the baseline. Low-E coatings, double glazing, stained glass, and decorative leaded panels each push the price higher.
- Interior vs. exterior placement — exterior transoms require weatherproofing, flashing, and often higher-performance glazing, all of which add cost that interior installations avoid entirely.
Fixed vs Operable Pricing Differences
A fixed transom is essentially a pane of glass in a frame — no moving parts, no seals to engineer, no hardware to source. That simplicity makes it the most affordable transom type by a comfortable margin. When you move to an operable door with transom window configuration, you’re paying for precision-engineered hinges, airtight gaskets, locking mechanisms, and often a chain winder or motorised opener for high-mounted installations.
The gap isn’t trivial. Operable transoms typically cost meaningfully more than fixed equivalents of the same size and material — not just in upfront price, but in long-term maintenance as seals and hardware wear over time. If ventilation isn’t a genuine priority, a fixed unit delivers better value for most homeowners.
New Construction vs Retrofit Cost Realities
This is where budgets either hold or blow out. Installing a door with transom during new construction is relatively straightforward — the framing is designed around it from the start, and the builder integrates flashing and waterproofing as part of the standard build sequence.
Retrofitting transoms into an existing home is a different story. The wall may be load-bearing, requiring a longer header and potentially an engineer’s sign-off. Existing cladding needs cutting back, insulation gets disturbed, and interior trim often needs reworking. Labour — not materials — becomes the dominant cost driver in retrofit scenarios.
To get accurate quotes, specify every variable upfront: fixed or operable, exact dimensions, frame material, glass type, interior or exterior, and whether the wall is load-bearing. Vague requests produce vague estimates. The more detail you give installers, the tighter and more comparable your quotes will be — and the fewer surprises you’ll face once work begins.
Budget expectations set, the next critical question is whether your walls can actually support what you’re planning — because not every opening is as simple as cutting a hole and dropping in a frame.
Installation Requirements You Need to Know First
A transom window above door looks effortless once it’s in — a clean strip of glass that seems like it was always part of the wall. Getting it there, though, involves structural decisions that can range from straightforward to complex depending on one variable: is this a new build or a retrofit?
New Construction vs Retrofit Installation
In new construction, the framing crew sizes the rough opening to accommodate both the door and the transom from the start. Headers are specified at the correct length, trimmer studs are positioned to support the full height of the assembly, and flashing details get integrated during the standard build sequence. It’s efficient and predictable.
Retrofitting tells a different story. Trim carpenter Gary Striegler notes that installing a transom above a stock door requires a minimum of 14 inches of space above the door jamb — and that’s for a basic fixed unit. If your ceiling height doesn’t provide that clearance, the project may not be feasible without lowering the door or raising the ceiling line. In retrofit scenarios, you’re working within existing framing constraints, which means assessing what’s already there before committing to anything.
Structural Requirements and Load-Bearing Walls
Here’s where things get serious. Adding a transom above a door in a load-bearing wall means the rough opening gets taller — and a taller opening requires a longer, stronger header to carry the load above it. That header modification often needs engineering approval, especially in multi-storey homes where loads stack.
On non-load-bearing partition walls, the process is far simpler. You can header off the opening to match the height of a structural header without the same engineering concerns. Fixed transom windows on interior partitions rarely trigger structural complications, which is one reason interior transoms are so popular in renovations.
For transom windows exterior applications, rough opening preparation goes beyond framing. Proper flashing is critical — water that gets behind the cladding will find its way into any gap around the frame. Best practice involves pan flashing at the sill, self-adhesive flashing tape lapped shingle-style up the sides, and a head flashing detail that directs water outward over the top. Skipping these steps — or doing them out of sequence — exposes the wall cavity to moisture damage that’s invisible until it becomes expensive.
Matching the transom frame to the door or window below also matters structurally and visually. The inside measurements of the transom jamb need to align precisely with the door jamb so there’s a seamless transition between the two. Even small misalignments create visible gaps that no amount of trim can fully disguise.
Building Codes, Permits, and Compliance
Will you need a permit? Almost certainly, if you’re creating a new opening or enlarging an existing one. Building permits for new window openings are mandatory when projects involve removing portions of walls that provide structural support — and that includes cutting above an existing door to add a transom.
Permit requirements vary dramatically by jurisdiction. Urban areas tend to enforce stricter oversight than rural councils. Historic districts may impose additional restrictions on window styles and materials. Some regions require enhanced wind resistance ratings or specific glazing for bushfire zones. The only reliable way to know what applies to your project is to contact your local building authority before work begins.
Required documentation typically includes architectural plans showing the proposed opening, structural drawings indicating header specifications, and manufacturer specs for the window itself. Complex modifications — particularly those involving load-bearing walls — usually require stamped drawings from a licensed engineer. Simple interior transoms on partition walls may qualify for streamlined approval, but don’t assume. Even security bars for windows on the same wall can trigger additional compliance checks in some jurisdictions.
Skipping permits carries real consequences: fines, forced removal, insurance complications, and problems at resale when buyers discover unpermitted work during inspections. The permit process adds time and cost upfront, but it protects your investment and ensures the installation is structurally sound for the long term.
With structural feasibility confirmed and permits in hand, the next challenge is getting the proportions right — because a transom that’s technically sound but visually awkward defeats half the purpose of installing one.
Design Proportions, Common Mistakes, and Troubleshooting
A transom that’s structurally sound but visually off-balance does more harm than good. It draws the eye for the wrong reasons. Getting proportions right is what separates a transom window that elevates a room from one that looks like an afterthought tacked above the door.
Proportion Rules for Visual Balance
Here’s the guideline most architects follow: a transom should be one-quarter to one-third the height of the door or window below it. For a standard 2040mm (80-inch) door, that translates to a transom height of roughly 250mm to 450mm (10 to 18 inches). This range keeps the transom visually subordinate to the door — present enough to register, but not so tall that it competes for attention.
Width matters too. The transom should match the full width of the element below it, including any sidelights. A transom narrower than the door frame looks pinched and incomplete. One that extends beyond it — unless deliberately designed as a continuous horizontal windows band across multiple openings — creates visual tension that feels unresolved.
Ceiling height sets the upper limit. You need enough clearance above the door head to fit the transom, its frame, and any trim without crowding the ceiling line. If the gap between door head and ceiling is less than 300mm, a transom may feel cramped rather than elegant.
Common Design Mistakes to Avoid
Knowing what is a transom window supposed to look like is partly about knowing what it shouldn’t look like. These are the errors that show up most often in renovations and DIY projects:
- Transom too tall — exceeding one-third of the door height makes the assembly look top-heavy and awkward, as if the door shrank
- Transom too narrow — a width that doesn’t match the door frame below creates a disjointed, unfinished appearance
- Mismatched frame colour or material — a white vinyl transom above a dark timber door breaks visual continuity instantly
- Inconsistent frame profile — mixing a chunky frame on the transom with a slim profile on the door below looks uncoordinated
- Ignoring surrounding trim — the transom casing should align with existing architraves and mouldings for a cohesive look
- Forcing a transom where ceiling height doesn’t allow it — cramming one into a tight space makes the room feel compressed rather than elevated
An interior transom window is especially vulnerable to proportion mistakes because it’s viewed at close range in hallways and between rooms. Exterior transoms have the benefit of distance — you see them from the street. Interior ones sit right above your head, so every misalignment is noticeable.
Troubleshooting Condensation, Leaks, and Access
Even a well-proportioned transom can develop problems over time. The most common issues relate to the elevated position and, for operable units, the mechanical complexity of hardware mounted out of easy reach.
Condensation is the most frequent complaint on exterior transoms. Warm, moist indoor air rises and meets the cooler glass surface near the ceiling — exactly where transoms sit. In climate zones with large temperature differentials, this creates persistent fogging or water droplets on the glass. Prevention strategies include upgrading to insulated (double-glazed) units, sealing air gaps around the frame with weatherstripping, and managing indoor humidity levels between 30% and 50% using exhaust fans or dehumidifiers.
Air leaks around operable transom seals develop as gaskets age and compress. You’ll notice drafts or hear whistling on windy days. Replacing perimeter seals every few years — and checking that the sash closes flush against the frame — keeps performance intact.
Access is the practical headache most people don’t anticipate. An interior transom window that vents is mounted well above head height, making manual operation awkward. Chain winders solve this — a geared chain mechanism mounted at a reachable height that connects to the sash via a rigid rod. For higher installations or multiple transoms, motorised remote operators offer push-button control. Both options add cost but eliminate the frustration of needing a step ladder every time you want airflow.
Water infiltration around exterior transom flashing is the most damaging problem and the hardest to detect early. If flashing was installed incorrectly — or deteriorates over time — water tracks behind the cladding and into the wall cavity. Signs include paint bubbling around the frame, musty smells, or visible staining on interior trim. The fix requires removing exterior cladding to access and replace the flashing, so getting it right during installation is far cheaper than repairing it later.
Proportion, detail, and maintenance — these three factors determine whether your transom remains an asset or becomes a liability. With the design dialled in and potential issues understood, the final step is matching all of these considerations to your specific project goals and constraints.
How to Choose the Right Transom Window for Your Project
You’ve got the knowledge — types, glass, materials, installation realities, proportions, and costs. The question now is how all of that applies to your specific situation. Every project is different, and the right window transom for a heritage cottage renovation looks nothing like the right one for a new-build contemporary home. A simple decision framework keeps you from overthinking it.
Key Questions Before You Commit
Before requesting quotes or browsing catalogues, work through these questions in order. Each answer narrows your options and prevents expensive course corrections later:
- Measure your ceiling height — you need at least eight feet of clearance to fit a transom above a standard door. Less than that, and the proportions won’t work.
- Identify the wall type — load-bearing walls require engineering assessment and a longer header, which adds cost and complexity. Partition walls are straightforward.
- Define your primary goal — is it light, ventilation, aesthetics, or some combination? This single answer determines whether you need a fixed unit, transom windows that open, or a decorative statement piece.
- Set a realistic budget — factor in not just the window itself but framing modifications, flashing (for exterior installs), and labour. Retrofit projects cost significantly more than new-construction installs.
- Match the architectural style — a fanlight suits Georgian and Federation homes. Rectangular transoms complement modern builds. Stained or leaded glass works for Craftsman and heritage properties. Even single iron front doors in industrial-style entries pair well with simple rectangular transoms overhead.
Matching Transom Type to Your Project Goals
Here’s the short version. If your goal is purely light, a fixed transom delivers the most value for the least money — no hardware, no seals, no maintenance. If ventilation matters, an operable unit is worth the premium, but budget for chain winders or motorised openers if the mounting height makes manual access impractical. If you’re restoring a period home, vintage transom windows — whether salvaged originals or faithful reproductions — add authenticity that off-the-shelf products can’t match. And if you’re renovating rather than building new, start with a structural assessment before you fall in love with a design that your walls can’t support.
Selecting Quality Materials and Compliant Products
Material choice matters most for exterior applications where weather, UV exposure, and energy performance are constant factors. Whichever frame you choose, verify that the product meets relevant building standards — in Australia, that means compliance with AS 2047 (windows and external glazed doors) and a strong WERS rating for energy efficiency. Non-compliant products create permit headaches and long-term performance issues that no amount of savings justifies.
For Australian homeowners and builders evaluating aluminium transom options, MEICHEN’s aluminium window range offers energy-efficient, standards-compliant systems worth exploring as part of your shortlisting process. Their slim-profile frames maximise glass area — exactly the quality that makes aluminium so well suited to transoms in the first place.
The right transom adds light, character, and even airflow to spaces that would otherwise feel closed off. The wrong one wastes money and looks out of place. Work through the decisions methodically, choose quality over shortcuts, and you’ll end up with a result that earns its place above the door for decades.
Transom Window FAQs
1. What is the window above a door called?
The window above a door is called a transom window. It sits above a horizontal structural bar known as the transom, which separates the door frame from the glazed panel above. Transom windows come in fixed and operable varieties. Fixed versions are sealed and designed purely for admitting natural light, while operable transoms can be opened to provide ventilation. They appear in both exterior entryways and interior walls, and are available in rectangular, arched, fanlight, and decorative stained-glass styles to suit a wide range of architectural designs.
2. Do transom windows add value to a home?
Transom windows can add both aesthetic and functional value to a home. They increase natural light in entryways, hallways, and interior rooms, which is a feature buyers consistently rate highly. Architecturally, they add visual height and character to doorways, boosting curb appeal. Operable transoms also support passive ventilation strategies that can reduce cooling costs. The value impact depends on quality of materials and installation. Aluminium-framed transoms, for example, offer slim sightlines that maximise glass area while requiring minimal maintenance. Suppliers like MEICHEN provide Australian-standard-compliant aluminium window systems that combine energy efficiency with long-term durability, both of which support property value.
3. Can you add a transom window to an existing door?
Yes, but the feasibility depends on ceiling height and wall type. You need at least 14 inches of space above the existing door jamb to fit even a basic fixed transom. If the wall is load-bearing, the rough opening must be extended upward, which requires a longer structural header and typically an engineer’s approval. Non-load-bearing partition walls are much simpler to modify. Exterior retrofits also demand proper flashing and weatherproofing to prevent water infiltration. A building permit is usually required when creating or enlarging a window opening, so consulting your local building authority before starting work is essential.
4. What is the best glass for a transom window?
The best glass depends on placement and purpose. Clear glass works well for most transoms because their elevated position already provides privacy, and it delivers maximum light transmission. Frosted or obscured glass suits bathroom and bedroom transoms where additional privacy is needed. For exterior-facing transoms, Low-E coated double-glazed units offer the strongest energy performance by reflecting infrared radiation and providing thermal insulation. Stained or leaded glass turns a transom into a decorative focal point but reduces overall light transmission. Textured and seeded glass adds vintage character and is popular in heritage home restorations.
5. What are the ideal proportions for a transom window?
Architects generally recommend a transom height of one-quarter to one-third the height of the door or window below it. For a standard 2040mm door, that means a transom between roughly 250mm and 450mm tall. The transom should match the full width of the door frame, including any sidelights, to maintain visual balance. Going too tall makes the assembly look top-heavy, while going too narrow makes the transom barely noticeable. Frame colour, profile thickness, and trim style should also match the door below for a cohesive, intentional appearance rather than an afterthought.
More Window & Door Guides