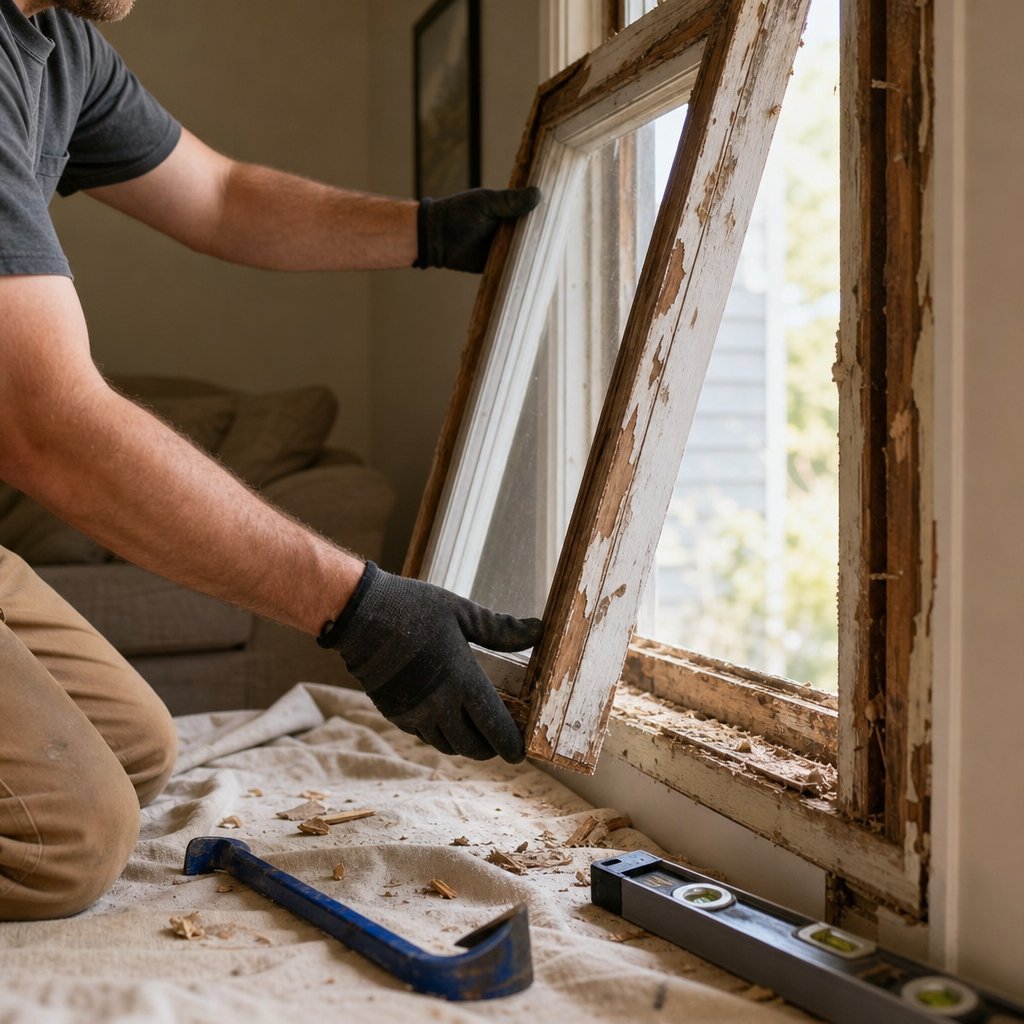
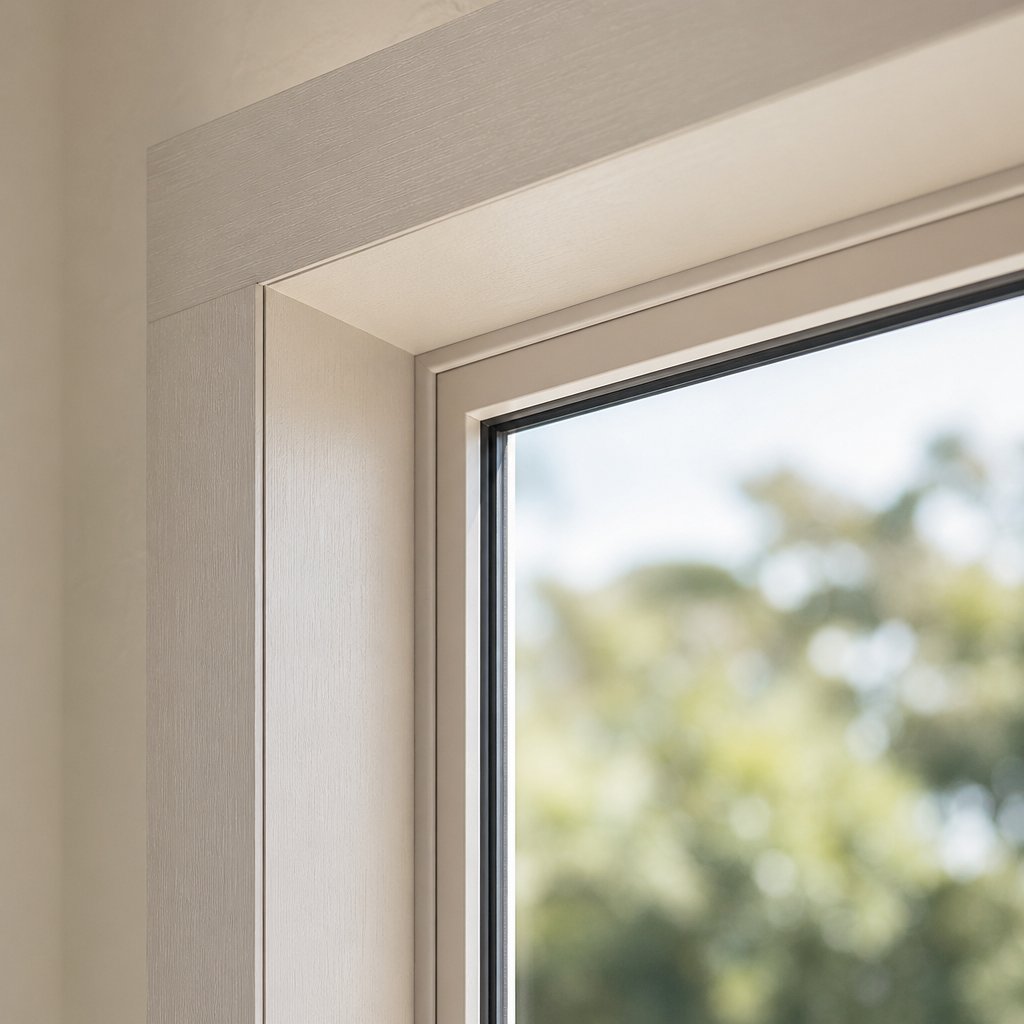
Step 1 — Assess Your Project Type and Take Accurate Measurements
Before you pick up a tape measure, you need to answer one question: are you replacing an existing sliding glass door, or are you cutting a brand-new opening into the wall? The answer shapes everything that follows — from structural preparation to the permits you may need.
Replacement vs New Opening — Which Path Are You On
A straightforward patio door replacement — swapping an old sliding glass door for a new aluminium unit within the same rough opening — is the simpler path. The structural framing already exists, the lintel is in place, and your main concern is removing the old frame cleanly and fitting the new one precisely. Most weekend renovators tackling a sliding glass patio door replacement fall into this category.
Putting in a sliding glass door where no opening currently exists is a different project entirely. You are modifying the building envelope, which means installing a structural header (lintel), trimmer studs, and potentially re-routing services like electrical wiring or plumbing. In brick veneer homes — the most common construction type across Australian suburbs — this also involves cutting through the external leaf and installing a steel lintel rated for the span.
Aluminium frames behave differently from timber or uPVC alternatives. They are lighter (a 2.4 m frame weighs roughly 30–40% less than an equivalent timber unit), significantly more rigid, and far less forgiving of rough handling. A slight twist that timber might absorb will permanently rack an aluminium frame. The anodised or powder-coated finish scratches easily against masonry, so protective film should stay on until the very last stage of installation. Understanding these material characteristics early prevents costly mistakes later.
How to Measure Your Rough Opening for Aluminium Frames
Accurate measurement is the single biggest factor in a leak-free installation. Rough openings are rarely perfectly square, so a single width and height reading is never enough. The correct approach uses multiple measurement points and always works from the smallest dimension.
Follow this sequence:
- Measure the width of the opening at three heights — along the bottom (sill level), at the midpoint, and across the top (lintel level). Record all three figures.
- Measure the height at three positions — left jamb, centre, and right jamb. Record all three figures.
- Take the smallest width and the smallest height as your working dimensions.
- Subtract your expansion allowance from each dimension. For aluminium, allow 2–3 mm per metre of frame length to accommodate thermal expansion. A 3 m wide opening, for example, needs 6–9 mm of clearance built into the width.
- Check diagonals corner to corner. A difference greater than 3 mm indicates the opening is out of square and will require shimming to correct during installation.
This thermal expansion factor is specific to aluminium. The material expands at roughly 23 micrometres per metre per degree Celsius — nearly twice the rate of steel and significantly more than timber. In Australian conditions, where a west-facing frame can swing from 5°C overnight to 60°C+ surface temperature in direct summer sun, ignoring this tolerance invites frame distortion, binding panels, and seal failure. A patio doors replacement that worked perfectly in winter can develop sticking and air gaps by the following February if expansion clearances were skipped.
Permits and Building Code Considerations
Many homeowners assume a like-for-like replacement does not require council approval. In most Australian jurisdictions, that assumption is correct — provided you are not altering the size of the opening or changing the structural framing. However, the moment you enlarge an opening, create a new one, or modify a load-bearing wall, you typically need a building permit or complying development certificate.
Key regulatory considerations for Australian projects include:
- National Construction Code (NCC) — Your door must comply with energy efficiency provisions under NCC Section J (residential) or Section J (commercial), depending on the building class.
- AS 2047 — The Australian Standard for windows and external glazed doors, covering structural adequacy, weather resistance, and operation under load.
- AS 1288 — Governs glazing selection and installation, including safety glass requirements for doors and low-level panels.
- BAL ratings — If your property is in a designated bushfire-prone area, the door system must meet the Bushfire Attack Level requirements for your site.
- Cyclone compliance — Properties in northern Queensland, the NT, and parts of WA may require doors rated to specific wind region categories (C or D).
- WERS ratings — While not mandatory everywhere, the Window Energy Rating Scheme helps demonstrate compliance with NCC energy provisions and is increasingly referenced by certifiers.
Contact your local council’s building department before starting work if there is any doubt. A development application (DA) or complying development certificate (CDC) is far cheaper than rectifying non-compliant work after the fact — or discovering during a future sale that unpermitted structural modifications void your insurance coverage.
With your project type confirmed, measurements recorded, and regulatory requirements understood, the next consideration is assembling the right tools and selecting a door system engineered for your specific opening and climate conditions.
Step 2 — Gather Tools and Select Your Aluminium Door System
A sliding door installation only goes smoothly when every tool and material is on hand before you start. Stopping mid-way to hunt for a specific fastener or sealant wastes time and can compromise work already in progress — especially with open flashing or unsealed gaps exposed to weather. Equally important is choosing a door system that actually suits your opening, your climate zone, and your wall construction. Getting both of these decisions right upfront prevents the kind of rework that leads to leaks.
Essential Tools and Their Purpose
The tools required for aluminium door installation fall into four categories. Some are standard items most renovators already own; others are specific to working with aluminium frames and glazed panels. Here is a complete checklist with context on why each item matters:
| Tool | Purpose | Notes |
|---|---|---|
| Laser level | Establishes true plumb and level reference lines across the full opening | More accurate than a spirit level over wide spans; essential for openings above 2 m |
| Spirit level (1200 mm) | Checks frame sections during shimming and fixing | Use as a secondary check alongside the laser |
| Tape measure (8 m) | Confirms rough opening dimensions and diagonal measurements | Choose one with a lock and a wide blade that won’t buckle over long spans |
| Impact driver | Drives frame fixings into timber or steel studs | Use low-torque settings to avoid over-driving into aluminium |
| Hammer drill | Pre-drills into masonry or concrete for anchor fixings | Required for brick veneer and slab-on-ground installations |
| Caulking gun | Applies sealant around the frame perimeter | A dripless model gives cleaner bead control |
| Low-expansion foam gun | Fills the gap between frame and rough opening for insulation | Never use high-expansion foam — it can bow aluminium frames |
| Utility knife | Cuts flashing tape, trims foam, removes protective film | Keep spare blades on hand |
| Pry bar (flat) | Removes old frame fixings and trim without damaging surrounding structure | Wrap the tip with tape when levering near new aluminium to prevent scratches |
| Stainless-steel or bi-metal screws | Secure the aluminium frame to the structure | Prevents galvanic corrosion — see fastener section below |
| Plastic or composite shims | Level and plumb the frame without introducing moisture-absorbing material | Never use timber shims, which swell and shrink with humidity |
| Flexible flashing membrane | Waterproofs the rough opening before the frame goes in | Self-adhesive butyl-based products work best on timber and masonry |
| Neutral-cure silicone sealant | Seals the exterior frame-to-wall junction | Must be aluminium-compatible — acid-cure silicone attacks aluminium |
| Safety glasses and gloves | Protects eyes from masonry dust and hands from sharp aluminium edges | Cut-resistant gloves recommended when handling glazed panels |
| Suction cup lifters (pair) | Safely grip and manoeuvre heavy glass panels | Essential for panels exceeding 40 kg — most patio sliding doors qualify |
Having everything laid out and accessible before you begin means the frame can go from dry-fit to fully sealed in a single session, minimising the window of exposure to weather.
Choosing the Right Aluminium Sliding Door for Your Opening
Not every aluminium sliding door frame suits every situation. Selecting the right system depends on four factors working together: opening width, wall construction, climate zone, and glazing requirements.
Opening width determines how many panels you need and what track configuration will work. A standard two-panel patio glass door (one fixed, one sliding) suits openings up to roughly 2.4–3 m. Wider openings — 4 m and beyond — typically require three or four panels on double tracks, with heavier-duty rollers rated for the increased panel weight.
Wall construction dictates your fixing method. Timber-framed walls accept screw fixings directly into studs. Brick veneer requires masonry anchors through the outer leaf and screw fixings into the inner timber frame. Steel-framed homes need self-drilling bi-metal screws or pre-drilled clearance holes with appropriate fasteners.
Climate zone affects both the frame profile and the glazing specification. In southern Australian states, thermally broken aluminium frames paired with double glazing meet NCC energy requirements comfortably. In tropical northern regions, cyclone-rated hardware and impact-resistant glazing become mandatory. Coastal properties anywhere in Australia need enhanced corrosion protection — marine-grade powder coating or anodising — to resist salt-air degradation.
Glazing requirements tie directly to energy compliance and safety. AS 1288 mandates safety glass in all sliding door panels. Beyond that baseline, your NatHERS or WERS targets may call for Low-E coatings, argon-filled cavities, or specific glass thicknesses that influence the frame’s glazing rebate depth.
The critical point many installers overlook is that these factors are not independent — they interact within the door system itself. Track profile, roller capacity, lock mechanism, weatherseal design, and glazing build-up all need to be engineered as a unified package. Treating components as interchangeable (sourcing generic rollers for a specific track profile, for instance) leads to poor sealing, premature wear, and water ingress. Systems like the MEICHEN MA100 Sliding Door illustrate this integrated approach — the track geometry, roller design, multi-point lock, and glazing specifications are purpose-matched so that water-tightness, air-tightness, and smooth operation are achieved as designed rather than improvised on site. When planning your sliding door installation, always select your door system first, then plan your preparation, fixings, and sealing around that system’s specific requirements.
Fastener Selection to Prevent Galvanic Corrosion
This is where many DIY installations go wrong — and where the damage only becomes visible months or years later. Galvanic corrosion occurs when two dissimilar metals are in direct contact in the presence of moisture. Aluminium sits low on the galvanic series, meaning it becomes the sacrificial metal when paired with more noble metals like plain carbon steel or copper. The result is white powdery oxidation around fixings, weakened screw holes, and eventually frame failure at the fixing points.
Research from BRANZ (Build 176, 2020) confirms that pairing aluminium with incompatible metals in the presence of moisture creates significant corrosion risk, particularly in coastal and high-humidity environments common across much of Australia.
The solution is straightforward:
- Stainless-steel fasteners (Grade 304 or 316) — These are close enough to aluminium on the galvanic scale that corrosion risk is minimal in most environments. Grade 316 is preferred for coastal properties within 1 km of the ocean.
- Bi-metal screws — Designed specifically for fixing into steel frames, these have a stainless-steel body with a hardened carbon-steel drill tip. The tip does the drilling, then the stainless body sits in the aluminium without causing galvanic reaction.
- Nylon or EPDM washers — Placed between the screw head and the aluminium frame, these act as an isolating barrier, breaking the metal-to-metal contact path even if a less-than-ideal fastener must be used.
Avoid galvanised steel screws entirely. While the zinc coating offers some initial protection, once it wears through — and it will, especially in patio slider doors exposed to weather — the underlying carbon steel accelerates aluminium corrosion rapidly. The few dollars saved on cheaper fasteners can result in hundreds of dollars in frame repairs within five to ten years.
With your tools assembled, your door system selected, and your fasteners confirmed as aluminium-compatible, the physical work begins: removing the existing door or preparing the rough opening for the new frame.
Step 3 — Remove the Old Door or Prepare the Rough Opening
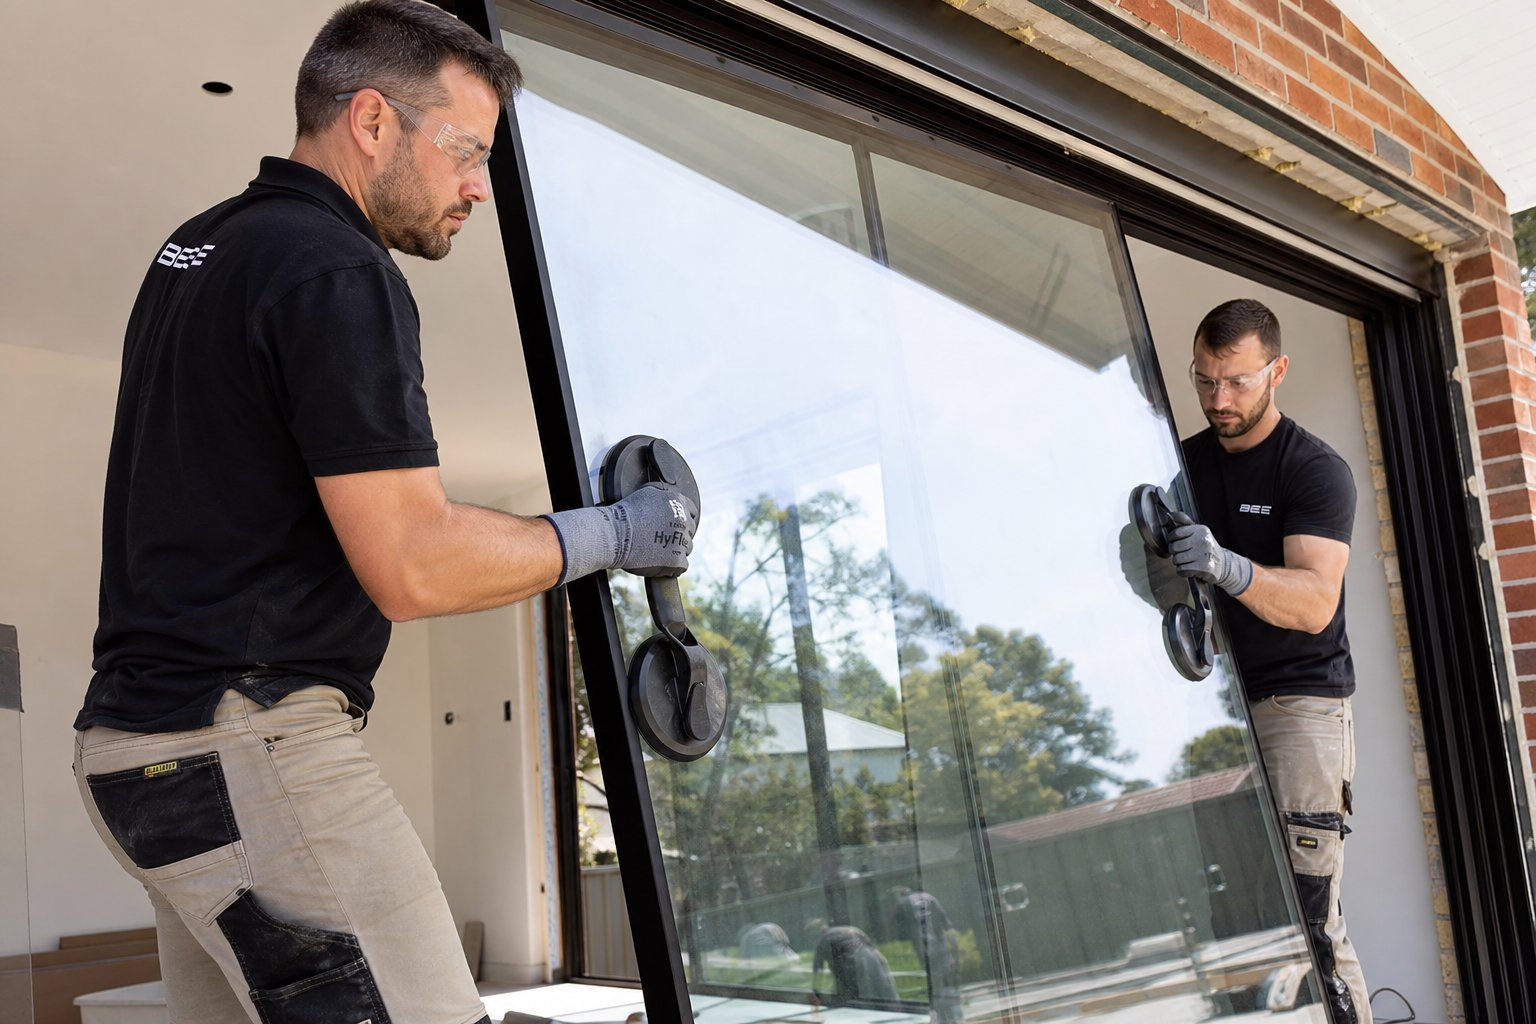
Aluminium-framed glass panels are deceptively heavy. A standard 2.1 m x 0.9 m double-glazed sliding panel weighs between 60 and 80 kg, and that weight is concentrated in a thin, awkward sheet that offers very little grip. Rushing this stage — or attempting it solo — is how glass breaks, frames bend, and people get hurt.
Safety warning: Never attempt to lift or manoeuvre a glazed sliding panel alone. Always work with a second person, wear cut-resistant gloves and safety glasses, and keep a clear path between the door and your lay-down area. If a panel exceeds 40 kg, use suction cup lifters for a secure grip.
How to Remove the Sliding Panel Safely
If you are wondering how to remove a sliding glass door without damaging the frame or surrounding wall, the key is working in the correct sequence — sliding panel first, fixed panel second, frame last. Here is the step-by-step process:
- Open the sliding panel to the centre of the track and locate the roller adjustment screws on the bottom edge of the panel stile. Turn them counterclockwise to retract the rollers, creating extra clearance between the panel top and the head track.
- With your helper, grip both sides of the panel. Lift it straight up into the head track until the bottom clears the sill rail.
- Tilt the bottom of the panel toward you and swing it out of the frame. Lower it gently onto a padded drop sheet or blanket laid flat on the floor.
- Remove the fixed (stationary) panel next. Unscrew any retaining brackets at the head or jamb, cut through old sealant with a utility knife, then lift and tilt it out using the same technique.
Applying a quick spray of silicone lubricant to the track beforehand makes the initial lift easier if the panel has been sticking. For anyone unsure how do you remove a sliding door that feels jammed, check for a small retaining screw or anti-lift block in the head track — these are common on security-rated patio slider doors and must be removed before the panel will clear.
Extracting the Old Aluminium Frame
With both panels out, the frame itself remains fixed to the structure. Aluminium door frames are typically secured with screws driven through the jambs and head into timber studs or steel framing behind the wall lining. A bead of sealant — usually silicone or polyurethane — runs along the exterior face where the frame meets the cladding.
To remove the frame cleanly:
- Score the exterior sealant line with a sharp utility knife on all four sides. This prevents the sealant from tearing render, paint, or weatherboard when the frame comes away.
- Remove all visible fixing screws from the jambs, head, and sill using an impact driver or drill.
- Gently lever the frame away from the opening with a flat pry bar, starting at one jamb. Work progressively around the perimeter rather than forcing one section.
- Lift the frame out as a complete unit if possible, or disassemble it by removing corner cleats if the opening is tight.
Inspect the exposed rough opening once the frame is out. Vacuum debris, scrape away old sealant residue, and check the timber framing for moisture damage or rot — particularly at the sill, where water tends to pool behind poorly sealed frames.
Preparing a New Rough Opening in the Wall
Cutting a new opening for a sliding glass door involves structural framing that must comply with the NCC and your engineer’s specifications. The opening needs a header (lintel) sized to carry the load above, supported by trimmer studs (jack studs) on each side.
Key framing requirements:
- King studs — Full-height studs running continuously from bottom plate to top plate on each side of the opening, providing the primary structural support.
- Trimmer (jack) studs — Shorter studs fixed to the inside face of each king stud, cut to the height of the rough opening. These directly support the header from below.
- Header/lintel — Spans the top of the opening and transfers roof and wall loads to the trimmer studs. For openings wider than 1.8 m, engineered timber (LVL) or steel lintels are typically required. Always have the header sized by a structural engineer — an undersized lintel can sag over time, racking your new frame and causing the panels to bind.
- Sill trimmer — A horizontal member at the base of the opening, supported by cripple studs below, establishing a level platform for the door frame.
In brick veneer construction, a galvanised steel lintel must also be installed in the outer masonry leaf, with adequate bearing (minimum 100 mm) on each side. This is separate from the timber or steel header in the inner frame and must be specified by your engineer for the span involved.
Whether you are removing an old frame or building a new opening from scratch, the goal is the same: a clean, structurally sound, and dimensionally accurate rough opening ready to receive waterproofing. That weatherproofing layer — applied before the new frame ever touches the opening — is what separates a leak-free installation from one that fails in the first heavy rain.
Step 4 — Flash and Waterproof the Opening Before Frame Installation
Waterproofing failures around sliding exterior doors almost never happen because the wrong material was used. They happen because the layers were installed in the wrong order — or the sill was sealed shut when it should have been left open to drain. Aluminium makes this problem worse than timber or uPVC because the metal acts as a highway for water. Any moisture that reaches the frame surface travels along it rapidly, finding the smallest gap and exploiting it. Getting the flashing sequence right is non-negotiable.
Install the Sill Pan and Drainage Slope
The sill pan is the single most critical waterproofing element in any sliding outside door installation. Its job is simple: catch any water that penetrates past the frame and redirect it back outside before it reaches the framing timber.
A properly formed sill pan has four essential characteristics: a continuous waterproof surface without holes or wrinkles, a back dam or positive slope directing water outward, end dams at each side preventing lateral movement into the wall, and a lower edge that laps over the drainage plane beneath the opening.
To create the drainage slope, fix a strip of bevelled timber (or a tapered packing piece) across the rough opening sill so the surface falls toward the exterior at approximately 5–10 degrees. Apply self-adhesive flexible flashing membrane over this slope, pressing it firmly into the corners. The membrane must wrap up the jamb faces at least 50 mm on each side to form end dams, and turn up at the back to create the back dam. Press the membrane tightly into the internal corners rather than bridging across them — a bridged corner is easily punctured by the frame during installation, creating a hole exactly where water collects.
Leave the front edge of the sill pan unsealed. This is the drainage outlet. Sealing it shut — a common mistake — traps water inside the opening with nowhere to go except into your wall framing.
Apply Jamb and Head Flashing in the Correct Sequence
Flashing works on the same principle as roof tiles: upper layers always overlap lower layers so gravity carries water outward across each joint rather than behind it. Reversing even one layer in the sequence can direct rainwater straight into the wall cavity.
Follow this order precisely:
- Sill pan first — Already installed as described above. The drainage plane (building wrap or sarking) beneath the sill should be in place before the pan goes on, so the pan’s lower edge laps over it.
- Jamb flashing second — Apply self-adhesive flashing membrane up both jambs, overlapping the sill pan end dams by at least 50 mm. The membrane should wrap around the jamb face onto the interior framing by 30–50 mm, creating a continuous seal from exterior to interior.
- Head flashing third — Apply the head membrane across the top of the opening, overlapping the top of both jamb flashings. This ensures any water running down from above is directed over the jamb layers and out, never behind them.
- Building wrap integration last — The wall’s water-resistive barrier (WRB) is cut and lapped over the head flashing and tucked behind the jamb flashing at the sides. At the sill, the WRB sits behind (under) the sill pan so drainage flows over it.
Each overlap should be a minimum of 75 mm. For exterior sliding glass patio doors — which have wider frames and greater exposure to wind-driven rain than standard windows — increasing overlaps to 100 mm provides a worthwhile safety margin, particularly on exposed elevations.
Retrofit vs New Construction Waterproofing Differences
In new construction, the flashing integrates directly with the wall’s WRB because both are being installed at the same time. You have full access to the framing, the sarking is still exposed, and lapping each layer correctly is straightforward.
Retrofit installations — replacing a sliding outside glass door in an existing wall — are trickier. The original building wrap is already buried behind cladding, and you cannot easily lap new flashing into it without removing external finishes. The practical approach for retrofit work is:
- Cut the existing WRB back to expose 100–150 mm of framing around the opening.
- Install the sill pan and jamb/head flashing as described above, adhering the membrane edges to the exposed WRB where possible.
- Use a compatible liquid-applied flashing or flexible tape to bridge the junction between new membrane and old WRB, ensuring no gaps exist in the drainage path.
- Where the original WRB cannot be accessed (common in rendered brick veneer homes), rely on a generous sealant bed between the frame flange and the cladding face as your primary exterior weather barrier, with the sill pan acting as the failsafe drainage layer beneath.
In coastal regions and high-rainfall zones — much of the eastern seaboard from Sydney north through Queensland — consider doubling the sill pan membrane for redundancy. The additional layer adds minutes to the installation but provides a second line of defence if the primary membrane is damaged during frame placement.
With the opening fully flashed and every layer draining outward, the frame can go in knowing that any water reaching the rough opening will find its way back outside rather than into your wall cavity. The next stage — positioning and levelling the aluminium frame itself — demands equal precision, but for a different reason: getting the frame perfectly plumb and square is what ensures the panels slide freely and the seals compress evenly for decades to come.
Step 5 — Position, Shim, and Level the Aluminium Frame
A flashed opening is only half the equation. If the frame goes in crooked — even by a millimetre or two — the sliding panel will bind at one end, the weatherseals will compress unevenly, and water will find its way through the gaps. Shimming and levelling an aluminium frame is more demanding than working with timber because aluminium has zero flex. It will not bend to accommodate an out-of-plumb jamb the way a timber frame might. What you set is what you get, permanently.
Dry-Fit the Frame and Check for Plumb and Level
Before driving a single fixing, place the assembled frame into the opening without shims or fasteners. This dry-fit reveals how the frame sits relative to the rough opening and highlights any problem areas — a high spot on the sill, a bowed jamb, or an uneven head gap. You want a consistent clearance of 10–15 mm between the frame and the structure on all sides.
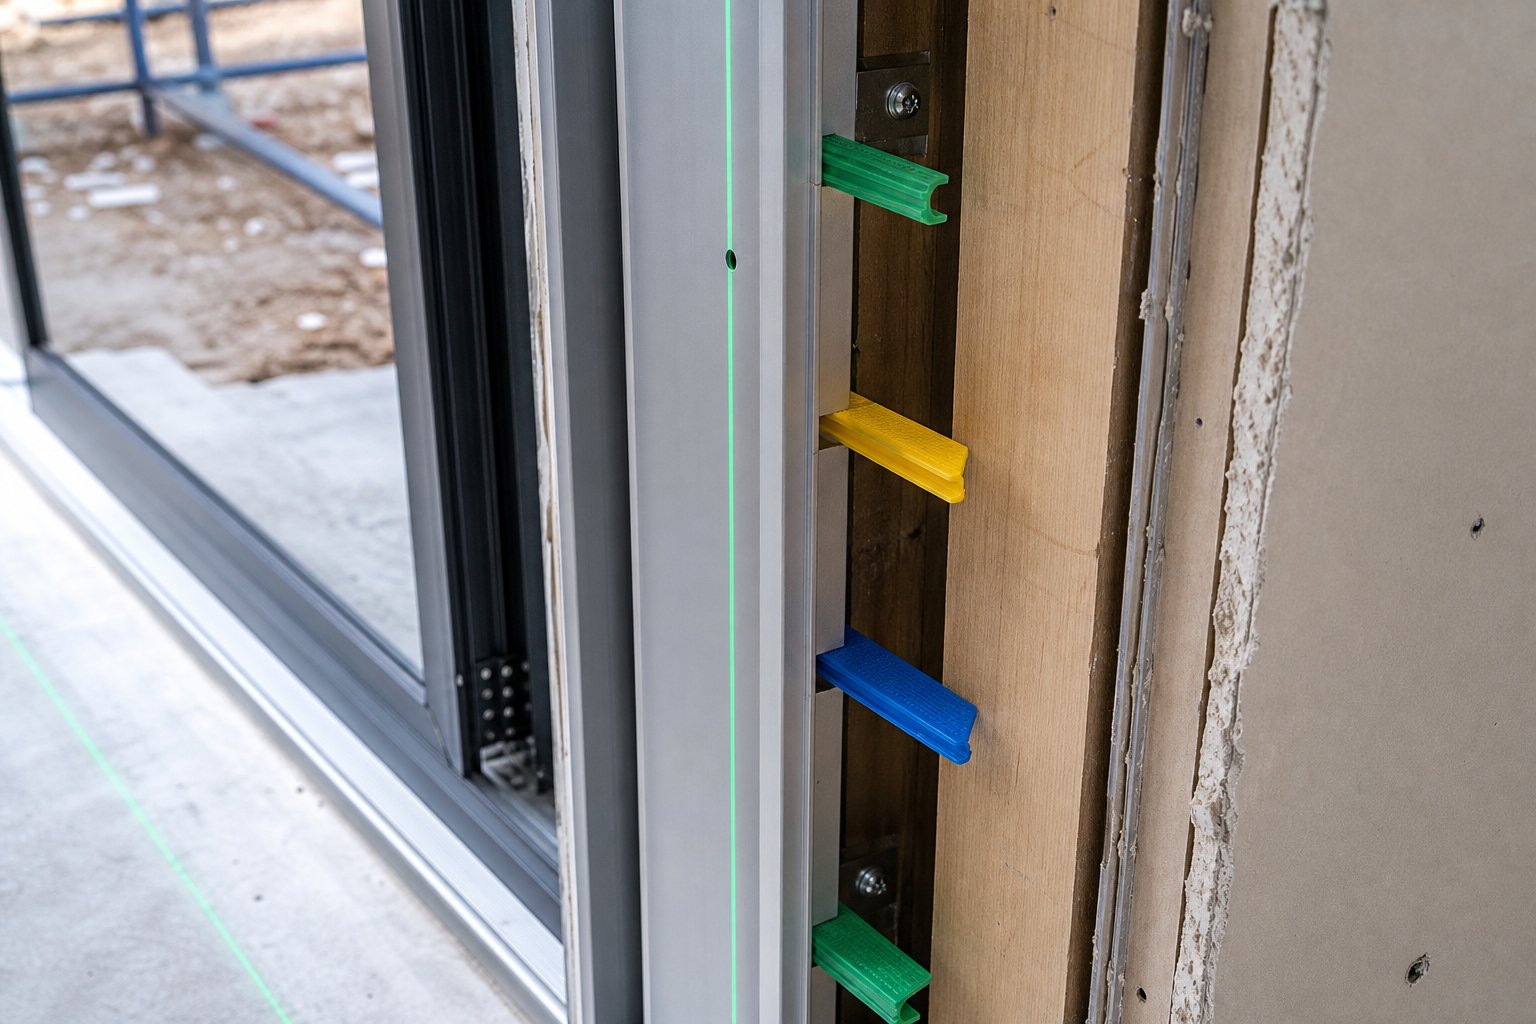
With the frame resting in position, check the sill track with a 1200 mm spirit level (or your laser level for wider openings). Then check each jamb for plumb and the head for level. Mark any spots where the gap is too tight or too wide — these are the locations that need shimming to bring the frame into true alignment. For a proper installation of sliding glass doors, the sill must be dead level along its entire length. Even a 2 mm fall across a 3 m track will cause the panel to drift under its own weight.
Shimming Locations and Correct Shim Materials
Material choice matters here. Timber shims are the traditional option, but they are the wrong choice for aluminium door frames. Timber absorbs moisture, swells, then shrinks as it dries — creating movement at the very points where the frame needs to stay locked in position. Over a few seasonal cycles, timber shims can introduce enough play to throw the frame out of alignment entirely.
Plastic or composite shims are the correct material. They are moisture-resistant, dimensionally stable, and manufactured to consistent thicknesses that allow precise stacking. Polypropylene shims in particular offer high compression strength without the brittleness of harder plastics, making them ideal for supporting heavy glazed panels.
Place shims at the following locations to properly fit a sliding door frame without distortion:
- Behind every fixing point — A screw driven into an unshimmed section of frame will pull the aluminium inward toward the stud, bowing the profile. Every fixing needs solid backing.
- At both sill corners — These carry the majority of the panel weight through the rollers, so they must be packed firmly and levelled precisely.
- At mid-span on the sill — Essential for openings wider than 2 metres, where the sill can sag between corner supports under the weight of the sliding panel.
- At the top, middle, and bottom of each jamb — Ensures the jamb remains plumb along its full height and does not bow inward when fixings are tightened.
- Adjacent to the lock strike location — The lock engagement point experiences repeated lateral force; solid shimming here prevents the jamb from flexing and causing lock misalignment over time.
Tap shims gently into place with a mallet rather than forcing them. The frame should feel snug and supported without any pressure that could distort the profile. Re-check plumb and level after shimming each section — what reads true at the sill can shift once the jambs are packed.
Accounting for Thermal Expansion in Aluminium Frames
Aluminium has a coefficient of linear thermal expansion of approximately 23 micrometres per metre per degree Celsius. In practical terms, that translates to roughly 2.4 mm of movement per metre of frame length across a 100°C temperature range. Australian conditions — where a dark-coloured west-facing frame can swing from near-freezing overnight to 60°C+ surface temperature in direct summer sun — make this expansion a real concern rather than a theoretical one.
When installing a patio door in aluminium, leave clearance gaps at the head and both jambs to accommodate this movement. For a 3 m wide frame, that means approximately 7 mm of free space at the head that is filled with flexible foam and sealant, never packed solid with rigid shims. At the jambs, 3–4 mm of clearance on each side allows lateral expansion without the frame pressing against the structure and buckling.
The final step before permanent fixing is to tighten in the correct sequence to avoid racking. Start with the sill — secure the centre shim point first, then work outward to the corners. Move to the jambs, fixing from the bottom up on each side alternately (left bottom, right bottom, left middle, right middle, and so on). Finish with the head. After each pair of fixings, re-check level and plumb. This alternating pattern distributes clamping force evenly and prevents the frame from being pulled out of square — a mistake that is almost impossible to correct once all fixings are driven home during a glass door installation.
With the frame shimmed, levelled, and lightly secured in its final position, the next stage locks everything permanently in place and brings the glazed panels into the picture.
Step 6 — Secure the Frame and Install the Sliding Panels
The frame is sitting in position, shimmed and level, held by just enough temporary fixings to keep it steady. This is the point of no return — permanent fastening commits the frame to its final alignment, and the glazed panels that follow will immediately reveal whether that alignment is true. Precision here determines whether your sliding glass door installation performs flawlessly or fights you every time you open it.
Secure the Frame with Correct Fastener Sequence
Driving all fixings in random order is a reliable way to rack an aluminium frame. The correct approach follows a deliberate sequence that distributes clamping force evenly and allows you to catch any drift before it compounds.
Work through the frame in this order:
- Sill first — Start at the centre fixing point and work outward toward each corner. After each screw, re-check the sill track with your level. The sill carries the panel weight through the rollers, so dead-level here is non-negotiable.
- Jambs from bottom up — Secure the lowest fixing on the left jamb, then the lowest on the right. Move to the middle fixings on each side, then the top. Alternating between jambs prevents one side from pulling the frame out of square.
- Head last — Fix from the centre outward, just as you did with the sill. Leave the head fixings slightly snug rather than fully torqued until the panels are installed — you may need minor adjustment once the weight is on the track.
Use your stainless-steel or bi-metal screws (selected in Step 2) and confirm each one bites into solid structure — stud timber, steel framing, or masonry anchor. A screw that spins without gripping means the shim behind that point has slipped or the substrate is compromised. Stop, re-shim, and re-fix before moving on. Check plumb and level after every second or third fastener. If a reading shifts, back off the last screw and investigate rather than hoping subsequent fixings will pull things back into line. They will not.
Install the Fixed and Sliding Panels
Panels go in with the fixed (stationary) panel first, followed by the sliding panel. This sequence matters because the fixed panel establishes the reference line for the interlock and weatherseal alignment. For anyone learning how to install a sliding glass door for the first time, this is the stage where a second pair of hands becomes essential — not optional.
- Tilt the fixed panel slightly and lift the top edge into the upper (inner) track channel. Push it fully up into the head recess.
- Swing the bottom of the panel inward and lower it onto the inner sill track. Slide the panel to its designated end (usually the lock jamb side) and secure it with the retaining brackets or head stops provided by the manufacturer.
- For the sliding panel, angle it the same way and lift the top into the outer head track.
- Lower the bottom onto the outer sill track, ensuring the rollers seat into the rail. You should feel a slight click or drop as the roller wheels engage the track profile.
- If your panels arrived unglazed — common with some commercial-grade systems — install the glass into the panel frame now using the glazing beads supplied. Press the rubber gasket into the bead channel first, then snap the aluminium bead into place starting at one corner and working around. Avoid using a metal tool directly against the glass edge; a plastic spatula or rubber mallet prevents chips.
A smooth sliding patio door installation depends on getting the fixed panel perfectly vertical and firmly locked in position before the sliding panel goes on. Any lean in the fixed panel will throw off the interlock gap and compromise the weatherseal contact between the two panels.
Engage Rollers and Verify Smooth Operation
With both panels on their tracks, slide the active panel back and forth through its full travel. It should glide with minimal effort — no scraping, no resistance at any point along the track. If it drags or feels heavy, the rollers may not be fully seated, or the sill track may have a slight bow from an over-tightened fixing beneath it.
At this stage, do not fine-tune the roller height adjustment screws yet (that comes in Step 7). What you are checking now is basic engagement: the rollers are sitting in the track, the panel is not rubbing on the head or sill, and the frame has not distorted under the panel weight. Push the panel to the closed position and look at the gap between the sliding panel and the lock jamb — it should be consistent from top to bottom. An uneven gap signals the frame is slightly out of plumb or the panel is sitting higher on one roller than the other.
If everything checks out — smooth travel, even gaps, no binding — go back and fully torque the head fixings you left snug earlier. Re-confirm level one final time. Installing a sliding glass patio door is a process of progressive commitment: each stage locks in the previous one, and this final tightening commits the frame to its permanent shape under load.
The panels are in and moving freely, but “freely” is not the same as “perfectly.” Fine-tuning the roller height, aligning the lock hardware, and dialling in that last millimetre of adjustment is what transforms a functional installation into one that operates effortlessly for years.
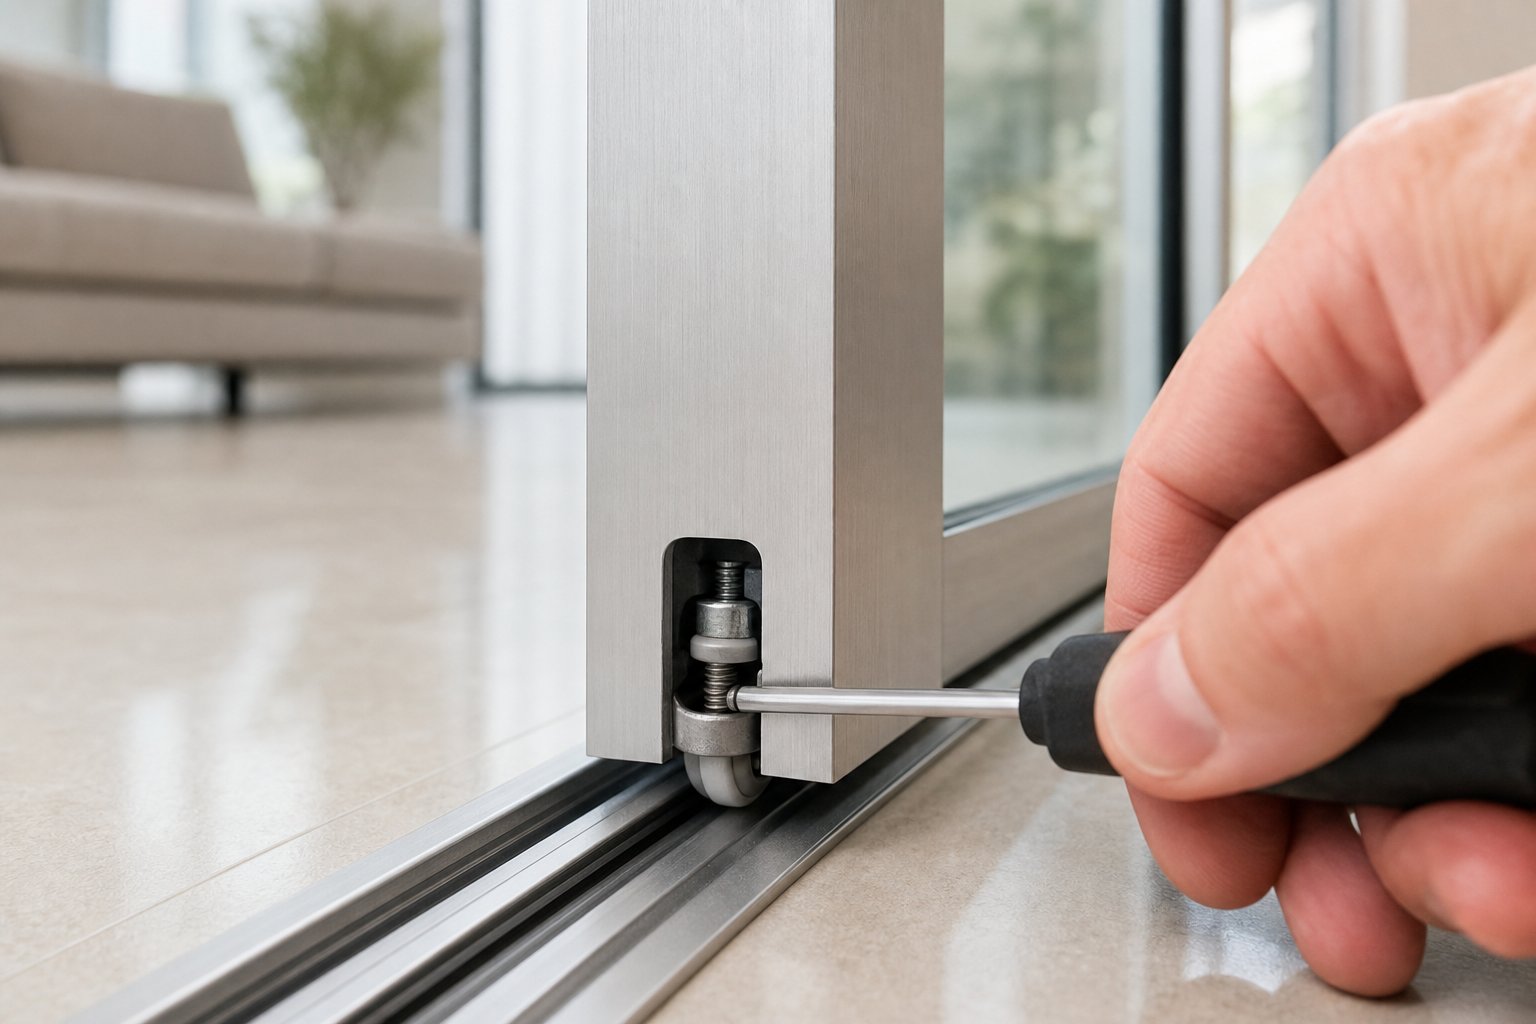
Step 7 — Adjust Rollers, Install Lock Hardware, and Test Operation
A sliding panel that moves is not the same as a sliding panel that performs. The difference lives in the final millimetres of adjustment — roller height that produces even gaps, lock hardware that engages cleanly on the first attempt, and weatherseals that compress uniformly across the full panel perimeter. This is the stage where a competent sliding glass door installer separates a good result from a mediocre one, and it requires patience more than strength.
Adjust Roller Height for Even Gaps and Smooth Glide
Each sliding panel rides on two roller assemblies mounted at the bottom corners. These rollers have adjustment screws that raise or lower each side of the panel independently, allowing you to fine-tune its position within the frame. The adjustment screws are typically accessed through small holes in the bottom rail or the inner face of the panel stile — look for a Phillips head, hex socket, or slotted screw recessed into a dedicated access port near each bottom corner.
The goal is threefold: the panel should sit parallel to the head track with an even gap along the top, rest at a consistent height above the sill track on both sides, and travel its full length without scraping or wobbling. Here is how to dial it in:
- Close the panel fully and examine the gap between the top of the sliding door glass panel and the head track. Measure at the lock side and the leading edge. If one end is higher than the other, the panel is sitting crooked on its rollers.
- Insert your screwdriver or Allen key into the adjustment port on the lower side (the side with the smaller gap at the top). Turn clockwise in quarter-turn increments — this typically raises that corner by engaging the roller further down against the track.
- Slide the panel open and closed after each quarter turn. Check the head gap again. Repeat until both sides show equal clearance.
- Once the panel is level, assess overall height. The panel should sit high enough that the bottom weatherseal lightly brushes the sill track without dragging, and low enough that the top does not rub the head channel. A gap of 2–3 mm at the head is typical for most aluminium systems.
- Test the slide with two fingers on the handle. A correctly adjusted panel on clean rollers should glide with minimal effort — no grinding, no bumping, no resistance at any point along the track.
Resist the temptation to over-raise the panel. Cranking the rollers too far down forces the panel upward into the head track, creating friction that feels like a stiff door rather than a roller problem. If the panel drags despite adjustment, the issue may be debris in the track or worn roller wheels rather than incorrect height — clean the track and inspect the rollers before adjusting further.
Install and Align the Lock and Strike Plate
Lock hardware goes in after roller adjustment, not before. The reason is simple: the lock and strike plate must align precisely for the bolt to engage, and that alignment depends entirely on where the panel sits once the rollers are set. Adjusting rollers after installing the lock means re-doing the strike alignment — wasted effort.
Most aluminium patio door sliders use a hook lock or multi-point locking system. The lock body mounts into a pre-machined mortise in the sliding panel stile, while the strike plate (keeper) fixes to the jamb or the edge of the fixed panel, depending on the system design. Installation follows this sequence:
- Insert the lock body into the panel mortise and secure it with the provided screws. Operate the handle to confirm the bolt or hook throws and retracts smoothly without binding against the mortise walls.
- Close the panel and mark the exact position where the bolt meets the jamb or fixed panel. Use the strike plate as a template to mark screw holes.
- Pre-drill pilot holes (undersized by 1 mm) and fix the strike plate in position.
- Test engagement by closing the panel and operating the lock. The bolt should slide into the strike receiver with minimal resistance — no forcing, no lifting the handle to make it catch.
- If the bolt hits above or below the receiver slot, adjust roller height in small increments until alignment is achieved. If it hits to one side, the strike plate position needs shifting laterally — loosen, reposition, and re-fix.
For multi-point locks (common on wider patio door slides and security-rated systems), each locking point must engage its corresponding keeper simultaneously when the handle is operated. This demands that the panel is perfectly parallel to the frame along its full height — any twist or lean will cause one point to engage while another misses.
Tip: The simplest way to verify correct roller adjustment is to test lock engagement. If the lock throws smoothly without lifting or forcing the handle, your rollers are at the right height. If you need to jiggle, lift, or push the panel to get the lock to catch, the rollers need further fine-tuning — the panel is sitting fractionally too high, too low, or out of parallel.
Why Hardware Must Match Your Door System
Generic rollers, locks, and handles sourced independently might appear to fit, but “fits” and “performs correctly” are not the same thing. Every aluminium sliding door system is engineered around specific relationships between components: the track profile geometry determines which roller wheel shape will seat properly, the panel weight dictates the roller bearing capacity required, and the lock throw distance must match the strike plate depth for full security engagement.
Mismatched hardware creates problems that surface gradually rather than immediately. A roller rated for 60 kg installed under a 90 kg panel will operate smoothly at first, then develop flat spots on the wheels within twelve months as the bearings deform under sustained overload. A lock designed for a different track profile may engage today but lose alignment as the slightly wrong roller geometry allows the panel to settle unevenly over time.
This is why integrated door systems — where the track, rollers, lock, glazing build-up, and weatherseals are designed as a matched package — outperform assemblies cobbled together from separate suppliers. The MEICHEN MA100 Sliding Door is a practical example of this principle: its roller assemblies are purpose-designed for the specific track profile, the multi-point lock is calibrated to the panel weight and stile dimensions, and the weatherseal compression is engineered around the exact clearances the roller adjustment range produces. Nothing is left to guesswork or on-site improvisation.
When sourcing replacement hardware or specifying components for a new installation, always reference the door system manufacturer’s specifications for roller type, weight rating, track compatibility, and lock model. A few dollars saved on generic parts today translates into premature wear, air leakage, and potential security compromise within a few years — the kind of slow-developing failure that is far more expensive to rectify than it was to prevent.
Hardware adjustment and lock alignment are the final mechanical steps. What remains is sealing the installation against weather, insulating the frame-to-wall gap, and completing the interior and exterior finish work that turns a functional door into a finished one.
Step 8 — Seal Gaps, Insulate, and Complete the Finish Work
The frame is fixed, the panels glide, and the lock engages cleanly. But the installation is not weatherproof yet. The gap between the aluminium frame and the rough opening — typically 10–15 mm on each side — is still open to air and water. Sealing this gap correctly is what delivers the long-term performance you have been building toward through every previous step.
Apply Exterior Sealant and Low-Expansion Foam
Start from the inside. Apply low-expansion polyurethane foam into the gap between the frame and the rough opening, filling it to roughly 70% depth. Low-expansion is critical — high-expansion foam generates enough pressure to bow aluminium profiles inward, distorting the track and binding the panels you just spent time adjusting. Allow the foam to cure fully (typically 4–6 hours depending on humidity) before trimming any excess flush with the frame edge using a utility knife.
On the exterior face, apply a continuous bead of neutral-cure silicone sealant where the frame meets the wall cladding. Neutral-cure formulations are essential for aluminium — acid-cure silicone (the type that smells like vinegar) attacks aluminium surfaces and breaks down the anodised or powder-coated finish over time. Tool the bead with a wetted finger or profiling tool to create a smooth, concave joint that sheds water rather than trapping it. Ensure the sealant bridges the frame flange and the cladding without gaps, but do not seal over the weep holes at the sill — these must remain open for drainage.
Install Interior Trim and Screen Door
Interior architraves or trim boards conceal the foam-filled gap and provide a finished appearance. Fix timber or MDF architraves with brad nails or adhesive, leaving a 1–2 mm clearance between the trim and the aluminium frame to allow for differential thermal movement. Caulk this fine gap with a paintable acrylic sealant for a seamless look once painted.
If your door system includes an outer screen track, this is the stage to install a sliding screen door. Many homeowners ask how do I install a sliding screen door — the process is straightforward on systems designed for it. Lift the screen door’s top rollers into the upper screen channel, then use a flat putty knife or screwdriver to lever the lower wheels over the bottom screen rail. Adjust the roller height screws until the screen sits level and slides freely without dragging. Set the latch hook on the jamb to align with the screen frame’s catch, and test that it holds securely when closed.
For a smooth sliding screen door installation, apply a light coat of silicone spray to the screen track before fitting the door — this reduces friction and prevents the lightweight frame from juddering during operation. If you need to install a screen door on a sliding door system that did not originally include a screen track, aftermarket clip-on or screw-fixed screen channels are available to suit most standard aluminium frame profiles.
Final Operational and Weather-Tightness Check
Before calling the job complete, run through a systematic inspection that covers every element of the installation. This final check catches small issues — a missed weep hole cover, a seal not fully compressed, a lock that needs one more quarter-turn of roller adjustment — before they become problems during the first storm.
- Lock engagement — Close the panel and operate the lock. It should throw fully without lifting or forcing the handle. Multi-point locks must engage all points simultaneously.
- Weatherseal compression — Inspect the perimeter seals with the panel closed. They should be visibly compressed against the frame on all four sides with no daylight gaps. Slide a piece of paper between the seal and frame — consistent resistance around the perimeter indicates even compression.
- Weep hole clearance — Confirm the drainage weep holes at the base of the outer track are unobstructed by sealant, foam, or debris. Pour a small amount of water into the track and verify it drains freely to the exterior.
- Panel travel — Slide the panel through its full range. It should move smoothly with two-finger pressure on the handle, with no scraping, bumping, or dead spots.
- Screen door operation — If fitted, confirm the screen slides independently without catching on the main door frame or latch hardware.
- Exterior sealant continuity — Walk the outside perimeter and check for missed sections, bubbles, or areas where the sealant has pulled away from the substrate.
- Interior foam and trim — Verify no foam has expanded beyond the trim line, and that architraves sit flush without bowing.
If any point fails, address it now rather than assuming it will settle in. Aluminium frames do not shift or bed in over time the way timber might — what you see today is what you will have in ten years. A thorough final inspection is the difference between a door that performs through every winter storm and one that develops a mysterious damp patch on the carpet six months down the track.
Step 9 — Troubleshoot Common Problems and Maintain Your Door
Even a well-executed installation can develop issues over time. Tracks collect grit, rollers wear, seals lose their spring, and seasonal temperature swings shift alignment by fractions of a millimetre. Knowing how to fix a sliding glass door when something feels off — rather than ignoring it until the problem compounds — saves you from expensive repairs or a premature sliding glass doors replacement down the line.
Fix Sticking Panels and Misaligned Rollers
A panel that drags, judders, or requires shoulder force to move is telling you something specific. The cause is almost always one of three things: debris in the track, rollers that have dropped out of adjustment, or a frame that has racked slightly under load. The table below maps common symptoms to their likely causes and fixes.
| Problem | Likely Cause | Solution |
|---|---|---|
| Panel drags or feels heavy across full travel | Dirt, sand, or grit packed into the sill track | Vacuum the track thoroughly, wipe with a damp cloth, then apply silicone-based lubricant (never oil-based, which attracts more debris) |
| Panel sticks at one specific point | Dent or raised burr in the aluminium track | Smooth the damaged section with fine emery paper or a flat file, then lubricate |
| Panel scrapes at one end but not the other | Roller height uneven — one side has dropped | Adjust the roller screw on the low side in quarter-turn increments until the panel sits level (see Step 7) |
| Panel binds progressively worse over months | Frame racking from foundation movement or over-tightened fixings | Check frame for plumb; loosen fixings, re-shim, and re-secure if the frame has distorted |
| Lock will not engage without lifting the handle | Panel sitting too low — rollers worn or maladjusted | Raise roller height until the lock bolt aligns with the strike plate receiver |
| Grinding noise during travel | Roller wheels worn flat or bearings seized | Replace the roller assembly with a unit matched to your track profile and panel weight |
If roller replacement is needed, source assemblies specified for your door system rather than generic alternatives. Mismatched rollers may physically fit the track but wear prematurely under incorrect load distribution — a common trigger for homeowners searching how to replace a sliding glass door when the real issue was only the hardware.
Solve Water Ingress and Air Leakage Issues
Water appearing inside the sill track or pooling on the floor beneath the door points to a drainage or sealing failure. Before assuming you need to replace sliding door components, work through these causes systematically:
- Blocked weep holes — The most common culprit. Dirt, leaves, or excess sealant can obstruct the small drainage slots at the base of the outer track. Clear them with a thin wire or compressed air, then test by pouring water into the track and confirming it exits freely to the exterior.
- Missing or failed sill flashing — If water bypasses the frame entirely and appears on the wall framing below, the sill pan may have been omitted or punctured during installation. This requires removing the frame to inspect and repair the flashing layer — a significant job, but the only permanent fix.
- Incorrect sealant application — Sealant applied over the weep holes traps water inside the track with nowhere to drain. Remove the offending sealant carefully with a utility knife and re-seal only the frame-to-wall junction, leaving drainage paths clear.
Excessive air leakage — noticeable as draughts around the closed panel — typically stems from weatherseals that have taken a compression set (permanently flattened) or shifted out of their channel. Run your hand slowly around the panel perimeter with the door closed; cold spots reveal the gap locations. Replacing glass on a sliding door is rarely the answer to air leakage — the seals between panel and frame are almost always the failure point. Replacement weatherseal strips are available in standard profiles and press into the existing channel without tools.
For persistent water issues in coastal or high-rainfall areas, consider whether the original installation included adequate flashing. Many older aluminium doors — particularly those installed before current NCC requirements — lack proper sill pans entirely. In these cases, a sliding glass doors replacement with modern flashing and drainage detailing is often more cost-effective than repeatedly patching a fundamentally flawed installation.
Ongoing Maintenance Schedule for Aluminium Sliding Doors
Aluminium is low-maintenance compared to timber, but it is not no-maintenance. A simple routine keeps the door operating smoothly and extends the life of rollers, seals, and track surfaces by years.
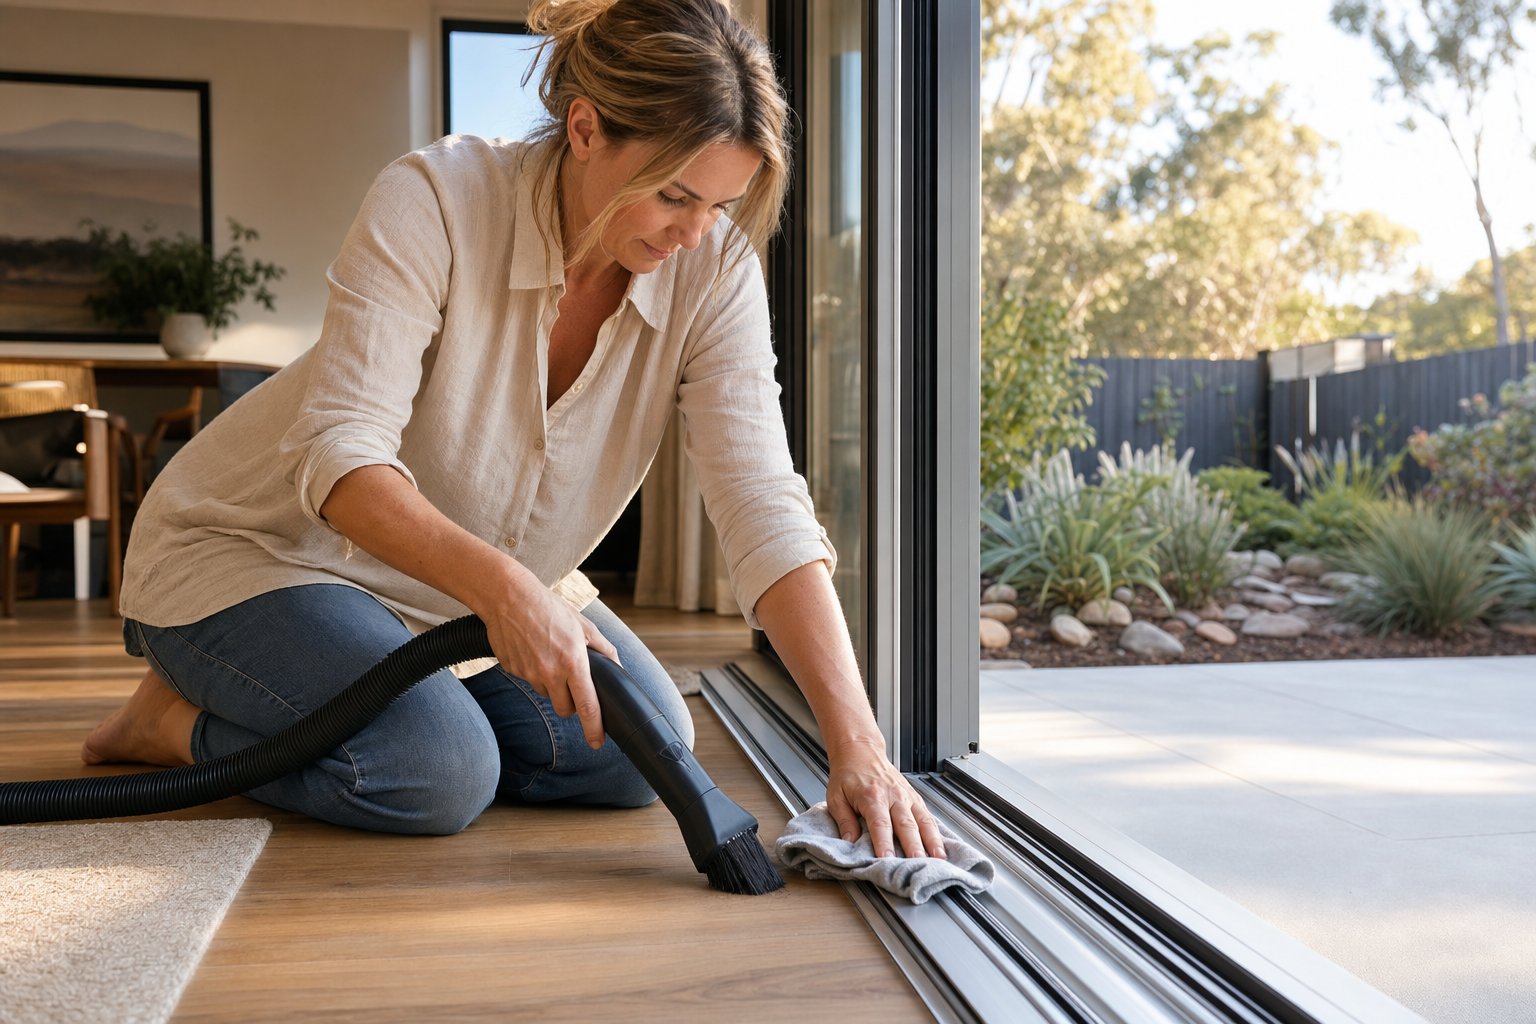
- Every 3 months — Vacuum or brush out the sill track to remove accumulated dirt, sand, and leaf litter. Wipe the track with a damp cloth. Clear weep holes with a thin wire or pipe cleaner and test drainage with a splash of water.
- Every 6 months — Inspect weatherseals around the full panel perimeter for cracking, compression set, or sections that have pulled out of their channel. Press any displaced sections back into place; replace seals that no longer spring back when compressed.
- Annually — Lubricate rollers with a silicone-based spray applied through the adjustment screw access ports. Operate the panel back and forth several times to distribute the lubricant across the bearings. Avoid petroleum-based products, which degrade rubber seals and attract grit.
- Annually — Clean the aluminium frame and tracks with a mild detergent solution (not abrasive cleaners or solvents). Rinse thoroughly. In coastal locations within 5 km of the ocean, increase frame washing to every 3 months to remove salt deposits that accelerate surface corrosion.
- Every 2 years — Check all frame fixings for tightness. Thermal cycling can gradually loosen screws over time. Re-torque any that have backed out, and inspect the surrounding aluminium for signs of galvanic corrosion (white powdery residue around screw heads).
- Every 5 years — Assess roller condition by lifting the panel slightly at each end. Excessive play or grinding resistance indicates worn bearings. Replace roller assemblies proactively rather than waiting for complete failure, which can score the track surface and create a more expensive repair.
Staying ahead of wear is always cheaper than reacting to failure. A door that receives fifteen minutes of attention each quarter will still be gliding smoothly in twenty years — while a neglected one may force you to replace sliding glass door glass, rollers, and seals all at once when multiple components fail together. The few minutes invested in routine care protect the hours of careful work you put into the original installation.
Frequently Asked Questions About Installing Aluminium Sliding Doors
1. Can I install an aluminium sliding door myself or do I need a professional?
A competent DIYer with a helper can handle a like-for-like replacement where the rough opening already exists. The work requires accurate measuring, correct flashing sequence, precise shimming with plastic shims, and careful roller adjustment. However, if you need to cut a new opening into a load-bearing wall, you will need a structural engineer to size the lintel and a licensed builder to complete the framing. Systems like the MEICHEN MA100 Sliding Door come with specific installation parameters for track, roller, and lock alignment that simplify the process when followed correctly.
2. How much clearance do I need around an aluminium sliding door frame?
Allow 10-15 mm of clearance between the aluminium frame and the rough opening on all sides. Within that gap, you must account for thermal expansion — aluminium expands approximately 2.4 mm per metre over a 100-degree Celsius temperature range. For a 3 m wide frame in Australian conditions, this means roughly 7 mm of free space at the head filled with flexible foam and sealant rather than rigid packing. At the jambs, 3-4 mm of clearance on each side accommodates lateral expansion without buckling.
3. Why is my aluminium sliding door hard to open and how do I fix it?
A stiff or dragging panel is usually caused by one of three issues: debris packed into the sill track, rollers that have dropped out of adjustment, or a frame that has racked slightly. Start by vacuuming the track and wiping it clean, then apply silicone-based lubricant. If the panel still drags, locate the roller adjustment screws at the bottom corners of the panel stile and turn them in quarter-turn increments to raise the panel. If the problem worsens over months, check the frame for plumb — foundation movement or over-tightened fixings can distort the aluminium profile.
4. Do I need a building permit to replace a sliding door in Australia?
In most Australian jurisdictions, a like-for-like replacement within the same rough opening does not require council approval. However, the moment you enlarge the opening, create a new one, or modify a load-bearing wall, you typically need a building permit or complying development certificate. The new door must also comply with NCC energy provisions, AS 2047 for weather resistance, AS 1288 for safety glazing, and potentially BAL ratings if your property is in a bushfire-prone area.
5. What type of screws should I use to fix an aluminium door frame?
Use stainless-steel fasteners (Grade 304 for most locations, Grade 316 for coastal properties within 1 km of the ocean) or bi-metal screws designed for steel framing. Never use plain galvanised steel screws — once the zinc coating wears through, the carbon steel accelerates galvanic corrosion of the aluminium, causing white powdery oxidation and weakened screw holes. Adding nylon or EPDM washers between the screw head and the aluminium frame provides an extra isolation barrier against metal-to-metal contact.
More Window & Door Guides