Diagnose Why Your Aluminium Bifold Doors Are Misaligned
A panel scraping against the threshold every time you slide it open. A sliver of daylight visible between two closed panels. A lock that used to click into place but now refuses to engage no matter how hard you push. These are the telltale signs that your aluminium bifold doors have shifted out of alignment, and they tend to get worse if left unaddressed.
The good news is that learning how to adjust bifold doors does not require specialist training or expensive equipment. Aluminium bifold systems are engineered with precision adjustment points built directly into the rollers, hinges, and locking hardware. Most aluminium bifold door alignment problems can be corrected in under 30 minutes using a couple of Allen keys and a spirit level. The key is diagnosing the right symptom first, then targeting the correct adjustment point rather than guessing.
This guide follows a complete adjustment lifecycle: diagnose the issue, prepare your tools safely, make targeted corrections, verify the result, and set up a maintenance routine that prevents the problem from returning.
Common Signs Your Bifold Doors Need Adjusting
If your bifold doors are not closing properly, the symptom itself points toward the cause. Use the table below to match what you are experiencing with the most likely adjustment needed.
| Symptom | Likely Cause | Adjustment Area |
|---|---|---|
| Panel dragging on the threshold | Roller height too low | Roller or carriage height screw |
| Visible gap at the top of a panel | Hinge drop or panel sag | Roller height (raise panel) or hinge tightening |
| Lock or latch not engaging | Lateral misalignment between panel and frame | Keep plate position or lateral hinge adjustment |
| Stiff folding or resistance when opening | Dirty track, worn rollers, or pivot binding | Track cleaning, lubrication, or pivot screw adjustment |
| Uneven gaps between panels | Lateral shift in one or more panels | Hinge carrier or pivot bracket lateral screws |
Pinpointing the symptom before picking up a tool saves time and prevents unnecessary adjustments that can create new problems elsewhere in the door set.
Why Aluminium Systems Differ From Timber or uPVC
Aluminium behaves differently from timber and uPVC in ways that directly affect how to adjust bi fold doors made from this material. Thermal expansion is one factor. Aluminium expands and contracts with temperature changes across seasons, and while the movement is small, it can shift panel alignment enough to affect seal compression and lock engagement over a full summer-to-winter cycle. A door that closes perfectly in April may bind slightly in January.
Weight is another consideration. Aluminium bifold panels carry substantial double-glazed units, with individual panels typically weighing between 40 and 80 kg depending on glass specification and panel dimensions. That mass places constant load on rollers, hinges, and tracks. Correct adjustment is not just about smooth operation today; it protects hardware from premature wear over the life of the system.
Powder-coated finishes also demand care during adjustment work. Unlike raw timber that can be sanded or uPVC that flexes under pressure, aluminium frames will chip or scratch if tools slip or panels are forced. Protecting the finish while working is part of the process, not an afterthought.
These material-specific factors mean the adjustment approach for aluminium bifolds is more precise and incremental than what you might be used to with other door types. Small, measured corrections deliver better results than large, aggressive turns of the Allen key.
Step 1 – Gather Your Tools and Prepare Safely
Before touching a single adjustment screw, lay out everything you need within arm’s reach. Aluminium bifold panels are heavy, awkward to manoeuvre, and unforgiving if something goes wrong mid-adjustment. Having the right tools needed to adjust bifold doors eliminates the temptation to improvise with the wrong size key or an ill-fitting screwdriver, both of which risk damaging hardware or rounding out screw heads.
Essential Tools for Bifold Door Adjustment
The list is short, and most homeowners already own the majority of these items. Gather the following before you start:
- Allen keys (4 mm and 5 mm hex) – The primary tools for roller height screws, hinge adjustments, and cam mechanisms. The bifold door Allen key size varies slightly between manufacturers, so check your system documentation. A 6 mm key is occasionally needed for older or commercial-grade systems.
- Phillips-head screwdriver (PZ2) – Used for keep plate screws, pivot bracket retaining screws, and some cover cap fixings.
- Flat-head screwdriver – Handy for popping off plastic access caps that conceal adjustment points, and for fine-tuning snugger brackets on some systems.
- Spirit level (minimum 600 mm) – Essential for confirming panels sit level across the top edge and plumb along vertical edges. A longer level gives more accurate readings across wide openings.
- Tape measure – For checking gap consistency between panels and between panels and the frame. You will be measuring differences of 1–2 mm, so a quality tape with a clear metric scale matters.
- Silicone-based lubricant – Applied to rollers, hinges, pivot points, and locking mechanisms after adjustment. Avoid petroleum-based products, which degrade rubber seals and attract grit.
- Soft cloths – For wiping tracks clean before adjustment and protecting powder-coated surfaces when resting tools against the frame.
- Painter’s tape – Use it to mark reference points on the frame before making changes. A small strip at the current panel position lets you measure exactly how far you have moved things if you need to reverse an adjustment.
A rubber mallet and thin packing shims (2–5 mm) are also worth having nearby for situations where a panel needs gentle repositioning or temporary support during pivot adjustments.
Safety Precautions for Heavy Glazed Panels
This is not a lightweight closet door project. A typical external aluminium bifold panel with double glazing weighs between 40 and 80 kg, and some larger panels exceed that. Dropping one can cause serious injury, shatter the glass unit, or damage the threshold and track beyond simple repair.
Follow these precautions every time you adjust a bifold door:
- Work with a second person if any adjustment requires loosening hinges or pivots. Never loosen more than two fixing points at once, or the panel may swing free unexpectedly.
- Wear safety gloves with good grip. Aluminium edges can be sharp, and glazed panels are slippery when handled with bare hands.
- Never position yourself beneath an unsupported panel. If a panel needs to be lifted or shifted, support it from the side.
- Secure panels in the open-stack position before working on any individual door. This prevents the set from folding or sliding while you are focused on a single panel’s hardware.
The reassuring reality is that most routine alignment corrections do not require panel removal at all. Well-engineered aluminium bifold systems, such as the MC80 Bifold Door, feature integrated adjustment hardware designed for accessible fine-tuning directly through the panel face or edge. Roller height screws, lateral hinge adjustments, and compression cams are all reachable with the panels in situ, meaning you can correct alignment without dismantling anything.
That said, always consult your system-specific documentation for exact Allen key sizes and the available adjustment range for each mechanism. Manufacturers design their hardware with defined travel limits, and exceeding those limits can strip threads or push components out of their housing. If your system’s manual is missing, the manufacturer’s website typically has downloadable installation and adjustment guides with diagrams showing screw locations for your exact model.
With your tools laid out and safety measures in place, the next step is identifying exactly which type of bifold system you are working with, because the location of adjustment points differs between top-hung and bottom-rolling configurations.
Step 2 – Identify Your Bifold Door System Type
Every aluminium bifold door falls into one of two categories, and knowing which one you have determines where to find the adjustment screws. Get this wrong and you will be hunting for hardware that does not exist on your system. A quick visual check is all it takes.
Top-Hung vs Bottom-Rolling Systems
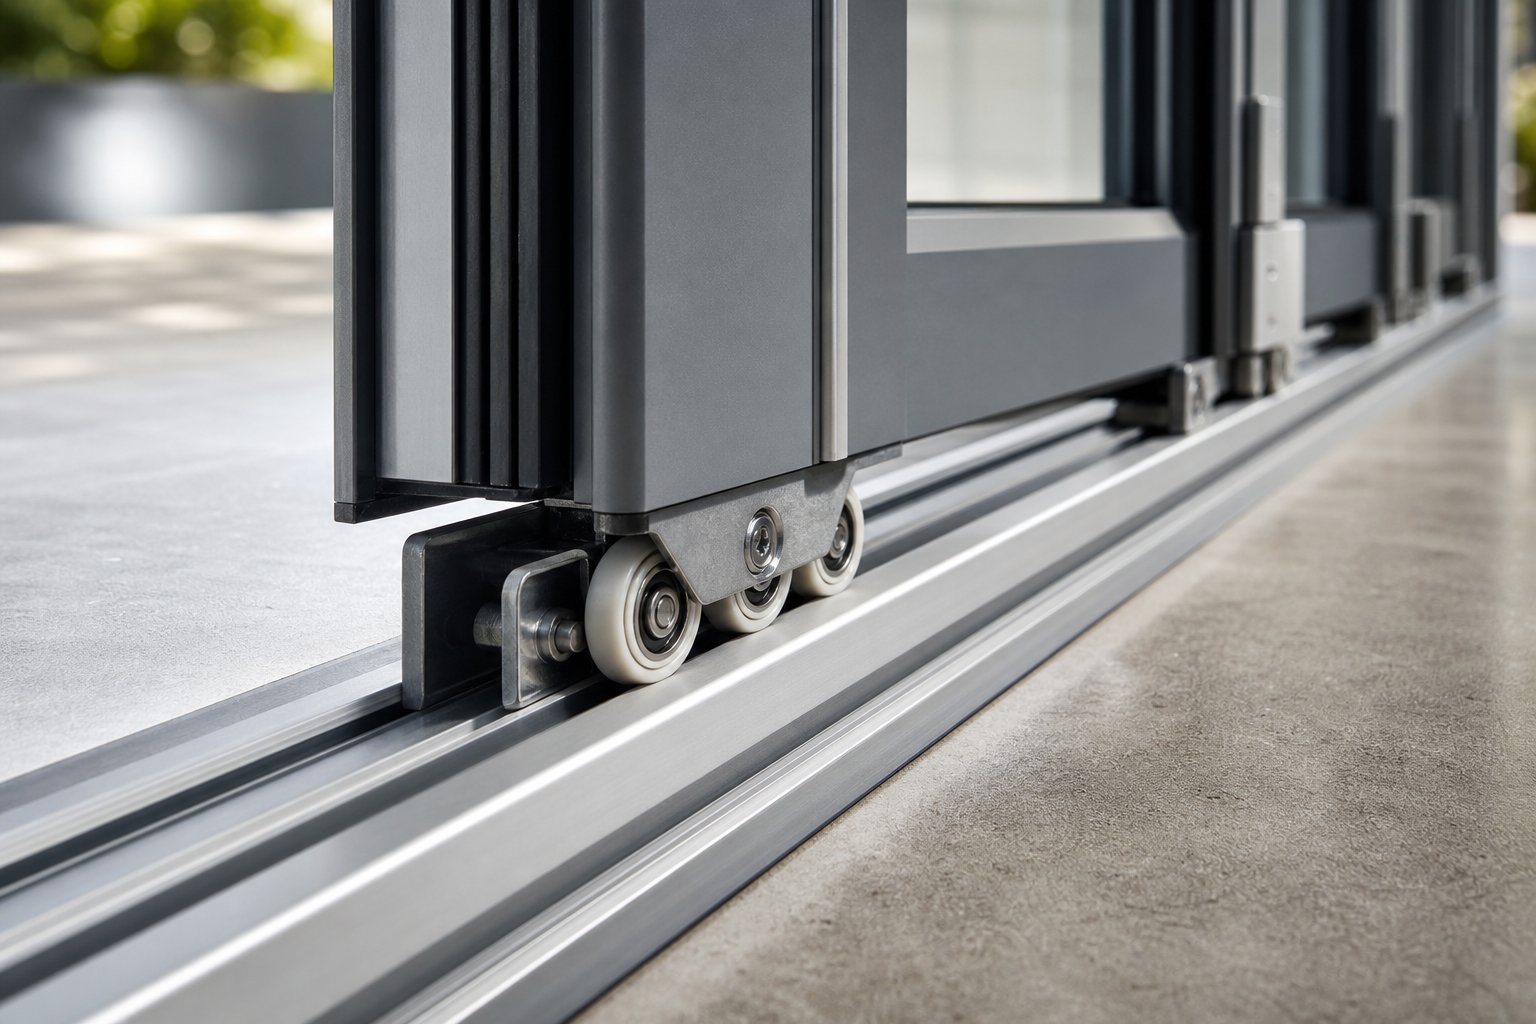
The distinction comes down to where the panel weight is carried. Top-hung bifold doors suspend the full weight of each panel from an overhead track, with a minimal floor channel acting only as a guide to prevent the panels swinging inward or outward. Bottom-rolling systems do the opposite — panels ride on roller carriages along a prominent floor track, while a lighter top rail keeps everything aligned vertically.
Here is how to tell them apart at a glance:
- Top-hung system: Look up. You will see a substantial, heavy-duty head track recessed into or mounted against the lintel. The floor channel is shallow and narrow, often just a slim fin or guide pin slot. The overhead structure needs a strong lintel because it bears both the panel weight and the load from the wall or roof above.
- Bottom-rolling system: Look down. A prominent aluminium rail sits on or is recessed into the threshold, and you can usually see the roller carriages or wheels sitting inside the track channel when the panels are open. The top track is lighter and serves primarily as a guide rather than a load-bearing element.
Most external aluminium bifold doors installed in Australian homes use bottom-rolling configurations. The lower centre of gravity provides smoother operation and greater stability, which matters when panels carry heavy double-glazed units. Top-hung systems appear more often in commercial fitouts or where a flush threshold is a design priority.
Understanding this distinction is essential for top hung bifold door adjustment versus bottom rolling bifold door adjustment, because the height screws, lateral adjustments, and pivot mechanisms sit in different locations on each type.
Locating Adjustment Points on Popular Aluminium Systems
Regardless of whether your doors are made by Origin, Schuco, Reynaers, Smart Systems, AluK, or another manufacturer, the adjustment logic follows the same universal principles. Exact screw positions vary between brands, but every system provides three categories of adjustment:
- Height adjustment – controlled by the roller carriage screws (bottom-rolling) or the hanging bracket mechanism (top-hung). These raise or lower individual panels to correct dragging or uneven gaps at the top.
- Lateral adjustment – controlled by hinge carrier screws or pivot bracket mechanisms. These shift panels left or right to equalise spacing between adjacent doors.
- Compression adjustment – controlled by keep plates and striker plates on the frame. These determine how tightly the panel pulls against weather seals when locked.
To find the specific screws on your system, check the bottom edge of each panel first. On bottom-rolling doors, a small plastic cap at the lower corner of the panel face or stile conceals the roller height screw — pop it off with a flat-head screwdriver. On top-hung systems, the equivalent adjustment is accessed from the top of the panel or within the overhead track housing.
If you cannot locate the adjustment points visually, your manufacturer’s installation guide will include diagrams showing exact positions. Knowing how to adjust bi folding doors starts with finding these access points, and once you have identified them, the actual turning and measuring process is straightforward. The critical thing is to work on the correct screw for the symptom you diagnosed earlier — height screws fix vertical problems, lateral screws fix horizontal ones, and keep plates fix locking issues.
Step 3 – Adjust Panel Height Using the Rollers
Height is the single most common adjustment on aluminium bifold doors, and it is also the most satisfying to fix. A panel that drags across the threshold or leaves a visible gap at the top has usually dropped by just a few millimetres — enough to cause problems, but well within the correction range of the roller mechanism sitting beneath it.
The bifold door roller adjustment process is controlled by a screw housed within the roller carriage at the bottom of each panel. On bottom-rolling systems, this screw is typically accessible from the panel face or the bottom edge, hidden behind a small plastic cap. Pop the cap off with a flat-head screwdriver and you will see a hex socket — usually 4 mm or 5 mm — recessed into the roller housing. On top-hung systems, the equivalent height screw sits within the overhead carriage bracket, accessed from the top of the panel or through a slot in the head track.
Raising or Lowering Panels With Roller Screws
Insert your Allen key into the hex socket and turn clockwise to raise the panel or anti-clockwise to lower it. This is the standard convention across most aluminium bifold manufacturers, though a handful of systems reverse the direction — check your documentation if the panel moves opposite to what you expect.
The critical rule here is to work in quarter-turn increments. A quarter turn typically moves the panel between 0.5 mm and 1 mm vertically, which sounds tiny but makes a noticeable difference to gap consistency and threshold clearance. After each quarter turn, step back and visually check the panel position. Open and close the door to feel whether the drag has reduced or the gap has improved. Resist the urge to crank the screw multiple full turns at once — overcorrecting creates new problems with adjacent panels and lock engagement.
If your system has two roller carriages per panel (common on wider doors), adjust both sides equally. Raising only one side tilts the panel diagonally, which shifts the problem from a height issue to a lateral alignment issue.
Measuring Correct Panel Height and Gap Tolerances
Guesswork leads to repeated adjustments. Use your tape measure and spirit level to confirm the panel is sitting where it should be:
- Threshold clearance: The gap between the bottom of the panel and the top of the threshold should measure 2–4 mm. Less than 2 mm risks contact during thermal expansion in summer. More than 4 mm compromises the weather seal and allows draughts.
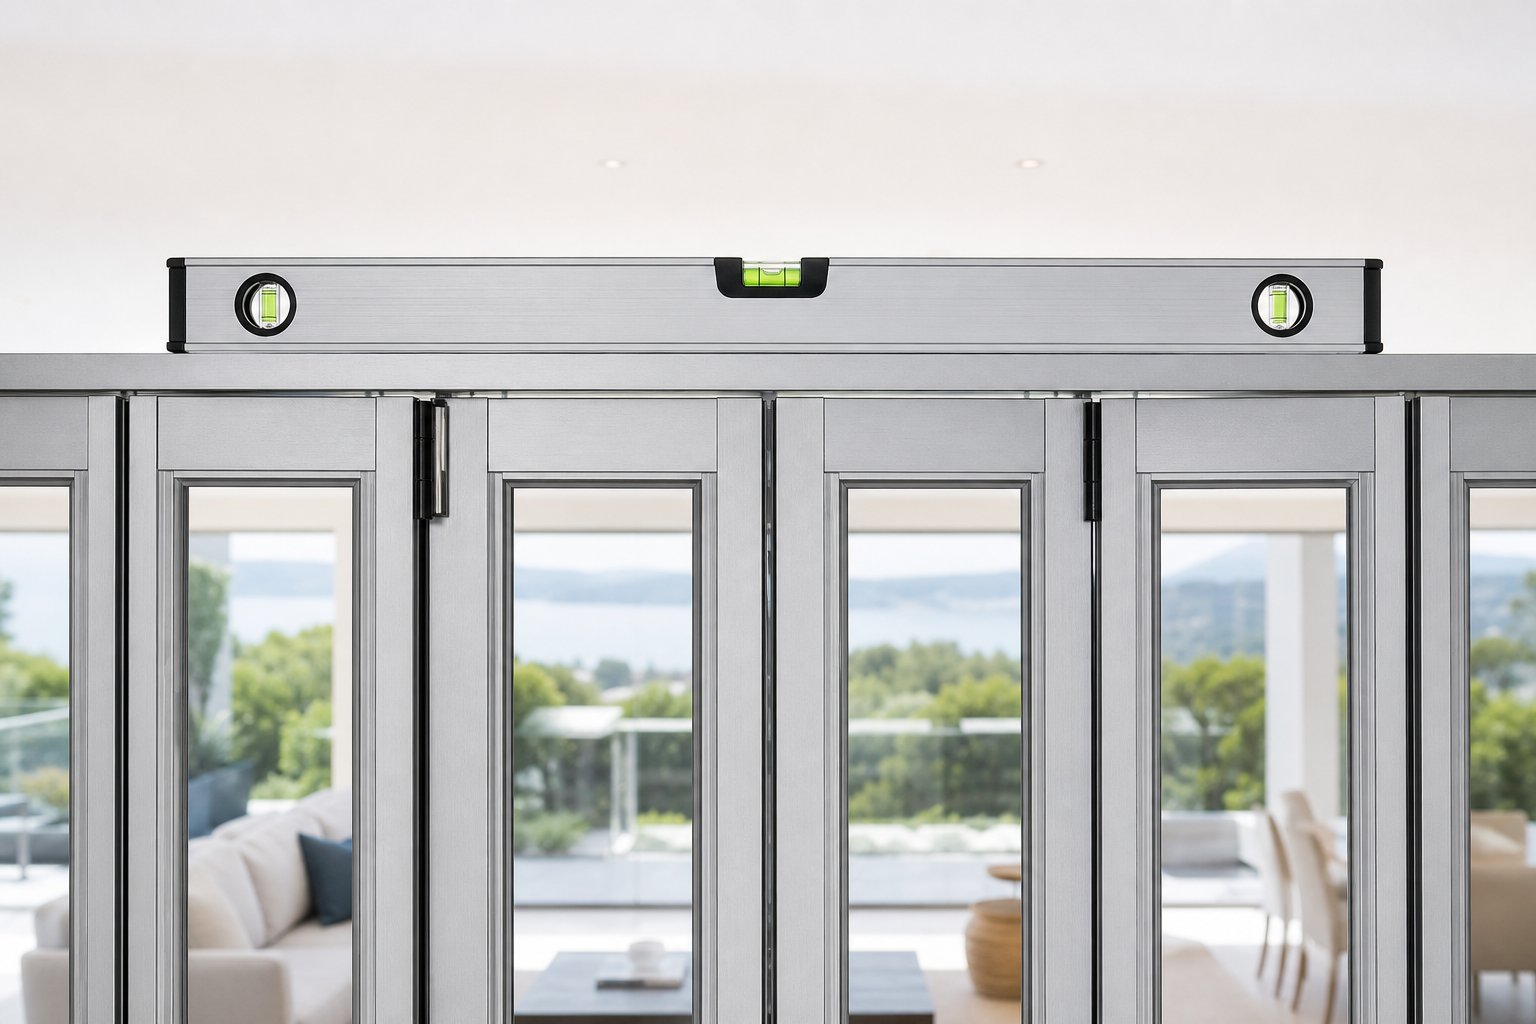
- Top edge level: Place your spirit level across the top edge of the closed panel. The bubble should sit centred. If it drifts to one side, one roller is higher than the other and needs a compensating quarter turn.
- Panel-to-panel flush: Rest a straight edge or long spirit level horizontally across the top of two adjacent closed panels. Any step between them indicates one panel is sitting higher than its neighbour. The target is a flush transition with no more than 1 mm difference.
When multiple panels need correction, always start with the lead door — the panel closest to the primary jamb that opens first. Set this panel to the correct height and confirm it is level, then move outward to the next panel in the set. Each subsequent panel gets adjusted to match the one beside it. Working in this sequence prevents a cascading effect where correcting one panel throws off three others.
If a single panel sits noticeably higher than both its neighbours and the roller screw is already near the bottom of its travel range, the issue may not be the roller at all. A hinge that has loosened over time can allow the panel to ride up on its pivot, mimicking a roller height problem. Check that all hinge screws are tight before continuing to wind the roller adjustment further than it wants to go.
Height sorted, the next variable to address is lateral positioning — the side-to-side spacing that determines whether your panels fold cleanly or bind against each other mid-travel.
Step 4 – Fix Lateral Alignment and Panel Gaps
Lateral adjustment controls the side-to-side position of each panel within the frame. Where height correction fixes dragging and top gaps, lateral correction fixes the spacing between panels — those vertical lines of daylight (or lack thereof) that tell you whether the doors will fold cleanly or bind against each other. Adjusting bifold door panels laterally is a finer operation than height work, because even a half-millimetre shift on one panel changes the gap geometry across the entire set.
The lateral adjustment screws sit on the hinge mechanism or pivot carrier, not on the roller. On most aluminium systems, you will find them on the hinge body itself — a small hex screw that, when turned, shifts the panel left or right relative to its hinge axis. Some systems use an eccentric cam rather than a direct-drive screw, but the principle is identical: turning the mechanism pushes the panel sideways within the available travel range.
Correcting Uneven Gaps Between Panels
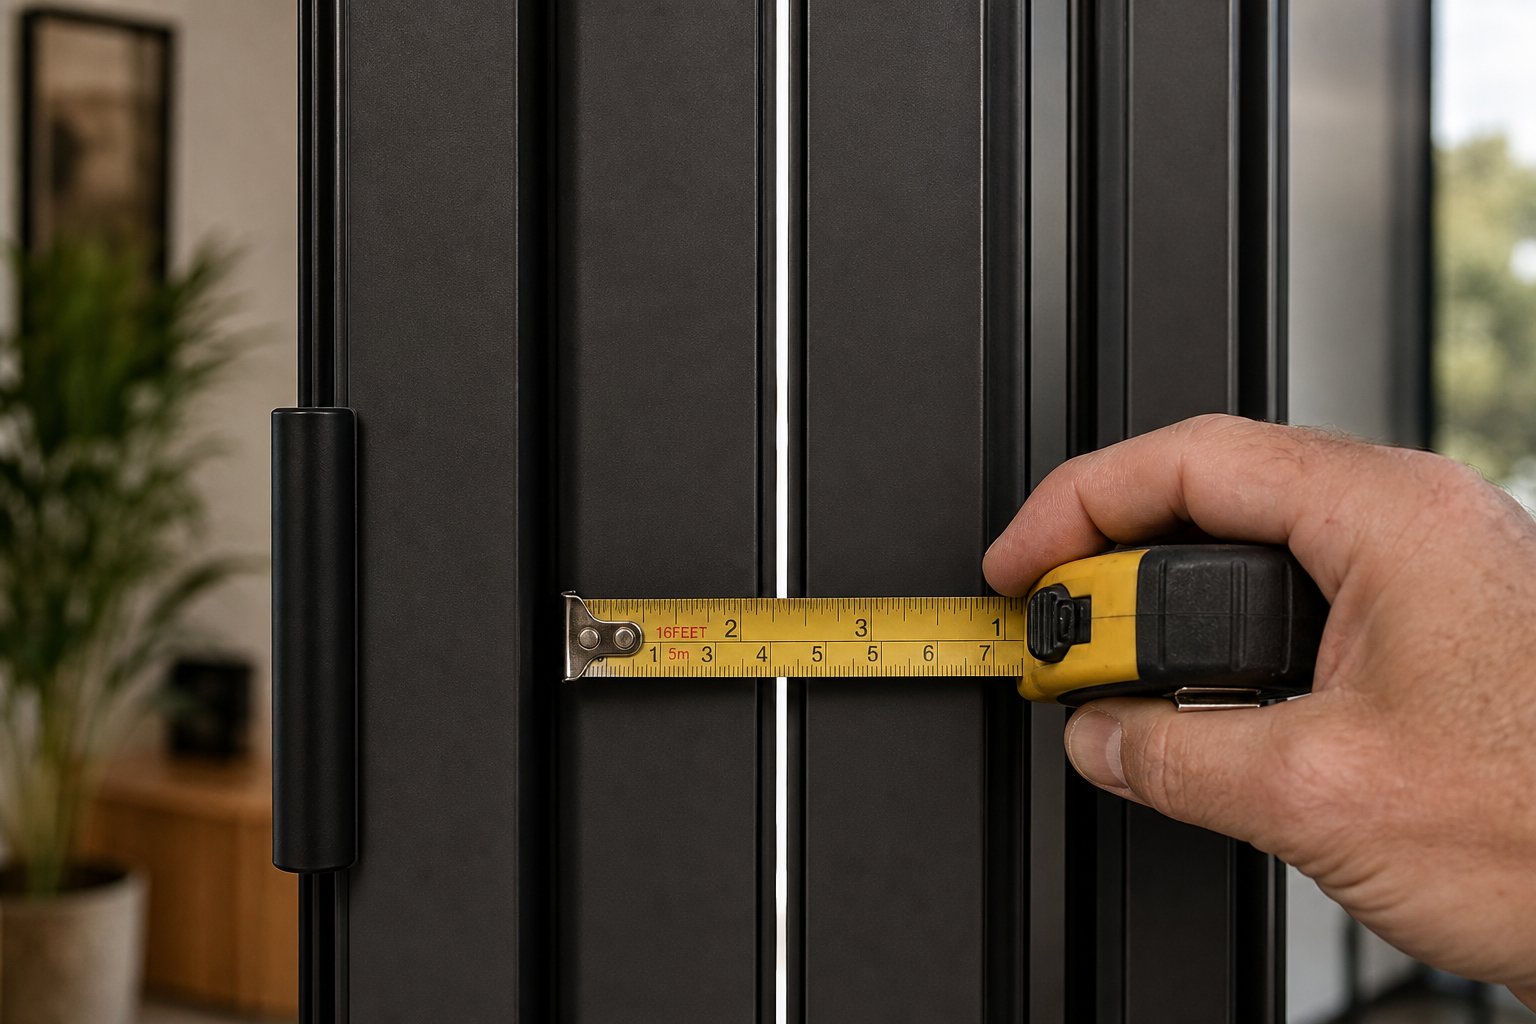
Grab your tape measure and check the gap between each panel pair at three points: top, middle, and bottom. Consistent gaps of 3–5 mm are standard for aluminium bifold systems. Write down each measurement — the numbers reveal exactly what is happening.
A few common patterns and what they mean:
- Gap wider at the top than the bottom — the panel is leaning away from its neighbour at the top. The lateral screw at the upper hinge point needs adjustment to pull the panel back.
- Gap wider at the bottom than the top — the opposite lean. Adjust the lower pivot or hinge carrier to shift the base of the panel.
- Gap consistently too wide or too narrow from top to bottom — the entire panel has shifted uniformly. Both top and bottom lateral screws need equal adjustment in the same direction.
When you adjust bi fold doors laterally, use the same quarter-turn rule as height adjustment. Turn the hex screw, close the panels, and re-measure. Rushing this step with full turns almost always overcorrects and pushes the problem to the opposite side.
Adjusting Pivot Points and Hinge Carriers
End panels — the ones closest to the frame jambs — pivot on brackets at the top and bottom rather than folding on intermediate hinges. These pivot brackets typically have a slotted mounting plate that allows lateral repositioning. Loosen the retaining screw, slide the bracket in the required direction, and retighten. Both the top and bottom pivot must move the same distance in the same direction to keep the panel plumb. If you shift the top pivot 1 mm to the left without matching it at the bottom, the panel tilts and creates a tapered gap.
Intermediate panels connect to their neighbours via hinge carriers. These carriers often include their own lateral fine-tuning screw, which adjusts how the fold geometry stacks when the doors are open. If panels collide or leave excessive space when folding, this is the mechanism to target. The same logic applies when learning how to adjust commercial aluminium door hinges — the hardware is heavier duty, but the incremental approach and measurement discipline remain identical.
The critical thing to understand about lateral adjustment is the knock-on effect. Shifting one panel 2 mm to the right tightens the gap on one side and opens it on the other. That change then affects the next panel in the sequence. Over-adjusting a single panel in isolation can misalign three or four others.
Always adjust from the lead door outward, correcting each panel sequentially rather than jumping between panels. Set the lead panel’s position relative to the frame jamb first, then adjust the second panel to achieve the correct gap with the first, then the third to match the second, and so on through the full set.
This sequential method keeps corrections contained and prevents the cascading misalignment that frustrates homeowners into thinking the doors are beyond repair. After each panel is set, open and close the full run to confirm the fold action is smooth and no panels are catching. Lateral alignment directly affects lock engagement too — if the panels sit in the right position vertically but the locking bolts still miss their keeps, the lateral position is the next place to look.
Step 5 – Align Locks, Latches, and Handles
Panels can sit at perfect height with uniform gaps and still refuse to lock. A bifold door lock not engaging is the most common complaint homeowners raise after the visual alignment looks correct, and it almost always traces back to a mismatch between the locking bolts and the keep plates mounted in the frame. Multipoint locking systems on aluminium bifolds use two or more hooks or shoot bolts that must land precisely into their corresponding keeps — if the panel has moved even 2 mm during height or lateral adjustment, those bolts now strike the wrong spot.
Realigning Multipoint Locks and Shoot Bolts
The keeps (also called strikers or receivers) are the metal plates screwed into the door frame that catch the locking bolts when you lift the handle. On most aluminium systems, each keep is fixed with two screws sitting in slotted holes. Those slots provide roughly 3–4 mm of vertical movement and 2–3 mm of lateral movement — enough to compensate for the panel repositioning you have already done.
So how do you adjust a bifold door latch that is not catching? The method is straightforward, but sequence matters. Follow these steps in order:
- Loosen the keep plate screws — back them off just enough that the keep can slide within its slotted holes. Do not remove the screws entirely.
- Close the door gently — push the panel into the closed position without engaging the lock. Let it rest against the frame under its own weight.
- Mark the bolt contact point — with the door closed, lift the handle slowly and watch where each bolt or hook contacts the frame. Use a pencil or painter’s tape to mark the exact strike position.
- Reposition the keep — slide the keep plate so its opening aligns with the mark you just made. The bolt should enter the keep centrally, without scraping the top or bottom edge.
- Tighten and test — secure the screws firmly, then open and close the door several times, engaging the lock each time. The handle should lift smoothly and the bolts should click into the keeps without resistance or excessive force.
Repeat this process for every keep on the frame — most bifold traffic doors have at least two shoot bolt keeps (top and bottom) plus a central latch keep. Each one may need independent repositioning if the panel height has changed.
Handle Tension and Compression Adjustment
Bifold door handle alignment affects more than just locking. The handle mechanism also controls how tightly the panel compresses against the weather gaskets when closed. If the handle requires excessive force to lift, the panel is being pulled too hard against the seals — this strains the gearbox inside the handle over time and accelerates wear. If the handle lifts too easily and the door rattles in wind, compression is insufficient and draughts will follow.
On many aluminium systems, compression is controlled by cam adjusters positioned around the locking edge of the frame. Insert a 4 mm Allen key into the cam and rotate it: a quarter turn toward the frame increases compression, a quarter turn away reduces it. The goal is a handle that lifts with moderate, consistent effort and pulls the panel firmly enough that the rubber gaskets compress evenly around the full perimeter — no daylight visible, no excessive resistance felt.
There is an important relationship to understand here. Every time you adjust panel height or lateral position, the lock geometry changes. Bolts that engaged perfectly before may now miss their keeps by a millimetre or two. This is normal and expected. Treat lock realignment as the final step after all positional adjustments are complete, not something to tackle in isolation. Adjusting keeps before the panel is in its final position means doing the work twice.
Once all locking points engage cleanly and the handle operates with smooth, even resistance, apply a light coat of silicone lubricant to each bolt, hook, and keep plate. This reduces friction, prevents corrosion in coastal environments, and keeps the mechanism operating freely between maintenance intervals. Avoid graphite on external doors exposed to rain — it washes out quickly and leaves residue on the frame finish.
Step 6 – Verify Adjustments and Test Full Operation
Turning screws and repositioning keeps is only half the job. A bifold door adjustment is not truly complete until the entire door set passes a full operational check — every panel, every lock, every seal, tested as a system rather than individual components. Skipping this step is how homeowners end up reopening the toolbox a week later when a problem they thought was fixed reappears under different conditions.
Think of verification as a quality gate. The door needs to perform correctly not just when closed gently from a standing position, but when folded open at speed, locked under wind pressure, and left partially open without drifting. Run through the following checks methodically, and only consider the job done when every item passes.
Post-Adjustment Testing Checklist
Work through each point in sequence. If any single check fails, note which panel or mechanism is responsible before attempting a correction.
- Smooth folding and unfolding without resistance — open and close the full set at least three times. The panels should glide along the track and fold against each other without catching, jerking, or requiring extra force at any point in the travel. Pay attention to the transition between sliding and folding, where binding most commonly occurs.
- Consistent gaps visible between all panels — with the doors fully closed, visually inspect the vertical gaps between every panel pair. They should appear uniform from top to bottom. If one gap looks noticeably tighter or wider than its neighbours, that panel’s lateral position still needs fine-tuning.
- All locking points engaging cleanly — lift the handle and confirm every shoot bolt and hook clicks into its keep without scraping, jamming, or requiring you to push the panel inward with your shoulder. The handle should return to the down position smoothly after locking.
- No dragging or scraping sounds — listen as the panels move. Any metallic scraping against the threshold or head track indicates a height issue that was not fully resolved. A grinding noise from the rollers suggests debris in the track or a roller that needs lubrication.
- Weather seals compressing evenly — with the door locked, inspect the perimeter gaskets from inside. Look for daylight gaps, particularly at the corners and where panels meet the frame jambs. Run your hand along the seal line on a breezy day to feel for draughts. Uneven compression means one section of the panel is sitting further from the frame than another.
- Door holding position when partially open without drifting — fold the panels halfway open and release them. They should stay put. If the set drifts closed or continues opening on its own, the track may not be level, or the roller resistance is insufficient to hold the panel weight on a slight incline.
A door that passes all six checks is correctly adjusted. A door that fails one or two is close — isolate the specific panel causing the issue and return to the relevant adjustment step with smaller, eighth-turn increments rather than quarter turns.
How to Confirm Structural Alignment With a Spirit Level
Your spirit level provides the objective confirmation that your eyes cannot. Place it horizontally across the top of the closed door set, spanning at least two panels. The bubble should sit centred. Then hold it vertically against the leading edge of each panel in turn to check plumb. This tells you whether panels are leaning forward, backward, or to one side — issues that are difficult to spot visually but affect long-term seal performance and lock engagement.
Acceptable tolerances for domestic installations allow up to 2 mm deviation across a full 3-metre opening. That is roughly the thickness of a two-dollar coin. Anything within that range is considered normal and will not affect operation or weatherproofing. If your readings exceed 2 mm, the bifold door gap tolerance has been breached and further correction is needed — or the issue may lie with the frame or structural opening rather than the panels themselves.
What if the door passes every check except one? Resist the temptation to start over from scratch. Instead, identify which single panel or component is responsible for the remaining failure. If the lock engages on three keeps but misses the fourth, only that keep needs repositioning. If five panels fold smoothly but the third catches midway, only that panel’s roller or hinge needs a small correction. Targeted, incremental fixes at this stage are far more effective than broad re-adjustment.
If a panel passes all checks immediately after adjustment but fails again within a few days, the problem may not be the hardware at all. Recurring misalignment despite correct bifold door adjustment often points to movement in the structural opening — lintel deflection, foundation settlement, or seasonal frame expansion that shifts the entire aperture. That distinction between a hardware fix and a structural issue determines whether the job is genuinely finished or whether deeper investigation is needed.
When DIY Adjustment Is Not Enough
Sometimes the problem is not the door. You can adjust rollers, reposition keeps, and fine-tune lateral screws with textbook precision, only to find the same symptoms returning within weeks. A bifold door keeps dropping despite correct roller settings. Gaps reappear after you have already closed them. Locks disengage again even though the keeps are perfectly positioned. These recurring failures are the clearest signal that something behind the frame is moving — and no amount of hardware adjustment will permanently fix a structural issue.
Knowing how do you adjust bifold doors is valuable, but equally important is recognising when adjustment has reached its limit. Here is the framework for deciding whether you are dealing with a hardware fix or a deeper problem that requires professional assessment.
Consider calling in a specialist if you observe any of the following:
- Recurring misalignment after correct adjustment — you fix the door, it works for a few weeks, then the same symptom returns. This cycle suggests the structural opening is shifting, not the hardware.
- Cracked or deformed frame sections — visible bending, cracking at corner joints, or frame profiles that are no longer straight indicate the frame is under stress it was not designed to handle.
- Visible bowing in the head track — place a straight edge along the underside of the head rail. Any downward curve, even a few millimetres, means the lintel above is deflecting under load and pressing the track out of alignment.
- Water ingress despite correct seal compression — if the gaskets are compressing evenly and the drainage slots are clear, yet water still enters, the frame geometry has likely distorted enough to create pathways that seals cannot bridge.
- Panels that cannot be brought into alignment within the available adjustment range — every roller and hinge screw has a finite travel. If you have wound a screw to its maximum and the panel still is not where it needs to be, the opening itself has moved beyond what the hardware can compensate for.
Any one of these indicators warrants investigation beyond the door itself. Two or more appearing together strongly suggest bifold door structural problems that originate in the building fabric rather than the door system.
Signs of Structural Movement Behind the Frame
Aluminium bifold doors span wide openings — often 3 to 6 metres — which makes them particularly sensitive to movement in the surrounding structure. Two common culprits are lintel deflection and foundation settlement, and both manifest as door problems long before they become visible in the walls themselves.
Lintel deflection occurs when the beam supporting the wall above the opening bends under load. Steel lintels in brick veneer homes can deflect over time, especially if the original lintel was undersized for the span or if additional load has been added above (a second-storey extension, for example). Visual indicators of lintel failure include cracking in the masonry above the door opening — typically stepped diagonal cracks following the mortar joints — and difficulty operating doors and windows beneath the affected lintel. As the lintel sags, it pushes the head track downward at the centre, creating a bow that pinches the panels and prevents them from sliding freely.
Foundation settlement is the other major cause. Reactive clay soils across much of eastern Australia expand and contract with moisture changes, and this seasonal movement can shift one side of an opening relative to the other. The result is a frame that is no longer square — one jamb sits lower than the other, or the threshold tilts along its length. You will notice this as a panel that drags on one end of the track but has excessive clearance at the other, and the problem worsens during dry summers when the soil shrinks most.
The key distinction is this: hardware adjustment compensates for small, stable misalignments. Structural movement is progressive. If the lintel continues to deflect or the foundation continues to settle, any adjustment you make today will be undone by further movement tomorrow. Addressing the root cause — lintel replacement, underpinning, or pier stabilisation — is the only permanent solution. A structural engineer can assess whether the movement is active or has stabilised, which determines whether the door can be readjusted successfully or whether the opening needs remediation first.
Choosing a Replacement System When Adjustment Is Not Enough
There is a second scenario where DIY adjustment reaches a dead end: the door system itself has aged beyond its serviceable life. Hardware wears out. Rollers develop flat spots after years of carrying heavy panels. Hinge pins elongate their housings. Adjustment screws strip their threads from repeated corrections. Folding door hardware that has been in service for over a decade may lack the smooth function and durability of modern equivalents, even if the aluminium frames and glass remain in good condition.
When the hardware has reached the end of its adjustment range, or when structural remediation has corrected the opening but the existing door no longer fits the revised geometry, upgrading to a modern aluminium bifold system is the practical path forward. Contemporary systems offer greater adjustment tolerance, tighter manufacturing tolerances, and better-engineered roller and hinge mechanisms that extend the interval between corrections.
For homeowners, builders, and developers specifying a replacement, the MC80 Bifold Door is a project-ready aluminium bifold system suited to wide openings and seamless indoor-outdoor connection. Final specification depends on the opening size, panel configuration, glass selection, hardware preferences, finish colour, and performance requirements for the specific site — factors like coastal exposure, bushfire rating, or energy efficiency targets under NatHERS all influence the build. A system engineered for the Australian climate and compliant with AS 2047 ensures the replacement performs where the original fell short.
Whether the decision is to repair the structure and readjust, or to replace the door system entirely, the diagnostic work you have already done is not wasted. Understanding exactly why the doors failed — whether it was progressive settlement, lintel deflection, or simply hardware fatigue — ensures the replacement is specified correctly and the same problem does not recur with a new set of panels in the same opening.
For doors that pass the structural test and remain within their adjustment range, the smarter long-term strategy is prevention. A simple seasonal maintenance routine catches minor shifts before they compound into the kind of misalignment that sends you searching for answers again.
Seasonal Maintenance to Prevent Future Misalignment
A bifold door that needed adjusting once will need adjusting again — unless you interrupt the cycle. Dirt accumulates in tracks. Rollers lose their lubrication. Seals harden and compress unevenly. Temperature swings shift panel geometry by fractions of a millimetre each season. None of these changes cause immediate failure, but they compound. Six months of neglect turns a two-minute lubrication job into a full afternoon of adjusting bifold doors back to square.
The fix is a simple bifold door maintenance schedule tied to the seasons. Each quarter brings different environmental pressures in Australia — winter rain drives grit into tracks, summer heat expands frames, autumn leaves block drainage, and spring reveals whatever damage the cold months left behind. Fifteen minutes of targeted attention four times a year keeps your doors operating within tolerance and extends the life of every roller, hinge, and seal in the system.
Seasonal Maintenance Schedule for Aluminium Bifolds
The table below maps each season to the specific tasks that matter most during that period. Treat it as a rotating checklist rather than a one-off job.
| Season | Priority Tasks | Why It Matters |
|---|---|---|
| Spring | Check panel alignment after winter temperature cycling; clean drainage slots and weep holes; inspect seals for frost or moisture damage; apply fresh silicone lubricant to all moving parts | Winter contraction and expansion can shift panels slightly. Blocked drainage causes water pooling that corrodes hardware. Spring is the reset point before heavy summer use. |
| Summer | Lubricate rollers and hinges; check for thermal expansion effects on seals and panel gaps; inspect powder-coated finish for UV degradation or chips | Aluminium expands in heat, which can tighten gaps and increase friction on rollers. Lubricant breaks down faster in high temperatures. UV exposure degrades rubber seals over time. |
| Autumn | Clear leaf debris and dirt from tracks; verify lock engagement before winter; tighten any loose hinge or handle screws; check that panels fold and stack cleanly | Organic debris traps moisture against aluminium surfaces. Locks that barely engage in autumn will fail entirely once winter contraction shifts panels further. Loose hardware worsens under repeated use. |
| Winter | Inspect weather seals for even compression; check for condensation in track channels; confirm drainage is flowing freely; monitor for new gaps or dragging | Cold contracts aluminium and can open gaps in seals. Condensation sitting in tracks accelerates corrosion of steel components. Early detection of dragging prevents threshold damage. |
Coastal properties in areas like Sydney’s Northern Beaches, the Gold Coast, or Perth’s western suburbs should add a monthly rinse of external frame surfaces with fresh water. Salt air deposits accelerate corrosion on hardware and degrade seal materials faster than inland conditions. A quick hose-down after storms or high-wind days removes salt residue before it bonds to the finish.
Lubrication and Track Cleaning Best Practices
Knowing how to lubricate bifold door rollers correctly makes the difference between smooth operation and a sticky mess that attracts more grit than it repels. The rules are simple but non-negotiable:
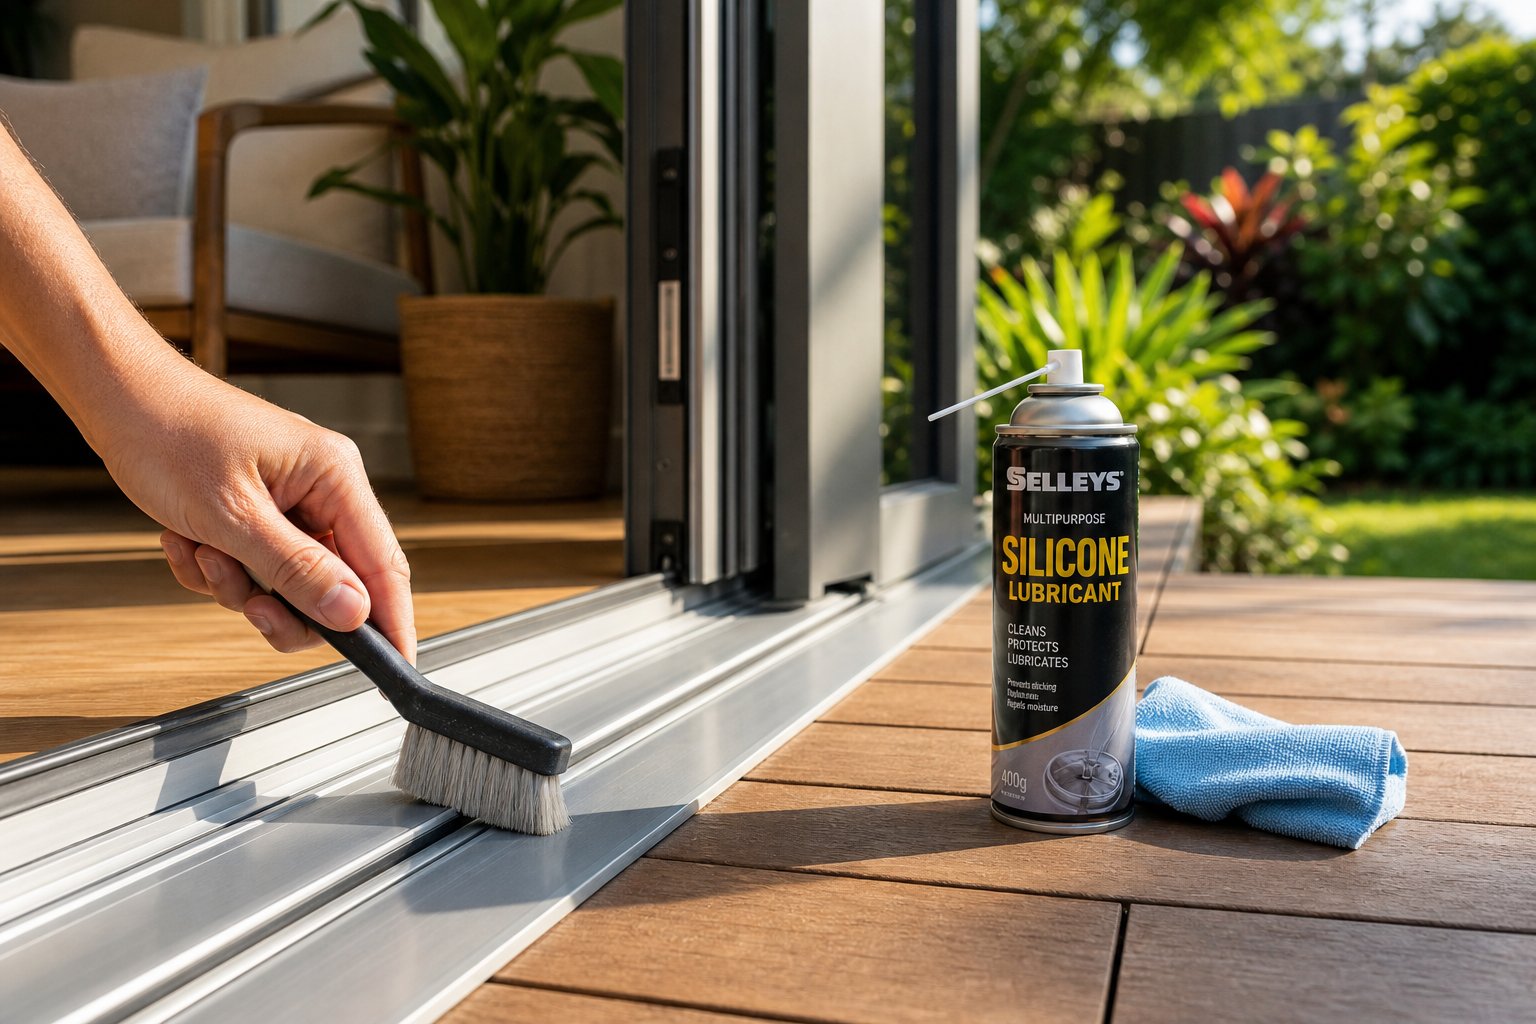
- Use silicone-based spray lubricant on rollers, hinges, pivot points, and locking mechanisms. Silicone does not attract dust, resists washout from rain, and will not degrade the rubber weather seals sitting nearby. A light mist is sufficient — flooding the mechanism just creates drips that collect dirt.
- Avoid petroleum-based products entirely. WD-40, engine oil, and general-purpose grease attract dust and grit within days, forming an abrasive paste that accelerates wear on roller bearings and hinge pins. They also attack rubber and EPDM seals, causing them to swell, soften, and lose their compression profile.
- Apply PTFE (dry Teflon) lubricant as an alternative for lock mechanisms and shoot bolts where you want zero residue. PTFE leaves a dry film that reduces friction without any wet surface for particles to stick to.
- Lubricate after cleaning, never before. Spraying lubricant over a dirty track just seals the grit in place. Always clean first, dry completely, then apply a fresh film.
For bifold door track cleaning, the process protects both function and finish. Aluminium tracks with anodised or powder-coated surfaces scratch easily if you use abrasive tools or harsh chemicals. Here is the method that works without causing damage:
- Vacuum first — use a crevice nozzle to remove loose dirt, leaves, sand, and small stones from the full length of the track. Pay extra attention to the corners and the area beneath the roller path where compacted debris builds up.
- Wash with mild detergent — a soft brush (an old toothbrush works well for tight corners) dipped in warm water with a pH-neutral soap. Avoid alkaline cleaners, bleach, or anything containing ammonia, all of which can discolour powder-coated aluminium.
- Rinse and dry thoroughly — wipe the track with a clean damp cloth to remove soap residue, then dry completely with a soft towel. Standing water in track channels is the primary cause of hardware corrosion, particularly on steel roller axles and spring components hidden inside the carriage housing.
- Inspect while cleaning — use the cleaning session as an opportunity to spot early signs of wear. Look for metal shavings in the track (indicating roller or carriage wear), scratches in the track surface (suggesting a foreign object has been dragged through), or discolouration around screw heads (early corrosion).
The same mild-detergent approach applies to the aluminium frame profiles themselves. A soft microfibre cloth with soapy water removes airborne grime, insect residue, and salt deposits without scratching the finish. For stubborn marks, a non-abrasive cream cleanser designed for coated metals works safely — but test it on a hidden section first.
Adjusting bifold doors is a skill worth having, but the best outcome is rarely needing to use it. Fifteen minutes of quarterly maintenance — a quick vacuum of the tracks, a wipe-down of the seals, a spray of silicone on the rollers, and a visual check of panel gaps — prevents the slow drift toward misalignment that eventually demands a full correction session. The doors stay smooth, the locks stay engaged, and the seals stay compressed. That is the difference between a system that needs attention once a year and one that demands it every few months.
Frequently Asked Questions About Adjusting Aluminium Bifold Doors
1. Why do my aluminium bifold doors keep dropping out of alignment?
Recurring misalignment typically stems from one of two causes. The first is normal settling — heavy glazed panels (40-80 kg each) place constant load on rollers and hinges, gradually shifting their position over months of use. Quarterly lubrication and seasonal checks prevent this from compounding. The second, more serious cause is structural movement behind the frame, such as lintel deflection or foundation settlement on reactive clay soils common across eastern Australia. If you adjust the doors correctly but the same symptoms return within weeks, a structural engineer should assess whether the opening itself is shifting.
2. What size Allen key do I need to adjust bifold doors?
Most aluminium bifold door systems use a 4 mm or 5 mm hex Allen key for roller height screws, lateral hinge adjustments, and compression cam mechanisms. Some older or commercial-grade systems require a 6 mm key. The exact size varies between manufacturers, so check your system documentation or the manufacturer’s website for your specific model. Well-engineered systems like the MC80 Bifold Door include accessible adjustment hardware with sizes noted in their installation guides. Keep both 4 mm and 5 mm keys on hand before starting any adjustment work.
3. How do I fix a bifold door that won’t lock properly?
A bifold door lock that refuses to engage is almost always a keep plate alignment issue rather than a faulty lock mechanism. The locking bolts and hooks need to land precisely in their corresponding keeps on the frame. To fix it, loosen the keep plate screws slightly so the plate can slide within its slotted holes, close the door gently without locking, lift the handle slowly to observe where each bolt contacts the frame, reposition the keep to align with the bolt’s strike point, then retighten and test. Always complete height and lateral panel adjustments before repositioning keeps, as any panel movement changes the lock geometry.
4. How often should aluminium bifold doors be serviced?
A quarterly maintenance routine of about 15 minutes per session prevents most alignment issues from developing. In spring, check alignment after winter temperature cycling and clean drainage slots. Summer calls for roller and hinge lubrication plus checking thermal expansion effects. Autumn is the time to clear debris from tracks and verify lock engagement before winter. During winter, inspect weather seals and monitor for condensation in track channels. Coastal properties should add a monthly fresh-water rinse of external surfaces to remove salt deposits that accelerate hardware corrosion.
5. Can I adjust bifold doors myself or do I need a professional?
Most alignment corrections are well within DIY capability. If your doors are dragging, have uneven gaps, or locks are not engaging, the built-in roller, hinge, and keep plate adjustment screws can resolve these issues in under 30 minutes with Allen keys and a spirit level. However, call a professional if you notice recurring misalignment after correct adjustment, cracked or deformed frame sections, visible bowing in the head track, water ingress despite proper seal compression, or panels that cannot reach alignment within the available screw travel range. These symptoms indicate structural issues that hardware adjustment cannot permanently fix.
More Window & Door Guides