
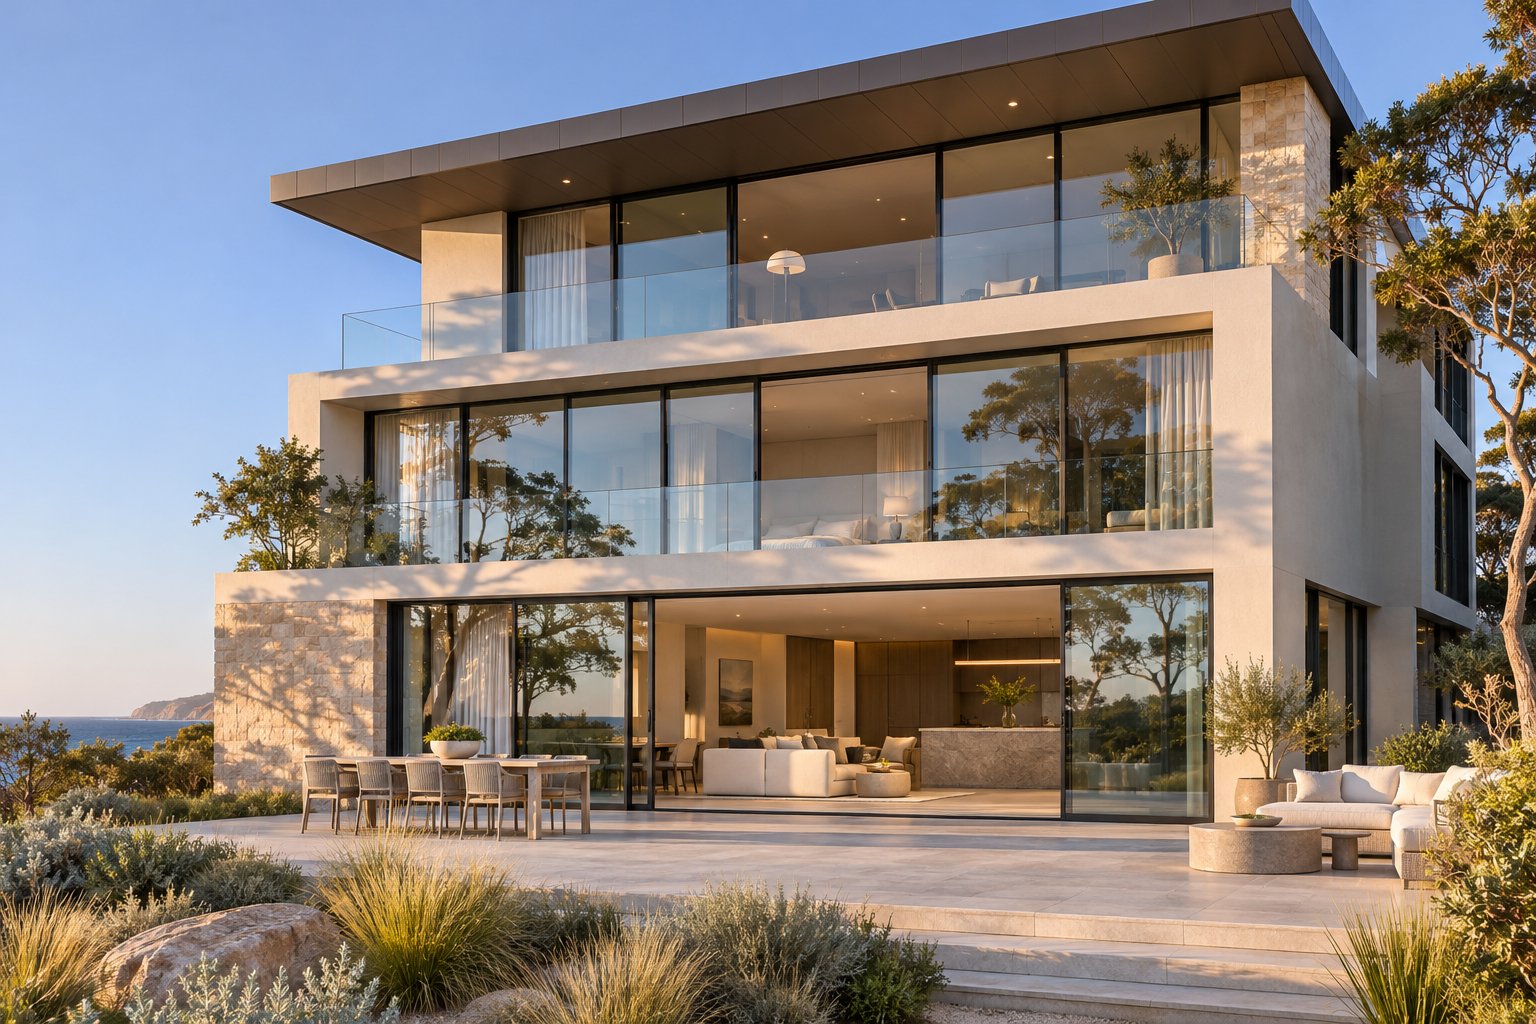
What Are Replacement Sliding Windows and How Do They Work
Most homeowners start shopping for new windows with one assumption that trips them up almost immediately: they think every window product on the market installs the same way. It doesn't. And the distinction matters more than you might expect.
Replacement sliding windows are purpose-built units designed to fit directly into an existing window frame opening without removing exterior cladding, trim, or siding. One or more sashes glide horizontally along tracks, eliminating the need for outward-swinging panels. Unlike new-construction windows — which attach to exposed wall studs via nailing fins and are intended for bare openings — replacement slider windows slot into the frame that's already there, making them ideal for upgrading older homes with minimal disruption.
That horizontal sliding motion is the defining feature. Rather than lifting a sash vertically like a double-hung window or cranking a panel outward like a casement, a sliding window moves sideways along a recessed track. The result is a low-profile, space-conscious design that works especially well across wide openings in kitchens, bathrooms, basements, and any room where vertical clearance is tight or outdoor obstructions sit close to the wall.
This article walks through the full decision-making journey — from recognising when your current windows genuinely need replacing, to understanding frame materials, evaluating energy ratings under the WERS (Window Energy Rating Scheme), comparing configurations, and planning your project timeline and budget. Each section tackles a gap most buyers only discover after they've already committed.
How Replacement Sliding Windows Differ from Other Styles
A sliding window operates on an entirely different plane of motion compared to other common styles. Double-hung windows move vertically. Casement and awning windows hinge outward on a crank mechanism. Sliding windows — sometimes called gliding windows or pop in windows by trades referring to pocket-insert units — travel left or right within the frame.
There is a functional tradeoff worth understanding upfront. Because one sash typically remains fixed while the other slides past it, only roughly half the total opening is available for ventilation at any given time. Double sliding windows, where both sashes are operable, improve airflow flexibility but still can't match the full-opening capability of a casement. The payoff, though, is that nothing protrudes beyond the wall plane — no sash swinging into a walkway, patio, or garden bed.
Why Homeowners Choose Sliding Windows for Replacements
Practicality drives most of these decisions. Sliding windows deliver unobstructed views through large glass panels with clean sightlines and minimal frame intrusion. They're simple to operate — a light push is all it takes — which makes them a smart choice for people with mobility limitations or for hard-to-reach spots above kitchen benchtops and bathroom vanities. The low-profile hardware stays flush, so curtains and blinds sit neatly without catching on protruding cranks or handles.
Rooms where furniture, planter boxes, or landscaping sits directly below the opening benefit particularly well. There's no clearance zone to maintain outside or inside the home. For Australian homeowners researching options online, you'll encounter terms like window slider parts, home depot sliding glass, and various brand-specific names — much of this content originates from the US market. Focus instead on products tested and rated for Australian conditions, and look for compliance with WERS and AS 2047 to ensure your new windows suit our climate and regulatory requirements.
The real complexity, however, isn't in choosing the style — it's in knowing whether your existing windows actually need replacing at all, or whether a repair could buy you another few years.
Signs Your Sliding Windows Need Replacement
Here's the uncomfortable truth the window industry rarely volunteers: not every problem with your horizontal sliding windows calls for a full replacement. Some symptoms point to a single worn part — a roller, a strip of weatherstripping, a failed glass seal — and fixing that part can extend the window's life by years at a fraction of the cost. Knowing the difference between a repair and a genuine end-of-life diagnosis saves you thousands of dollars and a lot of unnecessary disruption.
Walk through this checklist on a windy day. If your house window ticks one or two boxes, you're likely looking at a targeted repair. If three or more show up at the same time, the window has probably reached the point where piecemeal fixes no longer make financial sense.
- Fog, haze, or moisture trapped between double-pane glass
- Visible rot, softness, or sponginess in timber frames or sills
- Warped, bowed, or visibly out-of-square frames
- Cracked glass or chips that extend beyond the edge
- Gaps visible between the sash and frame when the window is closed and locked
- Sash that drags, jams, or requires significant force to slide open
- Persistent drafts along the edges even when the latch is fully engaged
- Rattling during moderate wind
- A noticeable and sustained increase in heating or cooling bills
- Condensation forming on the room-side surface of the glass in mild conditions
Visible Damage and Structural Deterioration
Start with the frame — it's the foundation everything else depends on. Press a screwdriver tip into the corners and lower edges of timber frames and sills. If the tool sinks into soft, punky material, you have rot, and rot doesn't stop spreading. It works through the sill, into the jamb, and eventually into the wall framing behind the window. You can't reliably seal glass or hang hardware on a frame that's deteriorating from within. Isolated soft spots on a sill can occasionally be cut out and patched, but widespread decay across the frame is a clear replacement signal.
Warping tells a similar story. A glass window sliding panel relies on the frame being square and straight to maintain its weather seal and latch properly. When a frame bows, twists, or racks out of alignment — common in older aluminium frames exposed to decades of thermal cycling or in timber frames affected by moisture and settling — gaps open unevenly around the sash. You'll notice it as a window that used to close flush but now needs a shove at one corner while daylight peeks through the opposite side. No amount of caulking fixes geometry that's gone.
Fogged or hazy glass between double-pane panels is the single most misread symptom in the business. That cloudy look means the perimeter seal on the insulated glass unit (IGU) has failed and the desiccant that absorbs residual moisture has saturated. Once moisture condenses inside the cavity, the insulating gas fill — typically argon — has already leaked out, and the window's thermal performance has dropped significantly. Repair by resealing the existing unit is rarely cost-effective; the IGU needs replacing. The good news is that if the frame and sash are still sound, a glazier can swap the glass unit without touching the frame. The bad news is that seal failure on one unit often signals that neighbouring windows of the same age and brand are close behind.
Operational and Performance Problems
A horizontal slide windows panel that drags, sticks, or refuses to latch isn't necessarily finished — but it is telling you something. The most common culprit is worn rollers. The small wheels beneath the sliding sash carry its full weight across the track, and after years of grit, dust, and pet hair grinding into them, they flat-spot or seize. A dropped roller lets the sash ride low, chewing into the track and breaking the interlock seal where the two panels meet, which then mimics a draft even though the weatherstripping itself may be perfectly fine.
Dirty or bent tracks cause similar symptoms. Vacuuming the track and applying a dry silicone lubricant — never grease, which attracts more debris — can restore smooth operation in mild cases. If adjustment screws at the base of the sash can lift the panel back into alignment, you're dealing with a maintenance task, not a window sale situation where someone convinces you the whole unit is shot.
Persistent drafts along the sash edges, even when the window is locked, often trace back to weatherstripping that has hardened, compressed, or deteriorated. Australian conditions — intense UV, wide temperature swings between summer and winter, and coastal salt exposure in many regions — accelerate this degradation. Replacing weatherstripping is one of the cheapest fixes available. But if drafts persist after new weatherstrip is fitted and the rollers are adjusted, the frame itself may have shifted enough that a proper seal is no longer achievable.
Rattling during wind points to loose sash fit within the frame, usually a combination of worn weatherstripping and hardware that no longer pulls the sash tight against the seal. A sustained rise in energy bills, while harder to attribute to a single cause, often correlates with multiple simultaneous failures — degraded seals, lost gas fill, and worn compression points all working together to bleed conditioned air.
Here's the broader context worth considering: modern sliding windows manufactured to meet current WERS ratings and AS 2047 requirements deliver substantially better air infiltration performance than units made fifteen to twenty years ago. The improvement isn't marginal — it's a generation of engineering advancement in roller design, interlock seals, glazing technology, and frame profiles. Even if your existing horizontal sliding windows still technically open and close, upgrading to a current-generation unit can make a measurable difference to comfort and running costs, particularly in older Australian homes where the original windows were single-glazed aluminium without thermal breaks.
The critical distinction is between a window that needs a service call and one that's genuinely past its useful life. Multiple symptoms showing up together — fogged glass plus frame distortion plus persistent drafts — almost always indicate end of life. A single issue in an otherwise sound frame usually points to a repair. Getting that diagnosis right is the first step before any discussion about frame materials, glazing packages, or installation methods makes sense.
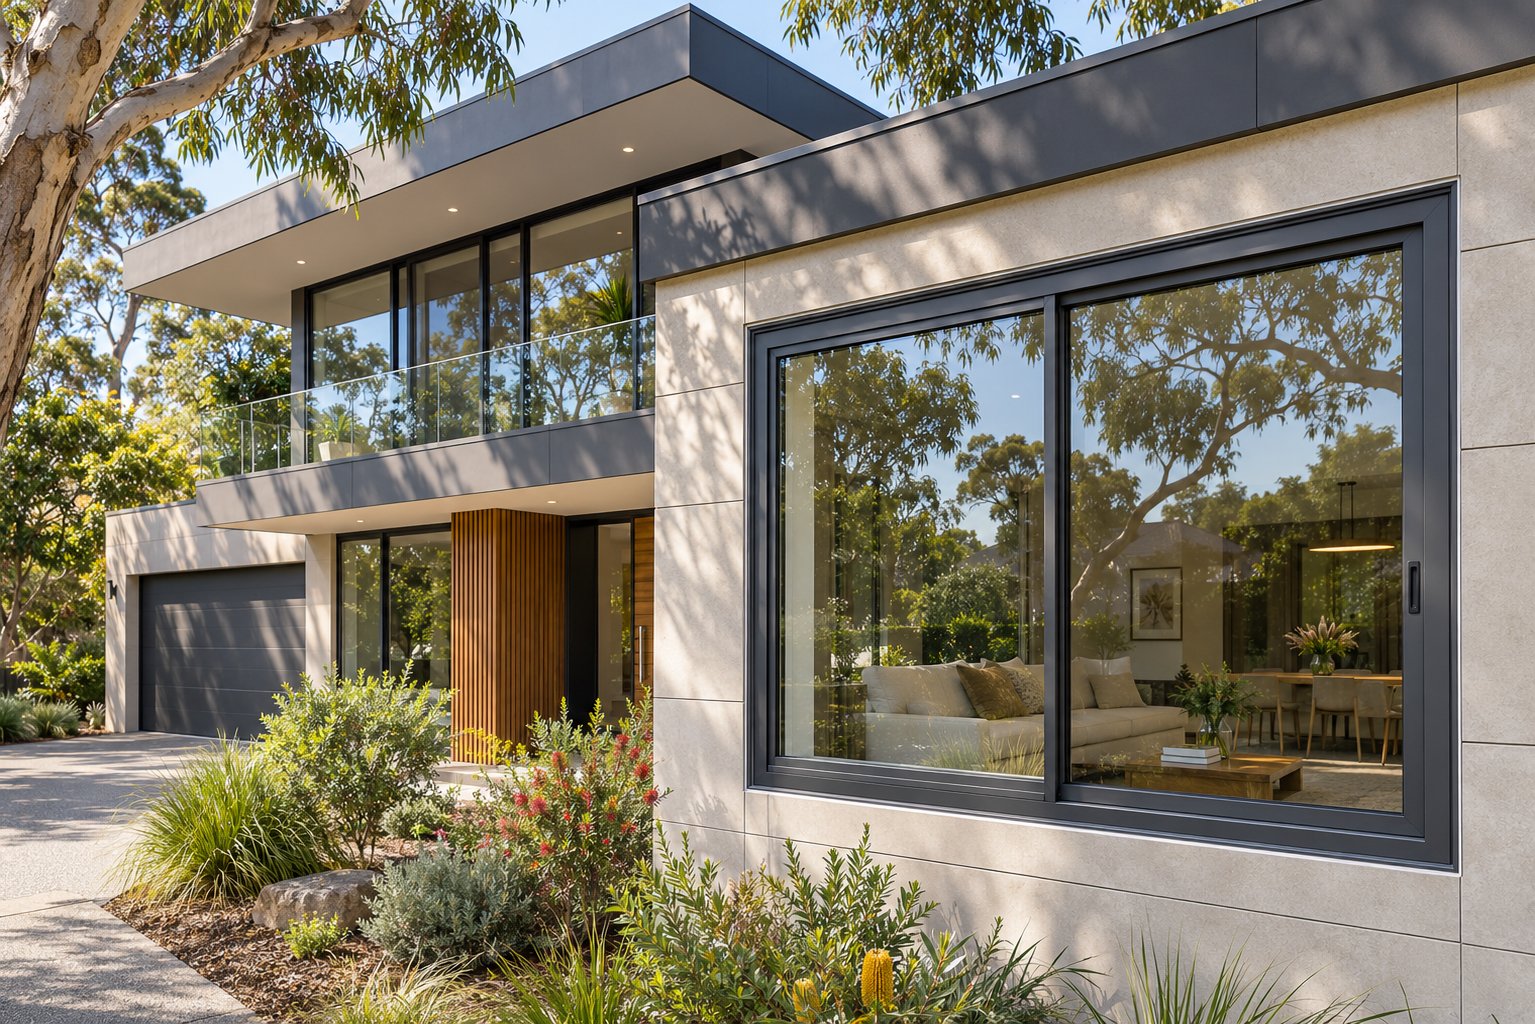
Pocket Insert vs Full-Frame Replacement
So you've confirmed the windows genuinely need replacing rather than repairing. The next decision is the one that reshapes your entire project — and it's the one most homeowners don't even realise they're making until a contractor shows up with a quote that seems wildly different from a competitor's. The gap usually comes down to a single question: are you doing a pocket insert or a full-frame replacement?
These two methods share the same end goal — a new, better-performing window in the same wall opening — but they differ dramatically in scope, cost, timeline, and how much of your house gets pulled apart in the process. Understanding the distinction upfront prevents the kind of budget shock that derails projects midstream.
Pocket Insert Replacement Windows Explained
A pocket insert — also called a retrofit or simply a replacement window — is designed to slide into the existing frame after the old sashes, hardware, and internal stops are removed. The original exterior cladding, flashing, interior casing, and sill remain completely untouched. Think of it as swapping the moving parts of a sliding window while leaving the structural shell exactly where it is.
This is how the vast majority of replacement sliding windows are installed in Australian homes when the existing frame is still structurally sound. For a standard 2 lite slider window — the most common configuration, with one fixed panel and one operable sash — the process is relatively straightforward. A qualified installer removes the old sashes, cleans the tracks, checks the frame for square and plumb, then sets the new pre-assembled unit into the opening. Shimming, sealing, and final adjustment typically take a few hours per window rather than a full day.
The advantages are compelling. Labour costs drop significantly because no exterior or interior finishes need to be disturbed. There's no siding to patch, no render to repair, no drywall to make good, and no repainting beyond a touch-up where interior trim meets the new frame. For brick veneer and rendered homes — the two most common construction types across suburban Australia — this means the external wall remains intact throughout the process.
There is one limitation worth noting honestly. Because the new window frame sits inside the existing one, the visible glass area shrinks slightly on each side. The reduction is typically modest — roughly 10 to 15 mm per edge — but it's there. For most openings, the difference is barely perceptible. On smaller windows, though, it becomes more noticeable, and homeowners who prioritise maximum glass area should factor this into their decision.
Pocket inserts rely entirely on the condition of the existing frame. If that frame is square, solid, and properly anchored to the wall framing, the new window will seal well and perform as designed. If it's not — and this is the critical fork in the road — no amount of shimming can compensate for a compromised structure.
When Full-Frame Replacement Is Necessary
Full-frame replacement strips the opening back to the raw wall studs. Every part of the old window comes out — sashes, frame, sill, head, jambs, exterior flashing, and interior trim. What's left is the rough opening: the structural timber or steel framing of the house itself.
This method becomes unavoidable under specific conditions. Rotted timber frames are the most obvious trigger, particularly on older weatherboard and fibro homes where decades of moisture exposure have softened the sill and lower jambs. Frames that are visibly out of square — whether from building settlement, ground movement, or previous poor installation — can't reliably support an insert. And aluminium frames suffering from severe corrosion, especially in coastal areas where salt air has eaten through protective coatings, often need to come out entirely.
Tearing out to the rough opening exposes everything the old frame was hiding. Water damage to the wall framing, missing or degraded sarking, failed flashing, even termite activity — none of this is visible during a pocket-insert assessment. As replacement specialists frequently note, the full-frame method is the only way to know for certain what's behind the window, and the only way to fix it before a new unit goes in.
The project scope escalates accordingly. New flashing and sarking wrap the opening before the window is installed. Exterior cladding — whether weatherboard, fibre cement, brick mould, or render — may need patching or replacing where it meets the new frame. Inside, plasterboard often requires cutting back and making good, and architraves are reinstalled from scratch. For homeowners researching brands and comparing options like ProVia windows cost versus other manufacturers, it's essential to understand that the installation method often accounts for a larger portion of the total spend than the window unit itself.
Full-frame replacement also opens the door to changes that pocket inserts simply can't accommodate. Want to shift from a fixed panel to windows that slide? Need to widen the opening, swap from a double-hung to horizontal slider windows, or add a completely different configuration? Full-frame is the only path.
| Factor | Pocket Insert (Retrofit) | Full-Frame Replacement |
|---|---|---|
| Scope of work | Old sashes and hardware removed; new window set into existing frame | Entire window removed to rough opening; new frame, flashing, and finishes installed |
| Typical project duration per window | 1–3 hours | Half a day to a full day |
| Relative cost | Lower — less labour, no finish repairs | Higher — additional labour, materials, and finish restoration |
| Disruption to home | Minimal — interior and exterior finishes stay intact | Significant — interior plaster, exterior cladding, and trim may all require repair |
| Glass area | Slightly reduced (new frame sits within old) | Full opening utilised |
| Hidden damage inspection | Not possible — old frame conceals wall framing | Full visibility of rough opening, framing, sarking, and flashing |
| Ideal scenario | Structurally sound, square, undamaged existing frame | Rotted, corroded, or out-of-square frames; size or style changes; suspected concealed damage |
The right method isn't always obvious from a visual inspection alone. A frame can look perfectly fine from inside the room yet harbour rot or corrosion behind the exterior trim. Any reputable installer will assess the frame condition before quoting and will recommend full-frame work only when the evidence supports it — not as a default upsell. If you're getting quotes and one comes in dramatically higher than another, the first question to ask is whether the scope is the same. A pocket-insert quote and a full-frame quote for the same opening aren't comparable figures; they're different projects entirely.
Understanding the parts of a sliding window that each method replaces — and the parts it leaves in place — puts you in a far stronger position to evaluate quotes, ask informed questions, and avoid the painful mid-project discovery that your frame wasn't sound enough for the cheaper approach after all. That structural decision made, the next layer of the puzzle is what the new frame itself should be made of.
Frame Material Comparison for Slider Windows
The frame material you choose dictates almost everything about how your replacement sliding windows perform, look, and age over the coming decades. It affects thermal efficiency, maintenance demands, maximum sash dimensions, colour options, and — importantly for Australian conditions — how well the window handles UV exposure, coastal salt air, and wide temperature swings between seasons. Yet most buyers pick a material based on price alone, without understanding the tradeoffs they're accepting.
So what is a slider window frame actually made of, and why does it matter so much? Here's a structured comparison across the four main material categories before we break each one down in detail.
| Criteria | Vinyl (uPVC) | Aluminium | Fibreglass | Wood-Clad |
|---|---|---|---|---|
| Indicative cost range (AUD, supply only, standard size) | $350–$700 | $400–$900 | $700–$1,200 | $900–$1,500+ |
| Durability | Good — resistant to moisture and rot; UV stabilisers slow degradation | Excellent — strong and corrosion-resistant with quality powder coating | Excellent — dimensionally stable, resistant to warping and rot | Good to excellent — exterior cladding protects timber core |
| Maintenance | Minimal — wash and hardware checks; no painting required | Low — periodic cleaning of tracks and hardware; inspect coating integrity | Minimal — similar to vinyl; some lines are paintable for colour updates | Moderate — exterior cladding is low-maintenance; interior timber may need refinishing |
| Energy efficiency | Good — hollow chambers can be foam-filled for higher insulation | Variable — high conductivity unless thermally broken; thermal break systems perform well | Very good — low conductivity; insulated cavities achieve strong U-values | Very good — timber core provides natural insulation; cladding adds weather protection |
| Aesthetic versatility | Moderate — limited factory colour palette; field repainting not recommended | High — powder-coated in virtually any colour; crisp, slim profiles | Moderate to high — paintable surfaces; thinner sightlines than vinyl | High — natural timber interior; exterior available in various cladding finishes |
| Climate suitability (Australia) | Most temperate zones; may soften in extreme sustained heat | All zones with thermally broken frames; non-thermally broken suits mild climates | All zones — stable across extreme heat and cold | Best in temperate to cool climates; requires careful detailing in tropical or high-humidity regions |
| Expected lifespan | 20–30 years | 30–40+ years | 30–40+ years | 25–35 years (dependent on maintenance) |
Prices above reflect typical Australian supply-only costs for standard-sized slider windows and will vary based on glazing package, configuration, and supplier. Installation adds significantly to the total, particularly for full-frame replacements or upper-storey openings.
Vinyl and Fibreglass Sliding Windows
Vinyl — technically uPVC with UV stabilisers — dominates the replacement market in many regions for straightforward reasons. A vinyl slider window doesn't need painting, resists moisture admirably, and costs less than most alternatives at the point of purchase. The hollow chambers within the extrusion can be foam-filled to boost insulation, and industry sources note that vinyl frames are broadly characterised as low-maintenance and thermally efficient for residential applications. For double slider windows in standard openings — kitchens, bathrooms, bedrooms — vinyl delivers solid value without demanding much attention year after year.
The material does have boundaries, though. Vinyl expands and contracts more than aluminium or fibreglass under temperature cycling. That higher coefficient of thermal expansion means manufacturers typically cap maximum sash dimensions to prevent warping or seal stress. In parts of Australia that regularly exceed 40°C, dark-coloured vinyl frames can absorb enough heat to soften slightly, which is why most vinyl products come in lighter shades. And unlike fibreglass or aluminium, colour options are usually limited to what the factory offers — field repainting isn't recommended because coatings may not bond reliably to the PVC surface.
Fibreglass occupies a premium tier that fewer Australian homeowners consider, partly because it's less widely marketed here. That's a missed opportunity. Fibreglass frames share vinyl's low-maintenance appeal but add superior structural rigidity and dimensional stability, meaning thinner frame profiles are possible without sacrificing strength. Thinner profiles translate directly to more window glass sliding area within the same rough opening — a meaningful gain when you're already sacrificing a small amount of glass to a pocket-insert frame. Fibreglass also handles temperature extremes with very little expansion, which helps maintain seal integrity across seasons and reduces the long-term risk of air infiltration at the sash-to-frame junction. It's paintable, too, giving you more control over aesthetics down the line. The tradeoff is cost: expect to pay roughly double the price of a comparable vinyl unit at the supply stage.
Aluminium and Wood-Clad Sliding Windows
Aluminium is the dominant frame material in Australian residential construction and has been for decades. Its strength-to-weight ratio is unmatched among common window materials, which allows manufacturers to build sliding service windows with remarkably slim profiles and larger spans. In contemporary home design — where clean sightlines and maximum glazed area define the aesthetic — aluminium is difficult to beat. Powder-coated finishes are available in an almost limitless colour range, and quality coatings resist fading, chalking, and corrosion impressively well, even in harsh coastal environments.
The thermal conductivity issue, however, is real and worth understanding clearly. Aluminium conducts heat far more readily than vinyl or fibreglass, which means that without a thermal break — an insulating barrier separating the interior and exterior sections of the frame — the inside surface can become cold enough to attract condensation in winter. In mild and warm Australian climates, non-thermally broken aluminium performs adequately. In cooler regions like Tasmania, the Victorian highlands, or Canberra's winter conditions, thermally broken aluminium systems become important for comfort and to meet NCC energy efficiency requirements. The cost difference between thermally broken and non-thermally broken aluminium is meaningful, so it pays to evaluate your actual climate exposure rather than defaulting to the cheapest option.
Wood-clad sliding windows serve a different purpose entirely. They pair a natural timber interior — typically hardwood or engineered timber — with an exterior shell of aluminium or fibreglass cladding. The result is a warm, tactile interior finish that suits heritage renovations, traditional interiors, or simply homeowners who prefer timber's natural grain over painted or extruded surfaces. The cladding handles weather exposure, while the timber core provides excellent natural insulation.
Maintenance sits between the extremes. The exterior cladding is essentially care-free, but the interior timber surface benefits from periodic oiling, sealing, or refinishing to maintain its appearance and protect against moisture. In tropical or high-humidity regions, timber cores require careful detailing around the sill and lower jamb to prevent moisture ingress. Double sliding windows in wood-clad frames are also heavier than their vinyl or aluminium equivalents, which can influence roller and track specifications.
- Budget-conscious renovations: Vinyl delivers the strongest cost-to-performance ratio for standard-sized replacement openings in temperate climates.
- Coastal environments: Marine-grade powder-coated aluminium (thermally broken where energy ratings demand it) resists salt corrosion and suits the slim-profile aesthetic of contemporary coastal homes.
- Extreme cold or high-altitude climates: Fibreglass or thermally broken aluminium — both offer dimensional stability and low U-values when paired with quality double glazing.
- Modern architectural styles: Aluminium, with its narrow sightlines and expansive colour range, is the go-to for contemporary and minimalist designs prioritising maximum glass area.
- Heritage or traditional interiors: Wood-clad frames deliver the warmth of natural timber inside with weather-resistant cladding outside, bridging aesthetics and durability.
Every material works. None is universally best. The right choice maps to your climate zone, your home's construction type, your aesthetic priorities, and how many years of low-maintenance performance you expect from the investment. What matters equally — and what most material discussions ignore — is the glass itself: the glazing package and energy ratings that determine how well the entire window system actually insulates your home.
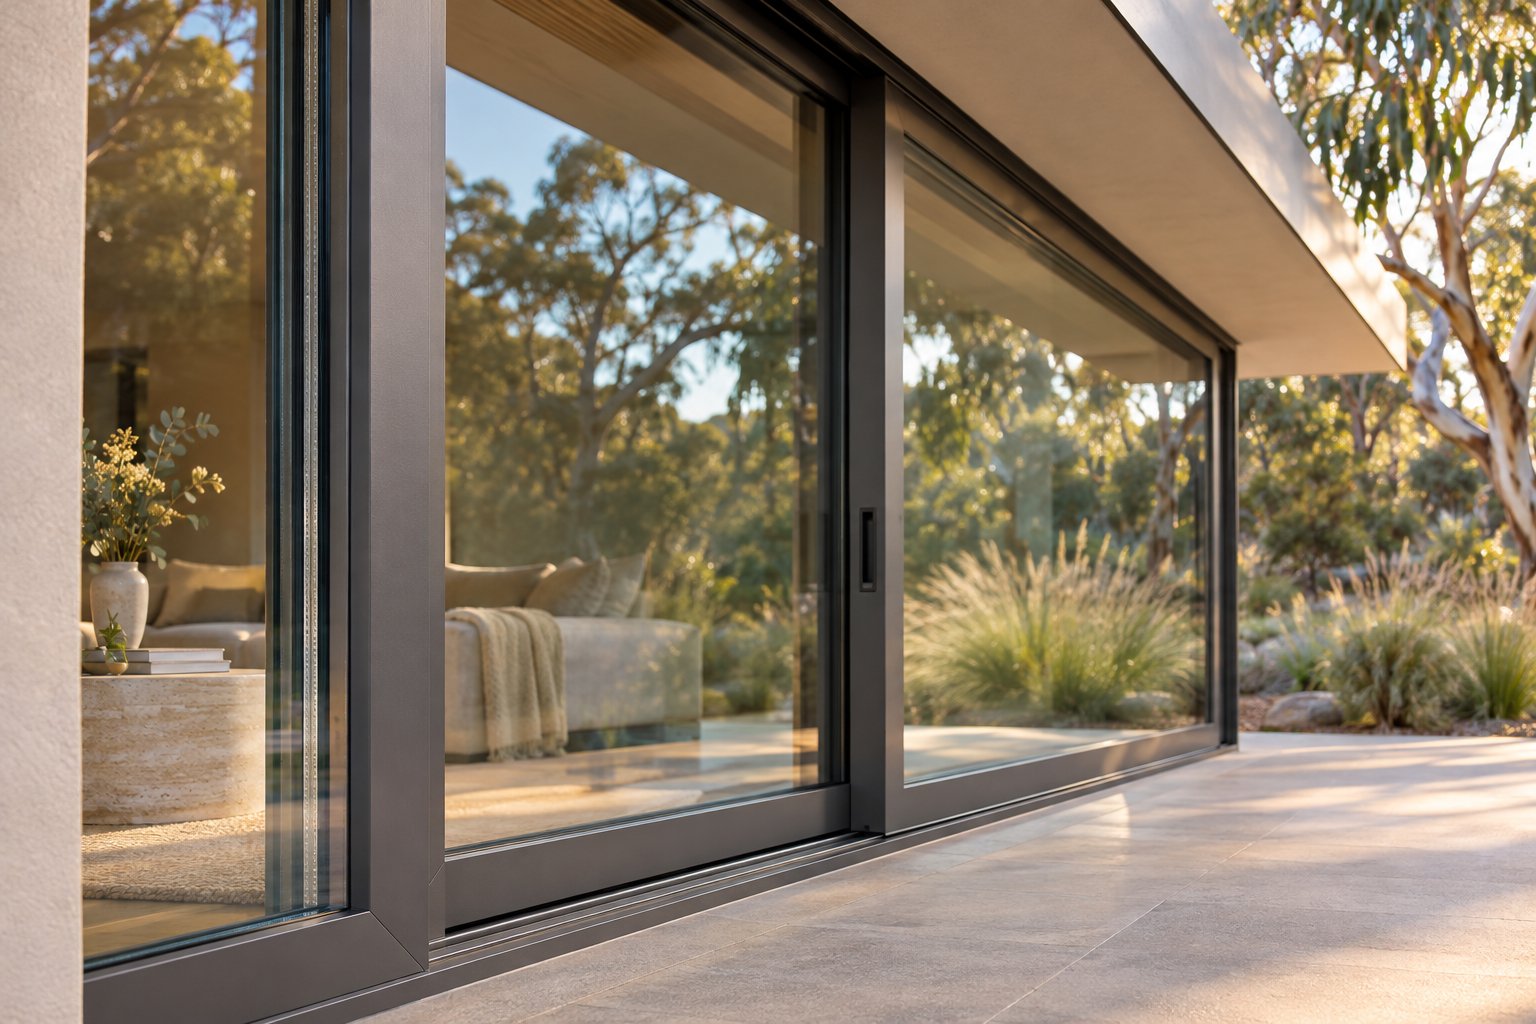
Energy Performance Ratings and Glazing Choices for Sliding Window Replacement
A window frame can be perfectly built from the finest material on the market and still perform terribly if the glass package is wrong. That's because the glazed area accounts for the vast majority of a window's total surface — and it's where most heat enters or escapes your home. When comparing energy efficient sliding windows, the frame material conversation from the previous section only tells half the story. The glazing tells the rest.
The problem is that energy ratings look cryptic at first glance. Numbers like 0.28, 0.23, and 0.45 sit on product labels without much context, and most homeowners gloss over them in favour of price and appearance. That's a costly mistake. These figures determine whether your new windows sliding into place will actually reduce your energy bills — or just look better while performing no differently from the old ones.
Understanding U-Factor, SHGC, and Air Infiltration
Three metrics matter most when evaluating any replacement sliding window, whether it's a standard 2 lite sliding window or a wide three-panel configuration.
U-value measures the rate of heat transfer through the entire window assembly — frame and glass combined. A lower number means better insulation. In practical terms, a window with a U-value of 3.0 W/m²K lets heat pass through roughly twice as fast as one rated at 1.5 W/m²K. In Australia, the Window Energy Rating Scheme (WERS) uses star ratings alongside U-values to make comparisons more intuitive — more stars for heating performance means less heat escaping through the glass in winter.
Solar Heat Gain Coefficient (SHGC) tells you how much solar radiation passes through the window and becomes heat inside the room. The scale runs from 0 to 1. A lower SHGC blocks more solar heat, which reduces cooling loads in hot climates — critical for north- and west-facing windows across most of Australia. A higher SHGC, conversely, lets more warmth in, which can benefit passive solar heating during cooler months in southern states. The U.S. Department of Energy notes that low-gain products (below 0.4 SHGC) suit hot climate zones, while high-gain products (above 0.55) are designed for cold zones — a principle that applies equally when selecting windows for Australian conditions under the NCC's climate zone framework.
Visible Transmittance (VT) measures how much natural light passes through the glazing. Values typically range from 0.10 to 0.80 for complete window assemblies, with higher numbers delivering brighter interiors. A common trap when chasing low SHGC is inadvertently selecting glass with poor VT — you block the heat but also block the daylight, leaving rooms dim and artificially lit during the day.
Air infiltration deserves special attention for any horizontal slider. Because the sliding sash meets the fixed panel at a vertical meeting rail — rather than compressing into a full-perimeter seal like a casement — that junction is inherently a potential weak point for air leakage. Quality matters enormously here. A well-engineered interlock and compression weatherstrip at the meeting rail can achieve air infiltration rates comparable to hinged windows, but a poorly designed or cheaply built junction will leak noticeably, especially during wind-driven rain. When comparing products, ask for the tested air infiltration rating rather than assuming all sliding windows perform equally at this critical seal point.
Glazing Options That Improve Efficiency
Individual components — the number of panes, the coatings, the gas between them — don't work in isolation. They function as an integrated system, and understanding how each layer contributes helps you make sharper choices.
Double glazing versus single pane. Single-glazed aluminium windows were standard in Australian homes for decades, and millions are still in service. Replacing a single-pane sliding sash with a double-glazed insulated glass unit (IGU) delivers the single largest performance jump available in a window upgrade. The sealed air space between two panes dramatically reduces conductive and convective heat transfer. For most Australian homeowners undertaking a sliding window replacement, double glazing is the minimum sensible specification.
Low-E coatings. A Low-E (low emissivity) coating is a microscopically thin metallic layer applied to one surface of the glass inside the IGU. It selectively reflects infrared heat energy while still allowing visible light through. Not all Low-E coatings behave the same way. Solar-control Low-E coatings are engineered to reject more incoming solar heat — ideal for west-facing windows in Brisbane or Perth. Passive Low-E coatings prioritise retaining interior warmth — better suited to south-facing windows in Melbourne or Hobart. The placement of the coating within the IGU (which glass surface it's applied to) also changes performance, so specifying "Low-E" without understanding which type yields very different outcomes depending on your climate zone and window orientation.
Argon gas fills. Replacing the air between panes with argon — an inert, denser gas — further reduces heat transfer across the cavity. Argon fills work in tandem with Low-E coatings: the coating manages radiant heat, while the gas slows conductive and convective transfer through the gap. Together, they improve the overall U-value of the IGU beyond what either achieves alone.
Climate zone should drive your glazing decisions. In tropical and hot-arid regions across northern and central Australia, prioritising low SHGC glass keeps cooling costs down and reduces the thermal load on your air conditioning system. In cooler southern zones — Victoria, Tasmania, the ACT, highland NSW — a lower U-value takes priority to retain warmth during extended heating seasons. Many homes benefit from a mixed approach: low-SHGC glass on sun-exposed elevations and higher-SHGC or neutral glass on shaded sides, tailoring the glazing package to what each window actually faces rather than applying a single specification across every opening.
When comparing products from different manufacturers, WERS star ratings and the energy performance data on certified labels provide the most reliable apples-to-apples comparison tool. Brochure claims and marketing language vary widely, but independently tested and certified ratings — assessed under consistent conditions — give you a standardised baseline. Always ask for the WERS certificate or the tested performance data for the specific product configuration you're considering, not just the best-case numbers from the range.
Getting the glazing package right transforms a horizontal slider from a basic wall opening into an active part of your home's thermal envelope. But even the best glass means little if the window itself isn't configured correctly for the room it serves — and that's where panel layouts, track systems, and sizing come into sharper focus.
Sliding Window Configurations and Sizing Explained
Every slider window you see on a product page carries a short letter code — usually something like XO or OXO — and most buyers scroll right past it. That's a problem, because those letters determine how much ventilation you actually get, which panel moves, and how the window functions day to day. Misread the code, and you end up with an operable sash on the wrong side of the kitchen benchtop or a fixed panel blocking the only corner of the room that catches a breeze.
Standard Two-Panel and Three-Panel Layouts
The industry uses a simple alphabet: X marks a sliding (operable) panel and O marks a fixed panel. The sequence is always read from the exterior looking in, left to right. Get that viewing direction wrong and the entire code flips — which is exactly how ordering mistakes happen.
XO is the most common two-panel configuration: standing outside, the operable sash sits on your left and slides right behind the fixed panel. OX is the mirror image — same window, operable panel on the right. The choice between them comes down to which side of the opening you want airflow and easy access to the screen.
Three-panel and four-panel layouts extend the same logic to wider openings. XOX places operable panels at both ends with a fixed centre, giving you ventilation from two sides simultaneously — a meaningful upgrade for living areas and large bedrooms. OXO reverses the arrangement: fixed ends, operable centre. And for genuinely wide spans — think full-width living room walls or openings where you'd otherwise consider a sliding door to replace patio windows — OXXO delivers four panels with two operable sashes that part in the middle.
| Configuration Code | Panel Count | Operable Panels | Approximate Ventilation Opening | Track System Required | Best Suited For |
|---|---|---|---|---|---|
| XO / OX | 2 | 1 | ~50% of total width | 2-track | Kitchens, bathrooms, bedrooms, standard openings |
| XX | 2 | 2 | ~50% (panels overlap when open) | 2-track | Rooms needing flexible left/right airflow |
| XOX | 3 | 2 (both ends) | ~66% of total width | 3-track | Living rooms, master bedrooms, wide openings |
| OXO | 3 | 1 (centre) | ~33% of total width | 3-track | Feature windows prioritising views over ventilation |
| OXXO | 4 | 2 (centre pair) | ~50% of total width | 2-track or specialised multi-track | Extra-wide openings, living areas, sunrooms |
The relationship between configuration and track system is direct. A two-track system provides two parallel grooves — enough for a standard two-panel XO or OX layout plus, on some systems, an integrated flyscreen channel. Three-track systems accommodate three-panel configurations like XOX by adding a full-width third groove. The practical implication for replacements is wall depth: three-track frames sit deeper front-to-back, which can matter in older homes with thinner wall cavities. Always confirm the frame depth against your existing opening before committing to a three-panel layout.
A symmetric code like OXO or OXXO reads identically from either side of the glass, which eliminates one common ordering error. Asymmetric codes — XO versus OX — do not, and as configuration guides stress, the safest practice is to note which side you're reading from on the order form itself. A photograph of the opening with the desired operable side marked removes all ambiguity.
Choosing the Right Configuration for Each Room
Matching a configuration to a room isn't just about aesthetics — it's about how the space is used, what's near the window, and whether safety codes apply.
Kitchens. An XO or OX gliding windows layout over the countertop is the standard choice. Pick the code that places the operable sash away from the stovetop and rangehood, so grease-laden air doesn't get pulled directly across food preparation areas. The fixed panel closest to the cooking zone stays sealed and easy to wipe clean.
Basements and lower-ground rooms. This is where Australian building regulations intersect with configuration choices. The NCC requires habitable rooms — including bedrooms — to have openings sufficient for emergency egress. A basement slider window used in a bedroom must meet minimum clear-opening dimensions. Sliding egress windows generally need to be at least approximately 1200 mm × 1200 mm (roughly 4 × 4 feet) to satisfy code requirements, though specific thresholds vary by state and council. Check your local regulations before finalising the size — an undersized basement slider window can fail inspection regardless of how well it's built. Because only the operable sash counts toward the egress clear opening, not the full frame width, you may need a wider unit than you'd initially expect.
Living rooms and wide openings. Three-panel XOX configurations shine here. Both end panels slide open, creating cross-ventilation pathways that a single operable sash simply can't replicate. For homeowners who want the wide-span look of sliding replacement windows without committing to a full sliding door system, a three-panel slider window bridges that gap — expansive glass, dual ventilation points, and no floor track to trip over.
Bedrooms. Privacy and quiet matter as much as airflow. An OX or XO layout with quality acoustic-rated glazing balances fresh air with noise reduction. Position the operable panel on the side that faces away from the street or neighbouring property where possible.
Custom sizing is one of the most underappreciated advantages of ordering sliding replacement windows rather than pulling stock units off a shelf. Most quality manufacturers build to the exact millimetre dimensions of your existing opening, which means a pocket-insert replacement slides into the frame without shimming out oversized gaps or — worse — discovering the stock size is 20 mm too wide. When browsing retrofit windows home depot or warehouse stores may carry in standard dimensions, those sizes rarely align perfectly with the openings in older Australian homes. Custom-manufactured units eliminate that mismatch entirely.
As a practical example, the MEICHEN MA100 Sliding Window is a two-track aluminium system that supports project-specific sizing for replacement openings. It includes double-glazing options, powder-coated finishes, and a fixed high-transparency flyscreen — a useful reference point for how a purpose-built aluminium slider window handles real-world replacement scenarios. Notably, MEICHEN requires project review to confirm panel layouts, large-opening dimensions, and structural requirements rather than publishing generic maximum sizes and leaving buyers to guess. That's a practice worth expecting from any manufacturer you're evaluating: if a company lets you order a wide-span configuration without reviewing your specific opening and structural conditions, treat that as a caution flag, not a convenience.
One important consideration with the MA100 and similar non-thermally broken aluminium systems: they perform well in mild and warm Australian climates, but buyers in cooler regions should evaluate whether the absence of a thermal break aligns with their NCC energy compliance needs and comfort expectations, particularly on south-facing elevations. The Weatherbarr Heritage Slider and comparable thermally broken alternatives may suit those conditions better — the key is matching the system to the climate rather than assuming one product fits every scenario.
Configuration and sizing decisions lock in how your windows will function for decades. But function also depends on what's happening inside the frame — the rollers, tracks, latches, and weatherstripping that determine whether a panel still glides smoothly ten years from now or becomes the window everyone avoids opening.
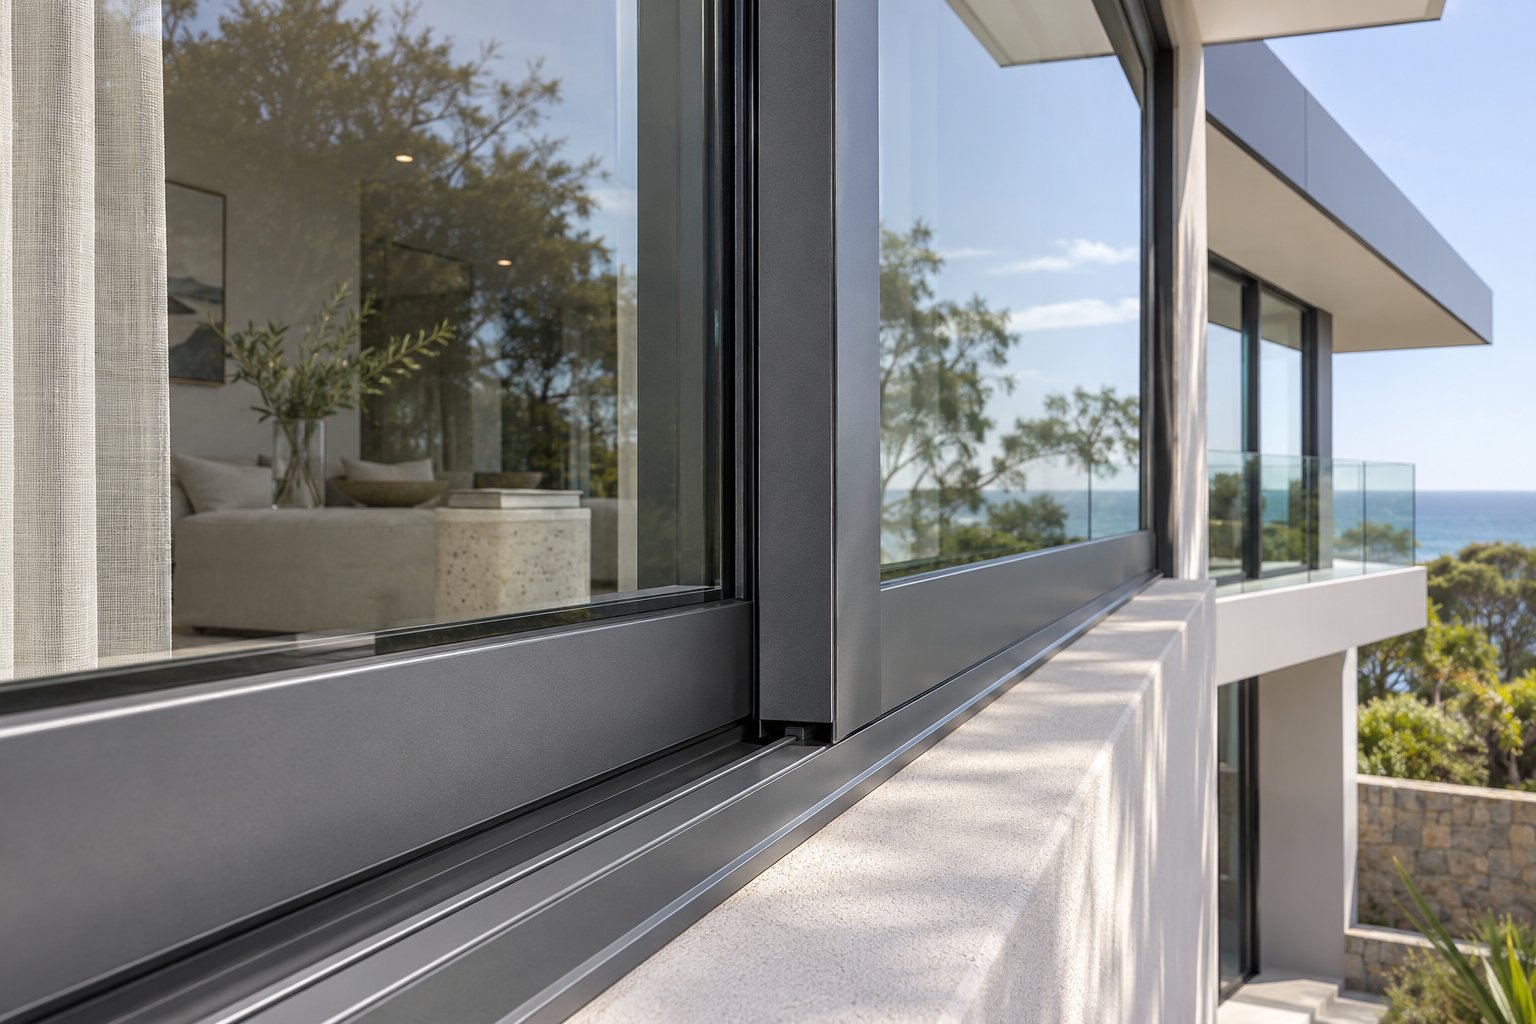
Hardware and Mechanisms That Affect Long-Term Performance
A horizontal sliding window can have the best frame material and glazing package money can buy — and still feel cheap, sticky, or draughty within a few years if the hardware inside it is second-rate. The rollers, tracks, latches, and weatherstripping are the parts you never see in a brochure photograph, yet they dictate how the window actually feels under your fingertips every single day. They also determine how well the sash seals when locked, how quietly it operates at midnight when you're trying not to wake the house, and how many years pass before anything needs servicing.
Most buyers spend their research time comparing frame materials and glass coatings — topics covered thoroughly in showrooms and spec sheets. Hardware rarely gets the same scrutiny. That's a gap worth closing before you sign anything.
Roller Systems, Tracks, and Latch Mechanisms
The rollers sitting beneath the operable sash carry its full dead weight across the track every time you open or close the window. A standard double-glazed aluminium sash in a 1500 mm wide opening can weigh 15 kg or more, and that load concentrates on two small roller assemblies — one at each bottom corner. The quality of those assemblies shapes the window's entire lifespan.
Tandem rollers — assemblies with dual wheels per corner — distribute weight across a wider contact area than single-wheel designs. That broader footprint reduces point loading on the track, slows flat-spotting of the wheels, and keeps the sash riding level even after years of daily use. As hardware manufacturers note, dual-wheel assemblies are especially effective for larger or heavier sliding windows commonly found in living areas and sunrooms. Single rollers work adequately on lightweight sashes in small openings — bathroom slider horizontal configurations, for instance — but they wear unevenly under heavier loads and tend to develop play in the bearing sooner.
Roller material matters, too. Nylon wheels are lightweight, quiet, and resist corrosion — a smart choice for coastal homes where salt air attacks exposed metal. Steel rollers handle heavier loads and suit commercial-weight sashes, though they benefit from zinc plating or stainless construction in high-humidity environments. Rubber-coated wheels, tested to over 120,000 open-close cycles in some product lines, add noise dampening while maintaining grip on the track surface.
Adjustability is the feature that separates a window slider you install once and forget from one that requires constant fiddling. Quality roller assemblies include height-adjustment screws accessible from the face or edge of the sash, letting you fine-tune the panel's alignment without removing it from the track. Frames settle. Houses shift. Tracks accumulate micro-wear. An adjustable roller compensates for all of this.
Track design is the roller's silent partner. Raised tracks — where the rail sits above the sill surface — shed water naturally through gravity and are simpler to clean because debris doesn't pool in a channel. Recessed tracks — grooves milled into the sill — offer a cleaner visual line and reduce the trip hazard at doorway-height openings, but they require integrated drainage channels to prevent water from sitting against the sash bottom and deteriorating the seal. Look for weep holes or slotted drainage paths in the track profile, particularly if you're installing sliding sunroom windows or any unit on an exposed elevation where wind-driven rain is a regular visitor.
Latches do double duty. They're the security mechanism and the compression device that pulls the sash tight against the weatherstripping when the window is locked. Cam locks — the most common type on residential horizontal sliding window units — rotate an oval-shaped cam behind a keeper, drawing the sash inward as they turn. Lever locks perform a similar function with a different hand motion. In either case, the lock's throw distance — how far it pulls the sash toward the frame — directly affects how much compression it applies to the weatherstrip seals. A lock that barely engages might feel "closed" but leaves a micro-gap the wind exploits ruthlessly.
Weatherstripping and Long-Term Seal Integrity
Weatherstripping is the last line of defence between conditioned indoor air and whatever's happening outside. On a sliding window, three distinct seal types work together across different parts of the assembly.
Pile strips — the fuzzy, brush-like material running along the sash edges — manage the seal between the sash and the frame channel. They flex to accommodate slight movement as the panel slides, wiping dust and debris while maintaining contact. Pile strips are standard across virtually all slider windows forms because they tolerate the repeated lateral motion that would destroy a rigid gasket.
Compression bulb seals sit at the meeting rail — the vertical junction where the operable sash overlaps the fixed panel. When the lock engages, the cam or lever forces the sash against this bulb, compressing it to form a near-airtight barrier. This junction is the single most critical seal point on any sliding window. It's where air infiltration testing picks up the widest variation between products: a well-engineered interlock with quality compression seals can perform comparably to a casement, while a poorly designed meeting rail leaks like a louvred window.
Fin seals — pile strips with a thin Mylar or plastic fin centred within the bristles — line the tracks and provide additional weather resistance at the sash-to-frame interface. The U.S. Department of Energy's Building America programme identifies fin seals as particularly durable for aluminium sliding windows and sliding glass doors, noting their longevity under repeated friction cycles — a quality that translates directly to Australian conditions where UV degradation and dust exposure challenge softer seal materials.
All weatherstripping degrades over time. UV radiation hardens rubber compounds. Dust and grit grind into pile fibres. Compression seals take a permanent set after years of being pressed flat, losing their ability to spring back and fill the gap. The rate of degradation varies enormously depending on material quality, UV exposure, and how often the window is operated. Budget-tier window slider products typically use thinner pile and lower-density compression seals that lose effectiveness within five to eight years. Premium products specify higher-grade EPDM rubber, denser pile, and thicker fin seals that maintain performance for fifteen years or more before needing replacement.
Critically, check whether the weatherstripping on any product you're evaluating is replaceable by the homeowner or a glazier — or whether seal failure means replacing the entire sash or frame assembly. Replaceable weatherstrip channels are a sign of a product designed for long-term serviceability, not planned obsolescence.
- Roller type: Tandem (dual-wheel) or single? What material — nylon, steel, or rubber-coated? Is height adjustment accessible without sash removal?
- Track drainage design: Are weep holes or drainage slots integrated into the track profile to prevent water pooling?
- Meeting rail interlock: How does the operable sash engage the fixed panel at the overlap? Is there a positive interlock that resists forced entry and compresses the seal?
- Lock mechanism: Cam lock or lever lock? What is the throw distance, and does it create measurable compression against the weatherstrip?
- Weatherstrip material and replaceability: What grade of rubber or pile is used? Can weatherstripping be replaced independently as it wears, without replacing the sash or frame?
These five questions won't appear on most product brochures. Ask them directly — of the manufacturer, the supplier, or the installer quoting your project. The answers separate hardware that quietly performs for decades from components that start failing almost as soon as the warranty clock begins ticking. And speaking of the total investment, the next piece of the puzzle is understanding what all of this actually costs — and how long the full process takes from first measurement to final inspection.
Cost Factors and Realistic Project Timelines for Sliding Window Replacement
The five hardware questions closing the previous section point toward a broader truth: a replacement sliding window's real cost goes far beyond the sticker price of the unit itself. Yet pricing is the single topic most guides dodge entirely, offering vague advice like "contact us for a quote" while leaving homeowners with no framework for judging whether a quote is reasonable, inflated, or suspiciously cheap.
Exact dollar figures vary too widely to publish a universal price list — your total will shift based on where you live, what your walls are made of, and a dozen other variables unique to your house. What we can do is map those variables clearly so you walk into every conversation knowing which levers move the number and why.
Factors That Drive Replacement Sliding Window Costs
Frame material creates the first pricing tier. As the material comparison earlier in this article showed, vinyl sliding windows start at roughly $350–$700 AUD supply-only for a standard-sized unit, while aluminium runs $400–$900, fibreglass sits around $700–$1,200, and wood-clad options climb past $900–$1,500+. These are supply-only figures for standard dimensions — the installed cost per window, including labour and materials, typically ranges from approximately $800 to well over $2,000 AUD depending on the specifics below.
Glazing package stacks on top of the frame cost. Stepping up from a basic clear double-glazed IGU to a Low-E coated, argon-filled unit adds anywhere from $80 to $250+ per window. Acoustic-rated laminated glass — common in window slider replacement projects near busy roads — costs more again. Single-pane glass barely exists in the replacement market anymore, so double glazing is effectively the baseline.
Size and configuration complexity scale predictably. A standard two-panel XO slider for a bathroom or kitchen opening costs less than a wide three-panel XOX unit for a living area, which in turn costs less than an OXXO four-panel setup. A triple slider window or a large-format end vent sliding window designed for maximum ventilation across a wide span requires more material, heavier-duty hardware, and longer manufacturing time. Custom-sized windows — built to match the exact millimetre dimensions of your existing opening — typically carry a premium of 10–25% over catalogue stock sizes. That premium, though, often pays for itself by eliminating the frame modifications, packing pieces, and additional labour needed to make a stock unit fit an opening it wasn't designed for.
Installation method is arguably the biggest cost variable of all. A pocket-insert (retrofit) slider window installation on a ground-floor opening with a sound existing frame might take a qualified installer one to three hours per window. Full-frame replacement — stripping back to the rough opening, reflashing, patching cladding and internal plaster — can run a half-day to a full day per opening and easily doubles or triples the labour component. Upper-storey installations add scaffolding or elevated work platform costs. Homes with brick veneer require careful cutting around the reveal, while weatherboard or fibre-cement-clad homes may need cladding repair at the junction. Regional labour rates also swing the total: expect higher per-hour rates in Sydney and Melbourne compared with regional centres in Queensland or South Australia.
Sliding basement windows and sliding windows for sunroom enclosures introduce their own cost modifiers. Basement installations may involve cutting into masonry block or concrete, adding drainage wells, or meeting NCC egress requirements that dictate minimum opening sizes — all of which increase scope beyond a simple like-for-like swap. Sunroom projects often involve multiple large openings on exposed elevations, which can push both the glazing specification and the structural requirements upward.
Realistic Project Timelines from Measurement to Completion
The physical installation is often the fastest part of the entire process. Industry installation guides note that a single standard replacement window typically requires 30 to 60 minutes of hands-on work once the unit is on site, assuming the frame is sound and no structural repairs are needed. A whole-house project with a dozen or more openings can often be completed by a two-person crew within one to three days.
The longer wait sits upstream and downstream of that installation day. Here's what a realistic project arc looks like in practice:
- Initial measurement and consultation (Week 1–2): A qualified installer or manufacturer's representative visits the home, measures each opening, assesses frame condition, and determines whether pocket-insert or full-frame replacement is appropriate. Getting two or three quotes at this stage is essential — not just for price comparison, but because different installers may diagnose the frame condition differently.
- Product selection and ordering (Week 2–4): You finalise frame material, glazing package, configuration codes, and colour. Custom-manufactured windows — the norm for Australian replacement projects — enter a production queue.
- Manufacturing lead time (Week 4–10+): Lead times vary significantly by manufacturer, product complexity, and season. Standard aluminium or vinyl sliding windows from local manufacturers may ship in three to four weeks. Fibreglass, wood-clad, or specialised configurations can stretch to eight weeks or beyond. Peak building season (spring and early summer) often extends lead times further.
- Scheduling and preparation (Week 8–12): Once windows are manufactured and dispatched, the installer books your installation date. Clear furniture away from internal window walls, trim back external landscaping for access, and remove blinds and curtains beforehand to keep the crew working efficiently.
- Installation day (1–3 days for a typical home): Pocket-insert replacements move quickly — often one to three hours per window. Full-frame jobs, upper-storey work, or projects involving multiple large openings take longer. Your installer should confirm the expected duration in advance so you can plan around it.
- Final inspection and sign-off (Within 1–2 weeks post-install): Check operation of every sash, confirm locks engage fully, verify drainage weep holes are clear, and inspect all internal and external sealant lines before making final payment.
One timeline element that catches many homeowners off guard is council approval. As permitting specialists note, requirements vary by jurisdiction, and the same principle applies in Australia. A like-for-like replacement — same size, same style, same opening — generally does not require a development application (DA) or building approval in most Australian councils. However, if you're changing the size of the opening, altering the external appearance of a heritage-listed property, or installing windows that affect compliance with NCC energy provisions or bushfire regulations (BAL-rated zones), council approval may be required. Always check with your local council before work begins. Discovering mid-project that you need approval you haven't applied for can freeze the entire job for weeks.
Regardless of project size, verify that your installer holds a current builder's licence (or the equivalent trade licence in your state), carries adequate public liability and workers' compensation insurance, and provides a written scope of work that details exactly what's included — and what's not. The gap between a verbal assurance and a written contract is where budget blowouts hide.
With cost and timeline mapped out, the final piece is pulling every decision — frame material, glazing, configuration, installation method, and budget — into a single coherent plan, and understanding when to handle it yourself versus when a professional is non-negotiable.

Choosing the Right Replacement Sliding Window for Your Project
You've assessed the condition of your existing frames, weighed up materials, decoded glazing ratings, and mapped out configurations and costs. What remains is the decision that ties everything together: who actually installs the windows, and how do you synthesise all of this into a confident final selection? These two questions trip up more buyers than any technical specification ever does.
DIY vs Professional Installation Considerations
The appeal of self-installation is obvious — save on labour, work on your own schedule, and feel a genuine sense of accomplishment. For certain scenarios, it's a realistic path. A pocket-insert replacement on a ground-floor, standard-sized opening with a sound existing frame is the most feasible DIY scenario. The old sashes come out, the new slide window unit goes in, you shim, seal, and adjust. Straightforward in principle.
In practice, the margin for error is thinner than most guides admit. Improper flashing around the frame edge — one of the most common DIY mistakes — creates water pathways behind the wall cladding that can cause concealed rot and mould damage costing thousands to remediate. The Efficient Windows Collaborative stresses that quality installation is critical for an airtight fit and a continuous water barrier, and recommends following manufacturer specifications closely, including whether the particular installation requires trained professionals. Getting the window level, plumb, and square inside the opening isn't just about aesthetics — a panel that's even slightly racked won't seal properly at the meeting rail, defeating the purpose of every dollar spent on premium glazing and weatherstripping.
Then there's the warranty question. Many manufacturers — particularly those producing higher-end aluminium, fibreglass, and sliding vinyl windows — require professional installation as a condition of their product warranty. As installation specialists note, when you hire a professional, you often receive two layers of coverage: one for the product and another for the labour. A voided warranty on a sliding glass window with a twenty-year glass seal guarantee represents a significant financial risk, potentially worth $1,500 to $3,000 AUD over the window's lifetime if seal failure occurs.
Full-frame replacements, upper-storey installations, oversized horizontal windows, and any project in a bushfire-rated (BAL) zone should be handled by a licensed professional. The skill requirements — cutting into wall framing, integrating new flashing with existing sarking, meeting NCC energy compliance, and potentially lodging council approvals — sit well beyond standard DIY capability. Even confident renovators tend to underestimate how long these projects take: what a professional crew completes in one to two hours per window can stretch to four to six hours for a homeowner working without specialised tools and experience.
Making Your Final Replacement Window Selection
Rather than bouncing between product pages hoping something clicks, work through the decision systematically. Each step narrows the field until you're comparing two or three specific products rather than fifty.
- Confirm the installation method. Is the existing frame structurally sound, square, and free of rot or corrosion? If yes, pocket-insert replacement keeps costs down and disruption minimal. If no, budget for full-frame replacement and the additional finishing work it involves.
- Select frame material based on climate and budget. A vinyl sliding window suits temperate zones and budget-conscious projects. Aluminium — the dominant choice for Australian homes — delivers slim profiles and broad colour options; opt for thermally broken systems in cooler regions. Fibreglass offers premium performance across all climates at a higher price point.
- Choose the glazing package for your climate zone. Prioritise low SHGC on sun-exposed elevations in warm climates (northern and western Australia). Prioritise low U-values in cooler southern zones. Double glazing with Low-E coating and argon fill is the practical minimum for any replacement project aiming to improve energy performance.
- Determine the correct configuration. Match the XO, OX, XOX, or OXXO layout to each room's ventilation needs, furniture placement, and — for bedrooms — NCC egress requirements. Custom sizing to your existing opening dimensions avoids the compromises of stock-sized units.
- Evaluate manufacturer warranty terms. Look for separate coverage on the frame, glass seal (IGU), hardware, and finish. Confirm whether the warranty requires professional installation. Check the claims process — a lifetime warranty with an onerous claims procedure is worth less than a twenty-year guarantee with straightforward support.
- Verify installer credentials. Confirm current builder's or trade licence for your state, public liability insurance, workers' compensation coverage, and a written scope of work. Obtain at least two to three quotes and compare scope, not just price.
Working through this checklist before requesting quotes puts you in a fundamentally stronger position. You're no longer comparing apples to oranges — you're comparing specific products, specific installation methods, and specific warranty terms against each other.
As one concrete example, the MEICHEN MA100 Sliding Window illustrates what a replacement-ready aluminium system looks like in practice: a two-track horizontal window design with double-glazing choices, powder-coated finishes, and a fixed high-transparency flyscreen. MEICHEN's process requires project review to confirm replacement fit, panel layouts, structural requirements, and installation scope before an order proceeds — a responsible approach that any quality manufacturer should offer. Worth noting: the MA100 is a non-thermally broken aluminium system, which makes it well suited to mild and warm Australian climates. Buyers in cooler regions — Victoria, Tasmania, the ACT — should evaluate whether a thermally broken alternative better matches their comfort and NCC compliance needs.
That kind of honest product-to-climate matching is exactly the mindset to carry through your entire selection process. Glider windows, horizontal windows, sliding glass window systems — the labels vary, but the evaluation framework stays the same. Whether you're comparing the cost of replacement windows at home depot-style warehouse stores or obtaining quotes from specialist aluminium fabricators, the six steps above give you a consistent lens for every option on the table.
Replacement sliding windows aren't a glamorous purchase. Nobody brags about their U-values at a barbecue. But they're one of the few home improvements that pays you back every single day — in comfort, in energy savings, in the simple satisfaction of a window that slides open with one finger and seals tight when it closes. Get the diagnosis right, match the product to your conditions, and trust the installation to someone qualified. The buyers who realise these things too late are the ones who skipped the homework. You just finished it.
Frequently Asked Questions About Replacement Sliding Windows
1. What is the difference between pocket-insert and full-frame replacement sliding windows?
A pocket-insert (retrofit) replacement slides a new window unit into the existing frame after the old sashes and hardware are removed, leaving exterior cladding, trim, and interior finishes untouched. This method is faster, less expensive, and minimises disruption. A full-frame replacement strips everything back to the rough wall opening — studs, sarking, and flashing are all exposed. Full-frame is necessary when the existing frame is rotted, corroded, or out of square. It costs more and takes longer but allows inspection of concealed damage and accommodates changes to window size or style. Always have an installer assess the frame condition before assuming which method applies to your project.
2. How do I know if my sliding windows need replacing or just repairing?
A single issue — such as a stiff sash from worn rollers or draughts from degraded weatherstripping — usually points to a targeted repair rather than full replacement. However, when multiple symptoms appear simultaneously, such as fogged glass between panes combined with frame warping and persistent air leakage even when locked, the window has likely reached end of life. Condensation trapped inside a double-glazed unit means the insulating gas seal has failed, which is rarely worth repairing. Modern sliding windows manufactured to current WERS and AS 2047 standards offer significantly better air infiltration performance than units from fifteen to twenty years ago, so upgrading can improve comfort even when old windows still technically function.
3. Which frame material is best for replacement sliding windows in Australia?
The best frame material depends on your climate zone, budget, and aesthetic priorities. Aluminium dominates the Australian market thanks to its slim profiles, extensive powder-coat colour range, and strong corrosion resistance — though thermally broken systems are recommended for cooler regions like Victoria and Tasmania. Vinyl (uPVC) offers the lowest upfront cost and zero painting maintenance, making it ideal for temperate-zone budget renovations. Fibreglass delivers superior dimensional stability and thinner sightlines at a premium price. Wood-clad frames suit heritage or traditional interiors where a natural timber finish is desired inside, paired with weather-resistant exterior cladding. Each material performs well under the right conditions; the key is matching it to your specific situation.
4. What do the XO and OX configuration codes mean on sliding windows?
Configuration codes use X for an operable (sliding) panel and O for a fixed panel, read from the exterior looking inward, left to right. XO means the left panel slides and the right is fixed; OX is the reverse. Three-panel setups like XOX have operable panels at both ends with a fixed centre, providing dual-point ventilation for living areas. OXXO is a four-panel layout with two operable sashes meeting in the middle, suited to extra-wide openings. Choosing the wrong code places the operable sash on the inconvenient side of the room, so always confirm your viewing direction — exterior looking in — when ordering.
5. Can I install replacement sliding windows myself, or do I need a professional?
A ground-floor pocket-insert replacement on a standard-sized opening with a structurally sound frame is the most feasible DIY scenario. However, improper flashing can cause concealed water damage, and a sash installed even slightly out of square will not seal properly at the meeting rail. Many manufacturers also require professional installation as a condition of their product warranty — voiding coverage on a window with a twenty-year glass seal guarantee represents a significant financial risk. Full-frame replacements, upper-storey work, oversized openings, and any project in a bushfire-rated (BAL) zone should always be handled by a licensed professional with current insurance and a written scope of work.