

Step 1 – Assess Your Aluminium Frame Condition
Can you paint aluminium window frames and get a result that actually lasts? Yes — but only if the surface underneath is worth painting over. The difference between a repaint that holds for a decade and one that peels within months comes down to what you do before you ever open a tin of paint.
Before learning how to repaint aluminium window frames, you need to honestly evaluate what you're working with. Think of it as a simple decision tree: check the frame condition, then decide whether DIY repainting makes sense, whether you need more intensive preparation, or whether the frames have deteriorated past the point of no return.
Can You Paint Aluminium Window Frames Successfully
Absolutely — can you paint a window frame made from aluminium and expect professional-looking results? Thousands of Australian homeowners do it every year. The metal itself is structurally sound for decades, even when the surface looks tired. Faded, chalky, or lightly weathered frames respond beautifully to repainting when the prep work is done right. The challenge is that aluminium's smooth, non-porous surface resists paint adhesion by nature. Its oxide layer forms almost instantly when exposed to air, creating a barrier that standard coatings struggle to grip. That's a solvable problem — it just requires the correct approach.
How to Assess Your Frame Condition Before Starting
Run your finger along the frame. A light chalky residue — white or grey powder that transfers to your skin — is aluminium oxide. This is surface-level weathering and the easiest condition to repaint over. Old aluminum window frames in this state are ideal DIY candidates.
For frames with existing paint, test adhesion by scoring a small cross-hatch pattern with a sharp knife, then pressing painter's tape firmly over it and pulling away. If the paint stays put, you can paint over it after proper sanding. If flakes lift off with the tape, that old coating needs to come off first.
Here's what to look for at each level:
Good candidate for DIY repainting:
- Light chalking or fading with no structural damage
- Existing paint still well-adhered (passes the tape test)
- Frames operate smoothly — no warping or sticking
- Surface feels slightly rough but not deeply pitted
Needs extra preparation before painting:
- Moderate oxidation with visible white powdery buildup
- Existing paint bubbling or flaking in patches
- Light surface pitting (less than 1 mm deep)
- Some discolouration but frame remains structurally solid
When Frames Are Too Damaged for DIY Repainting
Can you repaint aluminium window frames that show deep pitting, holes, or structural flex? Technically you can apply paint to anything — but it won't solve the underlying problem. Coating failures on aluminium trace back to surface condition more than paint quality. Research from corrosion specialists confirms that frames with pitting deeper than 3 mm have lost structural integrity that no amount of filler and paint can restore.
Consider replacement rather than repainting if you see:
- Deep pits or craters across more than 30% of the frame surface
- The frame flexes noticeably when you push on it
- Windows no longer close or lock properly due to frame distortion
- Corrosion around hardware mounting points — screws have nothing solid to grip
- Multiple previous repaints with diminishing results each time
Can you paint window frames in this condition? You can, but you'd be painting over a problem rather than fixing it. For frames showing severe deterioration — particularly in coastal areas where salt spray accelerates damage — honest assessment now saves frustration later.
If your frames fall into the first two categories, the project is well within DIY reach. The key is matching your preparation effort to the condition level, which starts with gathering the right tools and materials for the job.
Step 2 – Gather Tools, Materials, and Safety Gear
Getting everything together before you start prevents those frustrating mid-project trips to the hardware store — especially when you've already got a half-sanded frame exposed to the elements. The materials for repainting aluminium window frames break neatly into four phases: protection, cleaning, preparation, and painting.
Safety Equipment You Need for the Job
Primers designed for aluminium — particularly self-etching formulations — release fumes that irritate lungs and eyes. Workplace safety guidelines emphasise respiratory and skin protection whenever paints or primers containing solvents are applied, whether by spray or by hand. For a residential window project, that translates to:
- A half-face respirator with organic vapour cartridges (essential during priming and if using solvent-based paint for aluminum window frames)
- Safety glasses or goggles — sanding dust and chemical splashes are real risks
- Nitrile or chemical-resistant gloves to prevent skin absorption of solvents
- A stable ladder or scaffolding for upper-storey windows — never overreach from an unsecured position
- Drop cloths below your work area to catch drips and debris
Complete Materials Checklist by Project Phase
The table below covers what you need for a standard single window. Scale quantities up for multiple frames, and factor in that the best paint for aluminum window frames won't perform unless every preceding phase is done properly.
| Item | Purpose | Approx. Quantity (Per Window) |
|---|---|---|
| Sugar soap or TSP solution | Cuts through grease, grime, and chalky oxidation | 500 ml mixed solution |
| Scotch-Brite pads (green) | Scrub stubborn residue during cleaning | 1–2 pads |
| Clean lint-free rags | Wiping and drying between steps | 4–6 rags |
| 120-grit sandpaper | Creates mechanical key on bare aluminium | 2 sheets |
| 240-grit sandpaper | Smooths between primer and topcoats | 2 sheets |
| Painter's tape (quality brand) | Masks glass edges, weather stripping, walls | 1 roll (36 mm width) |
| Plastic sheeting | Protects glass panes and surrounding surfaces | 1–2 m² |
| Tack cloth or methylated spirits | Final dust removal before priming | 1 cloth or 100 ml |
| Self-etching or bonding primer | Chemical and mechanical adhesion to aluminium | 250–500 ml |
| Exterior acrylic topcoat (window trim paint) | UV-resistant, flexible finish coat | 500 ml |
| 38 mm angled sash brush | Detail work on narrow frame profiles | 1 brush |
| Mini foam roller (100 mm) | Smooth coverage on flat frame faces | 2 sleeves |
A quick note on paint for window frames: choose a 100% acrylic exterior formula in a satin or semi-gloss sheen. These flex with aluminium's thermal movement and resist UV degradation far better than cheaper alternatives. Aluminum trim paint in darker colours absorbs more heat, so a quality acrylic with good flexibility becomes even more important.
Should You Remove Hardware or Mask It
Removing latches, handles, and stays before painting delivers noticeably cleaner results. Paint for aluminum windows tends to build up around hardware edges when you try to work around them, leaving visible ridges once everything dries. As painting professionals note, nothing signals an amateur job quite like caked-over window hardware.
Take a photo of each piece before removal so reinstallation is straightforward. Keep screws in labelled bags — one per window. If hardware is corroded in place and won't budge without risking frame damage, mask it carefully with painter's tape pressed firmly into every edge.
For glass protection, you have two practical options. The thorough approach: run quality painter's tape precisely along the glass-to-frame junction, pressing the edge down hard to prevent paint creep. The faster approach: skip taping the glass entirely, paint with a steady hand using your angled sash brush, and scrape any overspill off the glass later with a razor blade. Both work — the tape method just demands less confidence with a brush.
With your gear assembled and workspace protected, the real work begins: getting that aluminium surface ready to accept primer and hold it permanently.
Step 3 – Clean and Sand the Surface Properly
Every product choice and application technique you read about later means nothing if this step is rushed. Surface preparation is where painting aluminium either succeeds or fails — and it's the step most DIYers underestimate.
Industry data consistently shows that roughly 80–90% of paint failures on aluminium trace back to inadequate surface preparation. Contamination, skipped sanding, or residual dust prevent the primer from forming a lasting bond — no matter how premium the product.
The good news? Proper prep doesn't require expensive equipment. It requires patience and a methodical approach across four sub-steps.
How to Clean Aluminium Frames Before Painting
Start by mixing a strong sugar soap solution in warm water — roughly two tablespoons per litre. Using a Scotch-Brite pad or stiff nylon brush, scrub every surface of the frame to lift embedded grime, grease from hands and hinges, and that chalky oxidation residue you identified during assessment. Pay extra attention to the bottom rail where dirt accumulates and to corners where cobwebs trap moisture against the metal.
Rinse thoroughly with clean water. Any soap residue left behind acts as a release agent between the metal and your primer — exactly the kind of substrate contamination that causes coatings to peel weeks after application. Allow the frames to dry completely. In humid coastal areas, give them a full afternoon in open air rather than rushing ahead while moisture lingers in joints and corners.
Sanding Technique for Proper Paint Adhesion
Here's the reality of painting on aluminium: the metal's surface is naturally slick. Even after cleaning, paint on aluminium has nothing to grip unless you create a mechanical key — thousands of tiny scratches that give primer something to lock into.
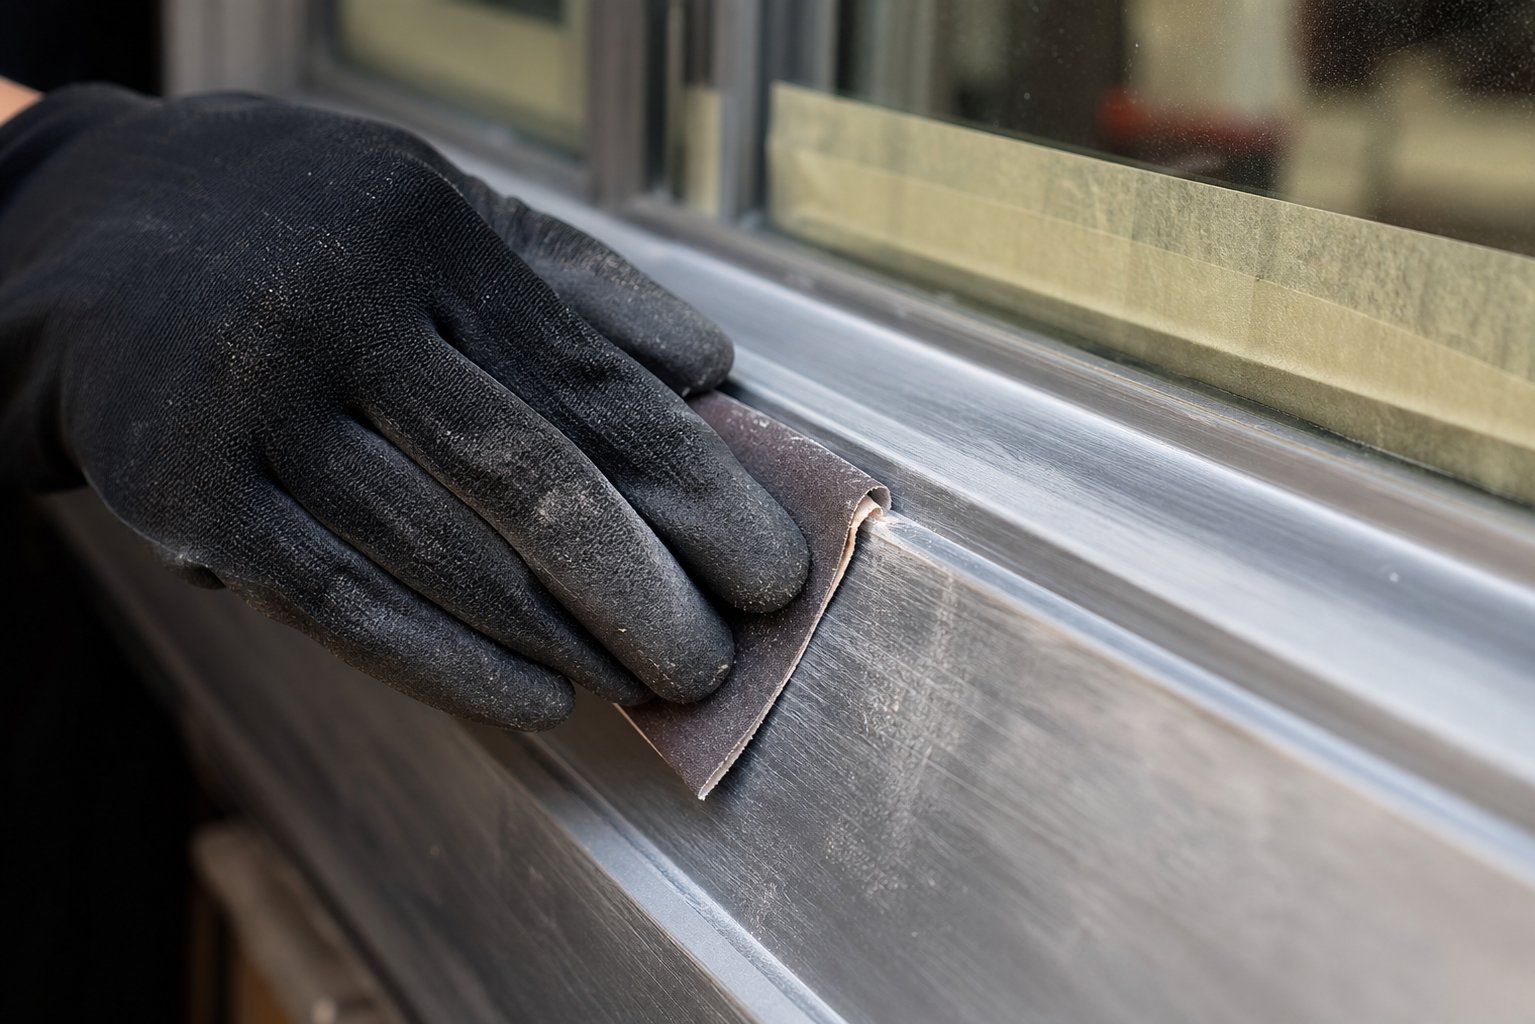
Take 120-grit sandpaper and work the entire frame surface using consistent, overlapping strokes. You're not trying to remove material — just dulling the sheen and creating a uniform texture. The frame should feel slightly rough to the touch, like fine suede, with no shiny patches remaining. On flat sections, wrap the sandpaper around a sanding block for even pressure. On curved profiles and corners, fold the paper and work by hand.
Once sanded, wipe the entire frame with a tack cloth or a rag dampened with methylated spirits. This final pass removes every particle of aluminium dust. Professional painters emphasise that any contaminants left behind at this stage cause adhesion issues, bubbling, or fisheyes in the finished coat. Don't skip it — even if the surface looks clean to the naked eye.
Handling Previously Painted or Anodised Frames
Frames with existing paint that's peeling or flaking need an extra step before sanding. Use a hand scraper or putty knife to remove all loose material, testing edges of intact paint as you go — if it lifts easily when you slide the scraper underneath, it's not bonded and must come off. Only once you're down to firmly adhered paint or bare metal should you proceed with sanding to feather the edges smooth.
Anodised aluminium window frames present a different challenge. The anodising process creates a hard, corrosion-resistant oxide layer that's deliberately designed to resist bonding. Painting anodised aluminium window frames successfully means scuffing through that protective coating more aggressively than you would on standard mill-finish aluminium. Step up to a coarser approach — firm pressure with 120-grit, or even 80-grit on heavily anodised surfaces — until the characteristic metallic sheen of the anodised layer is uniformly dulled. The goal isn't to strip the anodising entirely, but to roughen it enough that primer can penetrate and grip.
Regardless of your starting condition — bare, painted, or anodised — the frame should end this stage feeling uniformly textured, completely free of dust, and bone dry. That's the surface your primer needs to do its job. And choosing the right primer for your specific situation is what separates a five-year result from a five-month disappointment.
Step 4 – Apply the Right Primer for Aluminium
Does paint stick to aluminum without primer? Technically it can — for a few weeks. Then it peels off in sheets because there's no chemical bridge between the metal and the topcoat. Primer on aluminium isn't optional. It's the single product that transforms a slick, paint-rejecting surface into one that holds colour for years. The question isn't whether to prime — it's which type suits your frame condition.
So how do you paint aluminum window frames that actually stay painted? You choose a primer engineered specifically for non-ferrous metals. Standard metal primers designed for steel contain rust inhibitors that do nothing for aluminium and lack the bonding chemistry needed to grip its oxide layer. This mismatch is one of the most common reasons DIY repaints fail early.
Self-Etching vs Bonding Primer for Aluminium
Two primer categories dominate the aluminium market, and each works best in different situations. Understanding how to paint on aluminum starts with matching the primer to your surface.
Self-etching primers contain phosphoric acid that chemically reacts with bare aluminium, micro-etching the oxide layer and creating anchor points at a molecular level. They're the best way to paint aluminum that's been sanded back to bare metal — the acid does work that sandpaper alone cannot.
Bonding primers rely on adhesion-promoting resins rather than acid. They grip existing coatings and prepared surfaces through mechanical and chemical adhesion without the aggressive etching action. These are your pick when painting over previously coated frames where sound old paint remains.
| Feature | Self-Etching Primer | Bonding Primer |
|---|---|---|
| Best For | Bare aluminium sanded to raw metal | Previously painted frames with sound existing coating |
| Application Method | Spray (aerosol or gun) for even acid distribution | Brush, roller, or spray — all work well |
| Typical Dry Time | 15–30 minutes between coats | 1–2 hours between coats |
| Topcoat Compatibility | Most acrylics and enamels; check TDS for epoxies | Broad compatibility with water-based and solvent-based topcoats |
For anyone researching the best primer for aluminum siding or window frames, the same logic applies regardless of scale: bare metal gets self-etching, previously coated surfaces get bonding primer. If you're unsure which category your frames fall into after sanding, default to a bonding primer — it's more forgiving on mixed surfaces where patches of old paint remain alongside exposed aluminium.
How to Apply Primer Without Drips or Runs
Knowing how to paint aluminum metal well starts with restraint. The instinct is to lay primer on thick for full coverage in one pass — resist it. Thick coats trap solvents, sag on vertical frame sections, and actually reduce adhesion by curing unevenly.
Apply two thin, even coats rather than one heavy one. Work your brush or roller in a single direction along the length of each frame member, maintaining a wet edge to avoid lap marks. If using an aerosol self-etching primer, hold the can 200–250 mm from the surface and keep it moving — stopping in one spot causes runs and sags that are difficult to sand out without cutting through to bare metal again.
On narrow window frame profiles, an angled sash brush gives you the most control. Load the brush lightly — dip only the first third of the bristles — and lay the primer down in smooth, confident strokes. If you see the coating pooling in corners or dripping down vertical sections, you've applied too much. Wipe the excess immediately with a clean rag and continue with a lighter touch.
Drying Times and When to Apply Your Topcoat
Rushing to topcoat is where impatient painters undo all their careful prep work. Each primer type has a specific recoat window — the period during which the next layer bonds properly to the one beneath it.
Self-etching primers dry fast, often touch-dry within 15 minutes. You can apply a second primer coat after 30 minutes in moderate conditions. Bonding primers need longer — typically 1–2 hours between coats depending on temperature and humidity. In either case, how do you paint on aluminum without trapping solvents? Wait until the primer feels completely dry to a light touch and shows no tackiness before proceeding.
Before applying your topcoat paint, allow the final primer coat to cure for the time specified on the product's technical data sheet — usually a minimum of 2–4 hours for water-based bonding primers, or 30–60 minutes for self-etching formulas. Lightly sand the cured primer with 240-grit sandpaper to create a smooth, even base, then wipe with a tack cloth. This final scuff gives your topcoat the best possible surface to grip.
With primer cured and lightly keyed, the frame is genuinely ready for paint. The next decision — what type of paint to use and how to apply it — determines whether your finish looks brushed-on or factory-smooth.
Step 5 – Choose Your Paint Type and Application Method
Your primed frame is sitting there ready to accept colour — but the finish you end up with depends heavily on two decisions made right now: what paint to use on aluminium, and how you apply it. Each combination of tool and product produces a different result, and understanding the trade-offs helps you pick the approach that matches your skill level and expectations.
Brush vs Roller vs Spray on Aluminium Frames
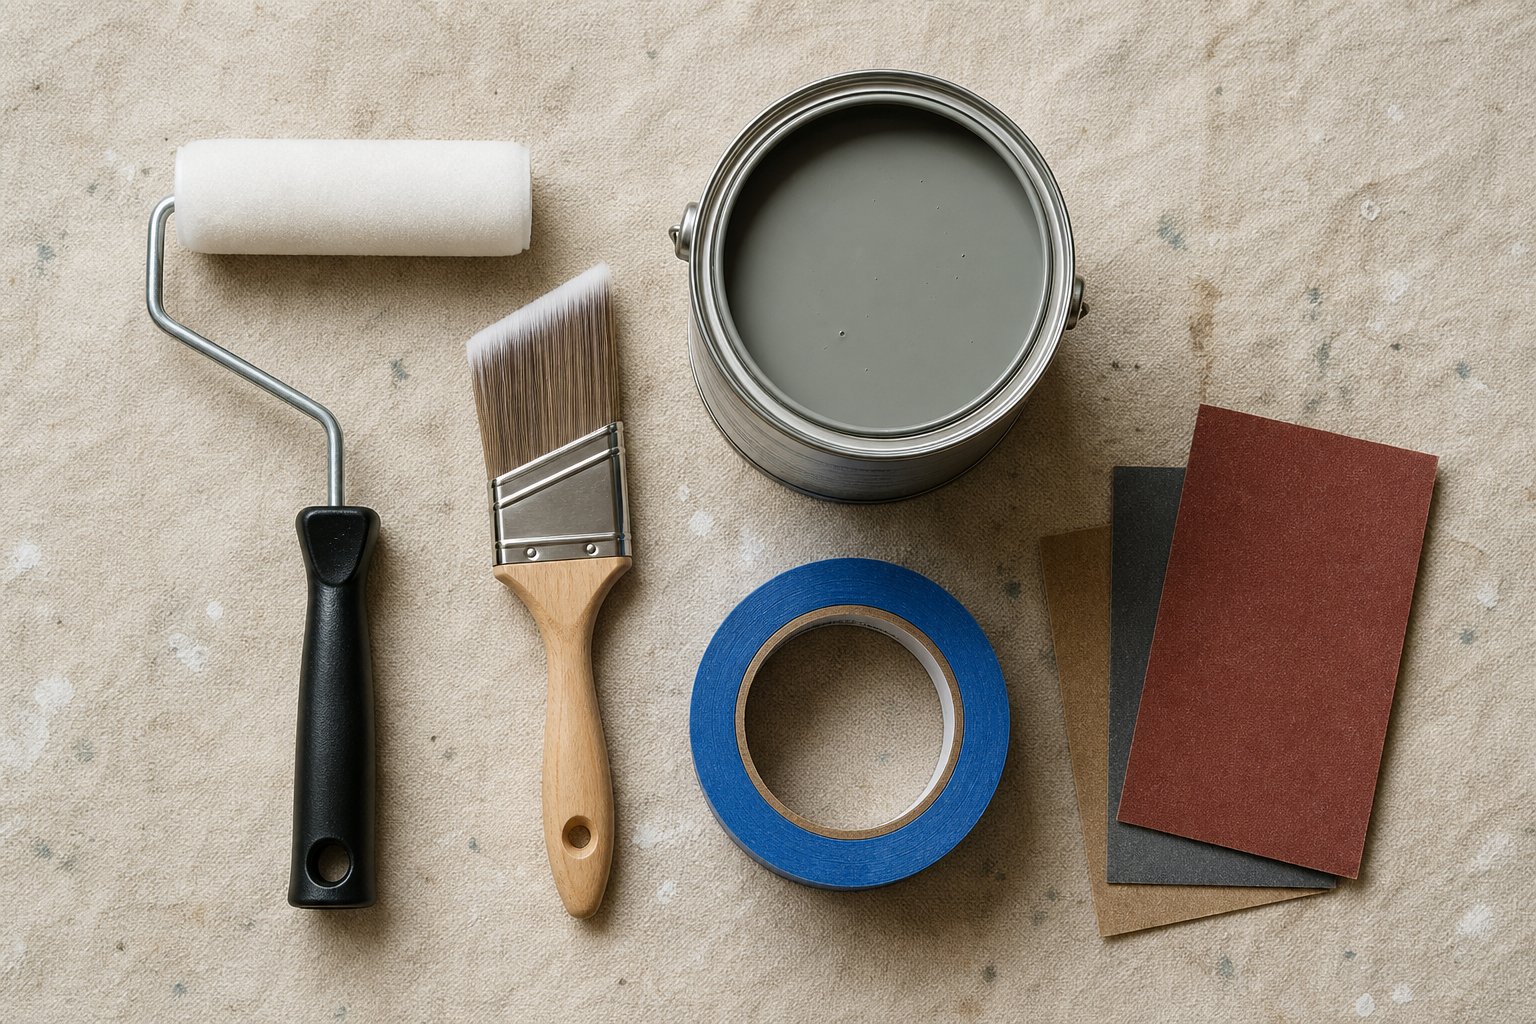
There's no single best method. Each tool suits different frame styles, project scales, and confidence levels. A brush gives you precision on narrow profiles and intricate corners — ideal for detailed window frame paint work — but leaves visible stroke marks unless your technique is very controlled. Mini foam rollers cover flat sections faster and produce a smoother texture than brushwork, though they struggle in tight corners and need a brush to finish edges. Spray application delivers the smoothest, most factory-like result, but demands thorough masking of glass, walls, and surrounding surfaces. It works best when frames are removed from the building entirely, which isn't always practical.
| Criteria | Brush | Mini Foam Roller | Spray |
|---|---|---|---|
| Finish Quality | Good — visible brush marks on close inspection | Very good — smooth and even on flat faces | Excellent — near factory-smooth finish |
| Skill Level | Beginner-friendly | Beginner to intermediate | Intermediate to advanced |
| Setup Time | Minimal — tape glass edges and go | Low — same masking as brush | High — mask everything within 2 metres |
| Best For | Detailed profiles, single windows, touch-ups | Flat modern frames, multiple windows | Full-house projects, frames removed for recoating |
For most homeowners tackling a few windows, a combination approach works well: roller on the flat faces for speed and smoothness, then an angled sash brush to cut in edges and corners. If you want to paint aluminium black or any dark colour, the roller-and-brush combo minimises visible lap marks that darker shades tend to highlight.
Acrylic vs Epoxy Paint Types Explained
The best paint for aluminium in a residential exterior setting is 100% acrylic latex. It flexes with the metal as temperatures swing — critical in Australian conditions where a west-facing frame can shift from cool morning shade to 60°C+ surface heat by afternoon. Acrylic also resists UV degradation well, cleans up with water, and allows same-day recoating. For the best paint for outdoor aluminium applications, a quality exterior acrylic in satin or semi-gloss sheen is hard to beat.
Epoxy-modified paints offer a harder, more scratch-resistant shell and excellent chemical adhesion. They're the best paint for painting aluminium in marine or industrial environments where corrosion resistance matters more than flexibility. The trade-off? Epoxy can become brittle in extreme temperature cycling and may yellow or chalk under prolonged UV exposure. It's also less forgiving to apply — mixing ratios and pot life add complexity that most DIYers don't need.
For exterior paint for aluminium siding and window frames on a typical Australian home, acrylic wins on practicality. Save epoxy for coastal hardware or high-wear commercial applications where its toughness justifies the extra effort.
Why Professional Powder Coating Outperforms All DIY Options
Regardless of how carefully you brush, roll, or spray, field-applied paint has inherent limitations. It sits on the surface rather than fusing with it. Even the best latex paint for aluminium will need refreshing within 5–10 years depending on exposure.
Factory-applied powder coating operates on a different level entirely. The dry powder is electrostatically charged, bonded to the aluminium, then baked in an industrial oven at around 200°C. The result is a finish that's 15–20 years durable with minimal maintenance — resistant to chipping, scratching, UV fading, and salt-air corrosion in ways that no brush-on product can match.
This is the quality gap worth understanding. MEICHEN's aluminium window systems arrive with factory powder coating applied during manufacturing — standard colour options plus project-specific custom colours specified by homeowners, builders, or architects at the design stage. There's no recoat cycle, no prep weekends, no fading concerns. For anyone weighing up the effort of repainting against a long-term solution, purpose-built aluminium windows with professional-grade finishes represent what the end goal actually looks like.
That said, if your existing frames are structurally sound and you're committed to the DIY path, the right paint and method will deliver a solid result. The technique you use during application — how you layer coats, manage edges, and protect surrounding surfaces — is what separates a tidy job from a messy one.
Step 6 – Apply Paint Using Proper Technique
Primer's cured, surface is prepped, and you've chosen your paint and tools. This is where window frame painting either comes together or falls apart — and the difference sits almost entirely in how you handle coat thickness, edge management, and sequencing.
Thin Coats and Proper Layering Technique
Two to three thin coats will always outperform one thick coat on aluminium. A heavy application traps solvents beneath the drying surface, leading to bubbling, soft spots, and eventual peeling. Thin layers cure evenly, bond to each other properly, and build a harder, more uniform shell.
Here's the step-by-step painting sequence for how to paint aluminium window frames that look professionally finished:
- Load your brush or roller lightly — only the first third of bristles, or a thin even film on the roller sleeve.
- Start with the recessed edges, rebates, and any detailed profiles. These tight areas are hardest to reach once flat faces are wet.
- Move to the flat face sections, working your brush strokes or roller passes along the length of each frame member — never across the narrow dimension.
- Maintain a wet edge by working quickly enough that each stroke overlaps the previous one before it begins to tack off. This prevents visible lap marks in the dried film.
- Allow the first coat to dry fully. For water-based acrylics, recoat time is typically two to four hours depending on sheen and conditions. Touch the surface lightly — if it feels tacky or leaves a fingerprint, it's not ready.
- Lightly sand between coats with 240-grit if you notice any nibs or rough spots, then wipe with a tack cloth.
- Apply the second coat using the same thin, directional technique. Assess coverage once dry — most colours need a third coat for full opacity and even sheen.
Direction matters more than people realise. Brush strokes running lengthwise along the frame profile catch less light and appear smoother than cross-grain marks. On vertical stiles, stroke top to bottom. On horizontal rails, stroke left to right. Keep it consistent within each member.
How to Paint Frames Without Removing Them
Removing frames from the wall gives the cleanest result — full access to every edge, no awkward angles, no risk of drips on brickwork. But for most homeowners, pulling out aluminium windows isn't practical without specialist tools or risking damage to seals and flashings.
Painting aluminium window frames in place works perfectly well with the right approach. The key is managing two junctions: frame-to-glass and frame-to-wall. At the wall junction, run painter's tape along the render, brick, or cladding edge where it meets the frame. Press the tape edge firmly into the gap so paint doesn't bleed underneath. For the bottom of the frame where it meets the sill, tape and a small piece of cardboard held as a shield catches drips before they hit the surface below.
Work from the top of the window down. Gravity is pulling any excess paint downward, so starting high means you catch and smooth drips as you progress rather than discovering them dried on a section you've already finished.
Protecting Glass and Surrounding Surfaces
Knowing how to paint a window frame cleanly comes down to how well you mask the glass. Apply painter's tape directly along the glass-to-frame junction, leaving a 1 mm gap of glass exposed. This tiny overlap ensures paint seals the edge where frame meets glazing — preventing moisture from wicking behind the coating later. Press the tape edge down firmly with a plastic scraper or credit card to create a hard seal.
For anyone wondering how to paint an aluminium window frame without spending hours on cleanup, masking liquid applied to the glass is a worthwhile alternative to tape. Brush it on, let it dry clear, paint freely, then score and peel it off once everything's cured. It seals the frame-to-glass gap more effectively than tape alone and prevents bleed-through on multi-coat jobs.
Cover the rest of the glass pane with plastic sheeting taped to your masking line. Protect window sills, walls, and any surfaces below with drop cloths. The few minutes spent on thorough masking save hours of scraping and touch-up work afterward.
With your final coat applied and drying, the finish you achieve depends on one factor you can't control with technique alone — the weather conditions during application and curing.
Step 7 – Paint in the Right Weather Conditions
You can nail every preparation step, choose the perfect primer, and apply flawless thin coats — then watch it all fail because you painted on the wrong day. Weather isn't a minor scheduling detail when painting exterior window trim. It's an active part of the chemistry. Temperature, humidity, and sun exposure directly affect how paint cures on aluminium, and getting conditions wrong produces failures that show up days or weeks later.
Aluminium conducts heat far more efficiently than timber or PVC. A wooden frame in afternoon sun might be a few degrees warmer than the surrounding air. An aluminium frame in the same sun can be 20–30°C hotter. That difference makes surface temperature — not air temperature — the number that actually matters for your outdoor window frame paint job.
Ideal Temperature and Humidity for Painting Aluminium
Most exterior acrylic paints specify an application window of 10–30°C. Within that range, the polymer particles in water-based paint have enough time to coalesce into a continuous, well-bonded film. Below 10°C, the paint stays soft and tacky — it never forms a hard shell. Above 30°C, water evaporates faster than the binder can fuse, leaving a porous, weakly adhered layer that chalks and peels prematurely.
Humidity matters just as much. Research into exterior paint performance confirms that relative humidity above 85% compromises coalescence entirely — moisture trapped in the film causes blistering within days and peeling within months. Aim for days where humidity sits between 40% and 70%. In tropical Queensland or humid coastal NSW, that often means painting in the drier morning hours before afternoon moisture builds.
For anyone learning how to paint exterior trim on aluminium frames, the practical checklist looks like this:
- Air temperature between 10°C and 30°C (sweet spot: 15–25°C)
- Frame surface temperature below 35°C and at least 3°C above the dew point
- Relative humidity under 70% — ideally 40–60%
- No rain forecast for at least 24 hours after your final coat
- Wind speed under 25 km/h to prevent dust contamination and uneven drying
Why Direct Sunlight Ruins Your Paint Job
Painting exterior windows and trim in full sun feels productive — the paint dries fast, you can recoat sooner, the job moves quickly. But speed is the enemy here. When acrylic paint dries too rapidly on a hot aluminium surface, the outer skin forms before the underlying layer has released its water. Solvents get trapped. The film looks dry but remains soft underneath, eventually bubbling or losing adhesion as those trapped gases try to escape.
Direct sun also creates uneven drying across the frame. The top rail baking in sunlight cures minutes before the shaded bottom rail, making it nearly impossible to maintain a wet edge. Lap marks become permanent.
If the frame is too hot to hold your hand on comfortably for five seconds, it's too hot to paint. Walk away and come back when the surface has cooled — no exceptions.
This simple touch test is more reliable than any thermometer for quick decisions. Aluminium's thermal conductivity means it heats and cools rapidly, so conditions can change within an hour as the sun moves. A west-facing frame that's too hot at 2 p.m. might be perfect by 4 p.m. once it falls into shadow.
Best Time of Day and Season to Paint
Follow the shade around your house. Paint east-facing frames in the afternoon once they're out of morning sun. Paint west-facing frames in the morning before the afternoon heat hits. North-facing frames (in Australia, the sun-exposed side) need early morning or late afternoon timing during warmer months.
Seasonally, mild autumn days — March through May in most of Australia — offer the most consistent conditions for painting window trim exterior. Temperatures sit comfortably in the 15–25°C range, humidity tends to be moderate, and you avoid both the extreme heat of summer and the damp, slow-drying conditions of winter. Early spring (September–October) works well too, particularly in southern states where summer hasn't yet pushed daytime temperatures past 30°C.
Wind is the overlooked variable. A gentle breeze aids drying, but anything above 25 km/h carries dust, pollen, and debris that embed in wet paint. Gusty conditions also cause uneven film thickness as paint is pushed across the surface before it levels. If trees are visibly swaying, postpone the job.
Timing your paint application to the right conditions takes patience — sometimes waiting a day or two for the weather to cooperate. But even a perfectly timed coat can develop problems if something goes wrong during application. Knowing how to identify and fix common painting mistakes saves you from stripping back and starting the entire process over.
Step 8 – Troubleshoot Common Painting Mistakes
Sometimes things go wrong despite your best efforts. Paint peels, bubbles appear overnight, or the finish looks patchy once it dries. The frustrating part about repainting aluminium window frames is that problems often don't reveal themselves until days or weeks after application — by which point you've packed away your gear and moved on.
Knowing what went wrong and whether you can fix it without a full strip-back saves significant time and money. Most failures on painted aluminum window frames fall into a handful of predictable categories, each with a clear cause and a specific remedy.
Why Paint Peels Off Aluminium and How to Fix It
Peeling is the most common complaint, and it almost always traces back to one of two root causes: contamination on the surface at the time of priming, or the wrong primer for the substrate. If paint lifts in sheets — coming away cleanly from the metal beneath — the primer never bonded properly. If it peels in flakes with primer still attached to the aluminium but topcoat separating from primer, there's a compatibility issue between your products or insufficient scuffing between coats.
The fix depends on how widespread the failure is. Localised peeling in a small area can be feathered back with 120-grit sandpaper, spot-primed, and recoated. But if paint is lifting across more than 20–30% of the frame, you're better off stripping everything back to bare aluminium and starting fresh. Trying to patch extensive peeling just creates an uneven surface that fails again within months.
Prevention comes down to the steps covered earlier: thorough degreasing with sugar soap, complete drying before priming, and using a primer specifically formulated for non-ferrous metals. As painting specialists note, aluminium leaves very little room for error — skipping even one preparation step can ruin the entire job.
Solving Bubbling, Drips, and Uneven Coverage
Bubbling and blistering appear as raised bumps in the paint film, sometimes days after application. Two culprits dominate: moisture trapped beneath the coating (from painting over a damp surface or in high humidity), and heat-induced solvent entrapment (from painting aluminium windows in direct sunlight). The outer skin dries before gases underneath can escape, pushing the film outward. Small isolated blisters can be sanded flat, spot-primed, and recoated. Widespread blistering means the entire coat needs to come off — the bond beneath those bubbles is compromised even where the surface looks intact.
Drips and runs are purely a technique issue. They happen when too much paint is applied in a single pass, particularly on vertical frame stiles where gravity pulls excess material downward. If you catch them while still wet, brush them out immediately with a lightly loaded brush. Once dried, sand the drip flat with 240-grit, feathering the edges into the surrounding paint, then apply a thin corrective coat over the area.
Uneven sheen — where some sections look glossier or flatter than others — results from inconsistent film thickness or mixing application methods mid-frame. Rolling a flat section then brushing the edges creates two different surface textures that reflect light differently. The fix is straightforward: lightly sand the entire frame with 240-grit and apply one final, consistent coat using a single method across all surfaces.
Chalking and premature fading within the first year signals either the wrong paint type (interior paint used outdoors, or a product without UV stabilisers) or insufficient coats leaving the primer partially exposed to weather. If the surface feels powdery when you rub it, wash thoroughly, sand lightly, and apply two fresh coats of quality exterior acrylic formulated for metal surfaces.
When You Need to Strip Back and Start Over
Not every problem warrants a complete restart. The table below helps you decide whether a localised repair will hold or whether you need to take it back to bare metal.
| Problem | Likely Cause | Solution |
|---|---|---|
| Peeling in sheets from bare metal | Surface contamination or wrong primer type | Strip to bare aluminium, clean, re-prime with correct product, repaint |
| Peeling topcoat from primer | Incompatible products or no inter-coat sanding | Sand back to primer, scuff, apply compatible topcoat |
| Bubbling across large areas | Moisture trapped under film or painted in direct sun | Strip affected area completely, allow frame to dry, re-prime and repaint in shade |
| Isolated blisters (fewer than 5 per frame) | Localised moisture or dust contamination | Sand flat, spot-prime, recoat — no full strip needed |
| Drips and runs | Too-thick application on vertical surfaces | Sand flat with 240-grit, feather edges, apply thin corrective coat |
| Uneven sheen or texture | Mixed application methods or inconsistent coat thickness | Sand entire surface lightly, apply one uniform final coat with single method |
| Chalking or fading within 12 months | Wrong paint type or insufficient coats | Wash, sand, apply two coats of UV-stable exterior acrylic |
The general rule: if the primer bond to the aluminium is sound, you can usually repair the topcoat without going back to bare metal. Test by scraping a small area — if primer stays firmly attached to the frame, your foundation is solid and the issue sits in the upper layers only. If primer lifts too, the entire system has failed and needs rebuilding from scratch.
Understanding how to repaint aluminum window frames successfully means accepting that mistakes happen — even to experienced painters. The difference is knowing which problems are surface-level fixes and which ones demand a full reset. Either way, the long-term performance of your repaint depends not just on getting the initial job right, but on how you maintain it afterward — and recognising when the frame itself has reached the end of its paintable life.

Step 9 – Maintain Results and Know When to Replace
A freshly repainted aluminium window frame looks sharp — but how long will it stay that way? The honest answer depends on three variables: how thoroughly you prepared the surface, what products you used, and how much weather punishment the frame absorbs year after year. Getting the initial job right is only half the equation. What you do in the months and years afterward determines whether your repaint holds for a full decade or starts deteriorating within three.
How Long a Repainted Aluminium Frame Lasts
A well-executed DIY repaint on aluminium typically lasts 5–10 years before it needs attention again. Professional resprays using industrial-grade coatings can push that to 7–15 years in favourable conditions. The range is wide because exposure matters enormously. A south-facing frame sheltered under an eave might hold colour for a decade without issue. A west-facing frame copping full afternoon sun and salt-laden coastal wind could start chalking within five years — even with premium paint.
Climate zone plays a significant role for Australian homes. Frames in temperate Melbourne or Adelaide generally outlast identical repaints in tropical Cairns or beachfront Gold Coast properties, where UV intensity and salt exposure accelerate coating breakdown. Darker colours fade faster than lighter ones, and frames that experience extreme thermal cycling — hot days followed by cool nights — stress the paint film with constant expansion and contraction.
Annual Maintenance to Extend Your Paint Job
Simple, consistent upkeep adds years to your finish. Repainting aluminium windows every half-decade gets expensive and time-consuming. A few minutes of maintenance at regular intervals pushes that cycle further out.
- Monthly: Rinse frames with fresh water from a garden hose to remove salt, dust, and airborne contaminants — especially important within 5 km of the coast.
- Every 3–6 months: Wash frames with mild detergent and a soft cloth. Avoid abrasive cleaners or scouring pads that scratch through the topcoat.
- Annually: Inspect every aluminium window frame closely. Look for chips, scratches, or areas where the coating has worn thin — particularly on bottom rails where water pools and on metal window trim edges exposed to direct weather. Touch up any bare spots with matching paint before oxidation takes hold underneath.
- Every 3–5 years: Assess overall condition. Check for chalking (rub a dark cloth across the surface — white residue means the topcoat is degrading), fading, or hairline cracking. If chalking is minor, a thorough wash followed by one fresh topcoat can reset the clock without a full strip-back.
The critical habit is catching damage early. A 5 mm chip left untouched for a year becomes a 50 mm patch of oxidation creeping beneath surrounding paint. Touch it up the week you spot it and you prevent the kind of cascading failure that forces a complete redo.
When Replacing Frames Makes More Sense Than Repainting
There's a tipping point where continuing to paint window frames delivers diminishing returns. Each repaint adds another layer to the system — and after two or three cycles, you're dealing with thick, potentially incompatible coatings that crack and peel more readily than the first application ever did. The economics shift too. If you're spending a weekend every five years on prep, materials, and labour to maintain frames that are 25+ years old, the cumulative cost and effort starts approaching what replacement would have cost upfront.
Consider replacement over repainting if:
- Frames have been repainted more than twice with each result lasting shorter than the last
- Seals have failed — you notice drafts, water ingress, or condensation between panes
- The aluminium itself shows structural fatigue: flex, warping, or hardware that won't hold
- Energy efficiency matters — old single-glazed aluminium frames without thermal breaks lose heat in winter and gain it in summer regardless of how fresh the paint looks
- You're renovating and want a consistent, long-term finish across all openings without ongoing maintenance
The concept of aluminium window trim wrapping — cladding old frames with new aluminium — occasionally comes up as a middle ground. While wrapping windows in aluminium can refresh appearances, it doesn't address failed seals, poor thermal performance, or structural issues. It's a cosmetic fix on par with repainting, not a replacement for properly engineered window systems.
Modern aluminium windows with factory-applied powder coating eliminate the repainting cycle entirely. MEICHEN's custom aluminium window systems illustrate what this looks like in practice — homeowners, builders, and architects specify exact colours and finishes at the manufacturing stage, with the powder coating baked on in controlled factory conditions. The result is a finish that resists chipping, fading, and corrosion for decades without maintenance beyond occasional washing. No prep weekends, no recoat cycles, no fading concerns.
For frames that are structurally sound and just need a colour refresh, how to repaint aluminium windows is a worthwhile skill that saves thousands compared to professional respraying. But for frames showing their age structurally — or for homeowners tired of the maintenance treadmill — factory-finished aluminium windows represent the permanent solution that repainting can only approximate.
Frequently Asked Questions About Repainting Aluminium Window Frames
1. How long does a repainted aluminium window frame last?
A well-prepared DIY repaint on aluminium frames typically lasts 5 to 10 years, depending on climate exposure, paint quality, and how thoroughly the surface was prepared. Frames sheltered under eaves or facing south in Australia tend to hold up longer, while west-facing frames exposed to intense afternoon sun and coastal salt spray may need attention sooner. Regular maintenance such as annual inspections, prompt touch-ups of chips, and periodic washing with mild detergent can push the lifespan toward the upper end of that range. Professional resprays using industrial coatings can extend durability to 7 to 15 years, while factory-applied powder coating on new aluminium windows from manufacturers like MEICHEN lasts decades without recoating.
2. What is the best primer for aluminium window frames?
The best primer depends on your frame's current condition. For bare aluminium sanded back to raw metal, a self-etching primer containing phosphoric acid is ideal because it chemically bonds to the oxide layer at a molecular level. For frames with existing paint that is still well-adhered, a bonding primer with adhesion-promoting resins works better as it grips both old coatings and exposed metal without aggressive etching. Standard metal primers designed for steel are not suitable for aluminium because they lack the bonding chemistry needed for non-ferrous metals. Always apply two thin coats rather than one thick coat, and allow full drying between layers before applying your topcoat.
3. Can you paint over anodised aluminium window frames?
Yes, but anodised aluminium requires more aggressive surface preparation than standard mill-finish frames. The anodising process creates a hard, corrosion-resistant oxide layer specifically designed to resist bonding. You need to scuff through this protective coating using firm pressure with 120-grit sandpaper, or even 80-grit on heavily anodised surfaces, until the characteristic metallic sheen is uniformly dulled. The goal is not to strip the anodising entirely but to roughen it enough for primer to penetrate and grip. After sanding, clean thoroughly with methylated spirits, apply a self-etching primer, and proceed with your topcoat as normal.
4. Why does paint peel off aluminium window frames?
Paint peeling off aluminium almost always traces back to inadequate surface preparation or using the wrong primer. If paint lifts in clean sheets from the metal, the primer never bonded properly due to surface contamination such as grease, soap residue, or dust left on the frame before priming. If the topcoat separates from the primer while the primer stays attached, there is likely a product compatibility issue or insufficient sanding between coats. Other causes include painting in high humidity which traps moisture beneath the film, applying coats too thickly, or using a standard metal primer not formulated for non-ferrous metals. Prevention requires thorough degreasing, complete drying, proper sanding to create a mechanical key, and selecting a primer specifically designed for aluminium.
5. Is it better to repaint or replace old aluminium window frames?
Repainting makes sense when frames are structurally sound with only cosmetic deterioration such as fading, light chalking, or minor surface oxidation. Replacement becomes the better investment when frames show deep pitting across more than 30 percent of the surface, noticeable structural flex, failed seals causing drafts or condensation, or when frames have been repainted multiple times with each result lasting shorter than the last. Modern aluminium windows with factory-applied powder coating from manufacturers like MEICHEN eliminate the repainting cycle entirely, with finishes that resist chipping, fading, and corrosion for decades. For homeowners tired of the maintenance treadmill or dealing with frames beyond their paintable life, professionally manufactured aluminium window systems offer a permanent, maintenance-free solution.