

Why Aluminium Window Frames Lose Their Finish Over Time
You run a finger along the frame and it comes back chalky white. The colour that once matched the rest of the house now looks washed out, patchy, or a shade you stopped liking a decade ago. Peeling flakes from a previous paint job catch the light in all the wrong ways. It drags down the whole facade, and it happens to old aluminum window frames far more often than most homeowners expect.
Aluminium itself is remarkably durable. It does not rot, warp, or attract termites the way timber does. But the finish sitting on top of that metal is a different story. UV radiation from Australia's intense sun breaks down the polymer binders in powder coatings and paints, causing pigments to lose depth and intensity over time. North- and west-facing frames cop the worst of it. Add oxidation, where the aluminium naturally forms a hard oxide layer that pushes coatings away from the substrate, coastal salt deposits, airborne pollutants, and seasonal thermal cycling, and the surface degrades faster than most people anticipate. A frame that looked sharp ten years ago can appear tired and neglected well before the aluminium underneath has any structural concern.
The good news: repainting aluminum window frames is entirely achievable, and with the right aluminium window paint and preparation approach, results can hold up for well over a decade. The frustrating part is that most failures come down to skipped steps or wrong product choices rather than any inherent difficulty with the project itself.
Common Signs Your Aluminium Frames Need Attention
- Chalking — a powdery residue transfers to your fingers when you rub the surface, indicating the coating binder has broken down
- Colour fading — noticeable difference between sun-exposed faces and sheltered sections of the same frame
- Patchy discolouration — uneven colour or grey/yellow shift rather than uniform fade
- Peeling or flaking — previous window frame paint lifting away from the metal, often starting at edges and corners where the coating is thinnest
- Pitting — small cavities or rough texture in the aluminium surface caused by localised corrosion, common in coastal areas
If you spot one or two of these on your aluminium window frame surfaces, you are dealing with a cosmetic issue that the right preparation and paint system can resolve. If several appear together, particularly pitting combined with peeling, the project requires more thorough assessment before you pick up a brush.
What This Guide Covers
This guide walks through every stage of the window frame painting process, from assessing whether your frames are candidates for painting through to product selection, surface preparation, application technique, drying timelines, colour choices, and long-term maintenance. It applies equally to first-time painting of factory-finished frames and to recoating aluminium that has already been painted once or twice before. By the end, you will have a clear picture of what the project demands, what it costs in time and materials, and whether your particular situation calls for a DIY approach or professional help.
The difference between a paint job that peels within two years and one that lasts a decade or more comes down almost entirely to what happens before the first coat goes on. That preparation stage is where aluminium behaves unlike any other substrate around your home.
Can You Paint Aluminium Window Frames Successfully
So, can you paint aluminium window frames? Yes, and the results can look genuinely impressive. But aluminium is not timber and it is not PVC. Those two surfaces are relatively forgiving — rough up the old coating, apply a compatible product, and you are mostly fine. Aluminium demands more respect. Its natural oxide layer, slick surface profile, and thermal movement characteristics mean you need specific products and deliberate preparation to get paint that stays put rather than lifting within a season or two.
The approach also shifts depending on what your frames look like right now. Painting a raw aluminium extrusion is a different job from recoating a factory powder-coated frame, which is different again from tackling an anodised surface. Each starting point carries its own adhesion challenges, and understanding which situation applies to your windows is the first real decision in the project.
Factory Finished vs Anodised vs Raw Aluminium
Most aluminium window frames installed in Australian homes over the past three decades arrived with a factory-applied powder coat. This is an electrostatically applied polymer finish, baked at high temperature to form a hard, uniform skin. When you paint over powder coating, the main challenge is creating enough surface texture for the new coating to grip. The existing finish is smooth and non-porous by design, so mechanical sanding and a bonding primer become essential steps.
Anodised aluminium is a different beast. Rather than sitting on top of the metal, an anodised finish is actually part of it — an electrochemically grown oxide layer that is extremely hard and integral to the surface. As industry resources note, anodising cannot peel because the coating is part of the metal itself. That hardness and integration makes it highly durable, but it also means paint struggles to bond without aggressive preparation. You need to physically break through the anodised layer with abrasives before primer and paint can establish a mechanical key.
Raw or bare aluminium appears occasionally on older frames where the original coating has completely failed, or on replacement sections that were never finished. It might seem like the easiest surface to paint since there is nothing to sand through, but the catch is that bare aluminium forms a fresh oxide layer within hours of exposure to air. This oxide is microscopically smooth and chemically inert, actively resisting adhesion. A self-etching primer that chemically bonds to the oxide is non-negotiable here.
Previously painted frames represent the fourth scenario. If the existing paint is sound — not flaking, lifting, or chalking heavily — you can sand it lightly and apply new coats directly over the top. Where previous paint is failing, you will need to remove it back to a stable layer or strip entirely to the substrate before retreating the surface as though it were raw metal.
When Painting Is the Right Choice
Painting makes strong practical sense in several common situations. It is worth reaching for the primer and brush when:
- You want a colour change without the cost of full window replacement
- Frames are structurally sound but cosmetically faded or dated
- Budget constraints rule out new windows in the short term
- You are refreshing one or two windows rather than an entire house
- The existing surface shows only mild chalking or uniform fade with no structural deterioration
Painting is a legitimate restoration method, and with proper technique the finish can hold for 7 to 10 years on well-prepared surfaces. For homeowners asking can you paint aluminum window frames as a weekend project, ground-floor windows in fair condition are a realistic DIY target.
There are situations, however, where a professional assessment is warranted before committing time and money to paint:
- Severe pitting or corrosion that has roughened the aluminium beyond cosmetic repair
- Structural damage — bent sections, cracked corners, or frames that no longer sit square in the opening
- Frames older than 25 to 30 years with failed rubber seals, single glazing, or visible condensation between glass panes
- Widespread coating failure across many windows where the labour investment in preparation rivals the cost of replacement
- Thermal performance concerns, since paint adds zero insulation value to frames lacking modern thermal breaks
In these cases, the money spent on preparation materials, primer, topcoats, and your weekend disappears into a surface that may not justify the effort. A frame with failed seals and single glazing still performs poorly no matter how fresh the paint looks from the street.
For frames that pass this assessment — structurally intact, seals functional, surface degradation limited to the coating layer — painting delivers genuine value. The critical variable shifts from whether you can paint window frames to how thoroughly you prepare them before any colour goes on.
Why Preparation Matters More on Aluminium Than Wood
Timber window frames are forgiving. Sand back the flaking bits, dust them off, slap on a coat of primer and your paint grabs hold without much fuss. The wood fibres are naturally porous, giving coatings plenty of texture to anchor into. Painting aluminium is a fundamentally different proposition. The metal itself actively works against adhesion in a way that no amount of expensive topcoat can overcome on its own.
This is not a minor technical detail you can skip past. Data from the National Association of Corrosion Engineers (NACE) indicates that roughly 70 percent of coating failures on aluminium substrates stem from inadequate surface preparation rather than the quality of the paint used. The product in your tin matters, but what you do to the frame before you open that tin matters far more. Understanding the science behind this helps you commit to each preparation step rather than cutting corners that cost you the entire job six months later.
How Oxidation Affects Paint Adhesion
Aluminium is a reactive metal. The moment bare aluminium contacts oxygen in the air, it forms a thin layer of aluminium oxide (Al₂O₃). This reaction happens almost instantly — raw aluminium develops a continuous oxide film within milliseconds of atmospheric exposure. Over the following hours, this layer thickens and stabilises into a hard, chemically inert surface.
Here is the problem for anyone painting on aluminum: that oxide layer is essentially a microscopic ceramic. It is non-porous, extremely smooth at a molecular level, and chemically stable. Standard paint resins cannot react with it or penetrate it. They simply sit on top, held in place by nothing more than weak surface friction. The first time the frame heats up in afternoon sun, expands slightly, or cops a decent rain, that friction fails and the coating lifts away.
Contrast this with rust on steel. Iron oxide is porous and textured, which is why you can sometimes paint over light surface rust with a rust-converter primer and get a reasonable bond. Aluminium oxide offers no such compromise. It is harder than the metal beneath it, smoother than glass at microscopic scale, and actively prevents any chemical or mechanical bonding from taking hold. If you paint aluminium without addressing this oxide barrier, failure is not a risk — it is a certainty.
The challenge intensifies on anodised aluminium window frames. Anodising deliberately grows a much thicker, denser version of this same oxide layer through electrochemical processing. Where natural oxidation produces a film measured in nanometres, anodised surfaces can be 20 to 25 micrometres thick. That makes them significantly more durable as a standalone finish, but also significantly harder for any new coating to bite into. Painting anodised aluminium window frames without aggressive mechanical preparation is almost guaranteed to produce adhesion failure within the first year.
The Role of Mechanical and Chemical Preparation
Overcoming the oxide barrier requires a two-pronged strategy. Neither approach works reliably in isolation — skip one and you undermine the other, regardless of how meticulously you execute the remaining step.
Mechanical abrasion does the physical work. Sanding or scuffing the surface with the correct grit creates a texture profile — tiny peaks and valleys that give paint something to physically grip. Think of it as creating a microscopic landscape of anchor points. On anodised surfaces, this abrasion also breaks through the hard oxide layer to expose more receptive metal beneath. The goal is not to reshape the frame or remove material in any visible way. You are working at a scale invisible to the naked eye, building a surface roughness that transforms a slick, paint-repelling substrate into one with genuine mechanical "tooth."
Chemical cleaning addresses the invisible threats. Aluminium frames accumulate contaminants that cannot be seen but will absolutely sabotage adhesion: silicone residues from window seals, atmospheric oils, salt deposits in coastal areas, skin oils from handling, and oxidation by-products. These contaminants lower the surface energy of the metal, creating microscopic zones where primer cannot wet out properly and voids form in the coating film. A frame can look perfectly clean to the eye while carrying enough invisible contamination to cause widespread paint failure within months.
The combination works because each step compensates for the other's limitations. Mechanical abrasion alone still leaves chemical contaminants trapped in the newly created surface profile. Chemical cleaning alone leaves the oxide layer intact and the surface too smooth for reliable mechanical bonding. Together, they produce a substrate that is both physically textured and chemically receptive — the two conditions required for long-term paint adhesion on aluminium.
Proper preparation accounts for roughly 80 percent of a successful aluminium paint job's longevity. The remaining 20 percent is split between product choice and application technique.
This ratio explains why two homeowners can use identical paint on identical frames and get wildly different results. One spends an hour per window on thorough cleaning, sanding, solvent wiping, and priming. The other gives the frame a quick wipe and starts brushing on topcoat. The first job lasts a decade. The second peels inside a year. The paint was never the variable — the preparation was.
It also explains why timing matters during preparation. Once you sand through the existing oxide layer to expose fresh aluminium, a new oxide film begins forming immediately. Industry protocols for painting aluminium recommend applying primer within four hours of the final sanding and solvent wipe to ensure the fresh oxide has not thickened enough to compromise the bond. Leaving a sanded frame overnight before priming reintroduces the very barrier you just worked to remove.
With the science clear, the practical question becomes exactly which products, grits, and sequences deliver these results on a real window frame — and how to execute each step without damaging the glass, seals, or surrounding finishes.
Choosing the Best Paint Type for Aluminium Windows
Getting the surface ready is only half the equation. The other half is what goes on top of it. Walk into any hardware store and you will find shelves of products claiming suitability for metal, but not all of them perform equally on aluminium window frames. Some adhere brilliantly but crack within two summers. Others flex well but lack the hardness to resist scuffing from opening and closing sashes. Picking the best paint for aluminium windows means matching the product chemistry to the specific demands of your frame surfaces: outdoor UV exposure, thermal movement, mechanical wear from window operation, and the unique adhesion challenge aluminium presents.
Five main categories of paint for aluminum window frames exist, each with distinct strengths and trade-offs. The right choice depends on your starting surface, skill level, desired finish quality, and willingness to invest in separate primer coats versus all-in-one systems.
Paint Types Compared for Aluminium Frames
The table below rates each paint type specifically for aluminium window applications rather than general metal use. A product that performs well on steel railings or iron gates may behave entirely differently on an aluminium frame with its smooth oxide layer, high thermal expansion rate, and exposure to constant weather cycling.
| Type | Adhesion on Aluminium | Durability | Ease of Application | Primer Required | Best For |
|---|---|---|---|---|---|
| Acrylic Latex (with bonding primer) | Good — relies heavily on primer quality | 7–12 years with premium 100% acrylic | Easy; water cleanup, fast recoat | Yes — bonding or self-etching primer essential | DIY projects; colour range; large areas needing flexibility and UV resistance |
| DTM Acrylic (direct-to-metal) | Very good — contains adhesion promoters | 7–10 years | Easy to moderate; similar handling to standard acrylic | Optional on sound surfaces; recommended on anodised or bare aluminium | Homeowners wanting fewer steps without sacrificing performance |
| Alkyd Enamel | Good on primed surfaces; poor directly on aluminium | 5–7 years outdoors (prone to chalking and brittleness) | Moderate; slower drying, solvent cleanup | Yes — must use compatible metal primer | Hard, glossy finish on sheltered frames; interior aluminium trim |
| Aerosol Spray Paint (metal-specific) | Good — quality products include bonding resins | 4–7 years depending on brand and exposure | Easy application but difficult masking; overspray risk | Self-etching spray primer strongly recommended | Small touch-ups; single frames; achieving a smooth factory-like finish |
| Two-Pack Epoxy/Polyurethane | Excellent — chemical bond to prepared substrate | 10–15+ years | Difficult; requires precise mixing, pot-life management, spray equipment | Epoxy primer included in system | Professional application; maximum durability; coastal or high-wear environments |
For most Australian homeowners tackling a weekend repaint, 100% acrylic latex over a self-etching primer hits the sweet spot between accessibility and longevity. It flexes with the thermal expansion aluminium experiences under harsh sun, resists UV fade far better than alkyd alternatives, and cleans up with water. Premium acrylic formulations specifically designed as paint for metal frames contain higher solids content (45–55 percent by volume) and UV stabilisers that justify their price over budget alternatives.
DTM acrylic formulations simplify the process by incorporating adhesion-promoting resins that bond directly to prepared aluminium without a separate primer coat. These are a smart middle ground — fewer tins to buy, fewer coats to apply, and solid performance on frames where the existing coating is sound and has been properly sanded. The limitation surfaces on challenging substrates like heavily oxidised or anodised aluminium, where even the best DTM paint benefits from a dedicated primer underneath.
Alkyd enamel was once the default paint for aluminium, prized for its hard, glossy shell. It still delivers a beautiful finish on sheltered frames, but outdoors in Australian conditions it becomes brittle within a few years. Aluminium expands and contracts roughly twice as much as steel with temperature swings, and rigid alkyd films simply cannot keep up. Cracking, then flaking, follows predictably. Reserve alkyd for interior metalwork or shaded applications where thermal cycling is minimal.
Aerosol spray paint designed for metal offers convenience and a genuinely smooth finish when applied correctly — thin coats, consistent distance, overlapping passes. The trade-off is cost efficiency. Spray cans deliver roughly 1 to 1.5 square metres of coverage each, making them expensive for anything beyond a single window or localised touch-up. They also demand thorough masking since overspray on glass and brickwork is harder to remove than a stray brush stroke.
Two-pack epoxy and polyurethane systems represent the professional tier. These are what factory coating shops use (adapted for site application) and the results speak for themselves — chemical-resistant, UV-stable finishes lasting well over a decade. The barrier to entry is steep: precise mixing ratios, limited pot life once components combine, spray equipment for proper application, and controlled temperature and humidity conditions. Unless you have experience with two-pack coatings or are hiring a professional spray painter, these systems are impractical for typical residential work.
Primer Selection and When It Is Optional vs Essential
If the paint is the armour, the primer is the anchor holding it to the frame. On aluminium, this anchor layer matters more than on almost any other substrate around your home. Two broad categories exist: self-etching primers and standard metal primers. The performance gap between them on aluminium is significant enough to influence the entire lifespan of your paint job.
Self-etching primers contain phosphoric acid or a similar acidic compound that chemically reacts with the aluminium surface on contact. This acid dissolves a microscopic layer of the oxide, simultaneously depositing zinc phosphate or iron phosphate crystals that bond at a molecular level to the metal. The result is a conversion coating — a chemically integrated layer that becomes part of the surface rather than merely sitting on top of it. Self-etching primers are the single most reliable way to establish adhesion on bare or heavily weathered aluminium. They turn a surface that actively repels paint into one that actively holds it.
Standard metal primers rely on physical bonding alone. They use high-build resins and adhesion-promoting pigments to grip a mechanically prepared surface, but they lack the acid-etch chemistry that creates a true chemical bond with aluminium. On steel, standard primers work brilliantly because iron oxide is naturally porous and receptive. On aluminium, where the oxide layer is smooth and inert, standard primers deliver noticeably weaker adhesion — particularly on anodised surfaces or frames that have not been aggressively sanded.
So when is primer optional? Strictly speaking, it never is on aluminium — even when using DTM formulations that claim to combine primer and topcoat properties. DTM products incorporate adhesion promoters that mimic some primer functions, making them adequate on well-prepared, previously painted surfaces in good condition. But on bare aluminium, anodised frames, or any surface where you have sanded through to fresh metal, a dedicated self-etching primer remains the difference between paint that endures and paint that disappoints.
A practical rule to follow: if you can see bare metal anywhere on the frame after preparation, self-etching primer goes on those areas as an absolute minimum. If the entire frame is being repainted from scratch, prime the whole thing. The cost of a tin of self-etching primer is trivial compared to the labour of stripping and redoing a failed paint job twelve months down the track.
With the right product selected and primer approach decided, the next critical variable is execution — the specific grits, solvents, and sequencing that turn a tired aluminium frame into a surface genuinely ready to accept and hold your chosen coating system.
Surface Preparation and Priming Step by Step
Knowing which products to use is one thing. Knowing exactly how do you paint aluminium in a way that holds up year after year comes down to a precise sequence of physical steps — each one building on the last. Rush through cleaning and your sanding effort is wasted. Sand with the wrong grit and your primer has nothing to bite. Skip the solvent wipe and invisible contaminants sit between your primer and the metal, waiting to push it off the first time the frame heats up in summer sun.
This section lays out the best way to paint aluminium window frames from a preparation standpoint: exact products, exact grits, exact sequencing. Follow these steps and you give your chosen coating system the foundation it needs to last a decade rather than a season.
Cleaning and Degreasing the Frame Surface
Every preparation job starts with removing what you can see before addressing what you cannot. Begin with warm soapy water and a non-abrasive sponge or cloth to wash away surface grime, cobwebs, dust, bird droppings, and salt deposits. This initial wash prevents you from grinding contaminants into the surface during the sanding stage that follows.
Next, apply a sugar soap solution or dedicated aluminium cleaner. Sugar soap cuts through greasy films, exhaust residue, and organic build-up that household detergent alone misses. Work it into the frame profiles with a stiff nylon brush, paying attention to rebates and drainage slots where grime accumulates. Rinse thoroughly with clean water and allow the frame to dry completely.
The final cleaning pass is the most critical and the one most DIYers skip. Wipe every surface with methylated spirits or acetone on a clean, lint-free cloth. These solvents dissolve invisible residues — silicone from weather seals, skin oils deposited during handling, atmospheric waxes, and oxidation by-products — that water-based cleaning cannot touch. Industry surface preparation standards recommend verifying cleanliness with a water-break test: mist clean water onto the frame surface and observe whether it sheets evenly or beads into droplets. Beading indicates residual contamination that needs another solvent pass.
How do you tell the difference between oxidation, dirt, and old paint failure? Run your thumb firmly across the frame:
- A chalky white or grey residue on your skin indicates oxidation breakdown of the existing coating or the aluminium oxide layer itself
- A dark smudge suggests environmental grime — exhaust, mould, or industrial fallout
- Flakes or chips lifting under light finger pressure indicate paint adhesion failure requiring more aggressive removal during sanding
Each diagnosis points to a different level of sanding aggression in the next step.
Sanding Techniques and Grit Progression
Sanding aluminium frames is not about removing material in any visible sense. You are working at a microscopic level to create surface texture — a profile of tiny peaks and valleys that gives primer and paint a mechanical grip. The grit progression you choose determines whether that profile is too aggressive (visible scratches through the finished paint), too fine (insufficient tooth for adhesion), or just right.
Match your starting grit to the frame's current condition:
- 120 grit — for heavy oxidation, flaking old paint that needs stripping back, or surfaces with visible pitting. This is aggressive enough to level rough patches and remove failing coatings efficiently without gouging the aluminium beneath. It is considered one of the most versatile starting points for window profile work.
- 180 grit — the minimum requirement when painting anodised aluminium window frames. The hard anodised layer resists finer abrasives, so you need this level of aggression to physically break through and expose a surface that primer can key into. Anything finer simply polishes the anodising rather than penetrating it.
- 240 grit — for general keying of sound, previously painted surfaces or factory powder-coated frames that are not flaking. This scuffs the existing coating enough to give the new system adhesion without cutting through to bare metal unnecessarily.
- 320 grit — a finishing pass after coarser grits to smooth the profile and reduce the visibility of sanding scratches through your topcoat. Also useful between primer and topcoat for the smoothest possible final finish.
The key principle is progressive refinement. Jumping from 120 grit directly to 320 grit leaves deeper scratches from the coarse stage partially unresolved — they telegraph through your paint as visible lines. Step through grits sequentially: 120, then 240, then 320 if you started coarse. For sound surfaces needing only a light key, 240 followed by 320 is sufficient.
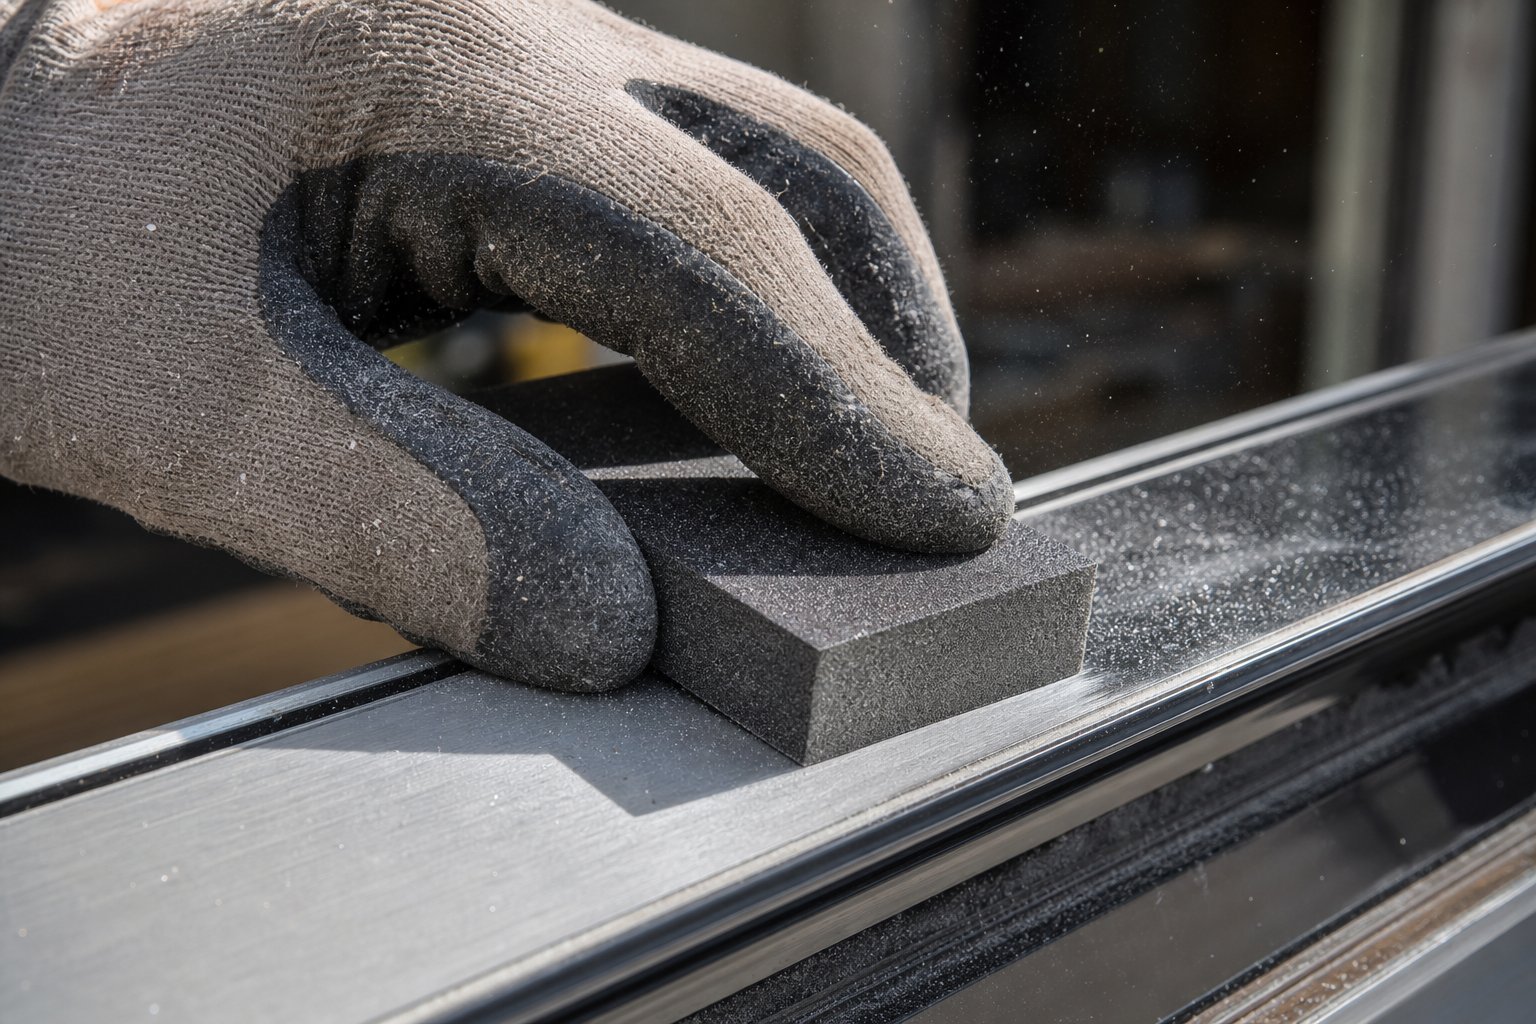
Use a sanding block or foam sanding pad rather than loose paper. Window frames have flat faces, curved profiles, and tight rebates — a flexible foam pad conforms to these shapes and distributes pressure evenly, preventing the dig-in points that occur when sanding freehand. For rebates and internal corners, fold sandpaper around a thin piece of timber or use a detail sanding sponge.
Sand with the length of the frame rather than across it. Cross-grain sanding marks (perpendicular to the frame's longest dimension) are far more visible under paint than marks running in the same direction as the profile. Apply light, consistent pressure and let the abrasive do the work — pushing harder does not speed the process, it just creates uneven spots and premature fatigue.
After sanding, wipe down with a tack cloth or another pass of methylated spirits to remove all aluminium dust. This dust, if left in place, prevents primer from contacting the fresh surface you just created. Remember the timing window discussed earlier: apply your self-etching primer within four hours of this final wipe to prevent oxide regrowth from compromising the bond.
Masking Glass, Seals, and Hardware
Thorough masking separates a professional-looking result from one that screams weekend DIY. Spending an extra thirty minutes on masking saves hours of scraping paint off glass and hardware later.
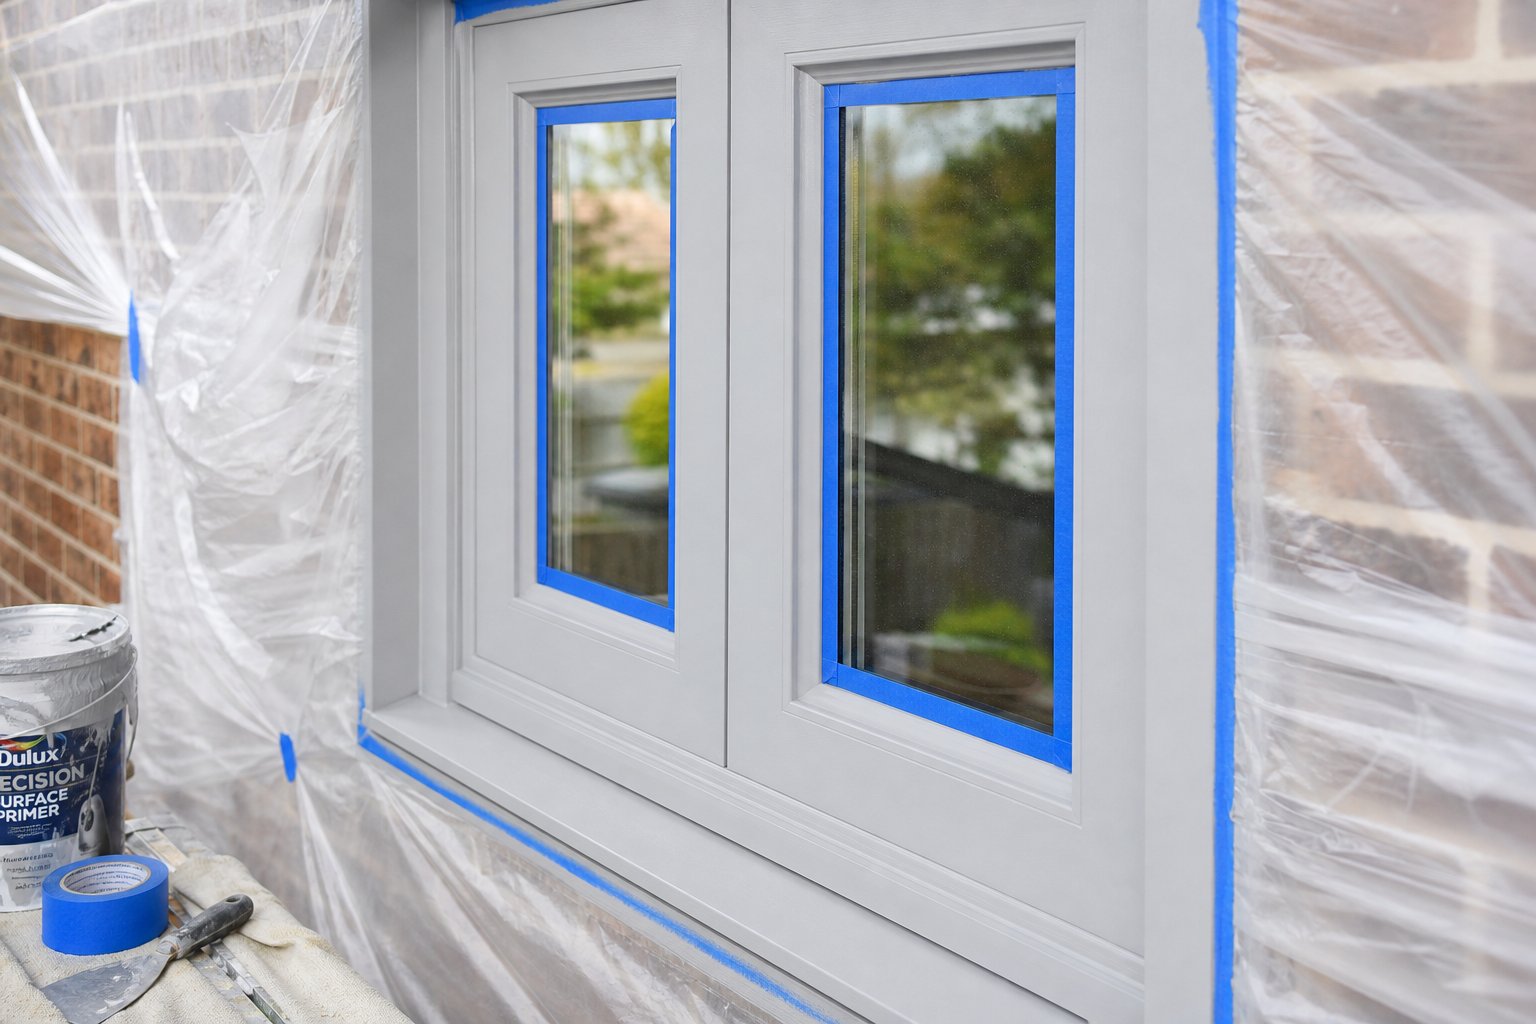
Use quality painter's tape rated for outdoor use and UV resistance — cheaper indoor tapes lose adhesion in direct sun and leave residue on glass. Apply tape to the glass edge at a slight angle, leaving approximately 1 mm of glass exposed. This creates a paint line that fractionally overlaps the glass-to-frame junction, sealing that gap against moisture ingress rather than stopping paint exactly at the frame edge.
Rubber gaskets and weather seals present a specific challenge. If paint bridges from the frame onto a rubber seal, it creates a bond between two surfaces that move independently. When you next open or close the window, the paint film tears, pulling coating away from the frame. Either remove rubber seals where possible (many simply press into a channel) or mask them carefully with thin tape pressed into the junction between seal and frame.
For hardware — handles, locks, stays, and hinges — removal is always preferable to masking around them. Masking creates paint dams at every edge and makes it nearly impossible to achieve full coverage underneath. Removed hardware also lets you sand and prime the frame surface it was covering, eliminating bare patches that become future failure points. If removal is impractical, mask with precision using narrow (6 mm) tape pressed firmly into every junction.
With glass, seals, hardware, and surrounding surfaces protected, here is the complete preparation workflow from start to finish:
- Remove window hardware (handles, stays, locks) where accessible
- Wash frames with warm soapy water to remove surface grime; rinse and dry
- Clean with sugar soap solution; scrub rebates and drainage channels; rinse and dry
- Wipe all surfaces with methylated spirits or acetone on a lint-free cloth
- Assess surface condition: identify oxidation, flaking paint, or sound coating
- Sand with appropriate starting grit (120 for damaged, 180 for anodised, 240 for sound surfaces)
- Progress through finer grits as needed, finishing with 320 grit for smoothest profile
- Remove sanding dust with tack cloth followed by a final solvent wipe
- Apply painter's tape to glass edges, seals, and any hardware that could not be removed
- Mask surrounding walls, sills, and brickwork with tape and plastic sheeting
- Apply self-etching primer to bare aluminium areas within four hours of final sanding
- Apply bonding primer to remaining surfaces; allow to cure per manufacturer's instructions
This sequence is designed so that each step creates the conditions the next step requires. Cleaning before sanding prevents grinding contaminants into the surface. Sanding before solvent wiping means the wipe removes freshly created dust. Masking after sanding avoids tape damage from abrasive work. And priming immediately after the final wipe captures the surface at peak receptiveness before oxide regrowth begins.
For anyone planning to how to repaint aluminum window frames that have been painted before, the same workflow applies — the only variation is your starting grit and whether you need to strip failing old paint back further before the sanding sequence begins. Sound old paint gets keyed with 240 grit and treated as a stable substrate. Flaking old paint gets removed with 120 grit back to a sound layer, then the area is treated as though approaching bare metal.
With frames cleaned, sanded, masked, and primed, the preparation phase is complete. The surface beneath your tape lines is now textured, chemically clean, and sealed with a primer coat bonded at molecular level to the aluminium. What follows — the actual application of colour — is where technique determines whether that prepared surface translates into a smooth, even, professional-looking finish or one marked by drips, brush lines, and lap marks.
How to Paint Aluminium Window Frames for a Smooth Finish
A perfectly prepared surface can still end up looking average if the application goes sideways. Drips pooling in corners, brush marks telegraphing through the sheen, lap marks where wet paint overlapped a partially dried edge — these are technique failures, not product failures. Knowing how to paint aluminium window frames properly means understanding that metal behaves differently under a brush or roller than timber does. The surface is non-absorbent, so paint sits on top rather than soaking in. Coats need to be thinner, strokes need to be more deliberate, and patience between layers pays dividends that rushing never will.
Two primary methods suit residential aluminium frames: brush and roller for precision work, or spray for speed and a factory-smooth result. Each has a place depending on the scope of your project, your comfort level, and the finish quality you are chasing.
Brush and Roller Application Technique
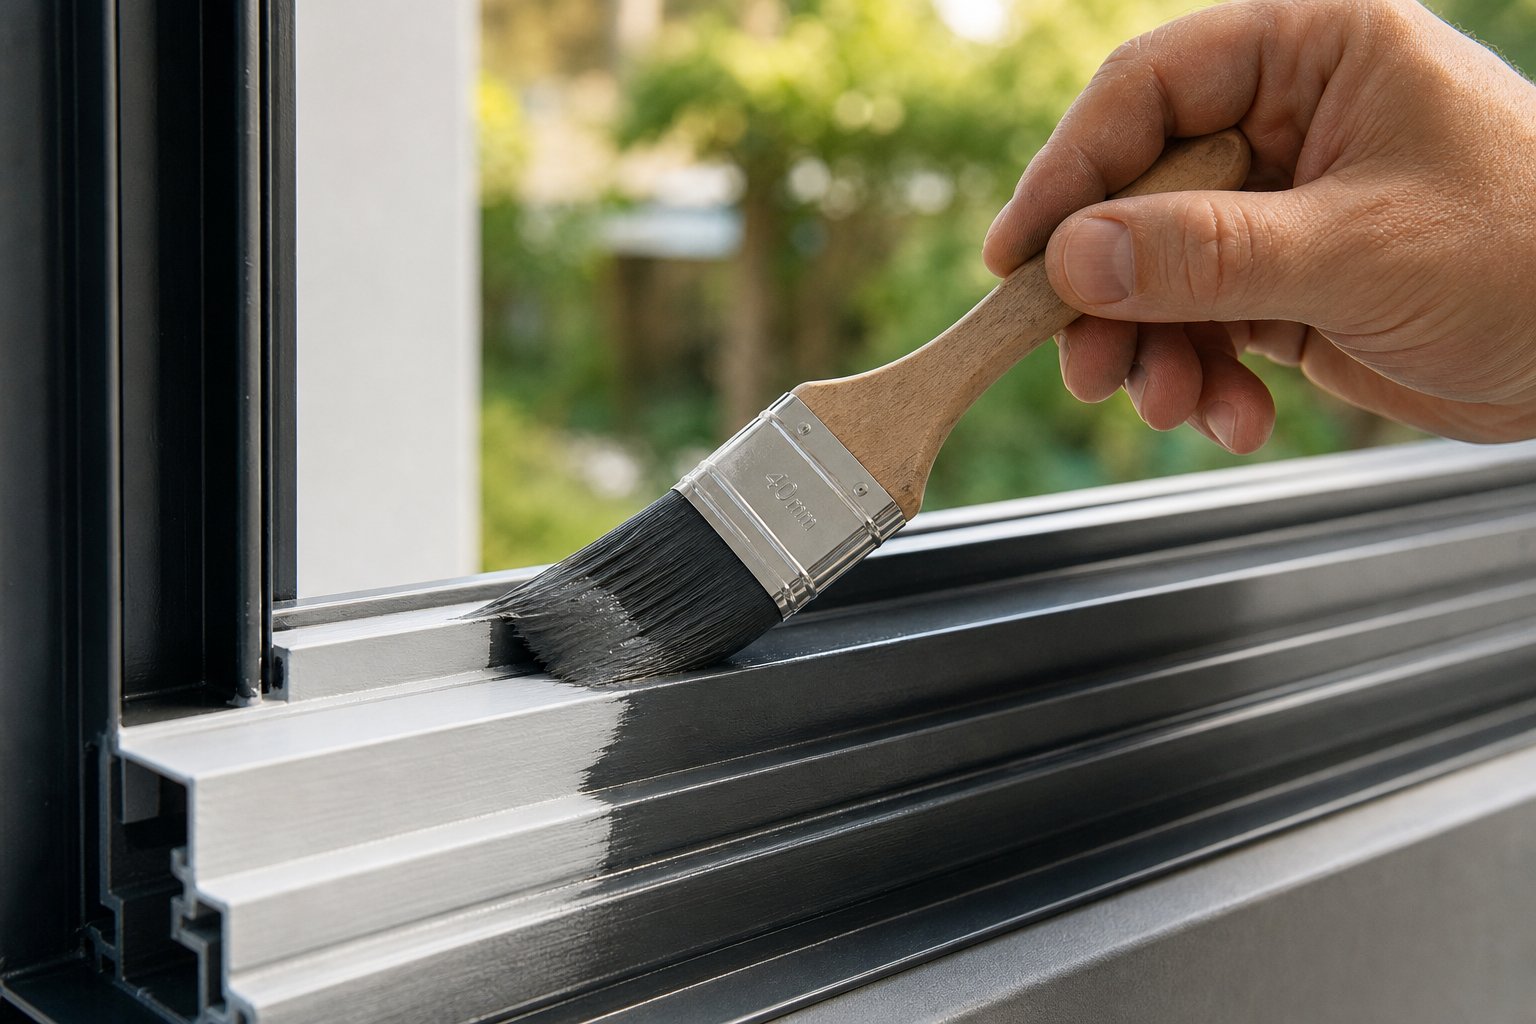
For most homeowners painting aluminum window frames one or two at a time, a brush and roller combination delivers excellent control with minimal masking. The key tools are a short-nap microfibre roller (5–10 mm nap) for flat sections like frame faces and mullions, and a quality angled sash brush (38–50 mm) for rebates, corners, and the narrow profiles where rollers cannot reach.
The single most important principle on aluminium: thin coats beat thick coats every time. Metal does not absorb paint, so a heavy coat simply sits as a thick wet film that sags, pools in profile channels, and takes far longer to cure. Two to three thin, even coats will outperform one heavy coat in adhesion, smoothness, and longevity. Each coat should look almost translucent when wet — barely opaque. Full coverage builds with successive layers rather than one pass.
Work your brush strokes in the direction of the frame profile. Horizontal members get horizontal strokes; vertical stiles get vertical strokes. This follows the natural eye line and makes any minor brush texture virtually invisible once dry. On flat face sections, lay off with the roller in long, consistent passes using light pressure — pressing hard squeezes paint to the roller edges and leaves tramlines.
Lap marks are the most common flaw on non-absorbent surfaces. They occur when you apply fresh paint over an edge that has already started drying, creating a visible ridge. The solution is maintaining a wet edge: work quickly enough that the leading edge of your painted area stays wet until you return to it. On a hot day, this may mean doing one frame section (a single rail or stile) at a time rather than trying to coat an entire window in one uninterrupted pass. If temperatures climb above 30°C, consider painting early morning or late afternoon when direct sun is off the frames — paint that dries too quickly on the surface while still wet beneath creates adhesion and texture problems.
Between coats, allow the manufacturer's recommended recoat time (typically 2–4 hours for acrylics) and lightly sand with 320-grit paper to knock down any nibs or micro-texture before the next layer. Wipe dust away with a tack cloth. This inter-coat sanding is quick — 30 seconds per frame section — but it noticeably improves the final smoothness.
Spray Painting Aluminium Frames in Place
Can you spray paint aluminium for a result that rivals factory powder coating? Absolutely — and for anyone tackling multiple windows or chasing that perfectly smooth, brush-mark-free finish, spray application is the faster and often superior method. The trade-off is preparation time shifts from painting to masking.
Proper masking for spray work needs to extend at least 300 mm beyond the frame on all sides. Use painter's plastic sheeting taped to the wall or brickwork around the window, and mask glass thoroughly with paper and tape rather than relying on careful aim. Overspray drifts further than most people expect, particularly outdoors where even a gentle breeze carries atomised paint onto surfaces you never intended to coat.
Hold the can or spray gun 200–250 mm from the surface and move at a consistent, moderate speed. Each pass should overlap the previous one by roughly 50 percent — this prevents striping and ensures even film thickness across the entire frame. Spray from the top down to catch any runs before they set.
The same thin-coat principle applies. Three light passes build better coverage than one heavy pass. With aerosol spray paints, expect each coat to be touch-dry within 20 to 30 minutes in warm conditions, making multi-coat application on the same day entirely feasible. Shake cans thoroughly before use and between coats to keep pigment and binder evenly dispersed.
Spray is preferable when you need to paint window frames across an entire facade, when frames have complex profiles that brushes struggle to coat evenly, or when you simply want the smoothest possible finish. Brush application suits single-window projects, frames surrounded by surfaces that are difficult to mask (textured render, unpainted brick), or detail work on ornate or older-style profiles where spray would struggle to reach recessed areas without excessive build-up on exposed edges.
Whether brushing or spraying, ventilation matters. Work with windows open where possible, wear a respirator rated for solvent fumes or paint particulate, and avoid painting in enclosed spaces without airflow — particularly with solvent-based primers or aerosol products.
DIY vs Professional Assessment
Not every aluminium frame repaint needs a professional, but not every one suits a weekend DIYer either. An honest assessment before you commit saves frustration and wasted materials. Consider these factors:
- Number of windows — one to four ground-floor windows is a manageable weekend project; ten or more windows across an entire home tips into multi-day territory where professional speed and equipment justify the cost
- Height and accessibility — frames reachable from the ground or a single-storey ladder are straightforward; second-storey windows requiring scaffolding or extension ladders introduce safety concerns and access difficulty that professionals handle routinely
- Condition of the existing surface — mild chalking and uniform fade on otherwise sound frames suit DIY preparation; heavy flaking, pitting, or multiple layers of failing old paint demand more aggressive stripping that professionals complete faster with industrial equipment
- Desired finish quality — if you are happy with a solid, even result that looks good from the street, brush and roller in competent hands delivers; if you expect a flawless factory-smooth finish indistinguishable from new powder coating, professional spray application is the realistic path
- Available time — budget a full day per window for thorough prep, priming, and two topcoats with drying time between; if your project involves six or more windows, that is a week of after-work evenings or a long weekend committed entirely to the task
Ground-floor windows in reasonable condition — surfaces that are faded or lightly chalked but not flaking — represent an excellent first DIY painting project. The stakes are manageable, access is easy, and mistakes are fixable without scaffolding or safety risk. Multi-storey homes, frames with severe coating failure, or situations where a flawless spray finish is non-negotiable are where professional painters earn their fee. Their spray rigs, surface preparation tools, and experience with how to paint aluminium window frames at height deliver results that justify the investment over a compromised DIY attempt from an awkward ladder position.
Whichever route you choose, the timeline from first coat to fully cured finish is not as simple as waiting for paint to feel dry to the touch. Drying times on aluminium differ from what you might expect based on painting timber or plaster — and getting those intervals wrong can undo otherwise solid application work.
Drying Times and Complete Project Timeline
Paint that feels dry to the touch is not paint that is cured. This distinction trips up more DIYers than almost any other aspect of painting aluminium windows. You press a finger to the frame four hours after the last coat, feel nothing transfer, and assume the job is done. Then you close the window that evening and wake up to find the sash bonded to the frame, pulling fresh paint away in sheets when you force it open. The difference between touch-dry and full cure on a non-absorbent metal surface can be days — sometimes weeks — and planning your project around these intervals is what separates a lasting result from a frustrating redo.
Drying and Recoat Times by Paint Type
Every paint chemistry dries and cures at its own pace. Water-based acrylics lose moisture quickly to evaporation but need extended time for polymer chains to fully crosslink and harden. Solvent-based products feel wet longer at the surface but develop mechanical hardness sooner once they do dry. The table below gives practical guidance for the four paint types most commonly used when painting aluminium windows in Australian conditions (assuming moderate temperatures of 18–25°C and relative humidity below 70 percent).
| Paint Type | Touch Dry | Recoat Window | Full Cure |
|---|---|---|---|
| Acrylic Latex | 30–60 minutes | 2–4 hours | 14–30 days |
| DTM Acrylic | 30–60 minutes | 2–4 hours | 14–21 days |
| Alkyd Enamel | 6–8 hours | 16–24 hours | 7–14 days |
| Aerosol Spray (metal-specific) | 10–20 minutes | 30–60 minutes | 7–10 days |
These figures assume cooperative weather. Drop the temperature below 10°C and drying slows dramatically — some systems can stall entirely, leaving the film soft and vulnerable for days longer than expected. Push humidity above 85 percent and water-based products cannot shed moisture into already-saturated air. Both scenarios are common in Australian winters and in tropical or coastal regions during summer, so plan your project for a stretch of dry, mild weather rather than squeezing it between forecast showers.
Recoat windows matter just as much as drying time. Applying the next coat too early traps solvents beneath the new layer, causing bubbling or poor intercoat adhesion. Applying it too late — beyond 48 to 72 hours for most acrylics — means the previous coat has hardened enough to require a light sand with 320-grit paper before the next layer will bond properly.
Planning Your Full Project Timeline
Knowing how to repaint windows successfully means respecting the clock as much as the brush. Here is a realistic timeline for painting aluminium windows on a typical home — two to four frames, using acrylic latex over self-etching primer, in moderate weather:
- Day 1: Cleaning, degreasing, sanding, final solvent wipe, and masking. Allow frames to dry fully overnight if using water-based cleaners late in the day.
- Day 2: Apply self-etching primer in the morning. Allow a minimum of four hours before handling, but overnight cure is ideal for maximum adhesion before topcoating.
- Day 3: Light sand primer with 320 grit, tack-cloth dust away, and apply first topcoat. Allow the full recoat window (minimum 4 hours for acrylics; overnight is safer in cooler weather).
- Day 4: Apply second topcoat. Some projects benefit from a third coat on heavily exposed faces — if so, allow another full recoat interval and add Day 5.
- Day 5–11: Leave windows in an open or slightly ajar position. Avoid operating sashes, latching locks against freshly painted surfaces, or cleaning frames during this period.
- Day 14+: Full cure achieved for acrylic systems. Windows can be operated normally, cleaned gently, and hardware reinstalled.
Do not close windows onto freshly painted surfaces until full cure is achieved. Paint that feels dry to the touch is not fully hardened — closing a sash against an uncured frame causes sticking, paint transfer, and torn film that requires stripping and recoating to repair.
That two-week cure window is non-negotiable if you want to paint aluminum windows and have the result hold up. Plan your project for a period when you can leave windows ajar without security or weather concerns. Spring and autumn in most Australian climates offer the ideal combination of moderate temperatures, lower humidity, and enough daylight hours to complete coating work comfortably.
One more scheduling consideration: if rain falls or humidity spikes above 85 percent between coats, the exposed paint film absorbs moisture and forms a microscopic barrier that reduces intercoat adhesion. Before applying the next coat after a weather interruption, lightly sand the existing layer with 320-grit paper, wipe with a tack cloth, and confirm the surface is completely dry. This adds perhaps twenty minutes to your timeline but prevents delamination between layers — a failure mode that only becomes visible months later when the topcoat lifts in sheets from the primer beneath.
With drying intervals mapped out and a realistic schedule locked in, the remaining decisions shift from how and when to what colour — a choice that affects more than just aesthetics when the substrate is thermally conductive aluminium.

Colour Selection and Energy Efficiency Considerations
Colour is never just cosmetic on aluminium. Unlike timber or PVC frames that insulate by nature, aluminium conducts heat readily — and the colour you paint it determines how much solar energy that frame absorbs, retains, and transfers into your home. Pick a shade based solely on what looks good on a paint chip and you might end up with frames that run uncomfortably hot to the touch on summer afternoons or fade unevenly within a few years. The smartest window frame paint ideas balance aesthetics with thermal performance and pigment longevity.
How Colour Choice Affects Frame Performance
Dark colours absorb significantly more solar radiation than light ones. A frame painted matt black can reach surface temperatures 20–30°C above ambient on a still, sunny day, while a white or light grey frame in the same position stays much closer to air temperature. On aluminium — a metal that conducts heat roughly 1,000 times faster than timber — that absorbed energy transfers directly into the frame profile and, through the frame, into the glazing rebate, weatherseals, and ultimately the room beyond.
Does that mean dark frames will overheat your home? Not necessarily. As research into dark window frames confirms, the actual impact on indoor temperature is minimal in well-insulated window systems — the difference rarely translates into a noticeable rise in room temperature when frames incorporate thermal breaks and quality glazing. However, the thermal expansion effect is real. Aluminium expands roughly twice as much as steel per degree of temperature rise, and hotter surface temperatures mean greater expansion and contraction cycles. Over years, this additional thermal stress can accelerate paint film fatigue on dark-coloured frames, particularly on north- and west-facing elevations that cop sustained afternoon sun.
UV fade resistance adds another layer to the decision. Not all pigments degrade at the same rate under ultraviolet exposure. Colour longevity data consistently shows that bright reds, vivid yellows, bold oranges, and highly saturated blues lose richness faster than earth tones, muted greys, and neutral shades. The underlying chemistry matters: organic pigments (used in vibrant reds and blues) are inherently less UV-stable than inorganic pigments (used in oxides, earth tones, and carbon blacks). If you love a bold colour, it can still work — but place it on a sheltered frame rather than a fully sun-exposed one, or accept that touch-up intervals will be shorter.
What is the colour of aluminium in its natural state? A soft silvery-grey, which is essentially what you see on clear anodized aluminum windows before any paint or powder coat is applied. That natural tone reflects a high percentage of solar radiation, keeping frames cool. It is worth noting as a baseline: the further your chosen colour moves from that reflective neutral toward deep, saturated darks, the more thermal load the frame carries.
Popular Aluminium Frame Colours and Combinations
Aluminium window frame colors trending across Australian homes lean toward a handful of proven families that balance street presence with long-term durability:
- Charcoal and anthracite — the dominant choice for contemporary facades. High contrast against light render or cladding, timeless rather than trendy, and dark enough to make frames recede visually while the glass takes centre stage. These tones show less fading than pure black and handle UV stress better than saturated colours.
- Monument and basalt — mid-tone warm greys that align with Australia's Colorbond palette. They coordinate effortlessly with metal roofing, blend with both brick and weatherboard, and sit in the sweet spot between visual impact and thermal moderation.
- White and surfmist — classic, reflective, and the coolest-running option for frames in full sun. Ideal for tropical and subtropical regions where minimising heat absorption matters, or for heritage homes where darker tones would look out of place. Note that white shows dirt and mildew staining more readily, requiring more frequent cleaning.
- Bold accent colours — deep navy, forest green, or terracotta on feature windows or front doors. These work best on single focal points rather than entire elevations, limiting UV fade exposure to one or two frames you can touch up easily.
When exploring window frame painting ideas, think about how your frames interact with the broader palette of your home. Dark frames against pale rendered walls create a sharp, architectural contrast that photographs well and defines window openings clearly. Frames matched to roof colour create visual cohesion from the street. Two-tone approaches — a darker exterior face with a lighter interior — add depth without committing the entire frame to high heat absorption.
For homeowners considering a full colour change across many windows, the economics shift. Painting ten or fifteen frames is a substantial time investment, and site-applied paint — however well executed — cannot match the durability of a factory powder-coated finish baked at 200°C. In renovation projects or new builds where multiple windows are being addressed simultaneously, specifying pre-finished aluminium windows in your desired colour often proves more cost-effective and longer-lasting than painting existing frames on site. Factory finishes are applied under controlled conditions with pre-treatment, electrostatic application, and oven curing that produce a coating thickness and adhesion level impossible to replicate with a brush or even professional spray equipment in an open-air environment.
That said, for homeowners refreshing a few frames on a budget or experimenting with a new look before committing to replacement, aluminium window paint remains a practical and satisfying route — provided you have realistic expectations about maintenance intervals and choose your colour with both eyes and thermometer in mind.
Colour choice locks in the visual result. What determines how long that result holds up is what happens in the months and years after the final coat cures — the cleaning habits, touch-up timing, and honest assessment of when a frame has given everything it can.
Maintaining Painted Frames and Knowing When to Upgrade
A fresh coat of aluminium window paint is not a set-and-forget solution. The day you finish painting is the day maintenance begins — and how you treat those painted aluminum window frames over the following years determines whether they still look sharp at the seven-year mark or start peeling well before their time. Aluminium painted with proper preparation and quality topcoats rewards consistent care with a long, attractive service life. Neglect it, and the same coating that could have lasted a decade deteriorates in half that time.
This section maps out the full maintenance lifecycle: routine cleaning, recognising when spot repairs will suffice versus when a complete repaint is needed, and identifying the tipping point where further painting no longer makes financial or practical sense.
Cleaning and Caring for Painted Aluminium Frames
Painted surfaces degrade faster when contaminants sit on them. Dirt, salt, airborne pollutants, and biological growth like mould all attack the paint film — some chemically, others by trapping moisture against the surface. Regular cleaning removes these threats before they cause damage.
The routine is simple. Every three to six months, wash painted frames with warm water and a mild dish soap or pH-neutral detergent. Use a soft cloth or non-abrasive sponge, working gently across flat faces and into rebates where grime accumulates. Rinse thoroughly with clean water and dry with a soft cloth to prevent water spots. That is the entire process for inland homes in temperate climates.
Coastal properties need a more aggressive schedule. Salt deposits are corrosive even on painted surfaces — they draw moisture from the air and hold it against the paint film, accelerating breakdown. Homes within five kilometres of the coast should clean frames monthly during summer and after any storm that drives salt spray inland. Aluminium maintenance guidelines for coastal environments recommend more frequent attention specifically because trapped salt, dirt, and moisture cause accelerated oxidation beneath the paint layer.
What to avoid matters as much as what to do:
- Abrasive cleaners and scouring pads — these scratch through the topcoat, exposing primer or bare metal to weathering and creating initiation points for peeling
- Pressure washers — the force of a pressure washer can blast paint off edges, corners, and any area where adhesion is less than perfect. A garden hose on gentle spray is the maximum water pressure painted frames should encounter
- Harsh solvents — acetone, turpentine, and strong degreasers soften cured paint films if left in contact for more than a few seconds. If you need to remove a stubborn mark, use methylated spirits on a cloth with a light, quick wipe rather than soaking the area
- Cream cleansers with micro-abrasives — even products marketed as "gentle" can dull semi-gloss or gloss finishes over repeated use, leaving patches that look different from the surrounding frame
One additional tip: check drainage slots and weep holes in the frame during each clean. These small openings allow water to escape from the track and sill areas. When they block with debris, water pools against painted surfaces for extended periods, softening the film and promoting both mould growth and early coating failure at the lowest points of the frame.
Expected Lifespan and Touch-Up vs Full Repaint
A properly prepared and coated aluminium window frame should hold its finish for 7 to 15 years. That range is wide because lifespan depends heavily on three variables: orientation and exposure (north-facing in full sun degrades faster than south-facing in shade), paint quality (premium 100% acrylics with UV stabilisers outlast budget products significantly), and maintenance consistency. A well-maintained frame in a sheltered position can push past 12 years before needing attention. A neglected frame facing west in coastal Queensland might show wear inside five.
The practical question most homeowners face is whether a deteriorating frame needs localised touch-up or a full repaint. The distinction matters — touch-up work takes an hour per window, while a full strip-and-repaint cycle demands the entire multi-day process outlined earlier in this guide. Knowing which situation calls for which response saves both time and money.
Signs that touch-up is sufficient:
- Isolated chips or scratches from impact damage (a ladder leaning against the frame, hardware scraping during operation)
- Minor edge flaking at a single point — typically where masking tape pulled a thin edge during the original application
- Small areas of localised fade on one face that looks noticeably different from the rest
- Surface scratches from cleaning damage that have not yet exposed bare metal
Signs that a full repaint is warranted:
- Chalking across the entire frame surface — rub your thumb along the paint and a powdery residue transfers consistently
- Widespread peeling or flaking across multiple faces and edges rather than isolated spots
- Visible colour mismatch between previous touch-ups and the original coat — patchy repairs that draw the eye more than the fading they were meant to fix
- Primer visible beneath topcoat in multiple locations, indicating the colour coat has worn through
- The paint is older than 10 years and showing general brittleness — hairline cracks across flat faces that have not yet begun lifting but will soon
For spot repairs, the technique is straightforward. Sand the damaged area and a 20–30 mm border of sound paint with 240-grit paper. Clean with methylated spirits. Apply a thin coat of primer to any exposed metal, let it dry, then build up with two thin coats of matching topcoat, feathering the edges into the surrounding sound paint. The challenge, as with any touch-up, is colour matching — paint fades over time, and fresh product from the same tin will look slightly different against a sun-aged surface. Keeping leftover paint from the original job stored in a cool, dark place helps, but even stored paint shifts subtly over years. Where colour mismatch bothers you, repainting the entire frame face (rather than the whole window) often provides the best visual result without full-project labour.
Can you repaint aluminium window frames multiple times? Yes — there is no practical limit to recoating, provided each cycle is properly prepared. However, each repaint adds a fraction of a millimetre to the coating thickness. After two to three full repaints, the accumulated film becomes thick enough that it can crack more readily under thermal stress, and hardware fitment grows noticeably tighter. At that point, stripping back to bare metal before the next coat becomes necessary to reset the surface — a significantly more labour-intensive process than recoating over sound existing paint.
When Replacement Makes More Sense Than Repainting
There comes a point where repainting aluminium window frames stops being a smart maintenance investment and starts being money poured into frames that have given everything they can. Recognising that threshold saves you from committing another weekend and several hundred dollars in materials to a surface that will fail again within a few years regardless of how carefully you prepare it.
Several indicators suggest replacement deserves serious consideration over another repaint cycle:
- Structural wear — frames that are bent, bowed, or no longer sit square in their openings. Paint cannot fix geometry.
- Failed seals and fogged glazing — condensation trapped between glass panes indicates seal failure. Repainting the frame does nothing to address the thermal and acoustic performance loss.
- Severe pitting — deep corrosion pits in the aluminium substrate create an uneven surface that paint fills cosmetically but cannot structurally repair. These pits trap moisture beneath the new coating and become ongoing failure points.
- Thermal inefficiency — older aluminium frames without thermal breaks conduct heat directly through the profile. In an era of rising energy costs and tightening NCC requirements, painting these frames preserves their appearance but does nothing to improve their energy performance.
- Multiple repaint cycles already completed — if a frame has been repainted two or three times, the cumulative paint thickness creates diminishing returns. Each subsequent coat is more likely to crack, and stripping back adds considerable labour.
- Hardware failure — when locks, hinges, and stays are worn beyond adjustment, replacing individual components on an old frame often costs nearly as much as a new window system.
After two or three repaint cycles, or when frames exhibit structural wear alongside cosmetic decline, upgrading to new aluminium windows with factory powder-coated finishes offers a fundamentally longer-lasting solution. Factory powder coating is applied electrostatically and baked at approximately 200°C in controlled conditions, producing a finish 60–120 micrometres thick that resists UV, salt, and abrasion at levels no site-applied paint can match. These finishes carry manufacturer warranties measured in decades rather than years — a stark contrast to the 7–15 year lifespan of even the best brush- or spray-applied aluminium window paint.
For homeowners evaluating whether their next repaint investment would deliver better value directed toward modern window systems, MEICHEN's aluminium window range provides project-ready options with factory-finished colour selections designed for Australian conditions. Thermally broken profiles, high-performance glazing, and powder-coated finishes that eliminate the ongoing cycle of how to repaint aluminium window frames every decade make replacement a compelling proposition — particularly when the alternative is committing another full preparation-and-paint sequence to frames approaching the end of their practical service life.
The decision is rarely purely financial. A freshly painted older frame still lacks the thermal breaks, acoustic insulation, modern hardware, and security features of a current-generation aluminium window frame. If painting keeps your home looking sharp while you budget for a broader renovation, it serves its purpose well. If the frames themselves are the weak link in your home's comfort and efficiency, no amount of fresh colour on the outside changes what is happening on the inside.
Frequently Asked Questions About Aluminium Window Paint
1. Can you paint aluminium window frames without removing them?
Yes, aluminium window frames can be painted in place without removal. The key is thorough masking of glass, seals, and surrounding surfaces. Extend masking at least 300 mm beyond the frame for spray application, or use quality outdoor-rated painter's tape along glass edges for brush work. Remove hardware like handles and stays where possible rather than masking around them, as this gives better coverage and prevents paint dams at edges.
2. What is the best paint for aluminium window frames in Australia?
For most Australian homeowners, a premium 100% acrylic latex over a self-etching primer delivers the best balance of durability, UV resistance, and ease of application. These systems flex with aluminium's thermal expansion under harsh sun and resist fade for 7 to 12 years. DTM (direct-to-metal) acrylic formulations offer a simpler alternative with fewer coats required. For maximum longevity in coastal or high-wear environments, professional two-pack polyurethane systems last 10 to 15 years but require spray equipment and precise mixing.
3. How long does aluminium window paint last before it needs recoating?
A properly prepared and painted aluminium frame typically lasts 7 to 15 years before needing a full repaint. The lifespan depends on sun exposure (north and west-facing frames fade faster), paint quality, and maintenance habits. Regular cleaning every three to six months extends coating life significantly. Coastal homes may see shorter lifespans due to salt deposits. After two to three repaint cycles, many homeowners find upgrading to factory powder-coated aluminium windows more cost-effective long term.
4. Do you need to prime aluminium before painting?
Primer is essential on aluminium and should never be skipped, even when using DTM products that claim built-in primer properties. Self-etching primers containing phosphoric acid chemically bond to the aluminium surface, creating a conversion coating that standard primers cannot match. On bare metal or heavily weathered frames, self-etching primer is non-negotiable. On sound, previously painted surfaces that have been properly sanded, a bonding primer still provides measurably better long-term adhesion than topcoat alone.
5. How long should you wait before closing windows after painting aluminium frames?
Wait a minimum of 14 days before operating windows normally after painting with acrylic systems. While paint feels touch-dry within 30 to 60 minutes, full cure takes 14 to 30 days for acrylics and 7 to 14 days for alkyd enamels. Closing a sash against an uncured frame causes sticking and paint transfer that tears the film. Plan your project for a period when windows can remain slightly ajar without security or weather concerns, ideally during mild spring or autumn weather.