

Diagnose Your Aluminium Window Problem Before You Start
Grabbing a screwdriver and diving straight into an aluminium window repair rarely ends well. The fix for a seized roller is completely different from the fix for a corroded track or a blown seal, and misdiagnosing the issue can waste hours or make things worse. A few minutes spent identifying the actual fault will point you toward the right tools, the right materials, and the right section of this guide.
Common Aluminium Window Problems and Their Causes
Most aluminium window failures fall into one of six categories. Match your symptoms to the list below to pinpoint where to focus your efforts.
- Stuck or stiff operation — the window drags, jams, or won't slide at all. Usually caused by debris in the track, worn rollers, or thermal expansion binding the sash.
- Track damage — visible dents, bends, or corrosion pitting along the bottom rail. Common in older homes and coastal properties where salt and grit accumulate.
- Hardware failure — handles spin without engaging, locks won't latch, or friction stays no longer hold the sash open. Wear and corrosion are the typical culprits.
- Structural issues — warping, bending, or cracking at mitre joints. Often triggered by building settlement or repeated thermal cycling over decades.
- Cosmetic damage — white oxidation pitting, peeling paint, or chalky powder-coat breakdown. Accelerated by UV exposure and salt air.
- Seal deterioration — drafts, rattling, water ingress, or visible gaps between the sash and frame. Weatherstrips harden and shrink with age.
If you're trying to figure out how to fix a sliding window that barely budges, the cause is almost always in the first two categories. Casement and awning windows, on the other hand, tend to suffer hardware and hinge failures first.
How Aluminium Differs from Timber and uPVC Repairs
Aluminium won't rot like timber or warp from UV exposure the way uPVC does. Its failure modes are distinct. The primary enemy is galvanic corrosion — an electrochemical reaction that occurs when aluminium contacts dissimilar metals (particularly carbon steel screws or fittings) in the presence of moisture. This is why you'll sometimes find white, powdery deposits around hinges or fastener points even when the rest of the frame looks fine.
Thermal expansion also creates unique stress. Aluminium expands roughly twice as much as steel per degree of temperature change, so frames that operate perfectly in winter can bind in the heat of a Queensland summer. Understanding this helps you distinguish a seasonal issue from a mechanical fault that needs parts replaced.
A few aluminium-specific rules apply to every repair covered in this guide:
- Never use steel wool on aluminium. Tiny steel particles embed in the softer metal and create new corrosion sites.
- Know your finish. Anodised frames have a hard, integral oxide layer that can be polished but not easily re-coated at home. Powder-coated frames have a painted-on finish that can be spot-repaired with etch primer and paint.
- Use only silicone-based lubricants on tracks and hardware. Oil-based products attract grit and accelerate wear.
Safety Precautions Before You Start
Aluminium window repair is generally low-risk, but a few hazards deserve attention before you begin:
- Sharp edges — cut or broken aluminium sections can slice skin easily. Wear work gloves when handling sashes or removing damaged beading.
- Chemical exposure — etch primers, degreasers, and silicone solvents require good ventilation. Work in a well-aired space and wear nitrile gloves.
- Working at height — upper-storey windows should be accessed from inside where possible. If external access is unavoidable, use a properly secured ladder or scaffolding that complies with Safe Work Australia guidelines.
- Glass hazard — if the glass is cracked, tape it with packing tape before attempting any frame manipulation to prevent shattering.
With your problem identified and safety gear sorted, the next step is gathering the right tools and materials for your specific repair type — because a one-size-fits-all toolkit doesn't exist for aluminium window work.
Tools and Materials Organised by Repair Type
A generic toolkit won't cut it for aluminium window repairs. The materials you need depend entirely on the fault you diagnosed above — and grabbing the wrong product (a standard primer instead of an etch primer, or oil-based lubricant instead of silicone) can actually make things worse. Here's what to gather, broken down by repair category.
Track and Roller Repair Kit
For repairing aluminium window frames that stick or drag, you need cleaning and lubrication supplies plus replacement rollers if the originals are worn flat. Gather a vacuum with a crevice attachment, a stiff nylon brush, mild detergent, silicone spray lubricant (never WD-40 or petroleum-based oils — they attract grit into the channel), and replacement roller assemblies matched to your window profile. Common roller sizes for sliding aluminium windows in Australia are 25 mm, 32 mm, and 38 mm diameter. Take the old roller to your hardware supplier to match the housing width and wheel type.
Hardware Replacement Essentials
Handles, locks, friction stays, and hinges each have specific fixing dimensions. You'll need a Phillips-head and flat-head screwdriver, a set of Allen keys (4 mm and 5 mm cover most aluminium window hardware), and the replacement components themselves. Measure spindle length and fixing centres on handles before ordering — even a 2 mm difference can mean a poor fit. When sourcing replacement hardware for sliding aluminium windows or casement systems, quality matters. MEICHEN's aluminium window systems use project-grade materials and powder-coated finishes engineered for long-term weather performance, and their customisation support helps you find compatible parts for both residential and commercial applications.
Cosmetic and Structural Repair Supplies
Structural fixes call for aluminium filler (epoxy-based), G-clamps, and a flat file for reshaping dented sections. Cosmetic restoration requires a degreaser (methylated spirits works well), 320-grit sandpaper, self-etching primer formulated for non-ferrous metals, and exterior-grade acrylic or epoxy paint. Standard primers simply won't bond to aluminium's oxide layer — skip the etch primer and the topcoat will peel within months. For sealing work, stock brush-pile weatherstrip, silicone sealant, and replacement glazing rubber matched to your frame's rebate depth.
| Repair Type | Key Tools and Materials | Estimated Cost (AUD) | Difficulty |
|---|---|---|---|
| Track and roller repair | Vacuum, stiff brush, silicone spray, replacement rollers | $30 – $120 | Easy to moderate |
| Hardware replacement | Screwdrivers, Allen keys, replacement handles/hinges/stays | $50 – $200 | Moderate |
| Structural repair | Aluminium filler, clamps, flat file, sandpaper | $40 – $100 | Moderate to hard |
| Cosmetic restoration | Degreaser, 320-grit sandpaper, etch primer, exterior paint | $60 – $150 | Moderate |
| Seal replacement | Weatherstrip, silicone sealant, glazing rubber, utility knife | $20 – $80 | Easy |
With your materials sorted by repair type, you avoid buying products you don't need and — more importantly — you avoid using the wrong ones. The most common aluminium window repairs start with the track and rollers, so that's exactly where the hands-on work begins.
Step 1 — Fix a Stuck or Stiff Sliding Window
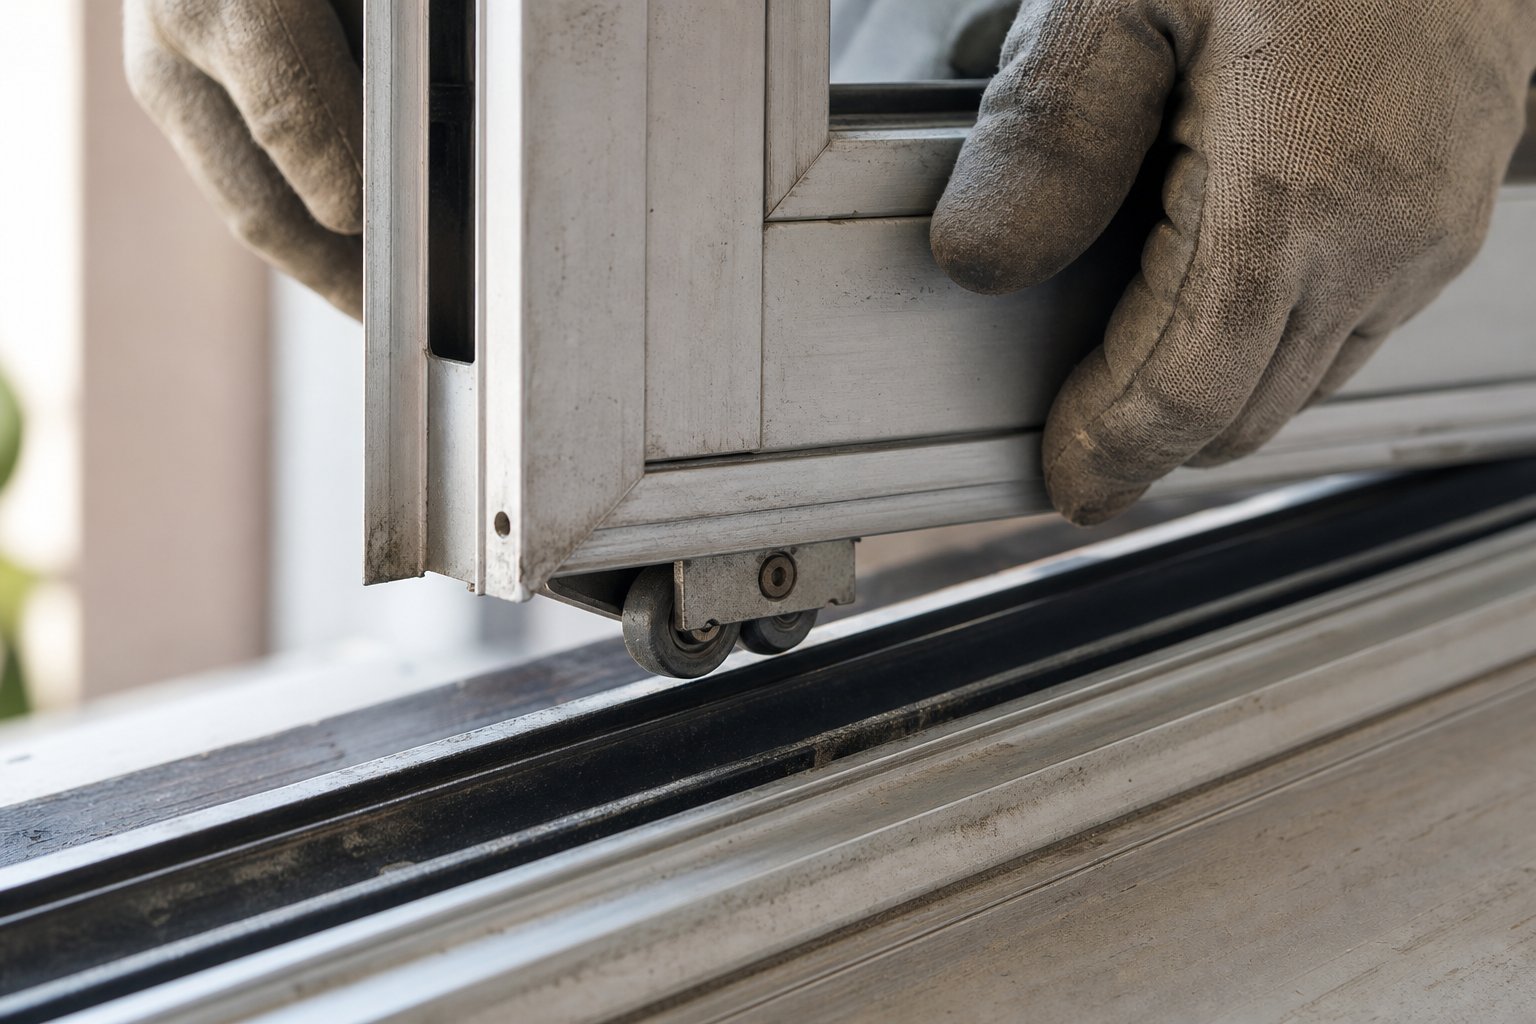
A sliding window stuck halfway is one of the most frustrating household problems — and one of the simplest to solve once you understand the mechanism. In most cases, the culprit is a combination of dirty tracks and worn rollers rather than any serious structural fault. This step walks you through the full process: removing the sash, cleaning the track, inspecting and replacing rollers, and getting everything back together smoothly.
How to Remove a Sliding Aluminium Sash Safely
Before you can fix a sliding window, you need to get the moving panel out of the frame. The technique is straightforward, but rushing it risks bending the sash or cracking the glass.
First, check for anti-lift blocks. Some aluminium windows have small plastic or metal clips in the top head track designed to prevent the sash from being lifted out accidentally. Run your finger along the top channel — if you feel a block or resistance, unscrew or slide it out before proceeding.
- Unlatch the window handle so the sash moves freely.
- Slide the window open slightly to give yourself working room.
- Place one hand on each side of the aluminium sash frame.
- Lift the sash upward into the top head track as far as it will go — this creates clearance at the bottom.
- Once lifted, angle the bottom of the sash toward you.
- Clear the bottom sill track and remove the sash completely.
- Lay the sash flat on a drop cloth or stand it upright against a stable surface.
For larger panels, get a second person to help. Aluminium sashes with double glazing can be surprisingly heavy, and losing your grip risks damage to both the glass and the track.
Clean and Inspect the Window Track
With the sash removed, you'll likely see the problem immediately. Years of dust, grit, insect debris, and (in coastal areas) salt crystals pack into the bottom track and create friction that no amount of force can overcome.
Start by vacuuming the entire track with a crevice attachment to remove loose material. Follow up with a stiff nylon brush and warm water mixed with a small amount of mild detergent — this loosens the baked-on grime that vacuuming misses. Wipe the track dry with a clean cloth. While you're in there, check the weep holes (small drainage slots at the outer edge of the bottom track) and clear them with a toothpick or thin wire. Blocked weep holes trap water, which accelerates corrosion and creates a muddy paste that seizes rollers.
Inspect the track surface itself for dents, bends, or corrosion pitting. Minor surface oxidation is normal and won't affect operation, but deep pits or bent sections will need attention in Step 2.
Replace or Adjust Rollers for Smooth Operation
Flip the sash over and examine the rollers mounted in the bottom rail. Healthy rollers spin freely when flicked with a finger. If the wheels are flat-spotted, cracked, or refuse to turn, they need replacing. Worn rollers are one of the most common reasons a sliding window stuck in its track won't respond to cleaning alone.
To replace them, remove the screws securing the roller housing (usually one or two Phillips-head screws per roller), slide the old assembly out, and fit the new one. Match the roller diameter and housing width exactly — take the old roller to your supplier if you're unsure.
If the rollers still spin freely but the window sits too low or too high in the frame, look for a small adjustment screw on the face or edge of the bottom rail. Turning this screw raises or lowers the roller, changing how the sash sits in the track. Small adjustments — a quarter turn at a time — make a noticeable difference.
Before reinstalling, apply a light coat of silicone-based lubricant to both the rollers and the cleaned track. Silicone won't attract dust the way oil-based products do, keeping things smooth for longer.
To put the sliding window back in the frame from inside, reverse the removal sequence:
- Hold the sash firmly on both sides and lift it up into the top head track.
- Push it as high as it will go to create clearance at the bottom.
- Swing the bottom inward and lower the sash until the rollers seat into the bottom track.
- Slide the window back and forth several times to confirm smooth operation.
- Re-engage any anti-lift blocks you removed earlier.
- Test the locking mechanism to ensure it latches securely.
A few climate-specific notes worth keeping in mind: homes along the coast accumulate salt in tracks far faster than inland properties, so quarterly cleaning is a minimum rather than an annual chore. In regions with extreme summer heat — think western Sydney or inland Queensland — aluminium expands enough to make windows bind seasonally. If your window only sticks on the hottest days and slides fine in cooler weather, the issue is thermal expansion rather than mechanical failure. Adjusting the rollers slightly lower gives the sash room to expand without jamming.
Dirty tracks and tired rollers account for the majority of sliding window problems. But sometimes the track itself is the issue — dented, corroded, or worn beyond what cleaning can fix.
Step 2 — Repair Damaged Window Tracks
A clean track with fresh rollers solves most sliding window problems. But when the track itself is dented, corroded, or worn into a groove that no longer guides the sash properly, cleaning alone won't restore smooth operation. Window track repair ranges from a five-minute file job to a full section replacement, depending on the severity of the damage.
Identify and Assess Track Damage
Run your finger slowly along the full length of the bottom track with the sash removed. You're feeling for four things:
- Dents or flat spots — caused by impacts, dropped objects, or years of a heavy sash pressing on one point.
- Bends or bowing — the track lifts away from the sill or curves inward, preventing the rollers from travelling straight.
- Corrosion pitting — rough, cratered patches where the aluminium has oxidised. Common on the aluminum sliding window track in coastal homes where salt and moisture sit in the channel.
- Worn grooves — the roller path has been ground deeper over decades of use, creating a channel that traps the wheels instead of guiding them.
Minor surface oxidation (a dull white haze) is cosmetic and won't affect function. Deep pitting that catches a fingernail, or dents that deflect the track profile by more than a millimetre, need active repair.
Repair Minor Dents and Corrosion
Small dents in the track can often be filed back to profile. Use a flat mill file held at a low angle and work in long, even strokes along the length of the track — not across it. The goal is to restore the original flat or slightly concave surface that rollers glide on. Check your progress frequently by rolling a spare roller wheel along the repaired section. It should travel without catching or jumping.
For corroded sections, start by scrubbing with a non-abrasive nylon pad (Scotch-Brite or similar) and a mild detergent solution. Never use steel wool — embedded steel particles will trigger galvanic corrosion and leave you worse off within weeks. Once the loose oxidation is removed, wipe the area dry and apply a thin coat of aluminium-compatible corrosion inhibitor. Products containing lanolin or zinc phosphate work well for this purpose. Let it cure fully before reinstalling the sash.
If the corrosion has eaten through the track surface or created holes, filing and inhibitor won't be enough. That's replacement territory.
Replace a Damaged Track Section
Severely damaged tracks need to be replaced rather than patched. The challenge is that aluminium track profiles vary significantly between manufacturers and installation eras — a track from a 1980s home in Melbourne won't match one from a 2005 build in Brisbane. Measure the existing profile carefully: track width, depth, and the shape of the roller channel all matter. Take a cross-section photo or, better yet, cut a short sample from the damaged end to bring to your supplier for matching.
To install a replacement section, apply a thin bead of silicone sealant along the bottom of the new track, then hook one end onto the existing frame and slowly lower it into position. Press firmly along the full length to seat it evenly. Avoid bending the new track during handling — aluminium profiles kink easily and a kinked track is useless.
Before refitting the sash, check the weep holes at the outer edge of the bottom track. These small slots allow water to drain from the channel to the outside. On an aluminum sliding window track, the bottom rail collects rainwater, condensation, and debris constantly — blocked weep holes trap that moisture, accelerating corrosion and creating the muddy paste that seizes rollers in the first place. Clear each hole with a pipe cleaner or thin wire, then pour a small amount of water into the track to confirm it drains freely to the exterior.
Use this checklist to decide whether your track needs repair or full replacement:
- Repair is sufficient when: dents are shallow (under 1 mm), corrosion is surface-level only, the track is straight overall, and rollers still travel the full length without catching.
- Replacement is needed when: the track is bent or bowed along its length, corrosion has pitted through the metal, the roller channel is worn so deep that wheels sit below the track lip, weep holes have corroded closed and can't be cleared, or the track has cracked at a join.
A note on vertical sliding window repair: if you're working on a double-hung aluminium window rather than a horizontal slider, the track principles are similar but the mechanism is more complex. Vertical sliders use counterbalance springs or spiral balances to hold the sash at any height. Damaged tracks on these windows often mean the balance mechanism is also under strain. If the sash drops when released or won't stay open, the balances likely need professional attention alongside the track work — attempting a spring balance repair without experience can be dangerous, as these components are under significant tension.
With the tracks restored to a smooth, corrosion-free surface, the mechanical foundation of your window slider repair is solid. The next layer of the system — handles, locks, and hinges — is where many older aluminium windows develop their second set of problems.
Step 3 — Fix Hardware Issues on Aluminium Frames
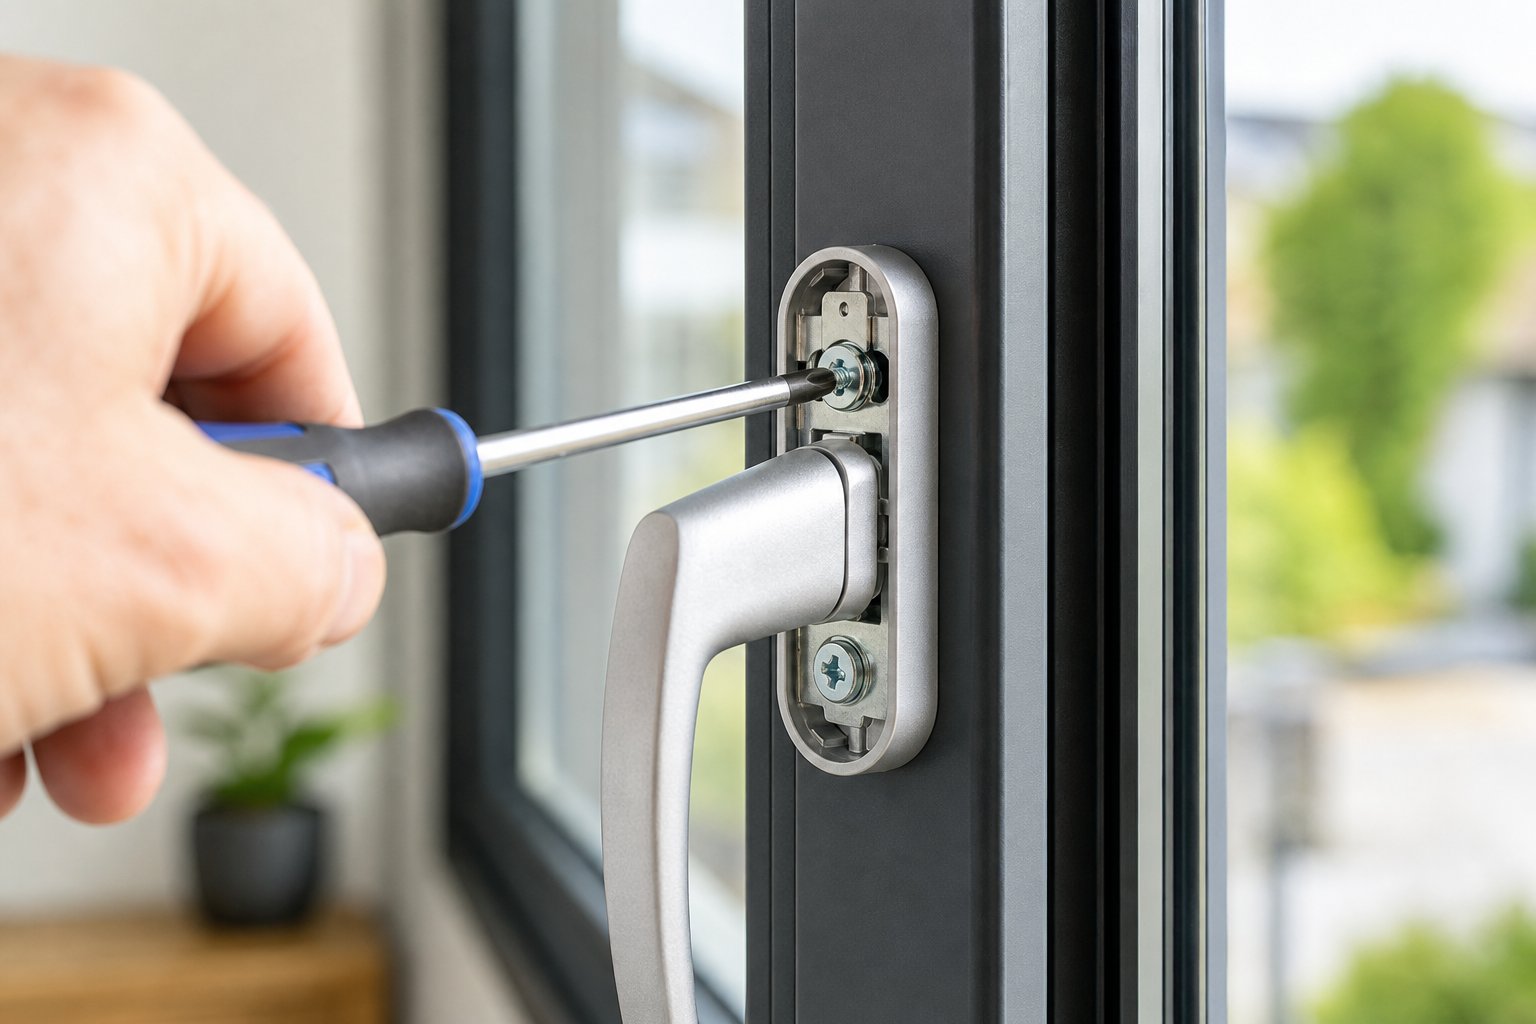
Tracks and rollers handle the mechanical movement, but it's the hardware — handles, locks, hinges, and stays — that controls how you interact with the window every day. A handle that spins without engaging, a friction stay that lets the sash slam shut in the wind, or a lock that won't latch properly: these are security and safety issues, not just annoyances. Different aluminium window types (sliding, casement, awning, louvre) use distinct hardware mechanisms, so the repair approach varies depending on what you're working with.
Replace Worn Handles and Locks
Aluminium window handles typically fail in one of two ways — the spindle snaps internally, or the fixing screws strip out of the frame. Either way, replacement is straightforward once you have the correct part. The critical step is measuring before you buy. Handles are not universal across brands, and even a couple of millimetres difference in spindle length or fixing centres will leave you with a component that doesn't seat properly.
- Locate the concealed screw covers on the handle faceplate — these are usually small plastic caps or a rotating cover plate that snaps or slides to reveal the fixings.
- Remove the two screws (typically Phillips-head) and pull the handle away from the frame.
- Measure the spindle length (the square metal rod that passes through the frame into the locking mechanism) and the fixing centres (distance between the two screw holes, centre to centre).
- Take note of the handle orientation — left-hand or right-hand — and whether it's an inline or cranked design.
- Insert the new handle's spindle into the gearbox slot, ensuring it engages fully.
- Align the screw holes, drive both screws in evenly, and replace the cover caps.
- Test the handle through its full range of motion — it should operate the lock smoothly without excessive force.
For sliding window repair, the handle mechanism is simpler — usually a flush-mounted latch or hook lock. These pull out with two screws and swap directly, provided you match the backset distance from the edge of the sash.
On older aluminium frames, you'll encounter two main locking systems. Cockspur handles use a simple lever that hooks over a wedge-shaped striker on the frame — budget-friendly and easy to replace, though they offer only single-point security. Espagnolette systems (often called "espag locks") are more sophisticated: turning the handle drives a metal rod with multiple locking cams into keeps along the frame edge, creating several secure points from a single action. If your espag handle feels stiff or fails to engage all locking points, the gearbox behind the handle may be worn and need replacing alongside the handle itself.
Fix or Replace Friction Stay Hinges
Casement and awning windows rely on friction stays — those slim, stainless-steel arms that control how far the sash opens and hold it at any angle. Over time, the friction mechanism wears down. The sash starts to drop when opened, won't hold position in a breeze, or binds against the frame because the stay has developed play in its pivot points.
Replacing friction stays is a common way to repair sliding windows of the casement variety without touching the frame itself. Remove the sash by unscrewing the stays from both the frame and the sash (note which screws go where — frame-side fixings are often longer). Measure the stay length along the track channel, the stack height, and confirm whether it's a top-hung or side-hung configuration. Fit the new stays to the sash first, then rehang the sash and secure the frame-side fixings. Open and close the window several times to confirm the friction tension holds the sash at various angles without sagging.
If the stays themselves are fine but the sash has dropped slightly, check whether the hinge screws have loosened in the aluminium frame. Aluminium is softer than steel, and screw holes can wallow out over years of use. Packing the holes with wooden matchsticks and PVA glue before re-driving the screws often restores a solid fixing without needing to drill new positions.
Adjust Casement and Awning Window Hardware
Beyond outright replacement, many hardware problems on aluminium casement and awning windows come down to adjustment rather than parts failure. If the sash doesn't close flush against the weatherseal, or the lock won't engage without slamming the window shut, the issue is usually alignment drift rather than a broken component.
Most espagnolette keeps (the metal plates the locking cams engage with) are mounted with slotted holes that allow a few millimetres of lateral adjustment. Loosen the keep screws, shift the keep inward or outward until the cam engages smoothly, and retighten. For friction stay casements that rub on the frame when closing, check whether the top or bottom stay has shifted — loosening the frame-side screws and repositioning by 1–2 mm can eliminate the bind entirely.
The key takeaway for how to repair sliding window hardware or casement fittings alike: always measure existing components before purchasing replacements. Spindle lengths, fixing centres, stay lengths, and gearbox backsets vary between manufacturers and even between product generations from the same brand. A tape measure and a photo of the old part will save you a return trip to the hardware store every time.
Hardware keeps the window secure and operable, but it can't compensate for a frame that's warped, cracked at the corners, or losing its protective finish. Those deeper structural and cosmetic issues call for a different set of techniques.
Step 4 — Repair Structural Damage and Restore the Finish
Old aluminium window frames often present a double problem: structural faults and cosmetic decay happening at the same time. A cracked mitre joint lets moisture in, which accelerates corrosion around the crack, which weakens the joint further. Tackling both issues together — rather than patching one and ignoring the other — gives you a repair that actually lasts.
Fix Warped or Bent Frame Sections
Minor warping in aluminium frames usually results from building settlement, impact damage, or decades of thermal cycling. If the bend is slight (a few millimetres over the frame's length), you can often coax it back into alignment without removing the frame from the wall.
Place a straight edge along the affected section to identify exactly where the deflection occurs. Position timber shims behind the frame at the high points, then use G-clamps padded with softwood blocks to apply gradual pressure toward the correct profile. Work slowly — aluminium will bend back, but forcing it too quickly risks cracking the metal at stress points or popping the glass seal.
For sections where the aluminium has creased or kinked rather than gently bowed, clamping alone won't restore the profile. In these cases, file the damaged area smooth, clean it thoroughly, and apply an aluminium-compatible epoxy filler to rebuild the surface. Once cured, sand the filler flush with the surrounding frame using 240-grit paper, progressing to 320-grit for a smooth finish ready for priming.
Repair Cracked Mitre Joints
Cracked corners are one of the most common structural failures on old aluminum window frames. The mitre joints — where two frame sections meet at 45 degrees — bear constant stress from the weight of the glass and the expansion and contraction of the metal. Over time, the original crimped or screwed connection loosens, and hairline cracks appear at the joint.
To repair a cracked mitre, start by cleaning out the joint completely. Use a thin blade or dental pick to remove old sealant, dirt, and corrosion from inside the crack. Wipe the area with methylated spirits to degrease. Apply a two-part aluminium-compatible epoxy into the crack, working it deep into the joint with a small spatula. Clamp the corner square while the epoxy cures — use a corner clamp or two G-clamps with a right-angle block to hold alignment.
If the joint has significant movement or the frame carries a heavy double-glazed unit, reinforce the repair by fitting an internal aluminium corner bracket (an L-shaped plate secured with stainless steel screws) on the inside face of the frame where it won't be visible. This adds mechanical strength that epoxy alone can't provide on a load-bearing joint.
Climate plays a direct role in joint failure. Coastal salt spray causes white oxidation pitting that eats into the joint from the outside, while homes in alpine regions or Canberra's cold winters experience freeze-thaw cycles that repeatedly stress the connection as trapped moisture expands and contracts.
Repaint and Restore the Surface Finish
Can you repaint aluminium window frames? Absolutely — but only if you follow the correct preparation sequence. Aluminium's natural oxide layer is what makes it corrosion-resistant, and it's also what makes paint refuse to stick without proper treatment. Skip a step and you'll be peeling paint off within a single season.
The aluminium window frame repair process for cosmetic restoration follows four stages:
- Degrease — Wipe the entire frame with methylated spirits or a dedicated aluminium degreaser. This removes oils, silicone residue, and grime that prevent adhesion.
- Sand lightly — Use 320-grit sandpaper to scuff the surface. You're not trying to strip the frame bare — just creating a mechanical key for the primer to grip. Wet sanding helps prevent heat buildup and keeps aluminium dust under control.
- Apply etch primer — This is the critical step. Use a self-etching primer formulated for non-ferrous metals. The mild phosphoric acid in the primer chemically bites into the aluminium, creating a bond that mechanical sanding alone cannot achieve.
- Finish coat — Apply two thin coats of exterior-grade acrylic or enamel paint, allowing full drying between coats. Thin coats resist runs and cure harder than a single thick application.
Etch primer is non-negotiable on aluminium surfaces. Standard primers — even high-quality ones designed for timber or steel — will not bond to aluminium's oxide layer. They may look fine initially, but adhesion failure is inevitable within months. Always use a primer specifically labelled for non-ferrous metals or aluminium.
A word on powder-coated versus wet-painted finishes: factory-applied powder coating is baked on at around 200°C, creating a finish that's significantly harder, more UV-resistant, and longer-lasting than any brush or spray-applied paint. Homebuilding & Renovating notes that a quality wet-paint job on aluminium lasts five to eight years with proper prep, while powder coating typically endures 15 years or more. You can't replicate powder coating at home, but you can spot-repair chips and scratches in an existing powder-coated finish by feathering the edges with fine sandpaper, applying etch primer to the bare spot, and building up thin layers of colour-matched exterior paint.
For homes near the coast, surface corrosion shows up as chalky white patches — this is aluminium oxide forming where the protective finish has broken down. Catching it early and recoating before pitting develops saves the frame from deeper structural damage down the line.
Structural integrity and a sound protective finish form the skeleton and skin of your aluminium window. But none of that matters much if the glass itself is cracked or broken — which brings us to the most hands-on repair in this guide.
Step 5 — Replace Broken Glass in an Aluminium Frame
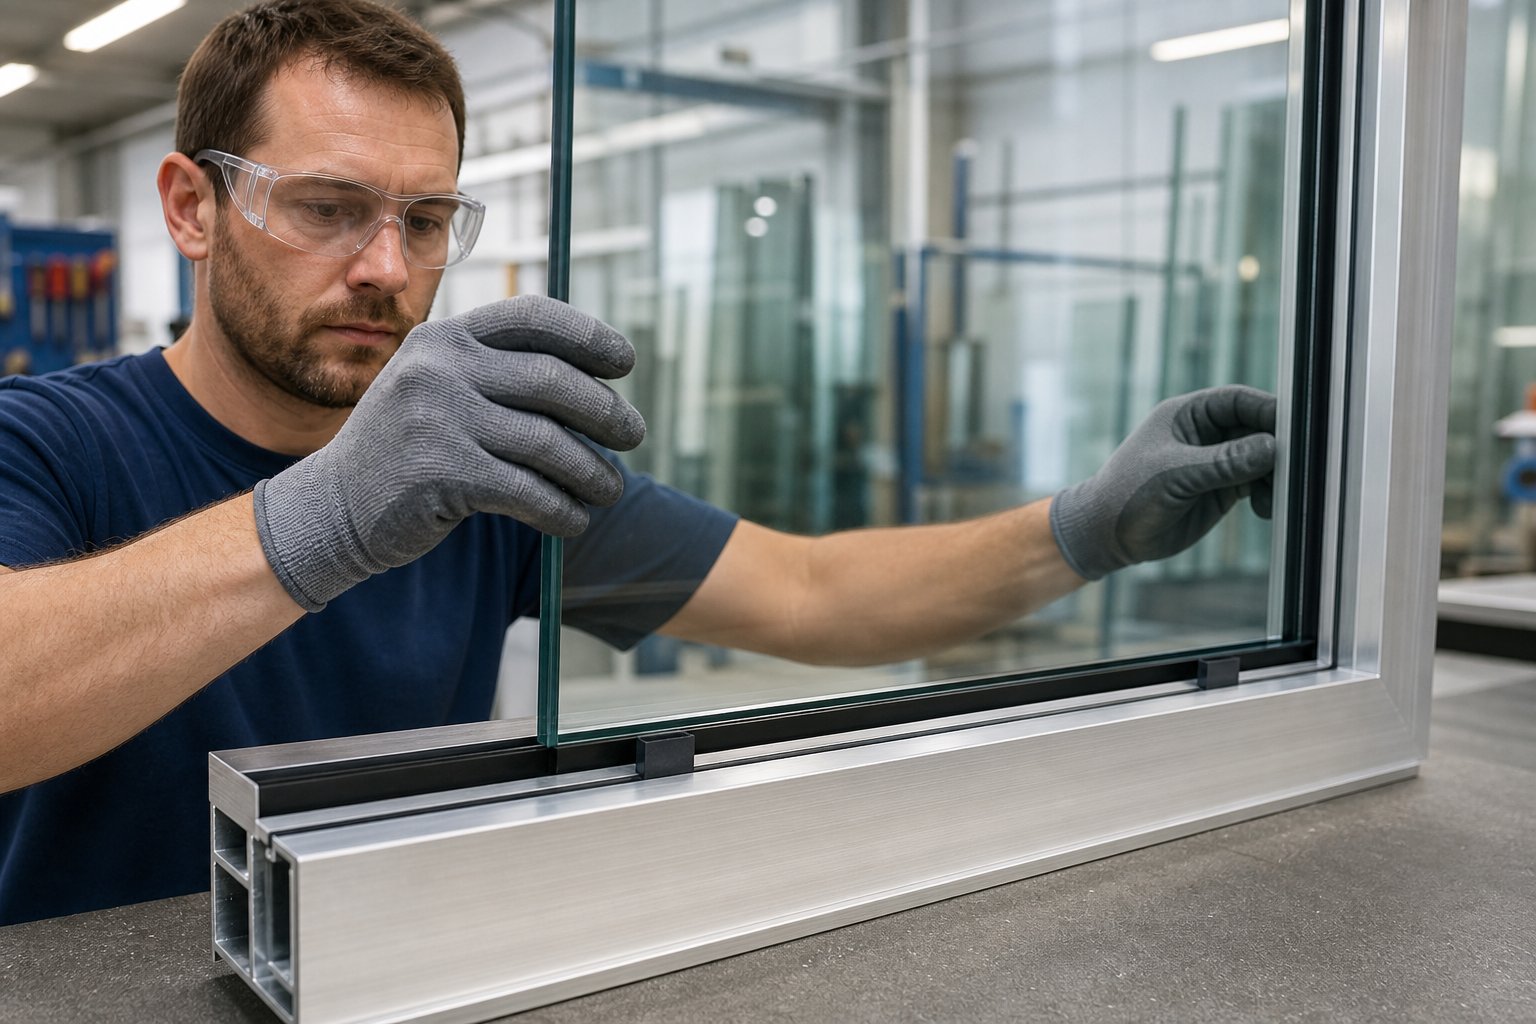
A cracked or shattered pane turns an otherwise sound aluminium frame into a security risk, an energy drain, and an eyesore all at once. Whether you're dealing with a broken sliding window that copped a stray cricket ball or an older casement with a failed seal, replacing the glass yourself is entirely achievable — provided you respect the hazards and understand which glazing method your frame uses.
Aluminium windows use one of two glazing systems. Most modern frames (post-1990s) rely on a rubber gasket (compression seal) held in place by snap-in or screw-fixed beading. Older frames — particularly those installed before the mid-1980s — often use wet glazing, where putty or sealant beds the glass directly into the rebate. The removal and installation process differs for each, so identify your system before picking up any tools.
Remove Broken Glass Safely from an Aluminium Frame
Glass removal is the most dangerous part of this job. Cut-resistant gloves and safety goggles are non-negotiable — aluminium edges are sharp enough on their own, and broken glass fragments turn the task genuinely hazardous.
- If the glass is cracked but still in one piece, apply packing tape in a cross-hatch pattern across both faces. This holds fragments together during removal and prevents shards from scattering.
- For gasket-glazed frames, use a nylon pry tool or flathead screwdriver (wrapped in tape to protect the powder coating) to release the glazing beads. Start at a corner and work along each edge. Set beads aside in order — they go back the same way.
- For wet-glazed frames, score along the old putty line with a utility knife, then use a stiff putty knife to chip the sealant away from the rebate. A heat gun on low helps soften stubborn putty without damaging the aluminium.
- Lift the glass out carefully using suction cups if the pane is intact, or remove fragments piece by piece if shattered. Wrap broken glass in thick cardboard or newspaper before placing it in a sturdy bin — never a standard plastic bag.
- Scrape the rebate clean of all old gasket material, putty residue, and debris. Wipe with methylated spirits so the new seal bonds to a clean surface.
Measure and Order Replacement Glass
Accurate measurement prevents the two most common DIY failures: glass that's too tight (which cracks under thermal expansion) and glass that's too loose (which rattles and leaks). With the old pane removed, measure inside the rebate — bead-to-bead or putty edge to putty edge — at three points for both width and height: top, middle, and bottom for width; left, centre, and right for height.
Use the smallest measurement in each direction, then deduct 2–3 mm from both width and height. This clearance allowance is critical for aluminium frames because the metal expands in heat. Without it, a summer day can put enough pressure on the glass to crack it.
Record the glass thickness as well. Standard single-glazed aluminium windows in Australia typically use 4 mm, 5 mm, or 6 mm float glass. If the window is in a bathroom, beside a door, or below 800 mm from floor level, Australian Standard AS 1288 requires safety glass (toughened or laminated) — check before ordering plain float. For double-glazed units, note the overall thickness including the spacer bar and specify the gas fill if applicable.
Install New Glass Using Gasket or Sealant Method
Gasket-glazed frames (modern):
- Fit a new EPDM rubber gasket into the rebate channel, pressing it firmly into the groove around the full perimeter. EPDM outperforms PVC gaskets in Australian conditions — it resists UV degradation and stays flexible across a wider temperature range.
- Place setting blocks on the bottom rebate, positioned roughly 150 mm in from each corner. These small nylon or rubber pads carry the weight of the glass and prevent it from sitting directly on the aluminium.
- Lower the new glass into the frame, seating it onto the setting blocks. Check that clearance is even on all sides.
- Press the glazing beads back into position, starting with the bottom, then sides, then top. They should click or screw into place without excessive force. If a bead resists, the glass may be slightly misaligned — reposition rather than forcing it.
- Run a finger along each bead to confirm the gasket is compressed evenly with no gaps or bulges.
Wet-glazed frames (older):
- Apply a thin bed of neutral-cure silicone sealant (never acidic cure, which corrodes aluminium) into the clean rebate.
- Position setting blocks at the bottom corners, then lower the glass onto them and press gently into the sealant bed.
- Apply a finishing bead of sealant around the exterior face, tooling it smooth with a wetted finger or caulking tool for a neat, weathertight line.
- Allow at least 24 hours for the sealant to cure fully before operating the window or applying any pressure to the glass.
Once the glass is secure and the sealant has cured, test the window's operation. A broken sliding window that's been reglazed should slide as smoothly as before — if it feels heavier or binds, double-check that the new glass thickness matches the original and that setting blocks aren't protruding into the roller path.
New glass restores the pane, but it won't fix drafts whistling around the frame edges or water trickling in at the sill. Those problems live in the weatherstrips and seals — the final layer of defence between your home and the elements.
Step 6 — Seal Gaps and Set Up a Maintenance Schedule
Drafts creeping around a closed window, water pooling on the sill after rain, or a persistent rattle when the wind picks up — these are all signs that the weatherstrips and perimeter seals have reached the end of their useful life. Seals are the final barrier between your home and the elements, and on a sliding aluminium window they degrade faster than most people expect. UV exposure, thermal cycling, and simple age cause rubber and brush pile to harden, shrink, and lose contact with the sash. Replacing them is the last step in a complete aluminium window repair, and it's also the easiest to maintain going forward.
Replace Worn Weatherstrips and Seals
Aluminium windows use three main weatherstrip types, and identifying which one your frame has determines the replacement method:
- Brush pile (mohair) — a strip of fine bristles set in a carrier that slots into a channel on the sash or frame. Common on aluminium windows sliding in horizontal tracks. It wears flat over time and loses its ability to fill the gap between sash and frame.
- Compression seals (EPDM rubber) — a solid or hollow rubber profile that compresses when the window closes, forming an airtight barrier. Used on casement and awning windows. EPDM outperforms PVC in Australian conditions due to its resistance to UV and temperature extremes.
- Fin seals — a flexible plastic or rubber fin mounted in a carrier strip. Often found on the interlock (meeting stile) of sliding aluminium window panels where two sashes overlap.
To replace any of these, pull the old strip out of its channel — most slide or peel free without tools. Clean the channel with a stiff brush and methylated spirits to remove residue. Measure the channel width and depth, then source replacement strip that matches. Cut the new weatherstrip slightly longer than the channel (2–3 mm extra), press it firmly into place starting at one end, and trim flush at the other. Avoid stretching the material during installation — stretched seals shrink back and leave gaps at the corners within weeks.
Close the window and check for even contact around the full perimeter. If you can see daylight or feel air movement at any point, the strip isn't seated properly or the wrong profile has been used.
Reseal Frame-to-Wall Junctions
The joint where the aluminium frame meets the wall opening is sealed with a bead of flexible sealant — typically neutral-cure silicone or polyurethane. Over 10 to 15 years, this bead cracks, peels away from the substrate, or hardens to the point where it no longer accommodates building movement. Water finds its way behind the frame, causing concealed timber damage in brick veneer homes or staining on rendered walls.
To reseal, cut away the old sealant with a sharp utility knife and scrape the surfaces clean. Wipe both the aluminium frame edge and the wall substrate with methylated spirits. Apply a continuous bead of neutral-cure silicone (never acidic cure on aluminium — it causes corrosion) into the joint, then tool it smooth with a wetted finger or caulking spatula. Pay particular attention to the bottom corners and sill junction, where water pressure is highest.
While you're at the sill, clear the weep holes one more time. These small drainage slots prevent water from pooling inside the bottom track. A blocked weep hole turns the track into a trough, and standing water accelerates corrosion on even powder-coated frames. A pipe cleaner or thin wire pushed through each hole, followed by a splash of water to confirm flow, takes thirty seconds and prevents months of damage.
Seasonal Maintenance Schedule to Prevent Future Problems
Repairs fix what's broken. Maintenance stops things breaking in the first place. A simple seasonal routine keeps your aluminium windows operating smoothly and extends their lifespan well beyond the 30-year mark — well-maintained aluminium frames can deliver 40 to 50 years of reliable service.
| Season | Maintenance Tasks | Focus Areas |
|---|---|---|
| Spring | Deep clean tracks and frames; lubricate all hardware with silicone spray; inspect weatherstrips for winter damage | Tracks, rollers, hinges, seals |
| Summer | Check for thermal binding on sliding panels; inspect sealant joints for UV cracking; clear weep holes | Operation, perimeter seals, drainage |
| Autumn | Tighten all hardware screws; lubricate locks and friction stays; condition EPDM gaskets with silicone conditioner | Hardware, locks, gaskets |
| Winter | Check for drafts and water ingress; inspect frame-to-wall sealant; test locks engage fully under wind pressure | Weatherproofing, security, drainage |
So how do you clean aluminium window frames properly without damaging the finish? The method is simple but specific. Mix a few drops of mild pH-neutral detergent (standard dishwashing liquid works) into a bucket of warm water. Wipe frames with a soft cloth or microfibre towel — never use abrasive pads, steel wool, or high-pressure washers, all of which damage powder-coated and anodised finishes. Rinse with clean water and dry with a soft cloth. That's it. No special products needed.
For homes in coastal areas — anywhere within a few kilometres of the ocean — salt deposits accelerate corrosion on hardware and degrade seals faster than inland environments. Increase your cleaning frequency to every two to three months rather than quarterly, and pay extra attention to hinges, locks, and any exposed fixings where salt tends to concentrate. A regular wash-down with soapy water removes salt before it has time to pit the surface or corrode fittings.
Consistent maintenance transforms a one-off repair into long-term performance. But there comes a point where patching, replacing seals, and swapping hardware no longer makes economic sense — and that's when the repair-versus-replace conversation becomes unavoidable.

When to Repair and When to Replace Your Aluminium Frames
Every repair has a tipping point. Replacing a set of rollers on a 15-year-old frame is a no-brainer. But when you're resealing joints, swapping hardware, repainting corroded sections, and still dealing with drafts on a frame that's been in service since the 1980s, the honest question becomes: am I pouring money into something that's past its useful life?
There's no single answer that fits every home. The right call depends on the condition of your specific frames, what you need them to do thermally, and how much you're prepared to spend now versus over the next decade.
When Repair Makes Sense
Aluminium is remarkably long-lived as a building material. Well-maintained frames routinely deliver 40 years of reliable service, and some push past 50 without structural failure. If your frames fall into the following categories, repair remains the smarter financial decision:
- Isolated faults — one stuck window, a single failed handle, or localised corrosion on a coastal-facing frame. These are component failures, not system failures.
- Surface-level corrosion only — white oxidation pitting that hasn't eaten through the metal. If you can sand it back and the aluminium underneath is solid, the frame has plenty of life left.
- Frames under 25 years old — most aluminium windows installed after the late 1990s use improved alloys and powder-coated finishes that hold up well with basic maintenance.
- Budget constraints — a full window replacement across an average three-bedroom home can run $8,000 to $20,000+ AUD depending on window type and glazing. Targeted repairs at $30 to $200 per window buy significant time.
- Heritage or strata restrictions — some council regulations and body corporate rules limit external changes, making like-for-like repair the only practical option.
Repair also makes sense when you're planning to sell within a few years. Functional, well-presented windows satisfy most buyers without the capital outlay of a full replacement that you won't recoup at sale.
Signs It Is Time to Replace
Aluminium doesn't rot or warp the way timber does, so it rarely gives you one dramatic failure that forces your hand. Instead, it declines gradually — and the accumulation of small problems is what signals end-of-life. Watch for these indicators:
- Through-corrosion — when pitting has eaten entirely through the frame wall, no filler or primer will restore structural integrity. This is most common on older frames in coastal areas where salt exposure has been relentless.
- Multiple simultaneous failures — if you're dealing with seized tracks, failed hardware, blown seals, and cosmetic breakdown all at once, the cost of repairing everything approaches or exceeds replacement cost.
- Single-glazed frames over 30 years old — these lack thermal breaks and use outdated glazing. They may still open and close, but they're bleeding energy. In climates with hot summers and cold winters (think Melbourne, Canberra, or the NSW tablelands), the ongoing energy cost of keeping them can exceed the cost of upgrading over a five-to-seven-year window.
- Security concerns — older single-point locks and thin glass offer minimal resistance to forced entry. Modern multi-point locking systems and laminated glass are a significant security upgrade.
- Persistent water ingress — if water enters despite new seals and cleared weep holes, the frame itself may have shifted or corroded at critical drainage points beyond what repair can address.
The table below puts repair and replacement side by side across the factors that matter most to Australian homeowners weighing up their options.
| Criteria | Repair | Replace |
|---|---|---|
| Typical cost per window (AUD) | $30 – $300 | $600 – $1,500+ |
| Timeframe | Same day for most jobs | 2–6 weeks (measure, manufacture, install) |
| Energy efficiency improvement | Marginal (better seals reduce drafts) | Significant (thermally broken frames, double glazing) |
| Expected additional lifespan | 5–15 years depending on frame age | 30–40+ years with quality frames |
| Disruption level | Minimal — no wall or render damage | Moderate — removal, installation, possible replastering |
| Thermal performance (WERS rating) | No change to frame U-value | Major improvement with thermally broken profiles |
| Security upgrade | Limited to hardware swap | Full multi-point locking, laminated glass options |
Choosing Quality Replacement Aluminium Windows
If the numbers point toward replacement, the temptation is to shop on price alone. That's a false economy with aluminium windows. A cheap frame with a thin powder coat and basic hardware will land you back in repair territory within a decade — exactly where you started.
When you decide to replace aluminum window units, prioritise these factors:
- Thermally broken profiles — a polyamide strip separating the inner and outer aluminium sections dramatically reduces heat transfer. This is the single biggest performance difference between old and new aluminium frames, and it's what makes modern sliding aluminum windows viable in climate zones that demand high NatHERS ratings.
- Quality powder coating — look for finishes that meet or exceed Australian Standard AS 3715 for architectural powder coating. A well-applied finish resists UV, salt, and abrasion for 15 to 20 years without chalking or peeling.
- Hardware grade — commercial-grade rollers, multi-point locks, and stainless-steel friction stays outlast residential-grade equivalents by a wide margin, particularly in coastal or high-use applications.
- Customisation support — older homes rarely have standard openings. The ability to fit aluminium windows to non-standard sizes without compromising seal integrity or hardware function matters more than most people realise until they're mid-project.
If replacement is the right call for your situation, investing in quality pays dividends over the frame's lifetime. MEICHEN's aluminium window systems feature powder-coated finishes engineered for Australian weather performance, project-grade materials built for durability, and customisation support across both residential and commercial applications — making them a strong option for homeowners upgrading from older frames that are beyond economical repair. Their range covers sliding, casement, and awning configurations, so whether you need to replace one problem window or how to replace sliding windows across an entire home, the hardware and profiles are designed to work together as a system rather than a collection of generic parts.
Ultimately, the repair-versus-replace decision isn't about choosing the cheapest option today. It's about choosing the option that delivers the best performance per dollar over the next 10 to 20 years. A frame with isolated, fixable faults deserves repair. A frame with compounding failures, outdated thermal performance, and corrosion eating through the metal deserves retirement — and a quality replacement that won't need this conversation again for decades.
Frequently Asked Questions About Fixing Aluminium Window Frames
1. Why is my aluminium sliding window so hard to open?
A stiff or stuck aluminium sliding window is almost always caused by debris buildup in the bottom track, worn or seized rollers, or a combination of both. Salt, grit, and dust pack into the channel over time, creating friction that prevents smooth movement. In hotter climates, thermal expansion of the aluminium frame can also cause seasonal binding. The fix involves removing the sash, vacuuming and scrubbing the track clean, inspecting the rollers for flat spots or seized wheels, and lubricating with silicone spray. If rollers are damaged, replacement assemblies cost between $30 and $120 AUD and restore smooth operation immediately.
2. Can you repaint aluminium window frames yourself?
Yes, you can repaint aluminium window frames at home, but the preparation sequence is critical. Aluminium has a natural oxide layer that causes standard primers to fail within months. The correct process is: degrease with methylated spirits, lightly sand with 320-grit paper to create a mechanical key, apply a self-etching primer formulated for non-ferrous metals, then finish with two thin coats of exterior-grade acrylic paint. The etch primer contains mild phosphoric acid that chemically bonds to the aluminium surface. Without it, even premium topcoats will peel. A properly prepared repaint lasts five to eight years, while factory powder coating typically endures 15 years or more.
3. How do I replace glass in an aluminium window frame?
First, identify whether your frame uses rubber gasket glazing (common post-1990s) or wet putty glazing (older frames). For gasket systems, remove the glazing beads by prying from a corner, extract the old glass, clean the rebate, fit new EPDM gasket, place setting blocks 150 mm from each corner, lower the new glass in, and refit the beads. For wet-glazed frames, chip out old putty, apply neutral-cure silicone sealant into the rebate, set the glass on blocks, and apply a finishing sealant bead. Always deduct 2-3 mm from your measurements for thermal expansion clearance, and check whether safety glass is required under Australian Standard AS 1288.
4. How long do aluminium window frames last before they need replacing?
Well-maintained aluminium window frames typically last 40 to 50 years. Unlike timber, aluminium does not rot, and unlike uPVC, it does not warp from UV exposure. The main enemies are galvanic corrosion (caused by contact with dissimilar metals in the presence of moisture) and accumulated wear on moving components like rollers and hardware. Frames under 25 years old with isolated faults are almost always worth repairing. Replacement becomes the better investment when through-corrosion has eaten entirely through the metal, multiple systems are failing simultaneously, or single-glazed frames without thermal breaks are driving up energy costs significantly.
5. What lubricant should I use on aluminium window tracks?
Always use a silicone-based spray lubricant on aluminium window tracks and hardware. Never use WD-40, petroleum-based oils, or general-purpose lubricants. Oil-based products attract dust and grit into the track channel, creating an abrasive paste that accelerates wear on both the track surface and the rollers. Silicone spray leaves a dry, slippery film that repels dust rather than attracting it, keeping the window sliding smoothly for longer between maintenance sessions. Apply a light coat to both the track and the roller wheels after cleaning, and reapply quarterly as part of routine maintenance.