
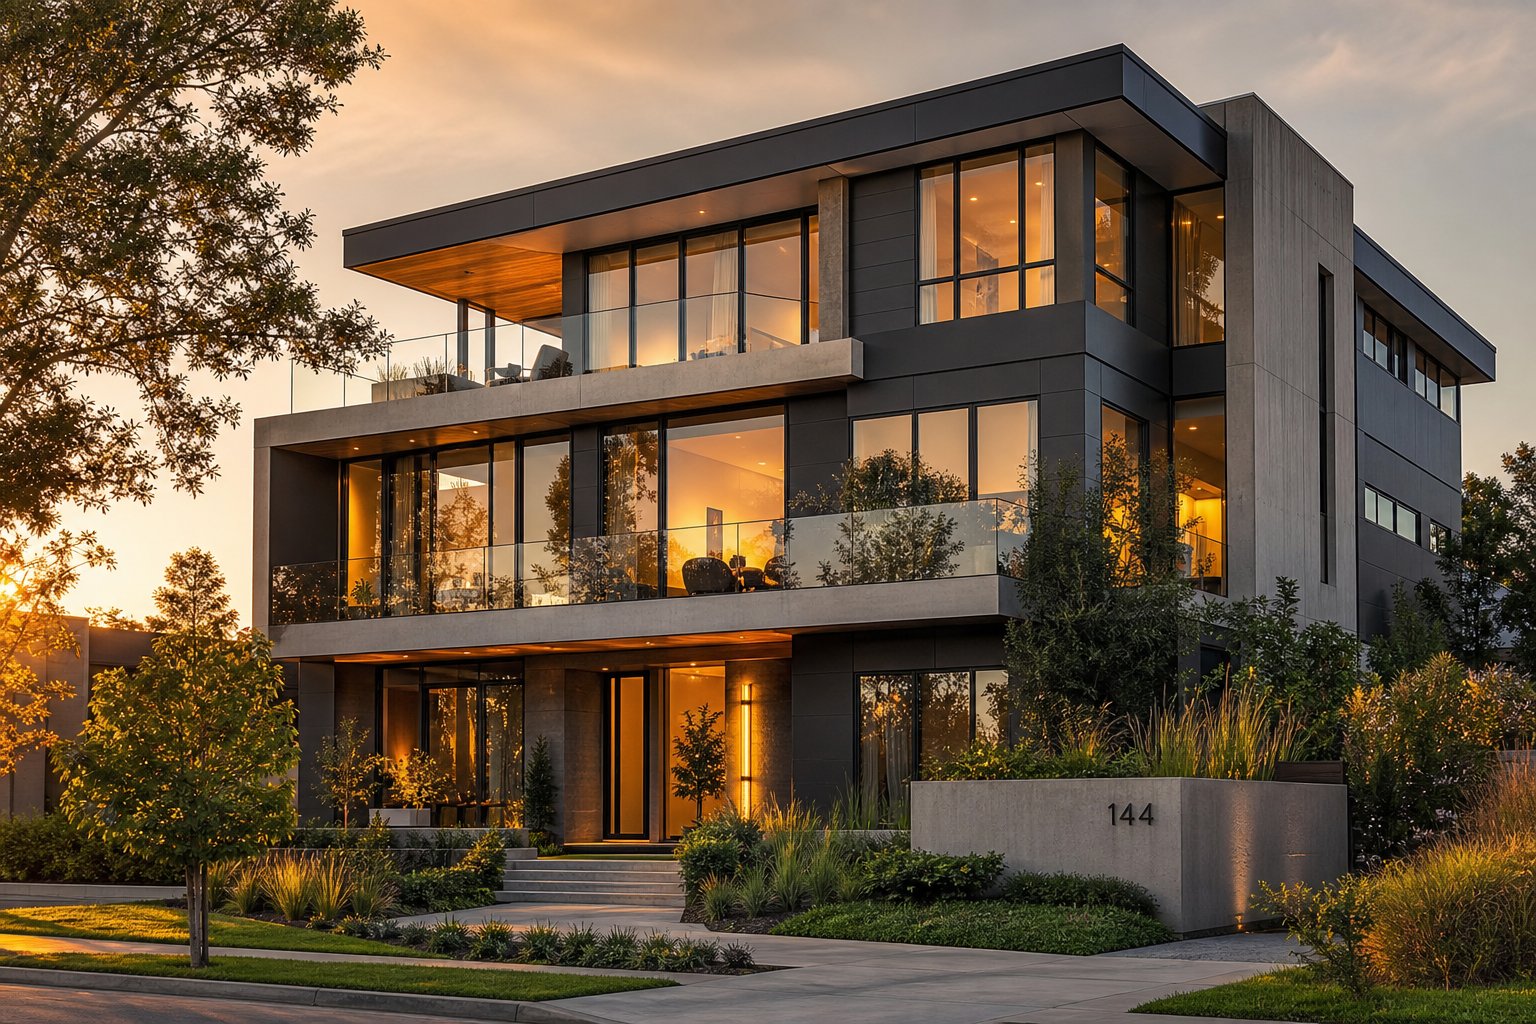
What Are Aluminium Window Infill Panels and Why They Matter
Not every part of a window assembly needs to be transparent. In bathrooms, below fixed panes, between floor levels, or flanking entrance doors, glass often serves no practical purpose. That is exactly where aluminium window infill panels earn their place.
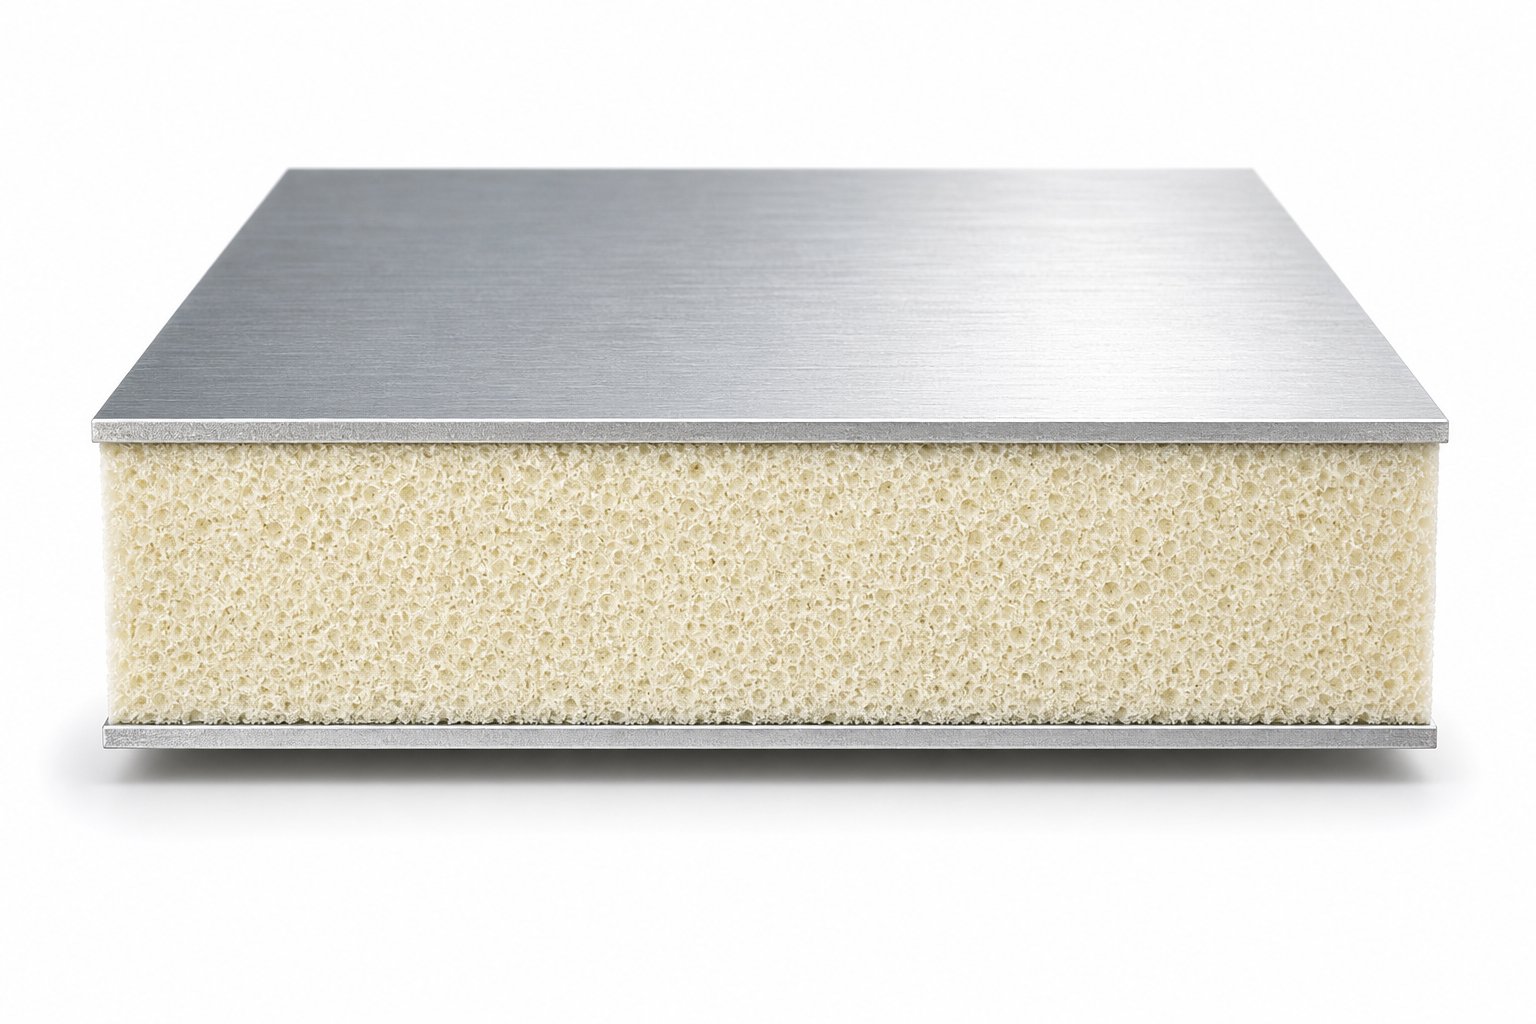
An aluminium window infill panel is a sandwich-construction unit consisting of two aluminium skins bonded to an insulating core, designed to occupy non-vision areas within a window, door, or curtain wall frame where transparent glazing is unnecessary.
What Exactly Is an Aluminium Window Infill Panel
The construction is straightforward. Two aluminium sheets — typically 0.6 mm to 3 mm thick — are bonded to a rigid insulation core, creating a lightweight yet thermally efficient composite. The outer skin receives a durable powder-coated finish, while the core provides the thermal resistance that bare aluminium cannot. Most infill panels are fully opaque, though translucent options using polycarbonate or specialist resin cores exist for situations where diffused light transmission is desirable without full transparency.
Where Infill Panels Sit in a Window System
Think of a window frame as a picture frame that can hold different types of "pictures." A glazing panel — whether single, double, or triple glazed — fills the vision zone. An infill panel fills everything else. In curtain wall systems, transoms and mullions divide the facade into sections, and each section accepts either glass or a panel infill depending on what sits behind it. In residential window frames, the panel slots into the same rebate and bead system that would otherwise hold a sealed glass unit. The frame does not change — only the insert does.
Who Uses Infill Panels and Why
Whether you are a homeowner replacing insulated glazing panels below a bathroom window, a builder fitting out a commercial shopfront, or an architect specifying facade elements for a multi-storey development, these panels solve three problems at once: thermal performance, privacy, and cost. They weigh less than equivalent glass units, deliver superior insulation values, and open up colour-matching possibilities that glass simply cannot offer. For specifiers working to meet NCC energy requirements, understanding how each infill panel performs thermally is not optional — it is fundamental to getting the envelope right.
The challenge is that infill panels, spandrel panels, and cladding panels are often discussed as though they are interchangeable. They are not, and confusing them leads to specification errors that cost time and money on site.
How Infill Panels Differ from Spandrel and Cladding Panels
Three terms circulate through specification documents, supplier catalogues, and building sites — often treated as synonyms when they describe distinctly different products serving different roles in a building envelope.
Spandrel Panels vs Infill Panels vs Cladding
A spandrel panel sits between floor levels in a curtain wall system, concealing structural slabs, columns, and mechanical services behind an opaque face. An insulated spandrel panel typically spans the full width of a curtain wall module and is engineered to handle inter-storey movement. Infill panels, by contrast, occupy non-vision zones within a window or door frame — below a fixed pane, beside an entrance, or within a storefront glazing assembly. They slot into the same rebate that would otherwise hold glass. Cladding panels are external facade elements fixed to a building's structural wall via a bracket system. They sit outside the window line entirely, forming the building's outer skin rather than filling openings within it.
Perforated metal cladding and other architectural panels fall into this third category — they are facade treatments, not frame inserts. Similarly, perforated metal panels architectural applications use for decorative screening sit independently of any window system.
Why the Terminology Overlaps
Manufacturers sometimes label an aluminum spandrel panel as an "infill" because it fills a non-glazed zone, or call a cladding cassette a "panel" without distinguishing its fixing method. The confusion is understandable — all three are opaque, all can be aluminium-skinned, and all contribute to thermal performance. But their structural attachment, weatherproofing responsibility, and dimensional constraints differ significantly.
Matching Panel Type to Your Application
In storefront glazing systems, infill panels are captured by the same aluminium framing that holds the glass, sharing gaskets and drainage channels. In residential window frames, they behave identically — fitting within the bead system at a thickness compatible with the frame's rebate depth. Perforated metal wall panels and rainscreen cladding, however, require separate subframes and ventilated cavities behind them.
| Feature | Spandrel Panel | Infill Panel | Cladding Panel |
|---|---|---|---|
| Typical location | Between floor levels in curtain walls | Non-vision zones within window or door frames | External facade, fixed to structural wall |
| Primary function | Conceals structure and services | Replaces glass for thermal, privacy, or cost reasons | Weather protection and aesthetic finish for the building envelope |
| Common materials | Back-painted glass, insulated composite, metal sheet | Aluminium skins with EPS, XPS, PIR, or mineral fibre core | ACM, solid aluminium, zinc, fibre cement, terracotta |
| Thermal role | Insulates inter-floor zone; must meet curtain wall U-value targets | Provides localised insulation within the window unit | Works with cavity insulation behind; panel itself may or may not insulate |
Getting the panel type right at specification stage prevents ordering errors and ensures the product actually fits the framing system on site. The next consideration — and arguably the one most often overlooked — is what sits between those aluminium skins and how it determines the thermal performance of the finished panel.
Insulation Core Types and Thermal Performance Explained
Aluminium is an excellent structural material — lightweight, corrosion-resistant, and easy to form. But is aluminium a good insulator? Not remotely. It conducts heat roughly 1,500 times faster than polystyrene. That is precisely why the insulating core sandwiched between those aluminium skins does all the thermal heavy lifting. Choose the wrong core, or specify an inadequate thickness, and the panel becomes little more than a decorative cover with minimal energy benefit.
Common Insulation Core Materials Compared
Four core types dominate the market for aluminium insulated panels. Each brings a different balance of thermal efficiency, fire behaviour, weight, and cost.
Expanded Polystyrene (EPS) is the most affordable option. Lightweight and easy to cut, it suits low-cost residential projects where fire rating demands are modest. Its thermal conductivity sits around 0.030–0.040 W/m·K — decent, but not exceptional.
Extruded Polystyrene (XPS) offers better moisture resistance and compressive strength than EPS. It performs well in damp-prone locations and holds its shape under pressure, with similar thermal conductivity to EPS but greater long-term stability.
Polyisocyanurate (PIR) delivers the highest thermal efficiency of the common options, with conductivity as low as approximately 0.022 W/m·K. PIR is moisture-resistant and relatively lightweight, making it the go-to choice for insulated composite panels where maximum thermal performance per millimetre of thickness matters most.
Mineral Fibre (Rock Wool) trades some thermal efficiency for superior fire resistance. Non-combustible and capable of withstanding temperatures up to 1,000°C, it is the preferred core for projects requiring non-combustible classification. Its conductivity ranges from 0.035–0.045 W/m·K, and it doubles as effective acoustic insulation — useful in commercial environments or panels adjacent to noisy areas.
| Core Material | Typical Thickness Range | Thermal Conductivity (W/m·K) | Fire Behaviour | Best Use Case |
|---|---|---|---|---|
| EPS | 20–80 mm | 0.030–0.040 | Combustible; limited fire rating | Budget residential panels, low-risk areas |
| XPS | 20–80 mm | 0.030–0.040 | Combustible; better than EPS under load | Moisture-prone locations, ground-floor panels |
| PIR | 20–100 mm | ~0.022 | Contains fire retardants; moderate rating | High-performance thermal panels, energy-conscious design |
| Mineral Fibre | 25–100 mm | 0.035–0.045 | Non-combustible (up to 1,000°C) | Fire-rated assemblies, acoustic requirements |
Understanding U-Values and R-Values for Infill Panels
Two metrics define how well a thermal panel resists heat flow. The U-value measures how much heat passes through a complete assembly per square metre per degree of temperature difference (W/m²·K). Lower is better — a U-value of 0.15 W/m²·K means very little heat escapes. The R-value is the inverse: it measures resistance to heat flow, so higher is better.
For insulated wall panels used in window systems, the U-value calculation accounts for the core material, its thickness, and the aluminium skins. Because aluminium conducts heat so readily, the skins contribute almost nothing to insulation — the core does virtually all the work. A PIR-cored panel at 80 mm thickness can achieve U-values as low as 0.15 W/m²·K, comfortably exceeding the minimum requirements set by NCC Section J for opaque elements in most Australian climate zones.
How Panel Thickness Affects Thermal Performance
The relationship is straightforward: a thicker core means a longer path for heat to travel, which means greater resistance. Double the core thickness and you roughly halve the U-value, assuming the same material. But thickness is not a free variable. The panel must fit within the glazing rebate of your window frame, and the bead system imposes a maximum depth. Most residential aluminium frames accept panels between 20 mm and 40 mm, while commercial curtain wall systems can accommodate 50 mm or more.
This is where material choice becomes a design decision rather than a simple cost calculation. A 25 mm PIR core outperforms a 40 mm EPS core thermally, so specifiers working within tight frame tolerances can still hit ambitious U-value targets by selecting a higher-performance material. Thermal wall panels in commercial facades often use PIR or mineral fibre precisely because curtain wall profiles demand slim assemblies without sacrificing energy compliance.
The core material also determines how the panel behaves in a fire — a factor that Australian building regulations treat with increasing seriousness, and one that directly limits which products you can specify for certain building classes.
Finishes, Coatings, and Aesthetic Options for Infill Panels
Performance behind the surface matters — but so does what people actually see. The exterior finish of an aluminium infill panel determines how it weathers over decades, whether it blends seamlessly with adjacent window frames, and how the building reads from the street. Get the finish wrong and even a thermally excellent panel looks like an afterthought.
Powder Coating Standards and What They Mean
Polyester powder coating is the dominant finish for aluminium infill panels in Australia. The process electrostatically applies dry powder to the aluminium skin, then cures it in an oven to form a hard, UV-resistant film. Two benchmarks govern quality: BS EN 12206 and Qualicoat certification.
BS EN 12206 sets minimum requirements for coating thickness (40 microns minimum), adhesion, and weathering resistance. It is a self-policed standard — manufacturers declare compliance without independent verification. Qualicoat goes further. Licensed applicators undergo twice-yearly unannounced inspections by independent test houses, and the specification covers testing frequency, not just methodology. For Australian specifiers, requesting Qualicoat-certified coatings adds a layer of assurance that BS EN 12206 alone does not provide, particularly for coastal or high-UV environments where coating failure shows up fast.
Colour Matching Your Panels to Window Frames
Because infill panels sit within the same frame as glazed units, colour consistency is critical. Most suppliers coat panels using the same RAL or custom colour batches applied to the window profiles, ensuring a uniform facade. Anodising offers an alternative — it creates a hard, metallic finish by converting the aluminium surface itself rather than applying a coating over it. Anodised finishes resist scratching better than powder coat but offer a narrower colour palette, typically limited to silver, bronze, and black tones.
Beyond solid colours, laminated finishes open up timber-look, stone-effect, and textured options. These use a heat-bonded film — essentially wall laminated sheets adhered to the aluminium skin — to replicate natural materials without the maintenance burden. A laminate panel in a woodgrain finish can match timber-framed windows on a heritage renovation while delivering the durability of aluminium underneath.
- Polyester powder coat — most common; wide RAL colour range; 25+ year durability with Qualicoat certification
- Anodising — integral metallic finish; excellent scratch resistance; limited colour options
- Laminated/textured film — replicates timber, stone, or brushed metal; ideal for panel laminate applications on heritage or mixed-material facades
- PVDF (polyvinylidene fluoride) — premium coating for extreme UV or coastal exposure; superior colour retention over decades
- Powder coated perforated metal sheet — used where partial ventilation or decorative screening is required alongside solid infill zones
ACM Construction vs Standard Insulated Panels
Aluminium composite material (ACM) panels — sometimes sold under brand names like Alumalite sheet or Alucobond — share a superficial resemblance with insulated infill panels. Both feature two aluminium skins bonded to a core. The difference is purpose and core composition. An insulated ACM panel uses a polyethylene (PE) or fire-retardant mineral core primarily for rigidity and flatness rather than thermal insulation. The core is thin — typically 3–5 mm total panel thickness — offering minimal R-value. Standard insulated infill panels use thicker EPS, PIR, or mineral fibre cores (20–100 mm) specifically engineered for thermal resistance.
ACM panels excel as decorative perforated metal panels and facade cladding where a separate insulation layer sits behind them. They are not a substitute for thermally rated infill panels within a window frame. Specifiers sometimes confuse the two because both carry a laminated aluminum sheet appearance, but their thermal and fire performance profiles differ dramatically — a distinction that carries real regulatory weight under Australian building codes.
Fire Safety and Building Regulation Compliance
A panel's thermal numbers might look impressive on a data sheet, but none of that matters if the product fails to meet fire safety or energy code requirements for your building class. In Australia, both concerns are governed by the National Construction Code — and getting either one wrong can halt a project, void insurance, or trigger costly rectification down the track.
Fire Ratings and What They Mean for Panel Selection
In Australian construction, fire performance of materials is assessed under AS 1530.1 — Combustibility Tests for Materials. This standard subjects a sample to a furnace test at 750°C and measures temperature rise, flaming, and mass loss. A material that passes is classified as non-combustible. One that does not is combustible — regardless of marketing language.
For aluminium window infill panels, the core material determines the outcome. Solid aluminium skins are inherently non-combustible, but the panel is assessed as a complete assembly. A mineral fibre core passes AS 1530.1 comfortably, achieving non-combustible classification with fibre melting points exceeding 1,000°C. PIR cores contain fire retardants and are self-extinguishing once the flame source is removed, but they do not achieve non-combustible status. EPS cores are combustible and generally unsuitable for applications where fire ratings are mandated.
For multi-storey buildings classified as Type A or Type B construction under the NCC, external wall assemblies — including any insulated metal panels for walls within the facade — must satisfy fire performance criteria. The simplest compliance pathway is the Deemed-to-Satisfy route: specify materials that are non-combustible per AS 1530.1. This eliminates the need for expensive full-scale fire engineering assessments.
Core Material and Its Impact on Fire Classification
The practical hierarchy is clear. Mineral fibre (rock wool) cores deliver the highest fire classification and suit projects where non-combustible ratings are mandatory — think Class 2 residential above four storeys, hospitals, and aged care facilities. PIR offers a middle ground for low-rise commercial and residential work where moderate fire performance is acceptable and thermal efficiency per millimetre is the priority. EPS sits at the bottom of the fire performance scale and should only be specified where building codes impose no combustibility requirements on the panel location.
Some suppliers have discontinued product lines entirely because tightening energy and fire codes rendered their existing panels non-compliant. That signals how actively this regulatory landscape is shifting — what was acceptable five years ago may no longer pass muster under current NCC provisions.
Energy Code Requirements and Panel Compliance
Fire is only half the compliance picture. NCC Section J governs energy efficiency for commercial and mixed-use buildings, setting minimum thermal performance requirements for the building envelope — walls, roofs, floors, and glazing. Infill panels fall under the opaque element provisions, meaning they must achieve specified U-values based on the building's climate zone. The 2025 NCC update introduced more stringent thermal performance requirements for building envelopes, making panel selection even more consequential for compliance.
For residential projects assessed under NatHERS, thermal panels for walls and window assemblies contribute directly to the star rating. A poorly performing infill panel drags down the overall envelope calculation, potentially forcing compensatory upgrades elsewhere — more expensive glazing, additional wall insulation, or mechanical system changes that blow out budgets.
Modern insulated liner panels with PIR or mineral fibre cores comfortably exceed minimum Section J requirements in most climate zones when specified at appropriate thicknesses. The key is verifying compliance before ordering, not assuming it.
- Confirm building classification — Type A and Type B construction impose stricter combustibility requirements than Type C
- Check core material against AS 1530.1 — request the actual test certificate from the supplier, not just a marketing claim
- Verify U-value against NCC Section J — ensure the panel meets minimum thermal performance for your climate zone and building class
- Assess NatHERS impact for residential — confirm how the panel contributes to the overall energy rating
- Review state-specific requirements — some jurisdictions impose additional fire safety provisions beyond the NCC baseline
- Document compliance evidence — retain test certificates, product data sheets, and CodeMark certifications for the building file
Specifiers who treat fire and energy compliance as a box-ticking exercise at the end of a project routinely discover that their chosen panel does not meet requirements — forcing last-minute substitutions that delay construction and compromise design intent. The smarter approach is selecting panels with verified compliance credentials from the outset, then confirming that the specific finish, thickness, and core combination still satisfies both fire and thermal codes for the intended application.
Residential and Commercial Applications
Compliance credentials only matter if the panel ends up in the right application. One of the persistent blind spots in the industry is that suppliers tend to frame infill panels as either a commercial product or a residential one — rarely both. In reality, the same fundamental product serves vastly different roles depending on the building type, and understanding the full range of applications helps specifiers identify opportunities they might otherwise miss.
Commercial Storefront and Curtain Wall Applications
In commercial construction, storefront panels and curtain wall assemblies account for the majority of infill panel demand. Storefront systems use aluminium framing to hold both insulating glass units and opaque panels within the same elevation. The infill panels typically occupy transom zones above shopfront doors, solid sections below display windows, and areas concealing structural columns or services. Because storefront framing weeps the entire elevation at the sill, the panels must be installed with correct packers to maintain drainage paths — a detail covered in installation guidance later.
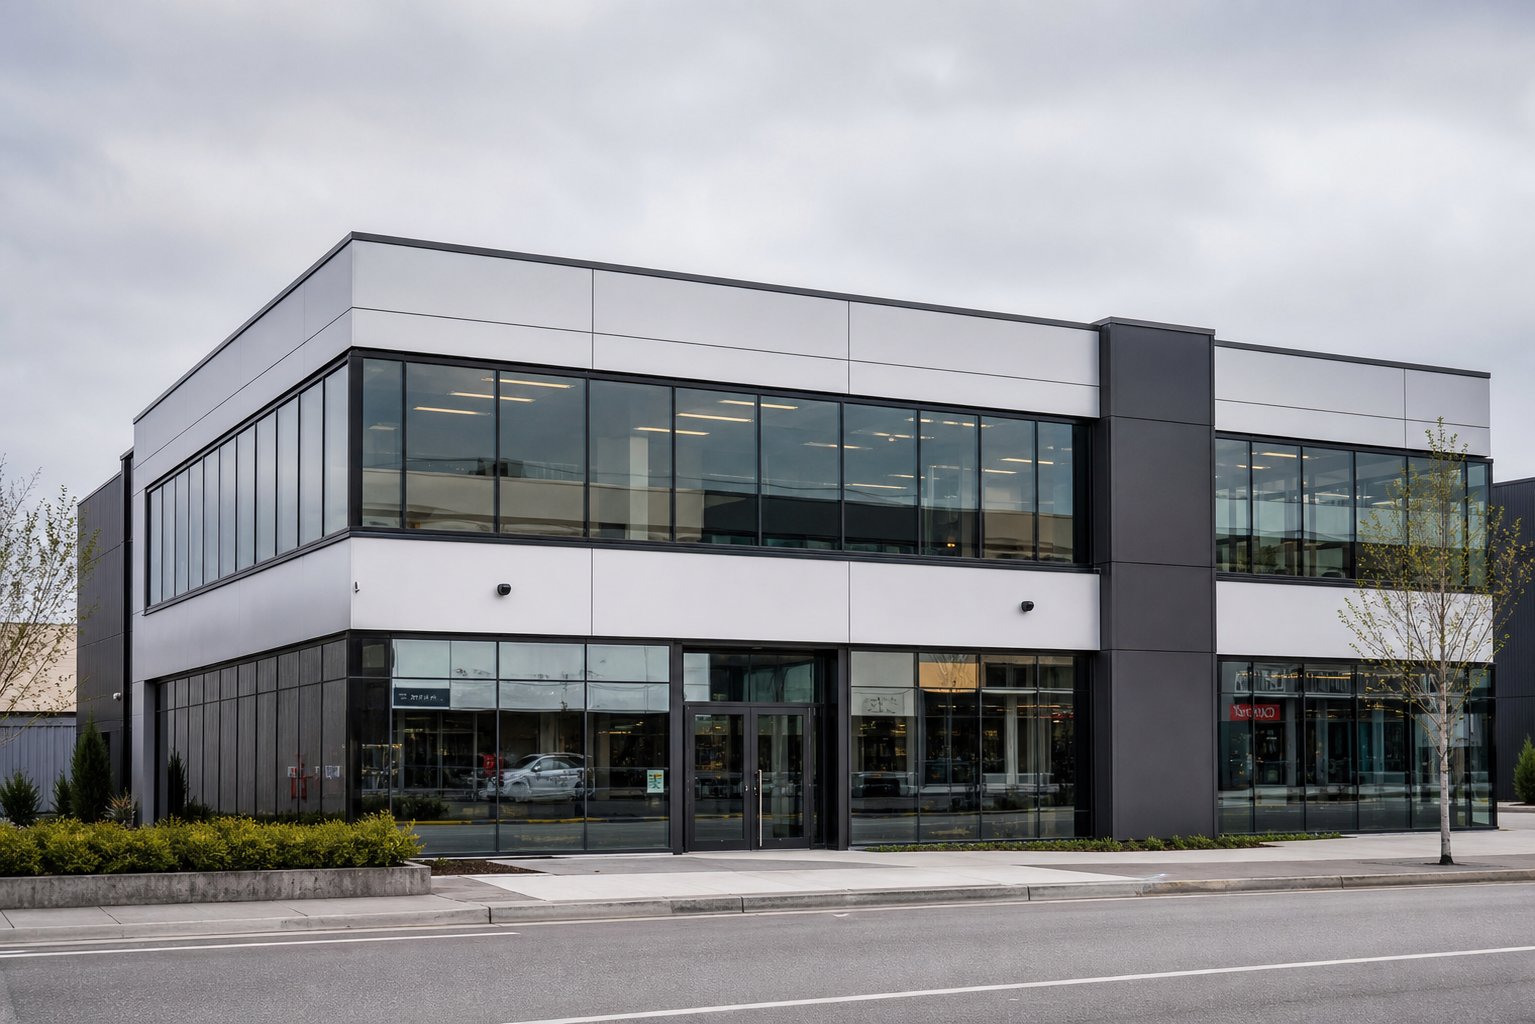
In curtain wall systems spanning multiple storeys, glass infill panels give way to opaque insulated units at spandrel zones between floor slabs. Here, the panels conceal slab edges and mechanical services while contributing to the facade's overall thermal envelope. High-rise projects in Australian CBDs routinely combine vision glass with insulated window panels across the same curtain wall grid, switching between transparent and opaque depending on what sits behind each module. The flush appearance between panel surface and framing maintains clean sightlines across the facade, so the transition from glass to solid reads as intentional rather than compromised.
Residential Uses from Bathrooms to Extensions
Residential applications are more varied than most homeowners realise. Infill panels integrate with casement, awning, and fixed-frame window configurations — essentially any system that uses a glazing bead to retain its insert. The panel simply replaces what would otherwise be a double glazing panels unit in locations where transparency serves no purpose.
- Below fixed windows — the most common residential application; panels fill the lower portion of a window assembly where a solid wall section provides privacy and insulation without reducing the glazed area above
- Side panels flanking entrance doors — sidelights that do not need to be transparent gain better thermal performance and security with an opaque infill rather than glass
- Bathroom and ensuite windows — privacy without relying on frosted glass or blinds; the panel delivers complete opacity plus superior insulation in wet areas
- Garage-to-living conversions — replacing large garage door openings with a combination of glazed and solid panels creates habitable space without full wall construction
- Insulation panels for sliding glass doors — fixed side panels in sliding door assemblies where only one leaf operates; the non-opening section gains thermal performance by switching from glass to an insulated panel
- Spandrel zones in double-storey homes — concealing floor structure between upper and lower window bands on modern facades
In each case, the panel slots into the same frame profile and bead system as the adjacent glazing. No additional framing or structural modification is needed — the window system treats the panel identically to a sealed glass unit in terms of retention and weatherproofing.
When to Choose an Infill Panel Over Glass
The decision comes down to three factors. First, thermal performance: exterior insulated wall panels and infill panels consistently outperform double glazing panels of equivalent thickness because solid insulation cores eliminate convective heat transfer between panes. A 30 mm PIR-cored panel delivers a U-value that would require triple glazing to match in glass form. Second, privacy: where a room backs onto a boundary fence, neighbour's property, or service area, opacity is the goal — not a compromise. Third, cost: insulated panels are typically less expensive than equivalent sealed glass units, particularly at larger sizes where glass weight and handling become factors.
None of this means glass is inferior. It means each material belongs where its properties are most useful. Vision areas demand glass. Non-vision areas often perform better — thermally, acoustically, and financially — with a purpose-designed infill panel. The real challenge is not choosing between them, but specifying the correct panel dimensions, thickness, and frame compatibility so the product actually fits the system it is destined for.
How to Specify the Right Infill Panel for Your Window System
Selecting the right core material and finish is only half the job. The other half — the part that trips up builders, architects, and homeowners alike — is making sure the panel physically fits the frame it is going into. An aluminium insulated panel with perfect thermal credentials is useless if it arrives 2 mm too thick for the rebate or 5 mm too wide for the opening. Specification errors are the single most common reason for rejected deliveries and site delays, and they are almost always preventable.
Measuring for the Correct Panel Size and Thickness
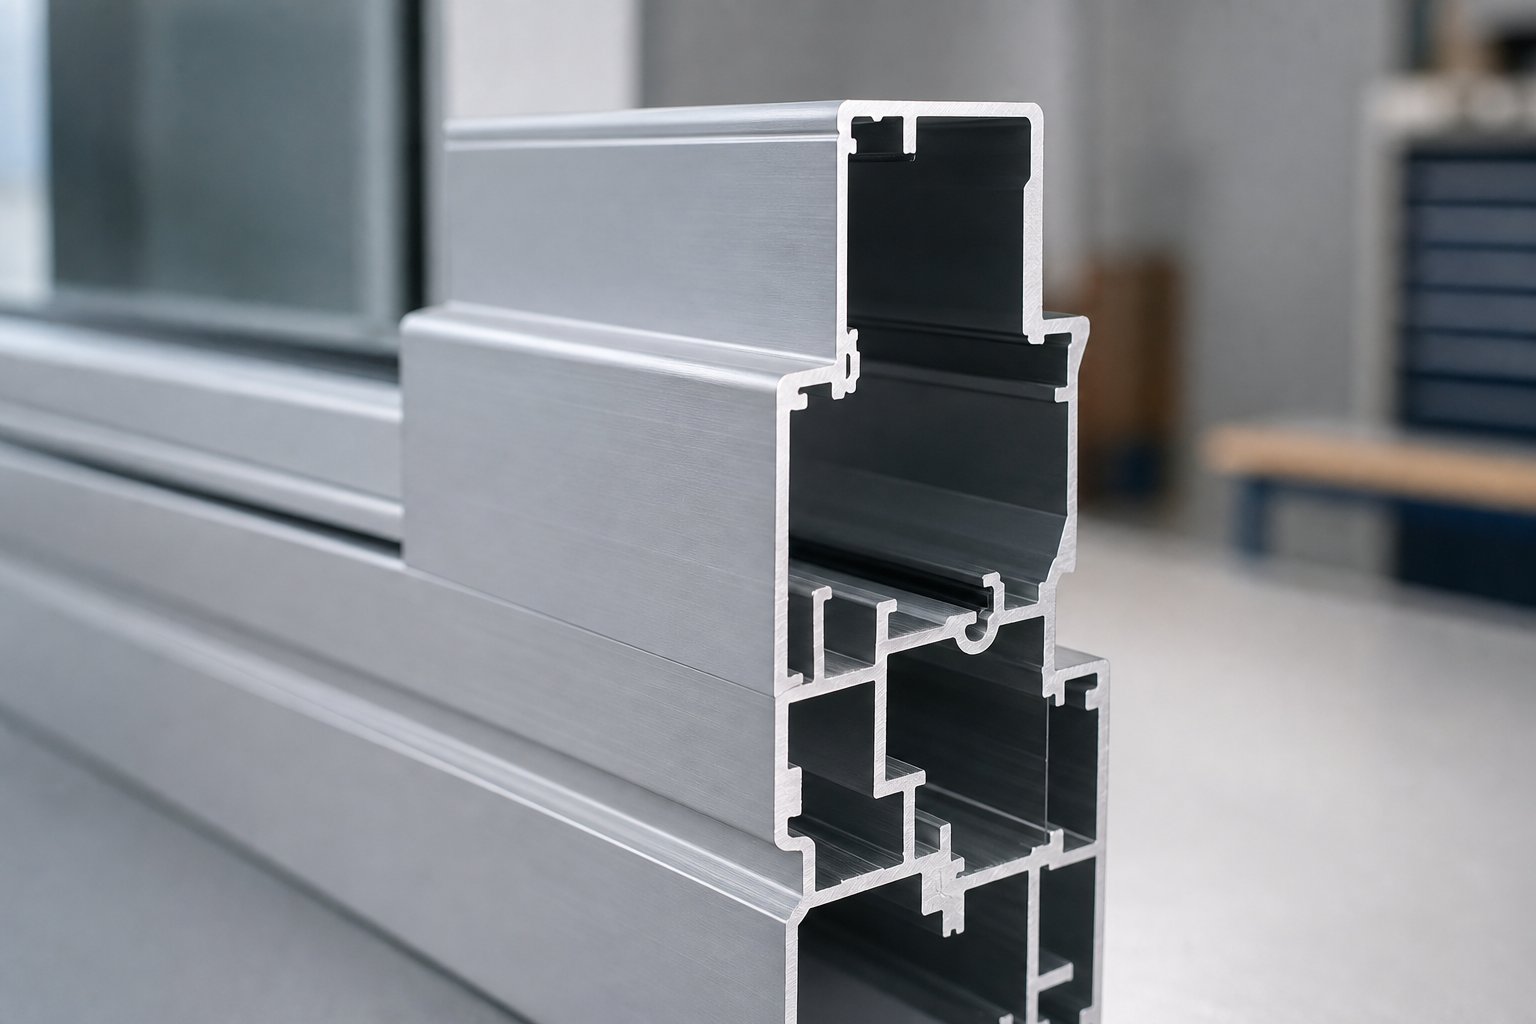
Every aluminium window frame has a glazing rebate — the channel into which glass or panel glazing units are inserted before being secured by beads. The rebate has three critical dimensions: width (the opening size), depth (how far the panel sits into the frame), and the clearance between the panel edge and the rebate wall. These dimensions vary between frame manufacturers, between product ranges within the same manufacturer, and sometimes between different sizes within the same range.
For insulated panels for windows, the measurement process starts at the rebate, not the visible opening. Measure the rebate width and height at multiple points — aluminium frames hold tolerances well, but site conditions, building movement, or installation irregularities can introduce variation. Deduct the manufacturer's recommended clearance (typically 3–5 mm per side) to arrive at the panel's cut size. This clearance allows for thermal expansion of the panel material and provides space for gaskets or sealant.
Thickness is where most mistakes happen. The panel must fit within the total rebate depth minus the space occupied by gaskets or glazing tape on each face, plus the bead engagement depth. A frame designed for 24 mm double-glazed units will not necessarily accept a 24 mm infill panel — the bead system may require slightly different engagement. Always confirm the acceptable thickness range with the frame manufacturer's technical data, not by measuring an existing glass unit and assuming equivalence.
Frame Compatibility and Drainage Considerations
Aluminium window frames are engineered as systems. The frame profile, bead, gasket, and drainage channels all work together to manage water that penetrates the outer seal. When you insert a metal panel window unit into that system, it must interact correctly with the drainage path or you risk trapping moisture inside the frame.
Most aluminium frames use a drained and ventilated rebate design. Water that passes the outer gasket collects in the rebate channel and exits through weep slots at the sill. The panel must sit on setting blocks — small plastic packers — positioned to keep the panel clear of the drainage channel below. If the panel sits directly on the sill rebate, it blocks the weep path and water accumulates, eventually causing corrosion of the frame or moisture ingress into the panel core.
Setting blocks should be positioned at quarter points along the sill (roughly 50–100 mm from each corner for residential panels) and sized to hold the panel at the correct height within the rebate. The block material matters too — use non-absorbent HDPE or neoprene rather than timber offcuts that swell when wet.
Edge clearance is equally important. The panel edges must not compress or obstruct the gasket channels that run vertically within the frame. If the panel is fractionally oversized, it pinches the gasket, breaking the pressure-equalised seal and creating a direct water path to the interior. This is why dry-fitting panels before final installation is considered essential practice — it catches sizing issues before sealants are applied and beads are locked in place.
What Information Your Supplier Needs from You
Ordering an infill panel without complete specification data is like ordering a suit without measurements — something will not fit. Suppliers who manufacture panels for specific window systems need precise information to produce a compatible product. Missing even one detail often results in a panel that cannot be installed without modification on site.
Here is the information checklist for a correct order:
- Window system and profile series — the manufacturer name and specific product range (e.g., a particular commercial or residential suite) determines rebate geometry and bead compatibility
- Rebate depth and width — measured dimensions of the glazing pocket, confirmed against the frame manufacturer's technical drawings
- Required panel thickness — must fall within the frame's acceptable range, accounting for gasket compression and bead engagement
- Target U-value — determines core material and minimum thickness; essential for NCC Section J or NatHERS compliance
- Fire rating requirement — dictates whether a mineral fibre, PIR, or EPS core is appropriate for the building class
- Finish colour and standard — RAL number or custom colour code, plus coating specification (Qualicoat, standard polyester, PVDF)
- Quantity and panel dimensions — individual sizes for each opening, not a single repeated dimension unless all openings are genuinely identical
- Gasket or wet-seal installation — affects edge preparation and tolerance requirements
- Site delivery constraints — maximum panel size that can be transported and manoeuvred into position
The most frequent ordering mistake is specifying panel dimensions based on the visible opening rather than the rebate size. The visible opening is smaller than the rebate because beads overlap the panel face. Ordering to the visible dimension produces a panel that rattles loosely in the frame with inadequate bead engagement — a weatherproofing failure waiting to happen.
The second most common error is assuming all frames in a project use the same rebate depth. Mixed-system projects — where different window types serve different elevations — may use two or three different profiles, each with its own rebate geometry. Every opening needs individual verification.
Working with a supplier who manufactures both the window frames and the infill panels eliminates much of this complexity. Integrated suppliers like MEICHEN design their aluminium window systems with panel compatibility addressed at the design stage, meaning rebate depths, bead systems, and drainage paths are already matched to the panel specifications. This removes the guesswork of cross-referencing separate frame and panel manufacturers — and reduces the risk of incompatibility that plagues projects sourcing components from multiple vendors.
Regardless of your supplier arrangement, always request written confirmation that the specified panel thickness and edge detail are compatible with your nominated frame system before production begins. A five-minute compatibility check prevents weeks of delay when panels arrive on site and do not fit.
Installation Guidance and Weatherproofing Best Practices
A perfectly specified panel can still fail if it is installed poorly. Moisture trapped inside the frame, gaskets pinched out of position, or drainage paths blocked by misplaced packers — these are site-level problems that no amount of correct specification can prevent. Yet installation guidance for aluminium infill panels is almost entirely absent from supplier literature. Most data sheets stop at dimensions and U-values, leaving installers to figure out the rest from general glazing experience.
The process follows the same principles as fitting sealed glass units into aluminium frames, with a few critical differences related to panel weight, thermal movement, and edge sealing. Here is the general sequence:
- Remove glazing beads — starting with the shortest bead (typically the top), use a stiff putty knife or bead removal tool to release the snap-fit clips. Work from the centre outward to avoid bending the bead.
- Clean the rebate channel — remove dust, old sealant residue, and any debris from the drainage slots. Blocked weep holes cause water to pool inside the frame.
- Position setting blocks — place non-absorbent HDPE or neoprene packers at quarter points along the sill, approximately 50–100 mm from each corner. These hold the panel clear of the drainage channel and distribute weight evenly.
- Insert the panel — tilt the insulated aluminum panel into the rebate, bottom edge first onto the setting blocks, then push the top edge into position. Confirm even clearance on all sides.
- Install location blocks — place side packers at the jambs to centre the panel and prevent lateral movement. These should not compress the gasket channels.
- Refit glazing beads — snap or screw beads back into place, starting with the top and bottom, then the sides. Ensure gaskets seat fully and uniformly along the entire perimeter.
- Check seal integrity — inspect all four edges for continuous gasket contact or sealant coverage. Look for gaps, pinched sections, or areas where the bead has not fully engaged.
Dry-Glazed vs Wet-Glazed Installation Methods
Two methods secure glazing panels within aluminium frames, and the choice depends on the frame system, the application, and the performance requirements.
Dry glazing uses pre-formed rubber gaskets — typically EPDM (ethylene propylene diene monomer) — to hold the panel in place and seal against weather. The gasket compresses between the panel face and the bead, creating a pressure seal. This method is faster, cleaner, and allows panels to be removed and replaced without cutting away cured sealant. Most residential aluminium window systems in Australia use dry glazing as standard.
The limitation is longevity. EPDM gaskets can shrink or perish over time with prolonged UV and weather exposure, loosening the seal and allowing moisture ingress. In sheltered residential locations, this degradation takes decades. In exposed coastal or tropical environments, it can become noticeable within 15–20 years.
Wet glazing uses a liquid sealant — usually structural silicone — applied into the rebate before and after panel insertion. Once cured, the silicone forms a continuous bond between the panel edge and the frame, eliminating any gaps where moisture could accumulate. Wet glazing is regarded as the superior weatherproofing method because it creates a monolithic seal rather than relying on compression alone. Commercial curtain wall systems and high-exposure applications typically mandate wet glazing for this reason.
The trade-off is that wet-glazed panels are harder to remove for future replacement. The silicone must be cut away completely before the panel can be extracted — a more labour-intensive process than simply releasing beads and gaskets.
Weatherproofing, Gaskets, and Drainage
Regardless of method, the weatherproofing system relies on two principles working together: sealing and drainage. No seal is perfectly impervious forever, so aluminium frames are designed to manage the small amount of water that inevitably penetrates the outer barrier.
Drainage slots — small rectangular openings machined into the sill section of the frame — allow water to escape the rebate before it accumulates. If setting blocks cover these slots, or if the panel sits too low and obstructs them, water pools inside the frame. Over weeks and months, standing water corrodes aluminium, degrades gaskets faster, and can wick into the panel core through exposed edges. The result is condensation between the aluminium skins — a sign of core moisture ingress that typically means the panel needs replacing.
EPDM gaskets remain the industry standard for dry-glazed residential glazing products because they resist UV degradation, maintain flexibility across a wide temperature range, and do not stain aluminium surfaces. Silicone gaskets offer marginally better longevity but at higher cost and are more common in commercial systems. Whichever gasket type your frame uses, it must be the correct profile for that specific bead — substituting a generic gasket from a hardware store is a reliable path to seal failure.
Common Installation Mistakes to Avoid
Most installation failures trace back to a handful of repeated errors:
- Blocking drainage paths — setting blocks placed directly over weep slots, or excess sealant squeezed into the drainage channel during wet glazing
- Omitting side packers — without lateral restraint, the panel shifts over time, compressing the gasket unevenly and opening gaps on the opposite side
- Forcing an oversized panel — trimming panels on site with incorrect tools damages the aluminium skin and exposes the core to moisture; panels should arrive cut to size
- Using incompatible sealants — some silicones react with certain gasket materials, causing swelling or degradation; always use the sealant specified by the frame manufacturer
- Ignoring manufacturer guidelines — every frame system has specific installation instructions covering packer positions, bead sequence, and acceptable tolerances; deviating from these voids the warranty
For straightforward residential replacements — swapping a failed sealed unit for an infill panel in an existing frame — a competent DIYer with the right tools can manage the job. The critical requirement is understanding the specific frame's bead system and drainage design before starting. Commercial installations, particularly in curtain wall or multi-storey applications, should always be carried out by installers certified for the specific framing system. The stakes are higher, the access is more complex, and the warranty implications of incorrect fitting are significant.
Proper installation sets the panel up for decades of maintenance-free performance. But "maintenance-free" does not mean "inspection-free" — and knowing what to look for over the panel's lifespan prevents small issues from becoming expensive replacements.

Maintenance, Lifespan, and Long-Term Value
Aluminium insulated panels are about as close to "fit and forget" as building products get. Unlike timber elements that demand regular sealing or steel components that need rust treatment, powder-coated aluminium skins shrug off most of what Australian weather throws at them. But a 30-year product still benefits from occasional attention — and knowing the difference between normal ageing and genuine failure saves money and stress down the line.
Routine Cleaning and Inspection Schedule
The maintenance regime is simple. Wash panels two to four times per year with warm water and a mild, non-abrasive detergent — the same approach you would use on the window frames themselves. A soft cloth or sponge removes atmospheric grime, salt deposits, and pollen without damaging the powder coat surface. Avoid pressure washers, abrasive pads, and solvent-based cleaners that can strip or dull the finish.
For properties in coastal zones or near industrial areas, increase the cleaning frequency. Salt crystallisation and airborne pollutants accelerate surface degradation if left to accumulate over months. A quick rinse after storms — particularly in areas exposed to salt spray — keeps the coating performing as intended. Annual visual inspection of the panel edges, gasket condition, and bead engagement catches developing issues before they progress.
Signs of Panel Degradation and When to Replace
Three symptoms signal that an insulated panel is approaching end of life:
- Chalking of the powder coat — a white, powdery residue on the surface indicates UV breakdown of the coating resin. Minor chalking is cosmetic and can be polished out, but heavy chalking exposes the aluminium skin to direct weathering.
- Seal failure at panel edges — visible gaps between the aluminium skins at the perimeter, or gaskets that have hardened and pulled away from the panel face. This allows moisture to reach the insulation core.
- Condensation between skins — moisture visible inside the panel (often as fogging or staining on the inner face) indicates core saturation. Once water enters the insulation, thermal performance drops sharply and the panel requires replacement.
Under normal conditions, well-manufactured aluminum insulated wall panels match the lifespan of the window frame itself — typically 25 to 40 years depending on coating quality, core material, and environmental exposure. Qualicoat-certified finishes in sheltered suburban locations sit at the upper end of that range. Panels facing direct coastal salt air or heavy industrial fallout may show coating degradation sooner, particularly if cleaning has been neglected.
The good news is that replacement does not mean replacing the entire window. Because infill panels sit within the same bead and rebate system as glazing units, a degraded panel can be removed and a new one fitted without disturbing the frame, hardware, or adjacent glass. It is a component swap, not a system overhaul — one of the practical advantages insulated decorative wall panels hold over monolithic wall construction.
Choosing a Supplier for Long-Term Support
Panel longevity depends as much on who supplies the product as on what the product contains. A standalone panel manufacturer can deliver a technically sound product, but if that manufacturer disappears or discontinues the profile, sourcing a compatible replacement in fifteen years becomes difficult. Architectural aluminum panels specified as part of an integrated window system avoid this problem entirely.
Working with a supplier who designs complete aluminium window systems — frames, hardware, glazing, and panel options together — ensures that replacement panels remain available and dimensionally compatible for the life of the installation. MEICHEN, for example, manufactures aluminium window systems with matched infill panel specifications, meaning future replacements slot directly into the original frame without re-engineering. That kind of system-level integration provides warranty backing, colour-matched replacements, and technical support that outlasts any single component.
Whether you are specifying for a new build or planning a renovation, prioritise suppliers who treat the panel as part of the window system rather than an afterthought. The upfront cost difference is negligible. The long-term difference — in compatibility, support, and hassle-free replacement — is substantial.
Frequently Asked Questions About Aluminium Window Infill Panels
1. What is the difference between an infill panel and a spandrel panel?
An infill panel fills non-vision zones within a window or door frame, slotting into the same rebate and bead system that holds glass. A spandrel panel covers the area between floor levels in curtain wall systems, concealing structural slabs and services. While both are opaque and aluminium-skinned, they differ in structural attachment, size, and the movement tolerances they must accommodate. Infill panels are frame inserts; spandrel panels are facade-scale elements engineered for inter-storey deflection.
2. Is aluminium a good insulator for window panels?
Aluminium itself is a poor insulator — it conducts heat roughly 1,500 times faster than polystyrene. However, aluminium window infill panels achieve excellent thermal performance because the insulating core (EPS, XPS, PIR, or mineral fibre) between the two aluminium skins does all the thermal work. A PIR-cored panel at 80 mm thickness can reach U-values as low as 0.15 W/m²·K, outperforming standard double glazing. The aluminium skins provide durability and weather resistance while the core delivers insulation.
3. How do I measure for the correct infill panel size?
Measure the glazing rebate of your window frame — not the visible opening. Take width and height measurements at multiple points, then deduct the manufacturer's recommended clearance (typically 3–5 mm per side) for thermal expansion and gasket space. Confirm acceptable panel thickness against the frame manufacturer's technical data, accounting for gasket compression and bead engagement depth. Suppliers like MEICHEN who manufacture integrated aluminium window systems can match panel specifications directly to their frame profiles, reducing measurement errors.
4. What fire rating do aluminium infill panels need in Australia?
Fire requirements depend on your building classification under the NCC. For Type A and Type B construction (typically multi-storey residential and commercial), external wall assemblies must satisfy combustibility requirements assessed under AS 1530.1. Mineral fibre cores achieve non-combustible classification, making them suitable for high-rise and sensitive occupancies. PIR cores offer moderate fire performance for low-rise applications, while EPS cores are combustible and restricted to locations where no fire rating is mandated. Always request the actual AS 1530.1 test certificate from your supplier.
5. How long do aluminium window infill panels last before needing replacement?
Well-manufactured aluminium infill panels with Qualicoat-certified powder coating typically last 25 to 40 years — matching the lifespan of the window frame itself. Lifespan depends on coating quality, core material, and environmental exposure. Panels in sheltered suburban locations sit at the upper end, while coastal or industrial environments may accelerate coating degradation. Watch for chalking of the powder coat, edge seal failure, or condensation between skins as signs that replacement is needed. Panels can be swapped individually without replacing the entire window frame.