
Why Aluminium Window Handles Fail and When to Replace Them
A failing window handle rarely announces itself with a dramatic snap. More often, it starts as a slight wobble, a bit of extra force needed to lock the sash, or a faint grinding sensation you brush off for months. By the time most homeowners search for replacement window handles, the problem has already progressed well past the early warning stage.
Aluminium frames present their own set of failure patterns. The spindle interface, where the square metal rod meets the internal gearbox, is particularly vulnerable to galvanic corrosion when dissimilar metals interact with moisture. Australia's coastal and high-UV environments accelerate this process considerably. Internal return springs fatigue after thousands of cycles, leaving the handle drooping rather than snapping back to its closed position. And the handles themselves, often made from zinc alloy with powder-coated finishes, can crack or become brittle after years of UV degradation.
Most online guides treat all window handles as interchangeable. They lump aluminium, uPVC, and timber frames into a single set of instructions, which leads homeowners straight to purchasing the wrong part. This guide focuses exclusively on aluminium-framed windows and the specific hardware considerations that come with them.
Common Signs Your Aluminium Window Handle Needs Replacing
If you notice any of the following, your window lock handle has likely reached the end of its service life:
- Handle wobbles at the base or spins freely without engaging the lock
- Window no longer locks securely despite the handle appearing to close
- Handle body has visible cracks, chips, or snap points
- Turning requires significantly more force than it used to
- Corrosion or pitting is visible on the backplate or around fixing screws
Any single symptom justifies investigation. Multiple symptoms together suggest the handle mechanism has failed internally, not just cosmetically.
Why Aluminium Frames Require Specific Hardware
Aluminium window handles differ from their uPVC and timber counterparts in ways that matter at the point of purchase. Spindle dimensions vary. Backplate profiles are narrower on many aluminium systems. Fixing methods often rely on machine screws threading into tapped holes within the aluminium sash, rather than self-tapping screws biting into plastic or timber. A window lock handle designed for a uPVC frame may physically fit an aluminium window but fail to engage the locking mechanism correctly, or leave the backplate sitting proud of the frame face.
These compatibility differences are the single biggest reason homeowners end up ordering twice. Getting the right part depends on knowing exactly what system you have, which measurements matter, and which handle type matches your window's operation style.
Identifying Your Aluminium Window System Before Buying
Knowing your frame material is aluminium only gets you halfway to ordering the correct part. Aluminium window systems from different manufacturers use proprietary hardware profiles, and the handle that fits one brand's frame channel may sit incorrectly or fail to engage the locking strip on another. Picking up a generic alu handle from a hardware store shelf without confirming your system details is the most common path to a return or, worse, a window that looks closed but is not actually secure.
Each aluminium window manufacturer designs their sash profiles to accommodate specific handle backplate widths, spindle positions, and fixing hole spacings. Even within a single brand, different product series can use different hardware. A handle built for a commercial-grade suite will not necessarily drop into a residential-grade frame from the same manufacturer. This is why identification comes before measurement, and measurement comes before purchase.
How to Find Your Window System Brand and Series
Start with the frame itself. Most aluminium window manufacturers etch or stamp a brand mark into the frame corner, typically on the inside face of the fixed pane or along the bottom rail. You may need to open the sash fully and inspect where the frame sections join at a 45-degree mitre. Common Australian aluminium window brands include AWS, Capral, Alspec, and Bradnam's, each with multiple product lines carrying distinct hardware specifications.
If no visible marking exists, try these approaches:
- Check original building plans, specifications, or handover documentation from your builder. Window schedules typically list the manufacturer and series name.
- Photograph the existing handle profile from the front and side. Include a ruler in the shot for scale. Suppliers can often identify the system from a clear photo.
- Contact the original installer or builder if known. Established window companies keep records of which systems they fitted to specific projects.
- Look for stickers on the glass unit edge or frame rebate that reference the fabricator or system supplier.
Even partial information helps. Knowing the brand alone narrows your search considerably, and combining it with the series name makes sourcing a matching handle straightforward.
Aluminium Handle Profiles vs uPVC and Timber Handles
The confusion around compatibility is understandable. Espagnolette handles for aluminium windows can look almost identical to handles for uPVC windows when viewed online. The critical differences are dimensional, and they only become obvious once you attempt installation.
Aluminium frames typically use inline espagnolette handles with specific spindle lengths tailored to thinner sash profiles. The spindle passes through less material to reach the gearbox, so it tends to be shorter. Backplates are often narrower to match the slimmer sightlines that aluminium systems are designed around. In contrast, handles for uPVC windows in the UK and Australian markets usually feature offset spindles, wider backplates, and longer spindle lengths to account for thicker plastic profiles. Timber window handles introduce yet another variable: many traditional timber casements use mortice-style fittings with surface-mounted latches and stays, which are entirely incompatible with the routed channels in aluminium frames.
| Characteristic | Aluminium Frames | uPVC Frames | Timber Frames |
|---|---|---|---|
| Typical spindle length | 15–30 mm | 25–45 mm | 20–40 mm (or mortice fitting) |
| Common fixing centres | 43 mm | 43 mm | Variable (often non-standard) |
| Backplate width | 14–20 mm | 18–32 mm | 20–40 mm |
| Spindle type | 7 mm square inline | 7 mm square (sometimes offset) | 7 mm or 8 mm square |
| Fixing method | Machine screws into tapped holes | Self-tapping screws into plastic | Wood screws or through-bolts |
| Backplate profile | Flat, narrow, flush-fitting | Wider, may be stepped | Decorative, surface-mounted |
This table illustrates why old window handles removed from a uPVC frame cannot simply be transferred to an aluminium window, even when the spindle appears to engage. The backplate overhang, screw alignment issues, and potential spindle length mismatch all compromise security and smooth operation.
Older Aluminium Systems and Discontinued Hardware
Homes built in the 1980s and 1990s across Australia frequently feature aluminium window systems whose original hardware lines have long since been discontinued. The frames themselves remain structurally sound, aluminium does not rot or warp, but the handles and locking components wear out and can no longer be sourced from the original manufacturer.
Several strategies work for these situations:
- Aftermarket compatible handles designed to fit common older profiles are available through specialist window hardware suppliers. These are engineered to match the fixing centres and spindle dimensions of discontinued systems without requiring frame modification.
- Some suppliers maintain old stock or can cross-reference discontinued part numbers to current equivalents. Providing your system brand and series name (or photographs) gives them the best chance of finding a match.
- In cases where no direct replacement exists, a handle with adjustable or universal fixing centres may bridge the gap, provided the spindle length and backplate width remain compatible.
- As a last resort, the frame's mounting holes can be re-tapped to accept a modern handle, though this requires careful work to avoid damaging the aluminium profile.
Patience matters here. Rushing into a generic purchase because the exact part seems unavailable usually results in a handle that fits loosely, operates poorly, or leaves visible gaps around the backplate. A specialist supplier familiar with older aluminium systems will save you time and repeated return postage.
With your system identified and the compatibility landscape understood, the next step is capturing the precise measurements that determine whether a specific handle will actually work in your frame.
How to Measure for the Correct Replacement Handle
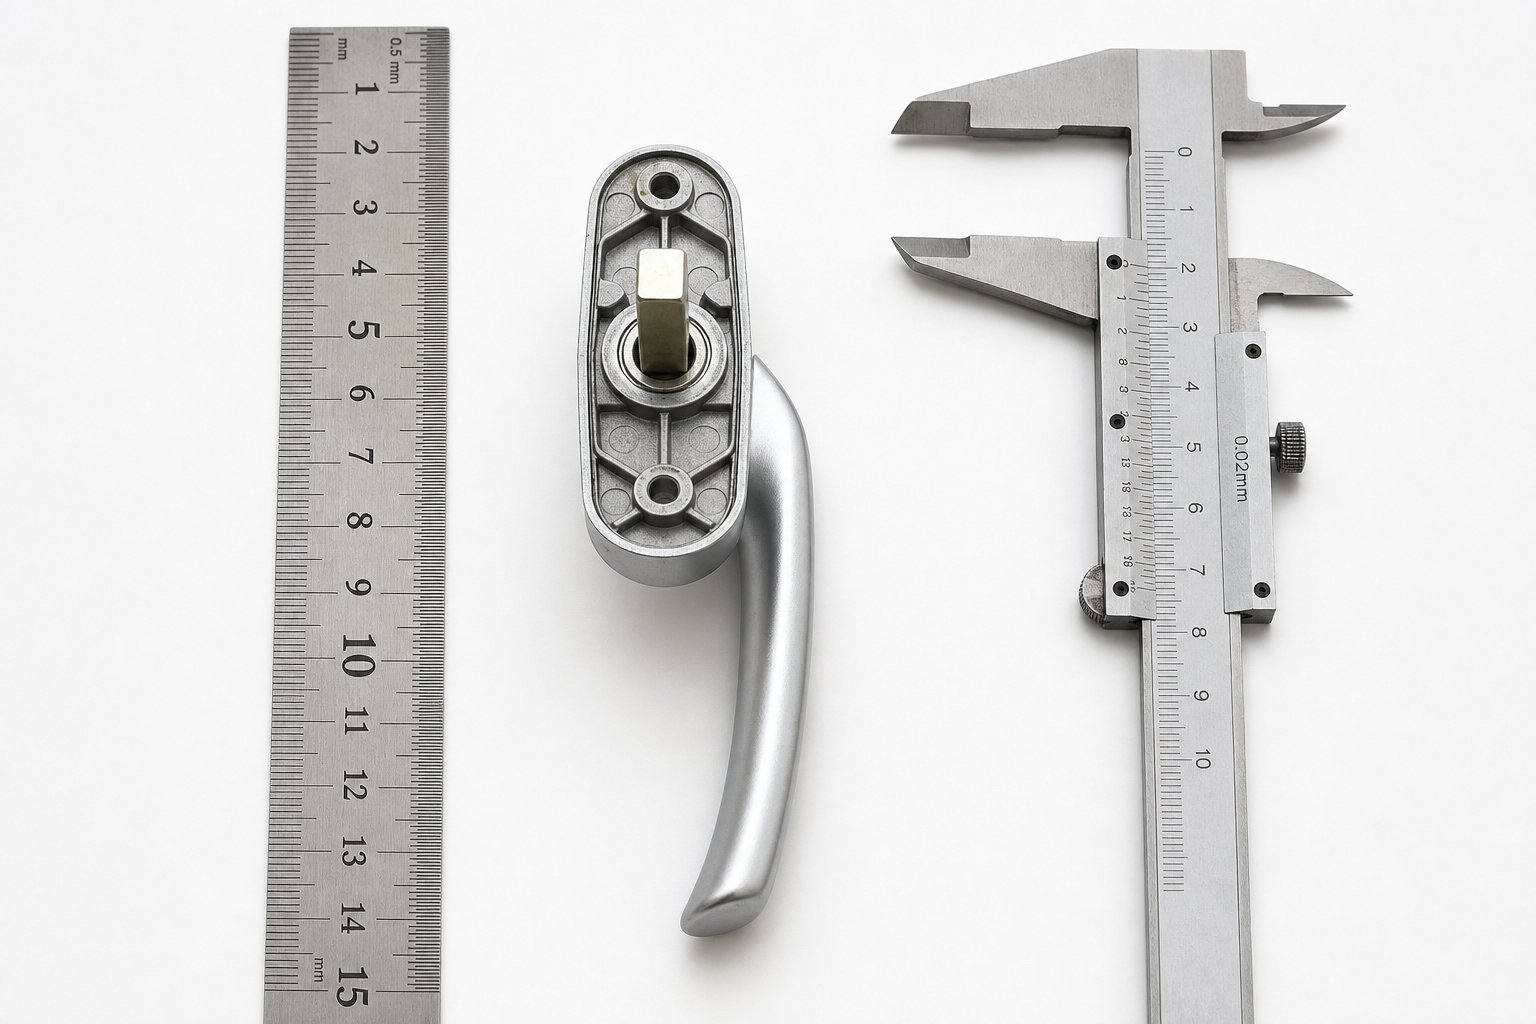
Three measurements separate a successful aluminium window handle replacement from a frustrating return. Get these right and the new handle drops in cleanly. Get any one of them wrong and you are left with a part that either will not engage the gearbox, cannot be screwed to the frame, or fouls against fly screens or window reveals. Grab a metric tape measure, a pair of vernier calipers if you have them, and a smartphone for reference photos.
Measuring Spindle Length for Aluminium Frames
The spindle is the square metal rod that extends from the back of the handle through the sash profile and into the gearbox mechanism. On aluminium windows, this dimension is typically shorter than on uPVC systems because aluminium sash sections are slimmer. Common spindle lengths on Australian aluminium frames range from 15 mm to 30 mm, measured from the rear face of the backplate to the tip of the spindle.
To measure accurately, remove the existing handle by unscrewing the two backplate fixings and gently withdrawing the spindle from the gearbox. Lay the handle face-down on a flat surface and measure from the back of the mounting plate to the end of the square shaft. Record the figure in millimetres. While you have the spindle exposed, note its cross-section size as well. Most aluminium window systems use a 7 mm square spindle, though some older or commercial-grade frames may use 8 mm.
Can you cut a longer spindle down to fit? In most cases, yes. A spindle that is a few millimetres too long can be trimmed with a hacksaw and filed smooth, provided the steel quality allows a clean cut. However, a spindle that is too short cannot be extended. When choosing between two available lengths, order the longer option and trim to fit rather than hoping a shorter one will reach the gearbox engagement point. A spindle that does not fully seat into the gearbox square hole will feel sloppy and may disengage under repeated use, compromising the entire window fastener mechanism.
Fixing Centres Distance and Backplate Dimensions
Fixing centres refers to the distance between the centres of the two screw holes on the handle backplate. This measurement determines whether the new handle lines up with the tapped holes already machined into your aluminium sash. Drilling new holes in an aluminium frame is possible but far from ideal, as it risks weakening the profile section or misaligning with the internal gearbox channel.
The most common fixing centre distance on aluminium window handles in Australia is 43 mm. This aligns with the widely used espagnolette handle standard. Some older systems or commercial-grade profiles use different spacings, so measuring your existing handle or frame holes is essential rather than assuming the standard applies.
To measure fixing centres, place your ruler or calipers across the two screw holes on the removed handle and measure from the centre of one hole to the centre of the other. If the handle is already discarded and you are measuring directly from the frame, use a pencil to mark the centre of each tapped hole, then measure between the marks.
Beyond the screw spacing, note the overall backplate dimensions. Measure the height and width of the plate itself. A replacement backplate should be at least as large as the original to cover any wear marks, paint shadows, or slight corrosion staining around the old fixing positions. A smaller backplate on a casement window fastener leaves exposed screw holes and an untidy appearance. A significantly larger one may overhang the sash edge or interfere with weatherseals.
Handle Projection and Clearance
Handle projection is the distance the handle body extends outward from the face of the frame when in the closed position. This measurement matters more on aluminium windows than most people realise, particularly in Australian homes where fly screens, security mesh, or roller shutters sit close to the window face.
If the replacement handle projects further than the original, it may prevent a fly screen from closing flush or catch against a security grille. In deep window reveals common to double brick construction, excessive projection can also make the handle awkward to reach. Conversely, a handle with minimal projection may be difficult to grip firmly, especially for anyone with reduced hand strength.
Measure projection with the old handle still fitted if possible. Hold a straight edge flat against the frame face and measure from the straight edge to the outermost point of the handle body. Record this in the closed position and in the open (90-degree) position, since the open projection determines whether the handle clears adjacent screens or blinds during operation.
For a complete and accurate set of dimensions before ordering any window fasteners and stays or handle replacements, follow this sequence:
- Photograph the existing handle from the front, side, and rear before removal. Include a ruler in the frame for scale.
- Remove the handle by unscrewing the backplate fixings and withdrawing the spindle from the gearbox.
- Measure spindle length from the rear of the backplate to the spindle tip. Record in millimetres.
- Measure spindle cross-section width (typically 7 mm square on aluminium systems).
- Measure fixing centres from the centre of one screw hole to the centre of the other.
- Measure backplate height and width to ensure the replacement covers existing marks or holes.
- Measure handle projection from the frame face in both closed and open positions.
- Note any clearance constraints such as fly screens, security grilles, reveal depth, or adjacent window sashes that limit available projection.
With these figures recorded, you have everything a supplier needs to match the correct part to your frame. The combination of spindle length, fixing centres, and projection defines your handle's physical envelope, and any mismatch in these three dimensions is what causes the wrong-part problem that sends homeowners back to the beginning.
Understanding Handle Types for Different Aluminium Windows
Accurate measurements only solve half the puzzle. The other half is knowing which category of handle your window actually uses. Aluminium windows operate in fundamentally different ways depending on their design, and each operation style demands a specific handle type paired with a matching lock mechanism. Ordering a handle with perfect dimensions but the wrong operational category is just as useless as ordering one with wrong measurements.
Casement Window Handles and Espagnolette Locks
Hinged aluminium casement windows are the most common type in Australian homes, and they overwhelmingly use inline espagnolette handles. When you turn the handle, the spindle rotates a gearbox inside the sash, which drives locking points up and down along a metal strip. These locking points engage into keeps mounted on the fixed frame, pulling the sash tight against its weatherseals at multiple positions simultaneously. This multipoint system is what gives modern locking casement window handles their security advantage over older single-point closers.
Older aluminium casements from the 1970s through to the early 1990s often used cockspur handles instead. A cockspur wedge sits on a pivoting lever that hooks over a peg on the frame, physically pulling the window closed through mechanical leverage rather than engaging an internal gearbox. These are surface-mounted, single-point closers with no spindle passing through the sash. Replacing a cockspur with an espagnolette handle is not a direct swap. It requires either a frame modification to accept a gearbox or a like-for-like cockspur replacement. If your window has a wedge-shaped hook that rotates over a frame-mounted peg, you are dealing with casement latch hardware from a previous era, and your replacement search needs to stay within that category.
Modern espagnolette casement window latch hardware, by contrast, is identified by its flat backplate with two screw fixings and a lever that rotates 90 degrees from the open to locked position. The handle itself does not physically grip anything. It simply drives the internal mechanism.
Sliding Window Handles and Flush Pulls
Aluminium sliding windows use entirely different hardware. There is no gearbox, no spindle, and no multipoint locking strip. Instead, the sash glides horizontally on a track, and the handle exists primarily to provide a grip surface and operate a simple latch or lock.
Common hardware on aluminium sliders includes recessed flush pulls (slim handles that sit within a routed pocket in the sash so nothing protrudes), D-handles for heavier sliding panels, and a sliding window sash lock that secures the sash in the closed position. Some designs combine the pull and the lock into a single unit, while others separate the grip from a distinct sliding sash window lock mechanism mounted at the sash meeting point.
The critical point: casement hardware and sliding hardware are not interchangeable in any configuration. They serve different window operation styles, mount differently, and engage completely different locking systems. A casement window latch cannot be retrofitted to a sliding sash, and a flush pull cannot replace an espagnolette handle on a hinged window.
Awning and Tilt-and-Turn Handle Mechanisms
Awning windows (hinged at the top, opening outward from the bottom) typically use the same espagnolette handle format as side-hung casements. The gearbox and locking strip orientation differs, but the handle itself is often identical in its dimensions and operation. Check your gearbox compatibility rather than the handle when replacing on an awning sash.
Tilt-and-turn aluminium windows add a layer of complexity. These handles must operate a dual-function gearbox that switches between two opening modes: tilting the sash inward from the top for ventilation, and swinging the entire sash open like a door for cleaning or egress. The handle rotates through multiple positions (down for locked, horizontal for side-opening, up for tilt), and each position triggers different locking points. A standard single-function espagnolette handle will not operate a tilt-and-turn gearbox correctly, even if the spindle length and fixing centres match perfectly.
| Window Operation Style | Handle Type | Lock Mechanism | Typical Spindle Size | Common Fixing Centres |
|---|---|---|---|---|
| Side-hung casement | Inline espagnolette lever | Multipoint locking strip | 7 mm square, 15–30 mm long | 43 mm |
| Casement (older style) | Cockspur wedge handle | Single-point hook over peg | No spindle (surface mount) | Variable (legacy) |
| Sliding window | Flush pull or D-handle | Sliding sash lock or snib | No spindle | Not applicable |
| Awning | Inline espagnolette lever | Multipoint locking strip | 7 mm square, 15–25 mm long | 43 mm |
| Tilt-and-turn | Dual-function espagnolette lever | Multi-position gearbox | 7 mm square, 15–30 mm long | 43 mm |
Identifying your window's operation style before purchasing eliminates an entire category of ordering errors. But there is one more variable that catches people out even after they have matched the type, measurements, and system brand: the handle's left or right orientation, and what happens when you get it backwards.
Handle Orientation and Handing Explained
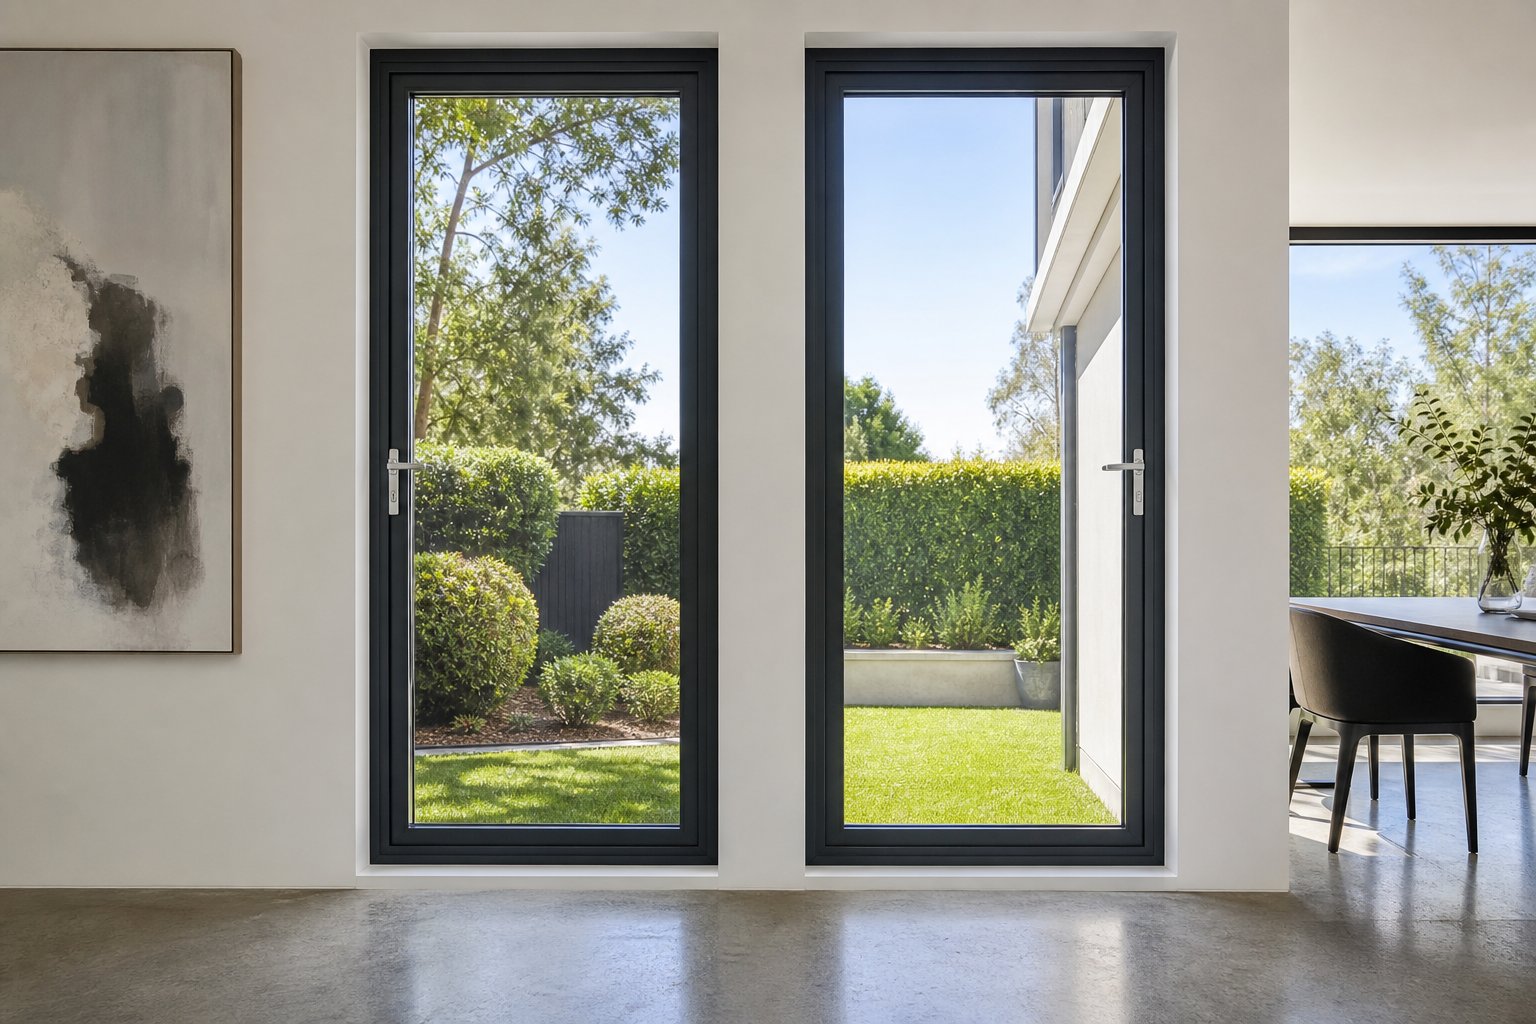
Handles for aluminium casement windows are not symmetrical. They are manufactured as left-hand or right-hand versions, and installing the wrong orientation means the locking mechanism will not engage properly, regardless of whether every other dimension is correct. This is the mistake that frustrates people most because the handle physically fits the frame, the screws line up, the spindle enters the gearbox, yet the window refuses to lock securely.
Left-Hand vs Right-Hand Handle Identification
The standard convention in Australia works like this: stand inside the room facing the window. Look at which side the hinges are on. If the hinges sit on the left, you have a left-hung casement, and you need a right-hand handle (because the handle mounts on the opposite side to the hinges). If the hinges are on the right, the window is right-hung and requires a left-hand handle.
Simple enough in theory. The complication is that some manufacturers define handing by the side the handle sits on rather than the hinge side. Under that convention, a handle mounted on the left of the sash is called left-hand, which is the opposite of the hinge-side method. Both systems exist in the market simultaneously, so confirming which convention your supplier uses before ordering is essential. If in doubt, the safest approach is to photograph your existing handle in the closed position, note which side the hinges are on, and send both details to the supplier. Let them determine the correct handing rather than guessing at terminology.
Universal Handles and Reversible Designs
Modern universal aluminium window handles sidestep the handing confusion entirely. These reversible designs can be installed in either orientation by rotating the spindle carrier or flipping the handle body 180 degrees before fixing. The lever then points toward the correct side regardless of whether the window is left-hung or right-hung.
For homeowners replacing casement window latches without certainty about which hand they need, a universal handle removes the risk of ordering the wrong version. The trade-off is a slightly smaller range of aesthetic options compared to dedicated left or right models. Some premium finishes and designer profiles are only available in handed versions. But for a straightforward aluminium window handle replacement where function matters more than a specific look, reversible handles save time and eliminate return postage.
What Happens When Handing Is Wrong
An incorrectly handed handle creates subtle operational failures that are easy to misdiagnose. Because the handle mounts and turns, homeowners often assume the problem lies elsewhere, perhaps with the gearbox or the window latches casement alignment. In reality, the handle lever is driving the locking strip in the wrong direction relative to the keeps, preventing full engagement.
Common symptoms of an incorrectly oriented handle include:
- Locking points extend but do not fully reach their keeps on the frame
- The window appears closed but rattles or can be pushed open from outside
- Handle travel feels restricted, stopping short of the full 90-degree rotation
- Latches for casement windows engage on one side of the sash but not the other
- Excessive force is needed to move the handle into the locked position
- The handle springs back toward the open position rather than holding firm
If you have just fitted a new handle and experience any of these issues, check the handing before assuming the handle or gearbox is faulty. Reversing the orientation, or swapping for the opposite hand, often resolves the problem immediately without any further adjustment to the window itself.
Handing applies primarily to hinged casement windows. Sliding windows, flush pulls, and most awning hardware are not handed in the same way. But for the majority of aluminium windows in Australian homes, which are side-hung casements, getting the orientation right is just as critical as getting the measurements right. The stakes change further when you move from a standard residential installation into commercial territory, where handle specifications carry additional security and compliance requirements.
Residential vs Commercial Aluminium Window Handles
A handle sourced for a home office window will not necessarily work in an office building window, even if both frames are aluminium. Residential and commercial aluminium window systems are engineered to completely different performance thresholds, and their hardware reflects that divergence in weight, security rating, supply chain, and physical profile. Treating them as interchangeable is a fast path to ordering the wrong part or, worse, compromising building security compliance.
Residential Aluminium Window Handle Standards
Residential aluminium windows in Australia, typically from manufacturers like AWS, Capral, and Alspec, use hardware rated for moderate daily use in low-rise homes and apartment buildings. Handles are designed for comfort and aesthetics alongside basic security, with standard sash locks for windows meeting the requirements of AS 2047 for residential applications.
Finish options tend to be broad. Powder-coated handles in colours matched to the frame, satin chrome, matt black, and brushed nickel are all commonly available through retail hardware channels or direct from window fabricators. Homeowners can typically source residential replacement handles from online specialist suppliers, local glaziers, or even larger hardware chains that stock branded aluminium window components.
The security expectation at residential level focuses on basic intrusion resistance. A functioning window lock for sash window or casement applications needs to hold the sash firmly closed and resist being forced open from outside by hand pressure. Multi-point locking systems achieve this comfortably in a residential context without requiring the heavier-duty mechanisms found in commercial installations.
Commercial and High-Rise Aluminium Window Hardware
Commercial aluminium window systems operate in a different world. Commercial systems use thicker reinforced profiles, heavier-duty hardware rated for high-cycle use, and stricter performance standards covering air infiltration, water penetration, and structural wind loading. The handles and window locks for sash windows in commercial buildings must endure far more frequent operation, higher security demands, and often comply with fire-rated hardware requirements depending on the building class under the National Construction Code.
Hardware for commercial aluminium systems is frequently restricted to trade-only supply channels. You will not find these handles at a retail outlet. They are ordered through the original window system manufacturer or authorised distributors, often requiring the project specification number or system series code to place an order. Attempting to fit a residential-grade handle to a commercial frame typically fails due to larger spindle cross-sections, wider fixing centres, and heavier backplate profiles designed to suit the beefier commercial sash sections.
For anyone managing a commercial property, the replacement process involves identifying the exact system specification, contacting the original supplier or fabricator, and ordering through the correct channel. Generic aftermarket handles are rarely an option in this space.
When Replacement Handles Signal a Bigger Problem
Replacing a handle once over a window's lifetime is normal maintenance. Replacing handles repeatedly, or finding that new handles fail within months, points to something deeper. In residential settings, recurring failures often indicate the gearbox mechanism is worn internally, creating excess play that accelerates handle fatigue. In commercial buildings, repeated handle issues may signal that the entire window system has exceeded its intended service life and the frames, seals, and locking hardware are degrading together.
For new builds or full window replacements where handle failures indicate broader system age, exploring purpose-built aluminium window systems with integrated quality hardware eliminates the cycle of recurring component failures. MEICHEN's aluminium window systems are designed with hardware matched to the frame from the factory, providing long-term reliability for both residential and commercial Australian projects rather than relying on piecemeal aftermarket fixes.
Persistent handle problems deserve honest assessment. If the frame has served two or three decades faithfully, a full window upgrade may deliver better value than chasing compatible replacement parts for a system approaching end of life. But if your window is otherwise sound and the handle failure is genuinely isolated, a correct replacement restores full function. The next step is understanding the physical process of removing the old handle and fitting the new one without damaging the frame or gearbox.
Step-by-Step Aluminium Window Handle Replacement
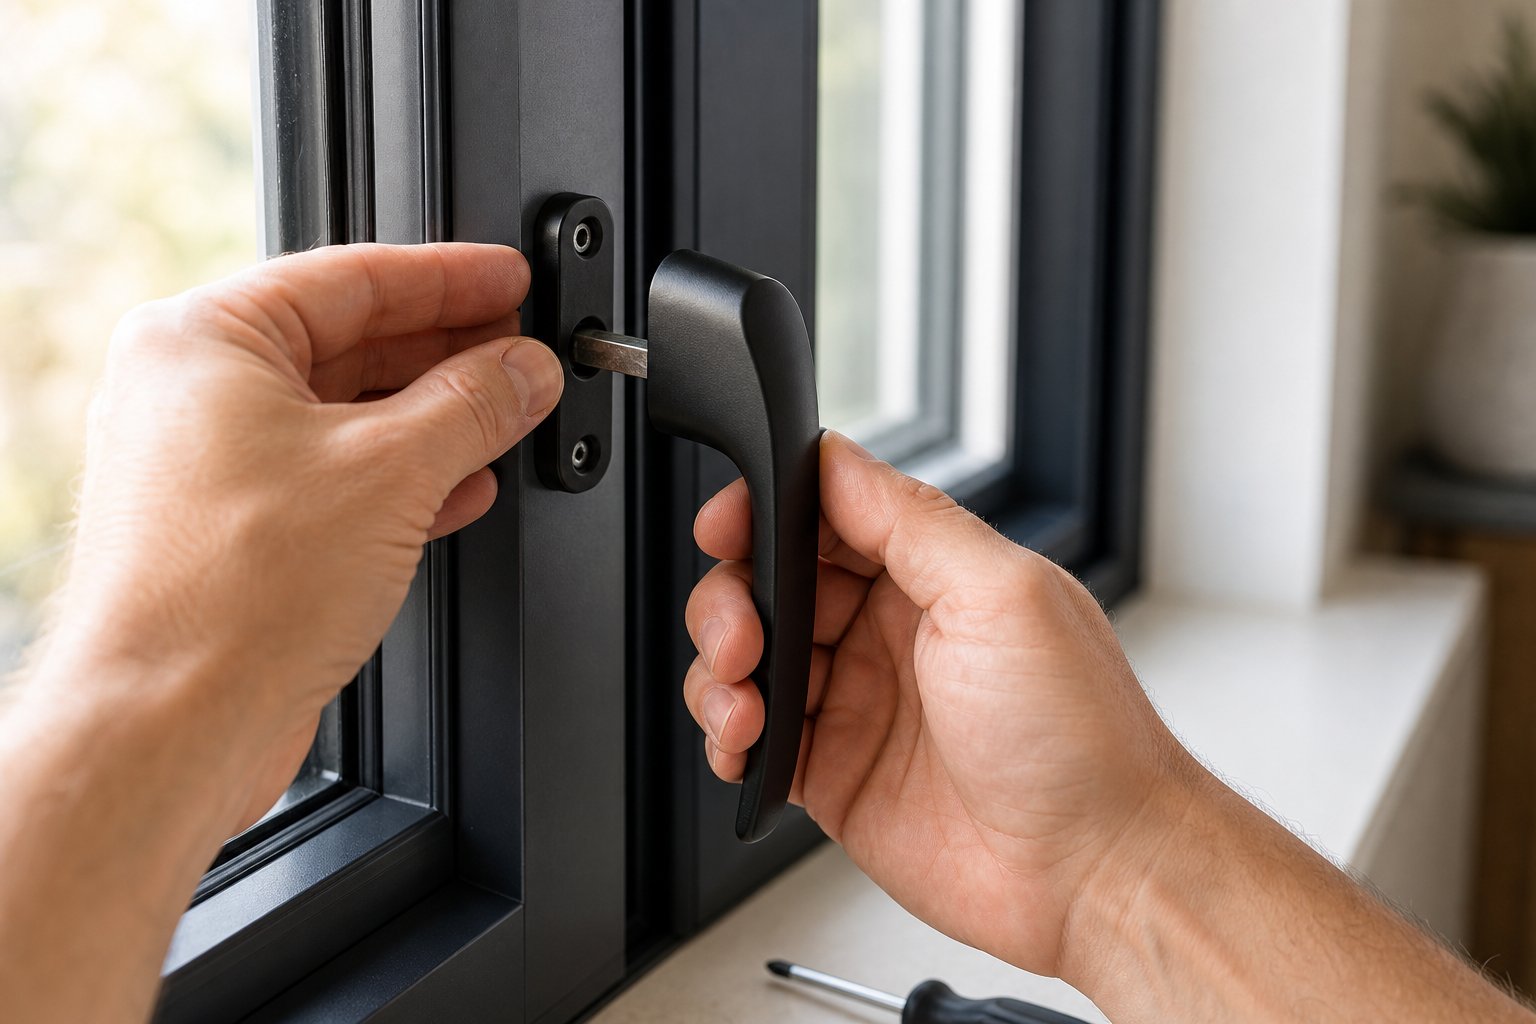
You have identified the system, taken measurements, confirmed the handle type, and verified the correct handing. The new part is in hand. Here is how to remove the old handle, prepare the frame, and fit the replacement without stripping threads or damaging the gearbox.
Removing the Old Aluminium Window Handle
Most aluminium window handles conceal their fixing screws behind small plastic or metal caps on the backplate. Locate these covers, usually one above and one below the spindle position, and prise them off gently with a flat-blade screwdriver or a fingernail. Forcing them risks cracking the cap or scratching the powder coat.
With the caps removed, unscrew the two fixing screws. Aluminium frames use machine screws threading into tapped holes, so they should back out cleanly without resistance. If a screw feels seized, apply a drop of penetrating lubricant and wait a few minutes rather than stripping the head. Once both screws are out, pull the handle and backplate away from the sash face. The spindle will slide out of the gearbox square hole as you withdraw.
Before discarding your window handle old unit, inspect the gearbox engagement point. Look into the square hole in the sash face where the spindle sat. Is the hole still a clean square, or have the corners rounded off from wear? A rounded gearbox hole will not grip a new spindle securely, and no handle replacement will fix that. If the hole looks worn or deformed, the gearbox itself needs attention before a new handle goes on.
Preparing the Frame and Fitting the New Handle
Clean the frame face around the fixing area with a damp cloth. Remove any paint buildup, corrosion residue, or old sealant that could prevent the new backplate from sitting flush. A backplate that rocks on debris will loosen over time regardless of how tight the screws are.
Test-fit the new handle before committing. Insert the spindle into the gearbox and confirm it engages smoothly without needing force. The spindle should slide in and rotate the mechanism freely. If it binds, check the spindle cross-section matches the gearbox (7 mm square is standard on most residential aluminium systems). Align the backplate over the existing fixing holes and visually confirm both screw positions line up cleanly.
When securing the handle, use the screws supplied with the new handle rather than reusing old ones. Aluminium frames require machine screws of the correct thread pitch to engage the tapped holes without cross-threading. Tighten evenly, alternating between top and bottom screws, and stop once firm. Over-torquing strips the threads in aluminium remarkably easily, and a stripped thread turns a simple sash window lock replacement into a much larger repair involving helicoils or oversized fixings.
Adjusting Spindle Length If Required
If the replacement spindle is longer than needed, it will bottom out in the gearbox and prevent the backplate from sitting flush against the frame. Trimming it to the correct length is straightforward. Mark the required length on the spindle using your measurement from the original. Secure the spindle in a vice with soft jaws to avoid marring the square edges, then cut with a fine-toothed hacksaw. File the cut end smooth, removing any burrs or sharp edges that could catch inside the gearbox square hole. A deburred spindle seats cleanly and rotates without the grinding resistance that rough-cut metal creates.
Never trim more than necessary. Cut conservatively, test-fit, and trim further only if the backplate still will not sit flush. A spindle that ends up too short means the handle will not fully engage the locking mechanism, and you will need a new spindle altogether.
Whether you are tackling a window sash lock replacement on a casement or swapping hardware on an awning sash, the full installation follows this sequence:
- Open the window fully so the sash is accessible and stable.
- Locate and remove fixing screw covers from the existing handle backplate.
- Unscrew both fixing screws and withdraw the old handle and spindle from the gearbox.
- Inspect the gearbox square hole for wear, rounding, or debris.
- Clean the frame face around the fixing area.
- Test-fit the new spindle into the gearbox to confirm smooth engagement.
- If the spindle is too long, trim with a hacksaw and deburr the cut end.
- Align the new handle backplate with the existing screw holes.
- Insert and tighten the new fixing screws evenly, alternating between top and bottom.
- Cycle the handle through its full range of motion: open, closed, and locked positions.
- Confirm the locking points extend and retract fully without binding.
- Refit the screw covers over the fixing heads.
The entire process takes ten to fifteen minutes on a straightforward swap where measurements have been confirmed in advance. Rushing through without the test-fit step or forcing a spindle that does not quite engage is where problems begin, problems that only become apparent once you try to lock the window and find the mechanism will not fully close.
Testing Your New Handle and Knowing When to Call a Pro
Fitting the handle is only half the job. A handle that screws on neatly but fails to secure the window is no better than the broken one you just removed. Proper post-installation testing catches problems while the tools are still out and the original handle is still available for comparison. Skip this step and you may discover the issue days later when someone tries to lock up at night.
Testing the Locking Mechanism After Installation
Cycle the handle through every position it is designed to reach. On a standard casement, that means fully open (handle pointing up or out), closed but unlocked (handle horizontal), and locked (handle pointing down). On tilt-and-turn systems, add the tilt position and verify the sash tilts inward without binding. At each position, visually confirm the locking points along the sash edge move in and out as expected. If your window uses multipoint sash window locks, check that every engagement point, top, bottom, and sides, seats fully into its corresponding frame keep.
Feel matters here too. The handle should move through its arc smoothly, with consistent resistance. Any sudden stiffness, dead spots, or grinding suggests the spindle is not engaging the gearbox cleanly. Test from outside as well: with the window locked, press firmly against the sash at several points. There should be no movement or rattling. A window lock sash that allows the sash to flex or shift under external pressure is not fully engaged, even if the handle reached its locked position.
Troubleshooting Common Post-Replacement Issues
Several problems can surface immediately after fitting a new handle. Most are straightforward to resolve once you identify the cause:
- Handle does not turn through its full arc: The spindle is likely too long and bottoming out in the gearbox, or debris inside the mechanism is creating an obstruction. Trim the spindle slightly or clean the gearbox square hole.
- Locking points do not extend when the handle turns: This indicates gearbox failure rather than a handle problem. The internal drive mechanism is worn or broken, and no new handle will fix it.
- Handle feels loose immediately after fitting: Screw holes in the aluminium frame may be stripped from previous over-tightening. Re-thread with a tap set or use slightly larger-diameter fixings designed for repair situations.
- Handle returns to the open position under its own weight: The internal spring or cam that holds the handle in position may be absent in the new unit or incompatible with the gearbox detent system.
- Window closes but does not seal tightly: Locking points are engaging partially. Check whether the issue is handing (wrong orientation) or whether the keeps on the frame need repositioning to match new lock engagement depths.
For sliding aluminium windows, testing is simpler but equally important. Confirm the sliding sash window locks engage firmly in the closed position and that the sash cannot be lifted off its track or forced sideways when locked. If you have fitted a key window sash lock, verify the key operates smoothly and that the bolt throws far enough to resist external leverage.
When to Call a Window Specialist
DIY handle replacement works well when the problem is genuinely limited to the handle itself. But some scenarios are beyond what a new handle can fix, regardless of how precisely matched the replacement is.
Call a specialist when:
- The multipoint lock gearbox has failed internally, symptoms being a handle that spins without driving any locking points
- The aluminium frame has twisted or bowed, causing the sash to sit unevenly in the opening and preventing proper seal compression
- Hinge wear has progressed to the point where the sash drops and no longer aligns with the frame keeps, regardless of handle condition
- The window is still under warranty, as DIY repair may void coverage
- You are dealing with sash window barrel locks or specialised security hardware that requires certified installation for insurance compliance
If the gearbox has failed or the frame is damaged, replacing the handle alone will not restore window security. At that point, the window needs professional assessment to determine whether a mechanism repair or a full unit replacement is the correct path forward.
Persistent hardware failures across multiple windows in the same home often point to system-wide age rather than isolated component wear. When diagnosis reveals that gearboxes are failing, seals have degraded, and frames show signs of fatigue, continued piecemeal repairs deliver diminishing returns. Purpose-designed aluminium window systems from MEICHEN pair quality-matched hardware with thermally efficient frames from the factory, offering long-term reliability for Australian homes and commercial projects where recurring handle and lock failures have become the norm rather than the exception.
A single handle replacement is a ten-minute job with the right part. But honest assessment of what is actually failing, the handle, the gearbox, or the entire window system, saves homeowners from a cycle of fixes that never quite resolve the underlying problem.
Frequently Asked Questions About Aluminium Window Handle Replacement
1. Can I use a uPVC window handle on an aluminium frame?
Generally, no. Aluminium window handles have narrower backplates, shorter spindles (typically 15-30 mm versus 25-45 mm for uPVC), and use machine screws that thread into tapped holes rather than self-tapping screws. A uPVC handle may physically attach but will often fail to engage the locking mechanism correctly, sit proud of the frame face, or leave gaps around the backplate that compromise security and weatherproofing.
2. How do I know if my aluminium window handle is left-hand or right-hand?
Stand inside the room facing the window. If the hinges are on the left side, you have a left-hung casement requiring a right-hand handle. If hinges are on the right, you need a left-hand handle. Be aware that some manufacturers use the opposite convention, defining handing by the side the handle sits on rather than the hinge side. When in doubt, photograph your existing handle in position and note the hinge side before ordering, or choose a universal reversible handle that works in either orientation.
3. What measurements do I need before buying a replacement aluminium window handle?
Three measurements are critical: spindle length (from the rear of the backplate to the spindle tip, commonly 15-30 mm on aluminium frames), fixing centres (distance between the two screw hole centres, usually 43 mm), and handle projection (how far the handle extends from the frame face in both closed and open positions). Recording backplate height and width is also important to ensure the new handle covers existing marks or holes from the old fitting.
4. Can I cut a spindle that is too long for my aluminium window?
Yes, a spindle that is slightly too long can be trimmed safely. Secure it in a vice with soft jaws, cut with a fine-toothed hacksaw at the marked length, then file the cut end smooth to remove burrs. A deburred spindle seats cleanly into the gearbox without grinding. Always cut conservatively and test-fit before trimming further, because a spindle that ends up too short cannot be extended and will need replacing entirely.
5. When should I call a professional instead of replacing the handle myself?
DIY replacement works well when the handle itself is the only failed component. Call a window specialist if the multipoint lock gearbox has failed internally (handle spins without driving locking points), the aluminium frame has twisted causing misalignment, hinge wear prevents proper sash closure regardless of handle condition, or the window remains under warranty. Repeated handle failures across multiple windows may also indicate the entire window system has reached end of life and needs professional assessment for full replacement.